> ## Documentation Index
> Fetch the complete documentation index at: https://help.kwentra.com/llms.txt
> Use this file to discover all available pages before exploring further.
# Proxy Virtual Machine Setup
> Proxy Download Settings: 1. Download the recommended virtual box, after download completion run the program and install it. https://www.virtualbox.org/wiki/Downloads 2. After installation you will...
**Proxy Server Setup:**
1. Download the recommended virtual box, after download completion run the program and install it. [https://www.virtualbox.org/wiki/Downloads](https://www.virtualbox.org/wiki/Downloads)
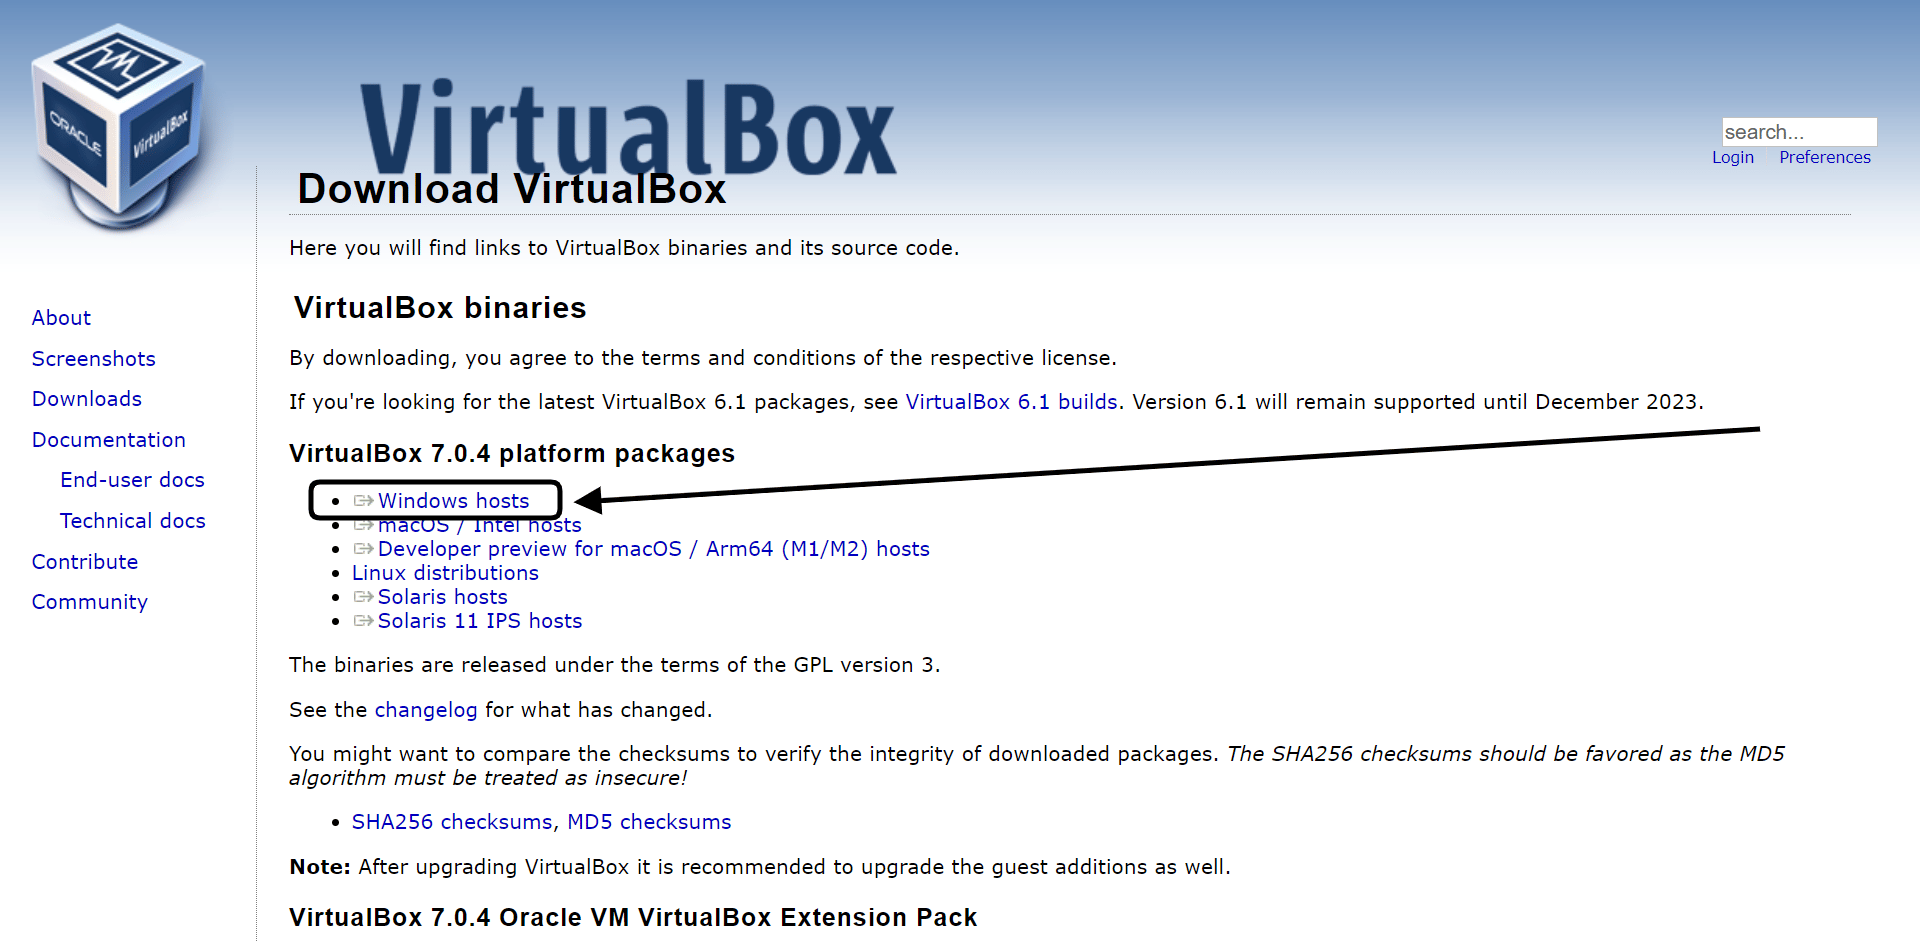 Also download the below in order to work as a virtual disc and use on the virtual box:
The best version to work with is the below ubunto version for desktop:
Ubunto Download For Desktop - [Ubuntu 20.04.6 Desktop (64-bit)](https://releases.ubuntu.com/20.04/ubuntu-20.04.6-desktop-amd64.iso.torrent?_ga=2.205911894.435674917.1681311557-1757327350.1677146562)
Also download the below in order to work as a virtual disc and use on the virtual box:
The best version to work with is the below ubunto version for desktop:
Ubunto Download For Desktop - [Ubuntu 20.04.6 Desktop (64-bit)](https://releases.ubuntu.com/20.04/ubuntu-20.04.6-desktop-amd64.iso.torrent?_ga=2.205911894.435674917.1681311557-1757327350.1677146562)
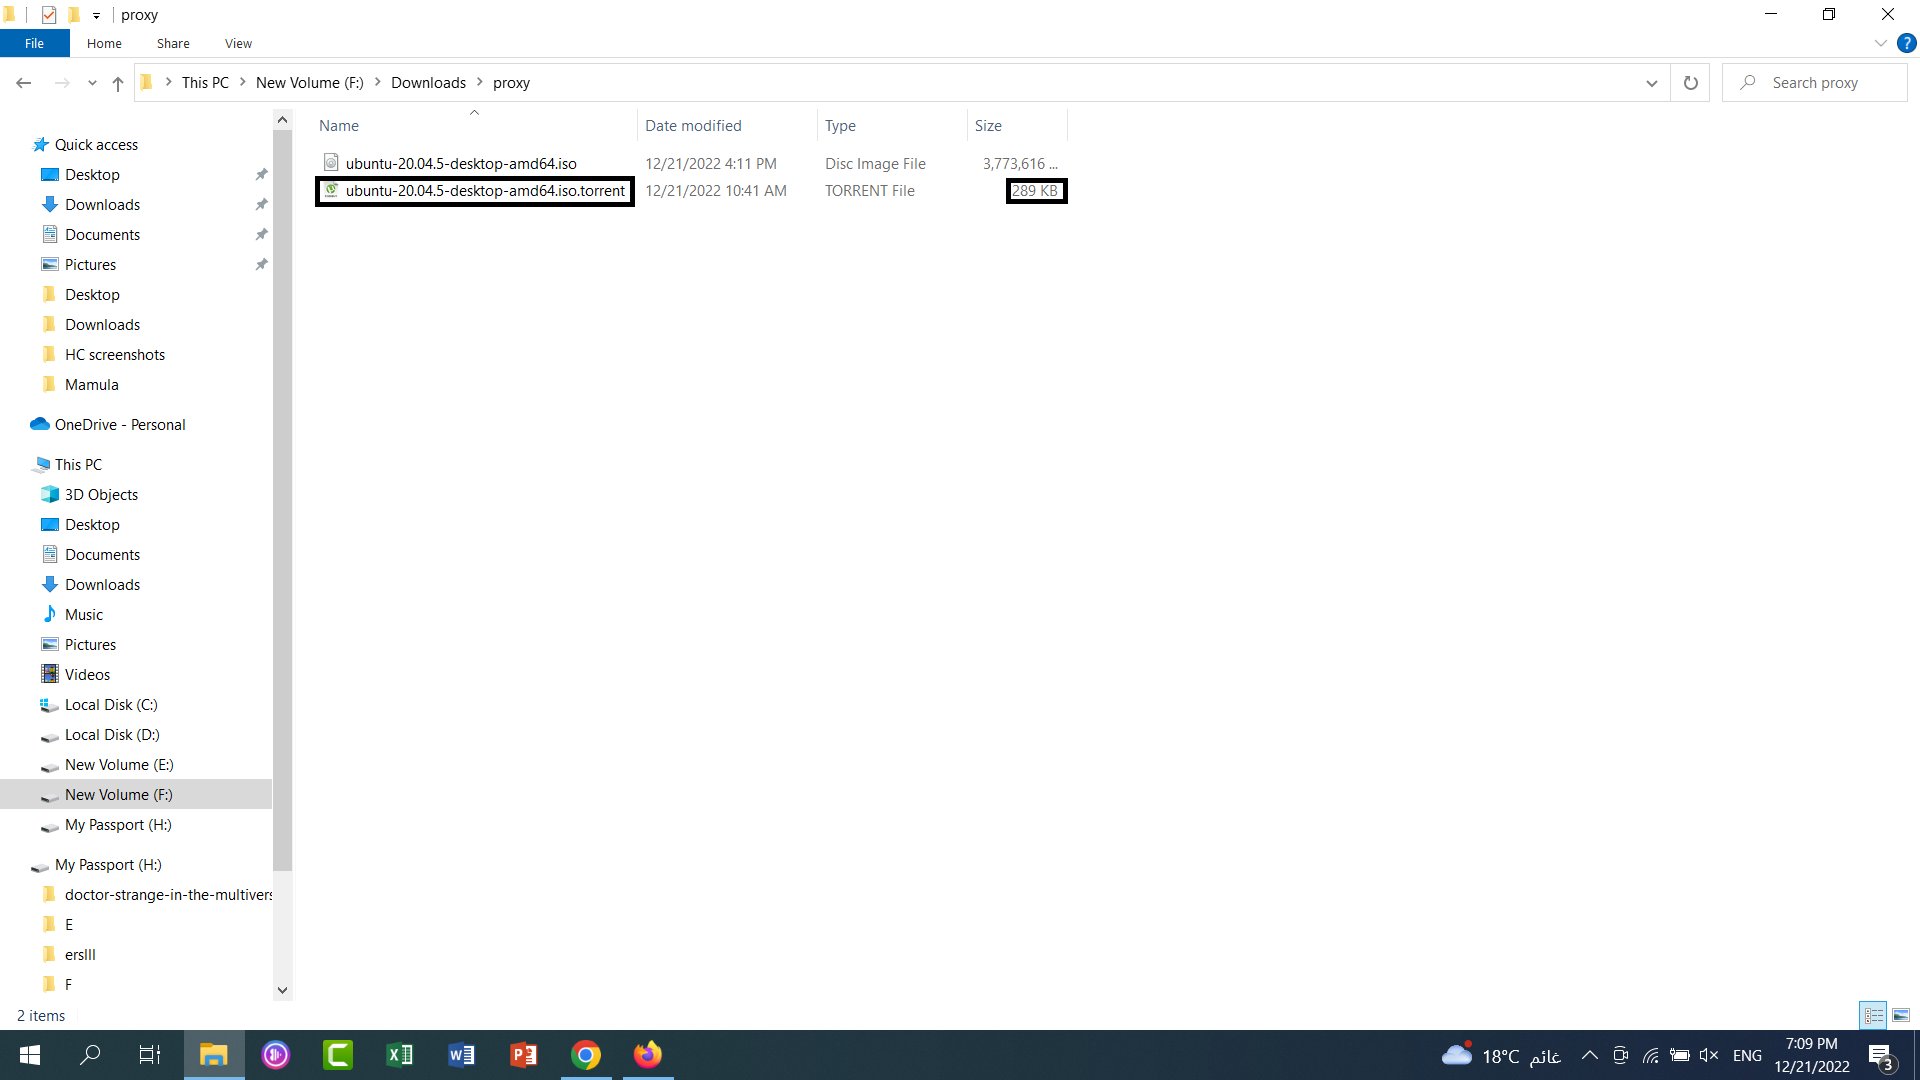 The downloaded file would be a torrent file and with a small size, you need to extract the iso file from the torrent using any torrent extractor:
[Download uTorrent.](https://www.utorrent.com/downloads/win/)
The downloaded file would be a torrent file and with a small size, you need to extract the iso file from the torrent using any torrent extractor:
[Download uTorrent.](https://www.utorrent.com/downloads/win/)
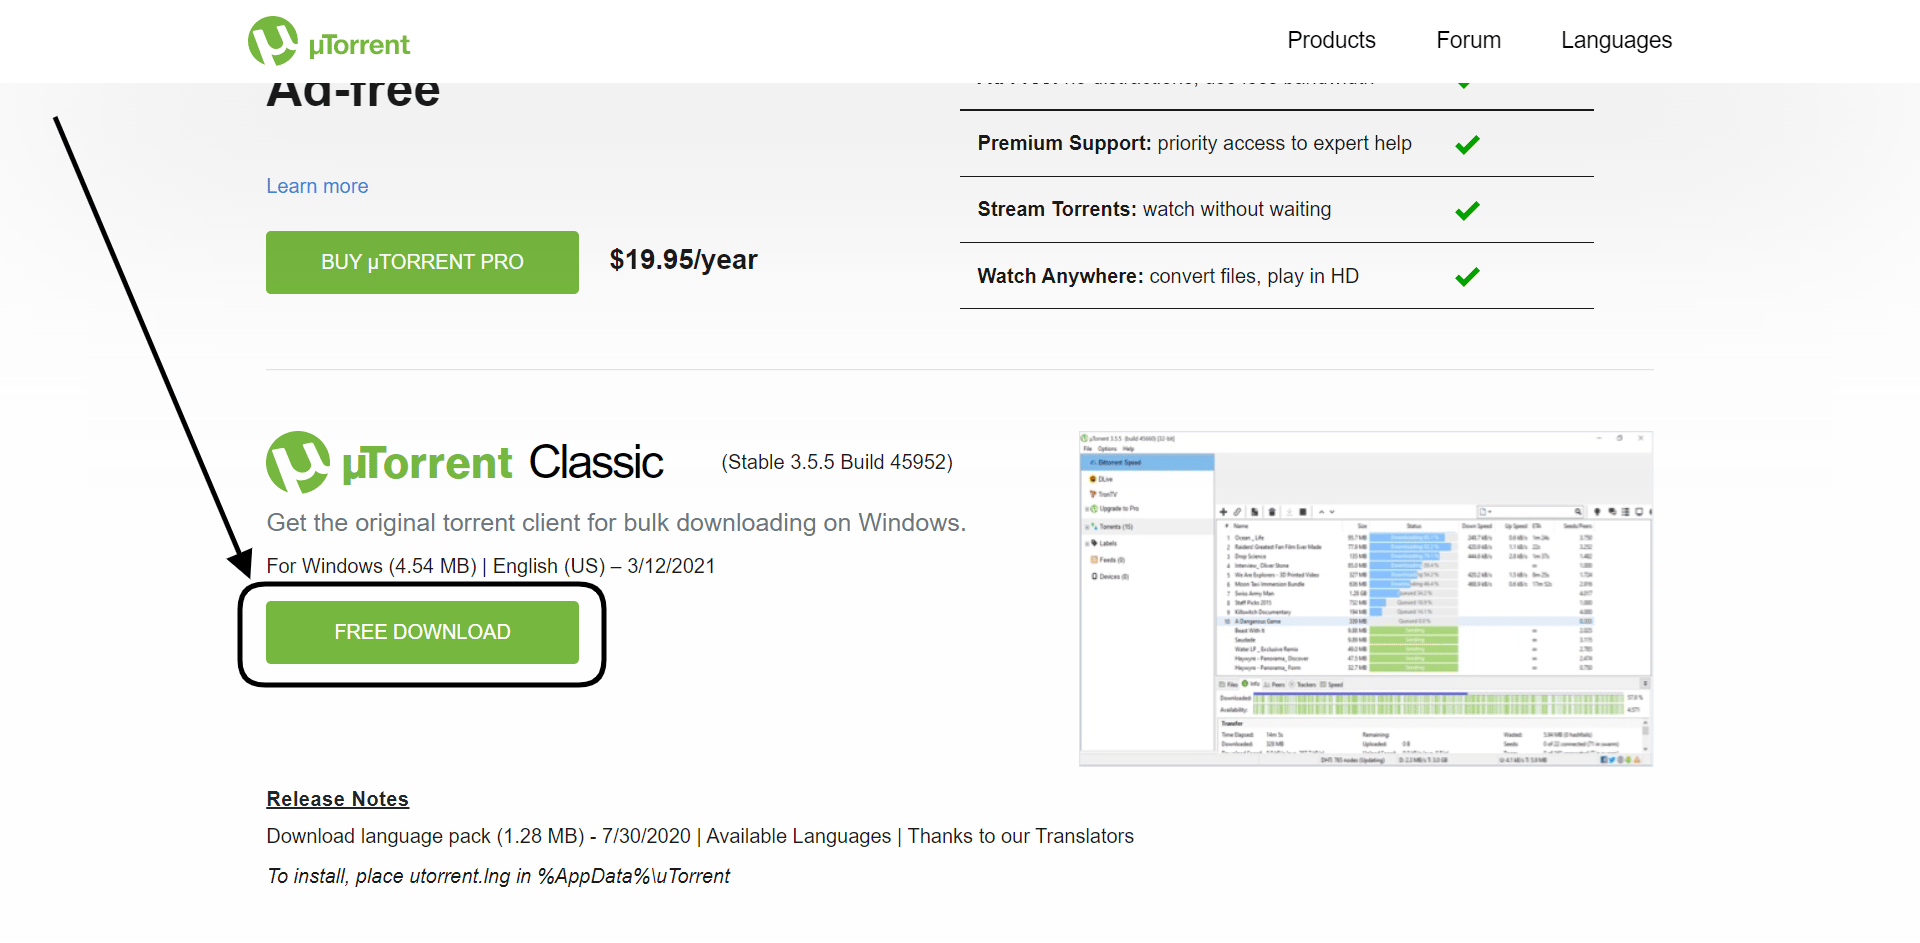 * Install uTorrent
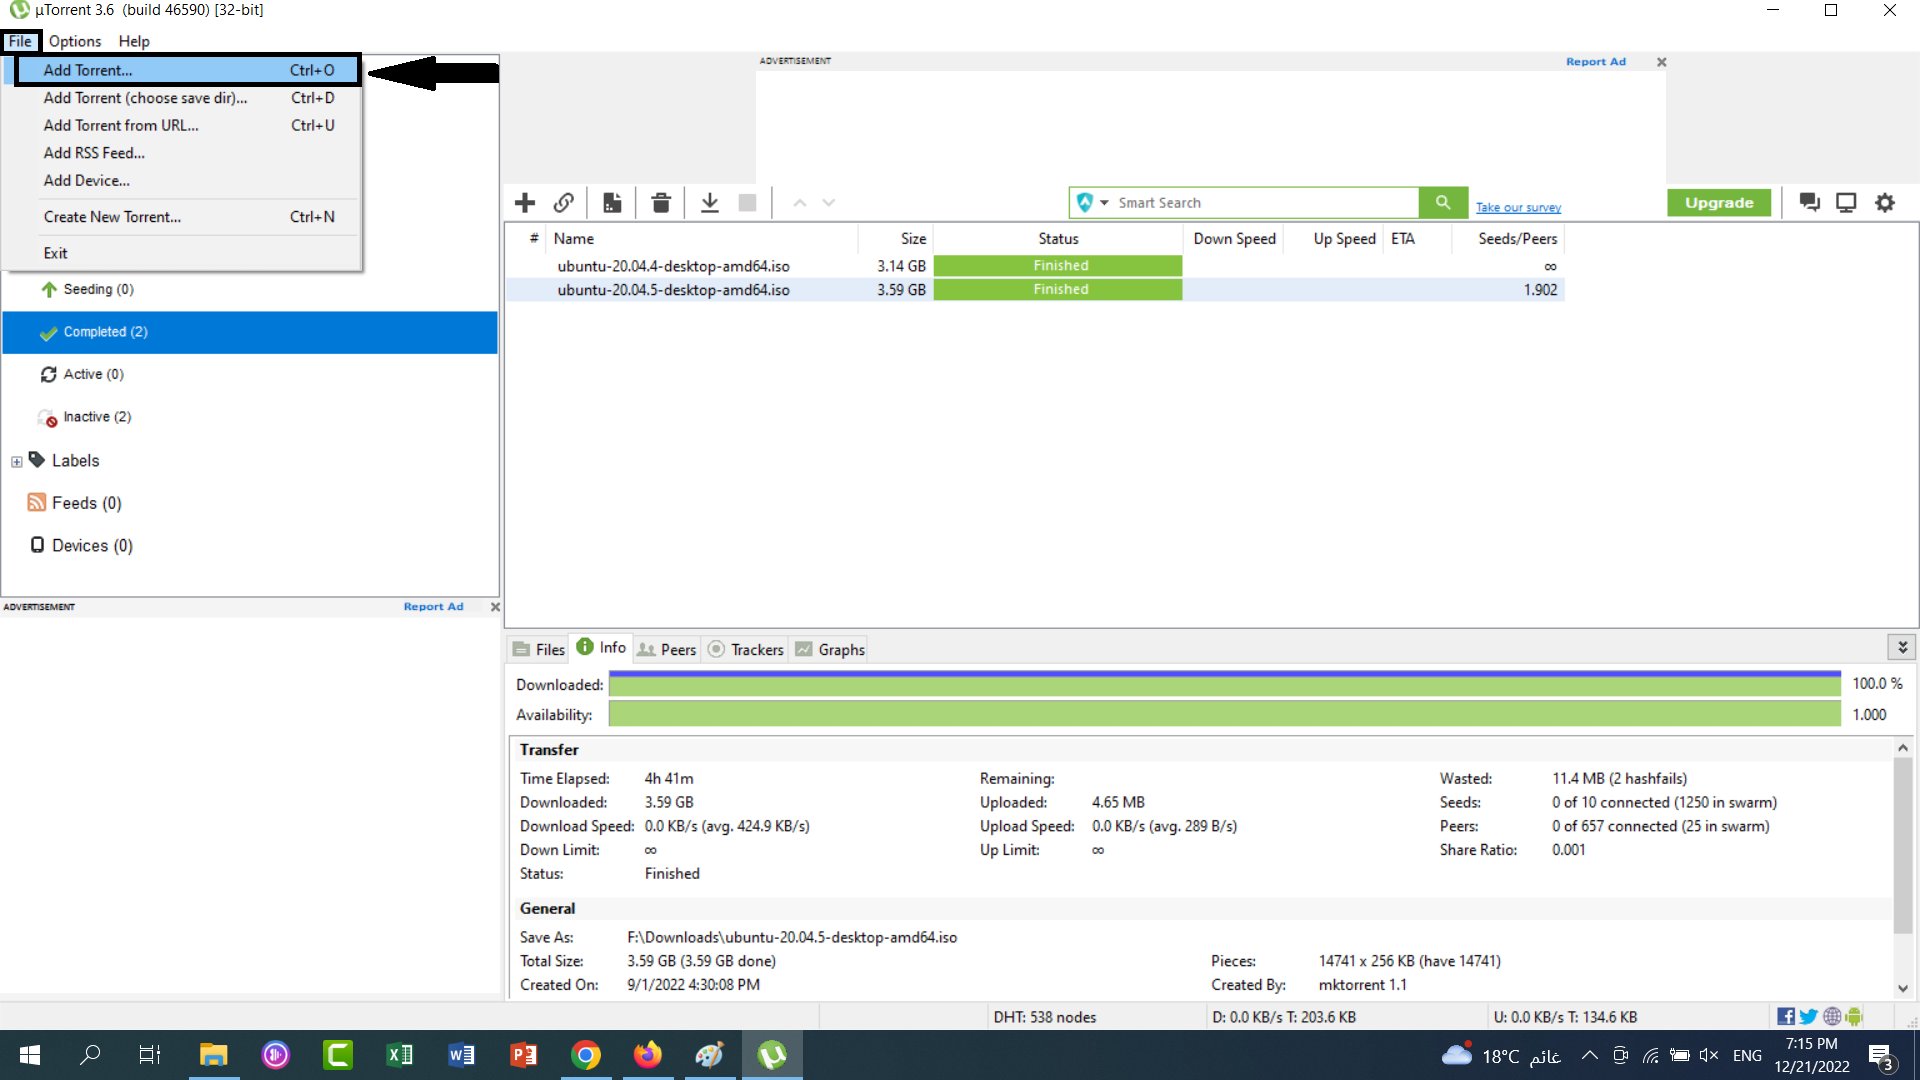
* Click **File**
* Click **Add Torrent**
* Select the torrent file you just downloaded
* Install uTorrent
* Click **File**
* Click **Add Torrent**
* Select the torrent file you just downloaded
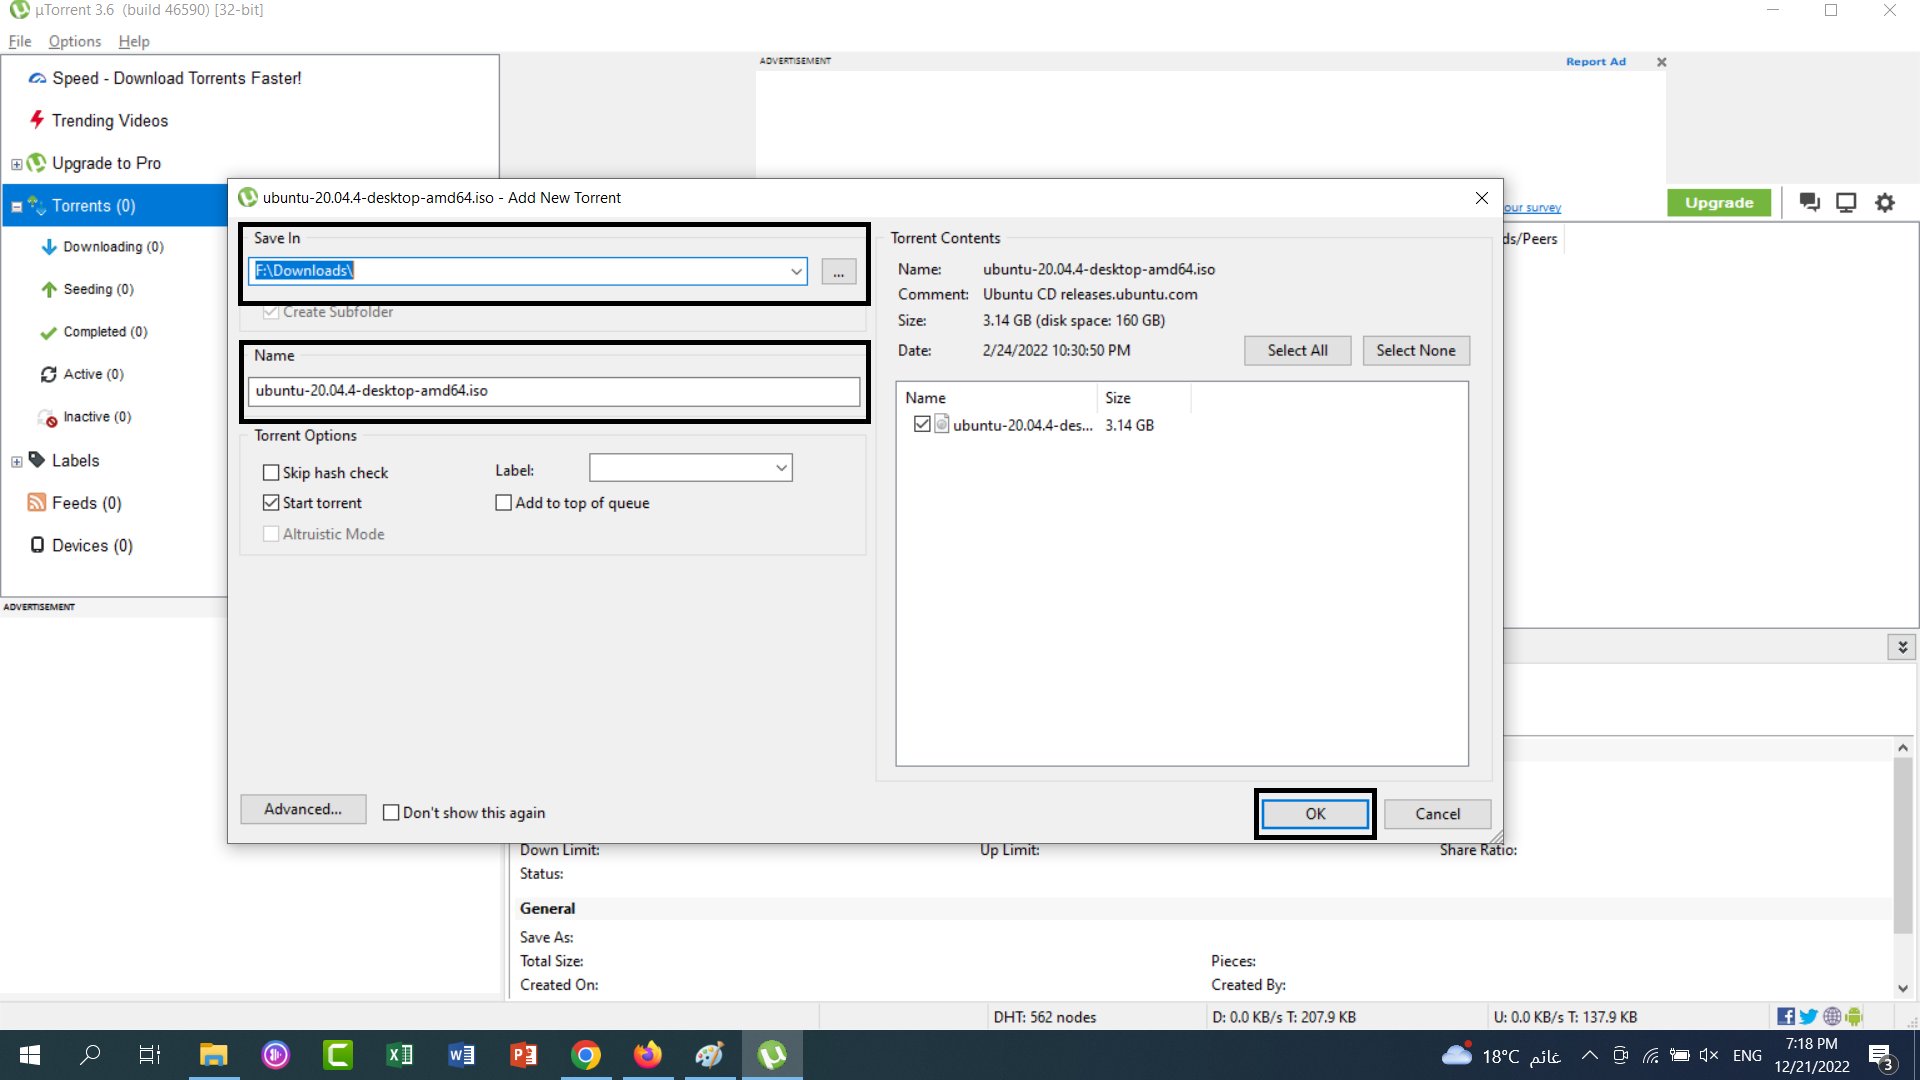
 * Select where you would like the iso file to be downloaded
* Type the new name you would like for the iso file, can be left as it is
* Click **OK**
* Select where you would like the iso file to be downloaded
* Type the new name you would like for the iso file, can be left as it is
* Click **OK**
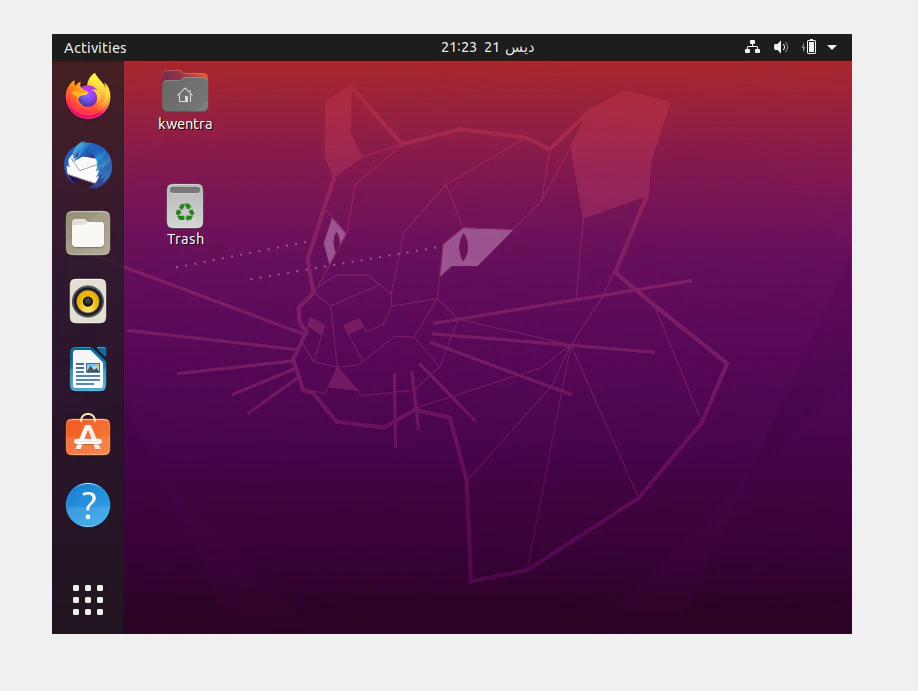
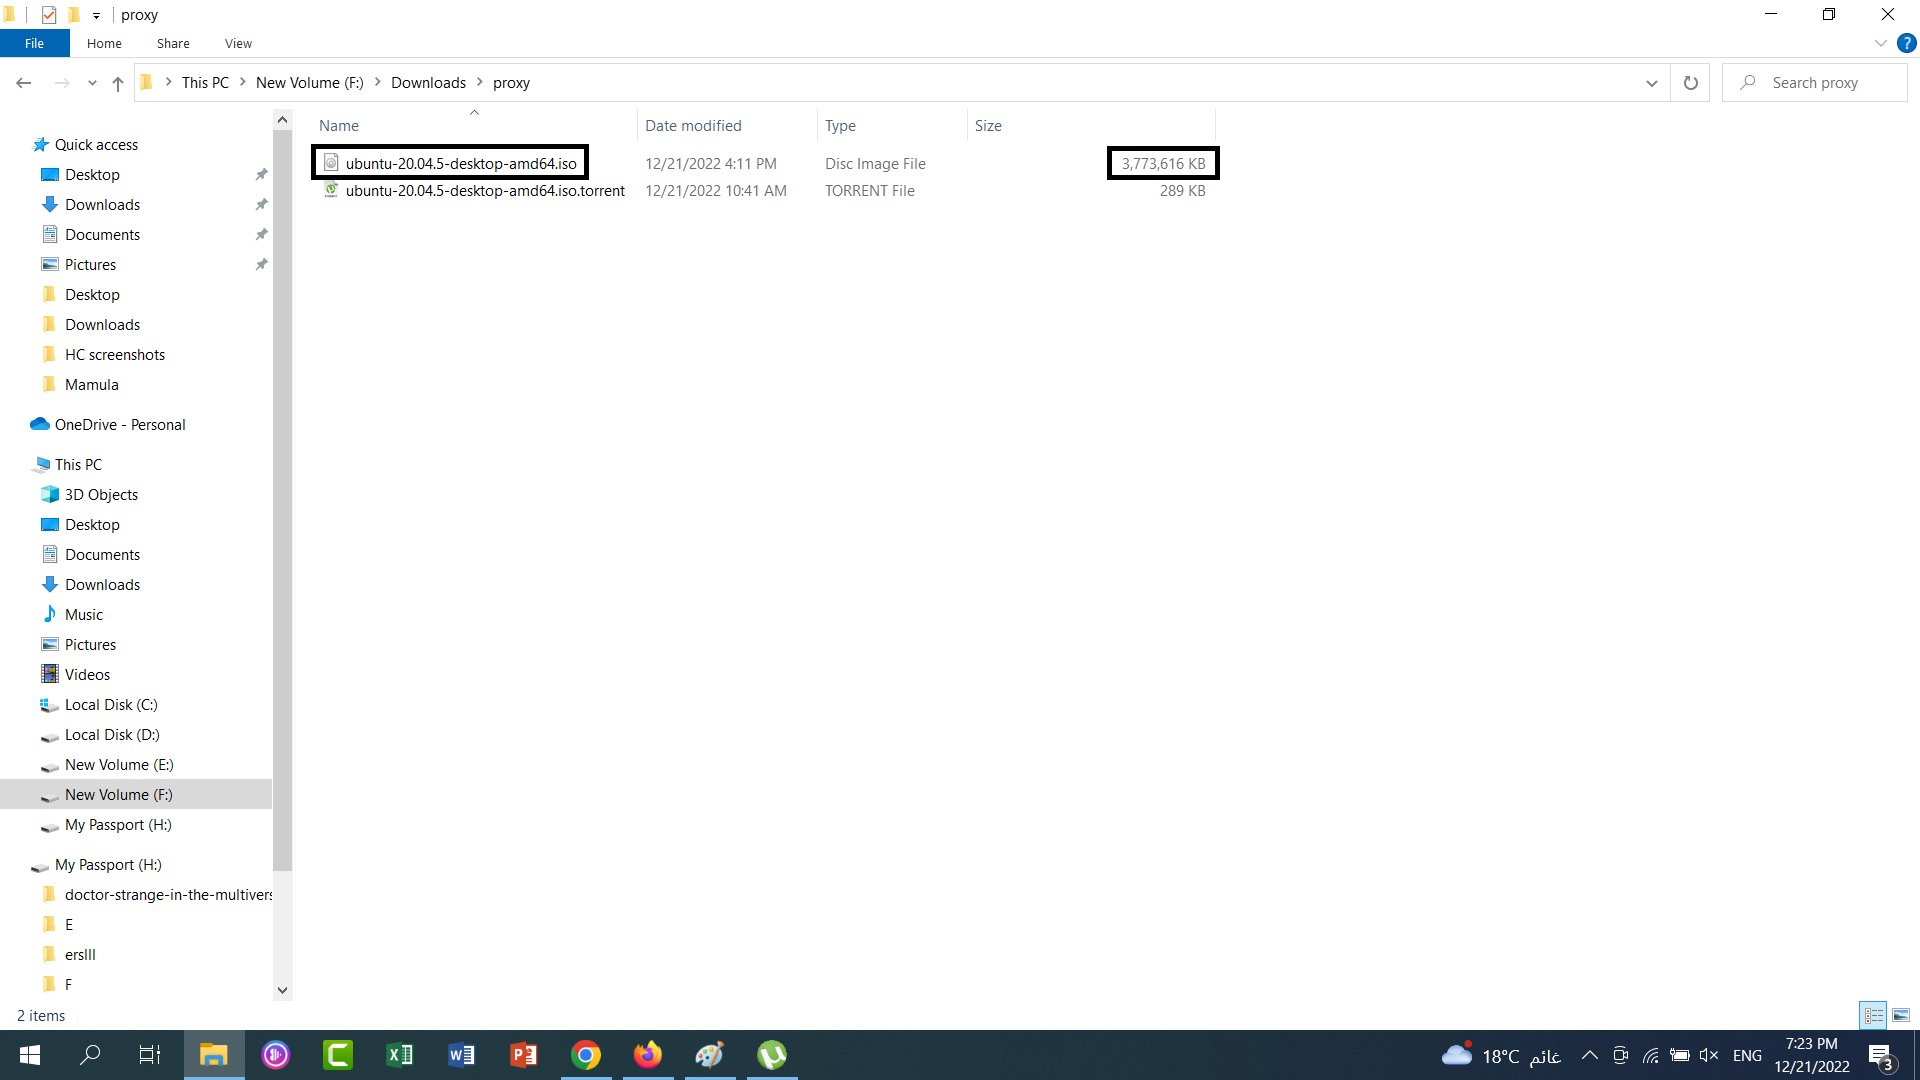
 Now the iso file is downloaded it would look like the below:
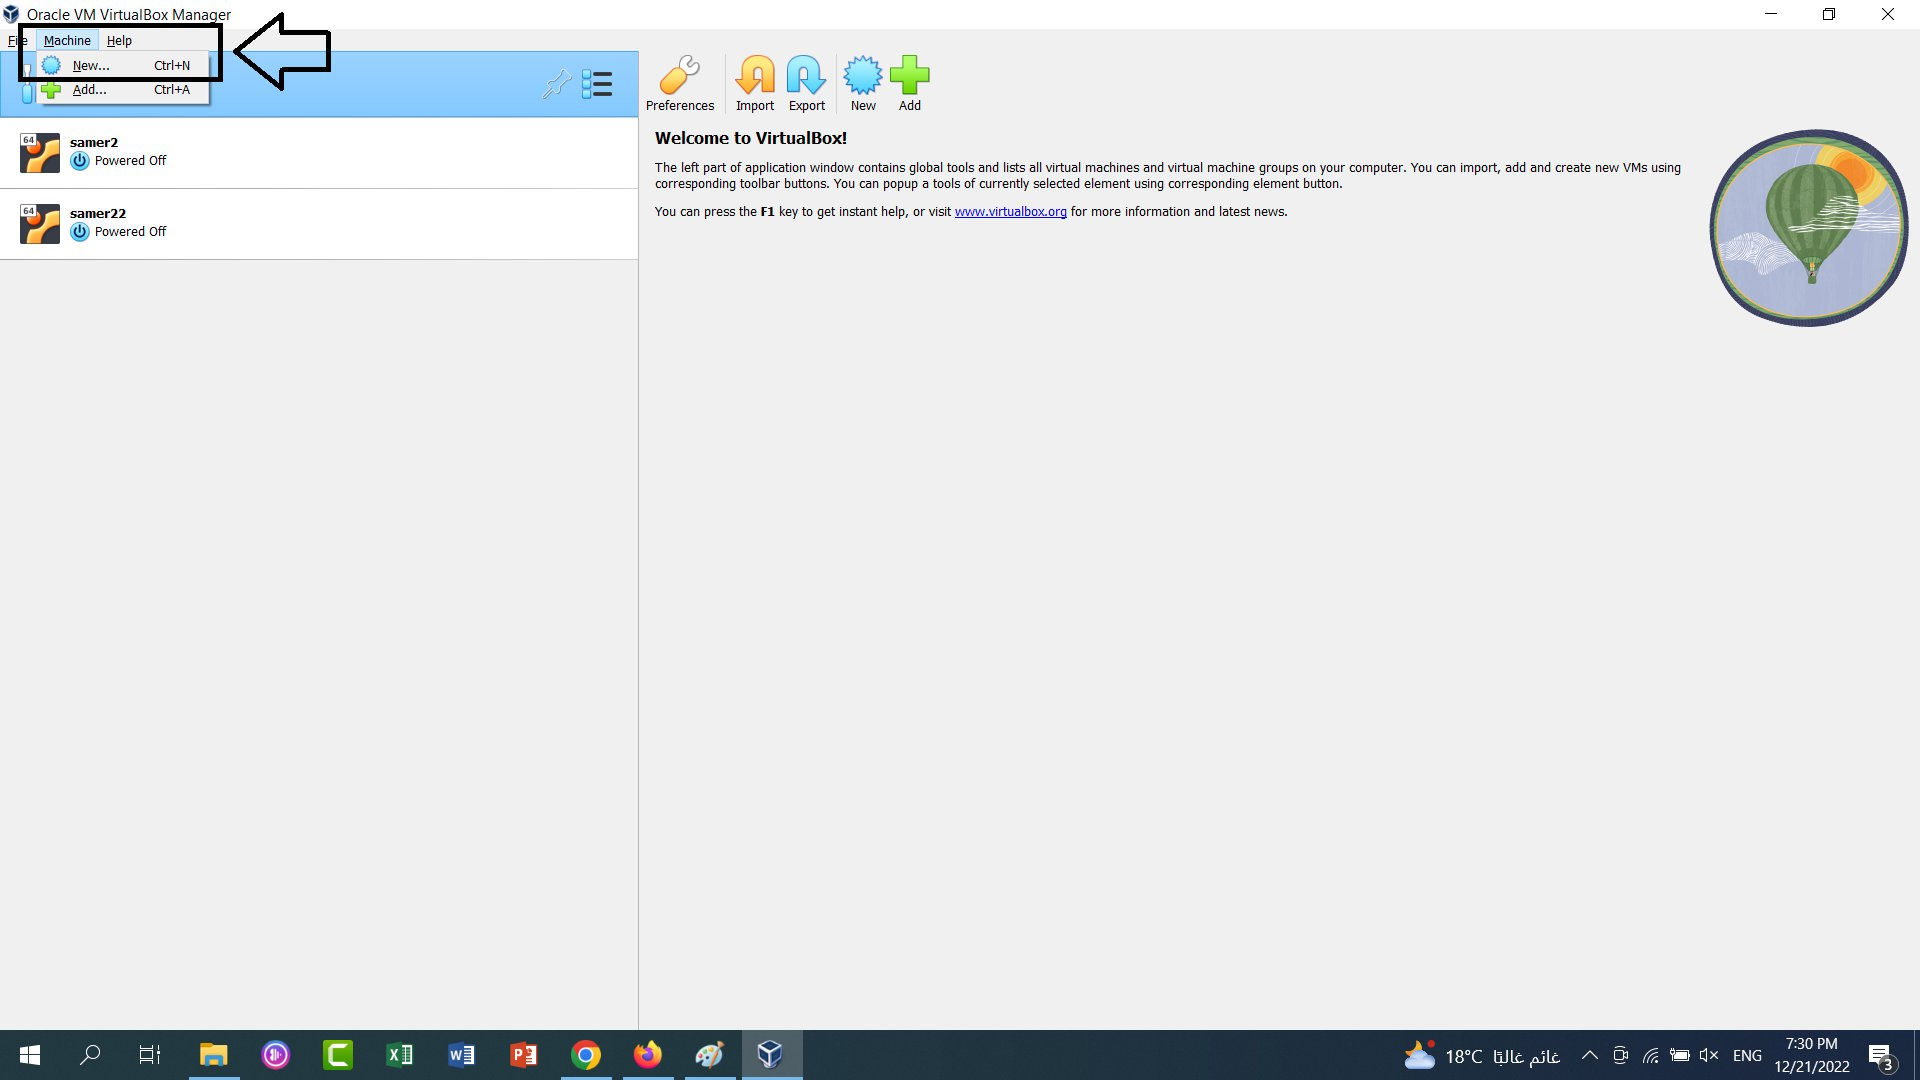
 2. After installing the Oracle VM and opening it, you will meet the welcome screen of the virtual box below, click on **machine** then **new machine**.
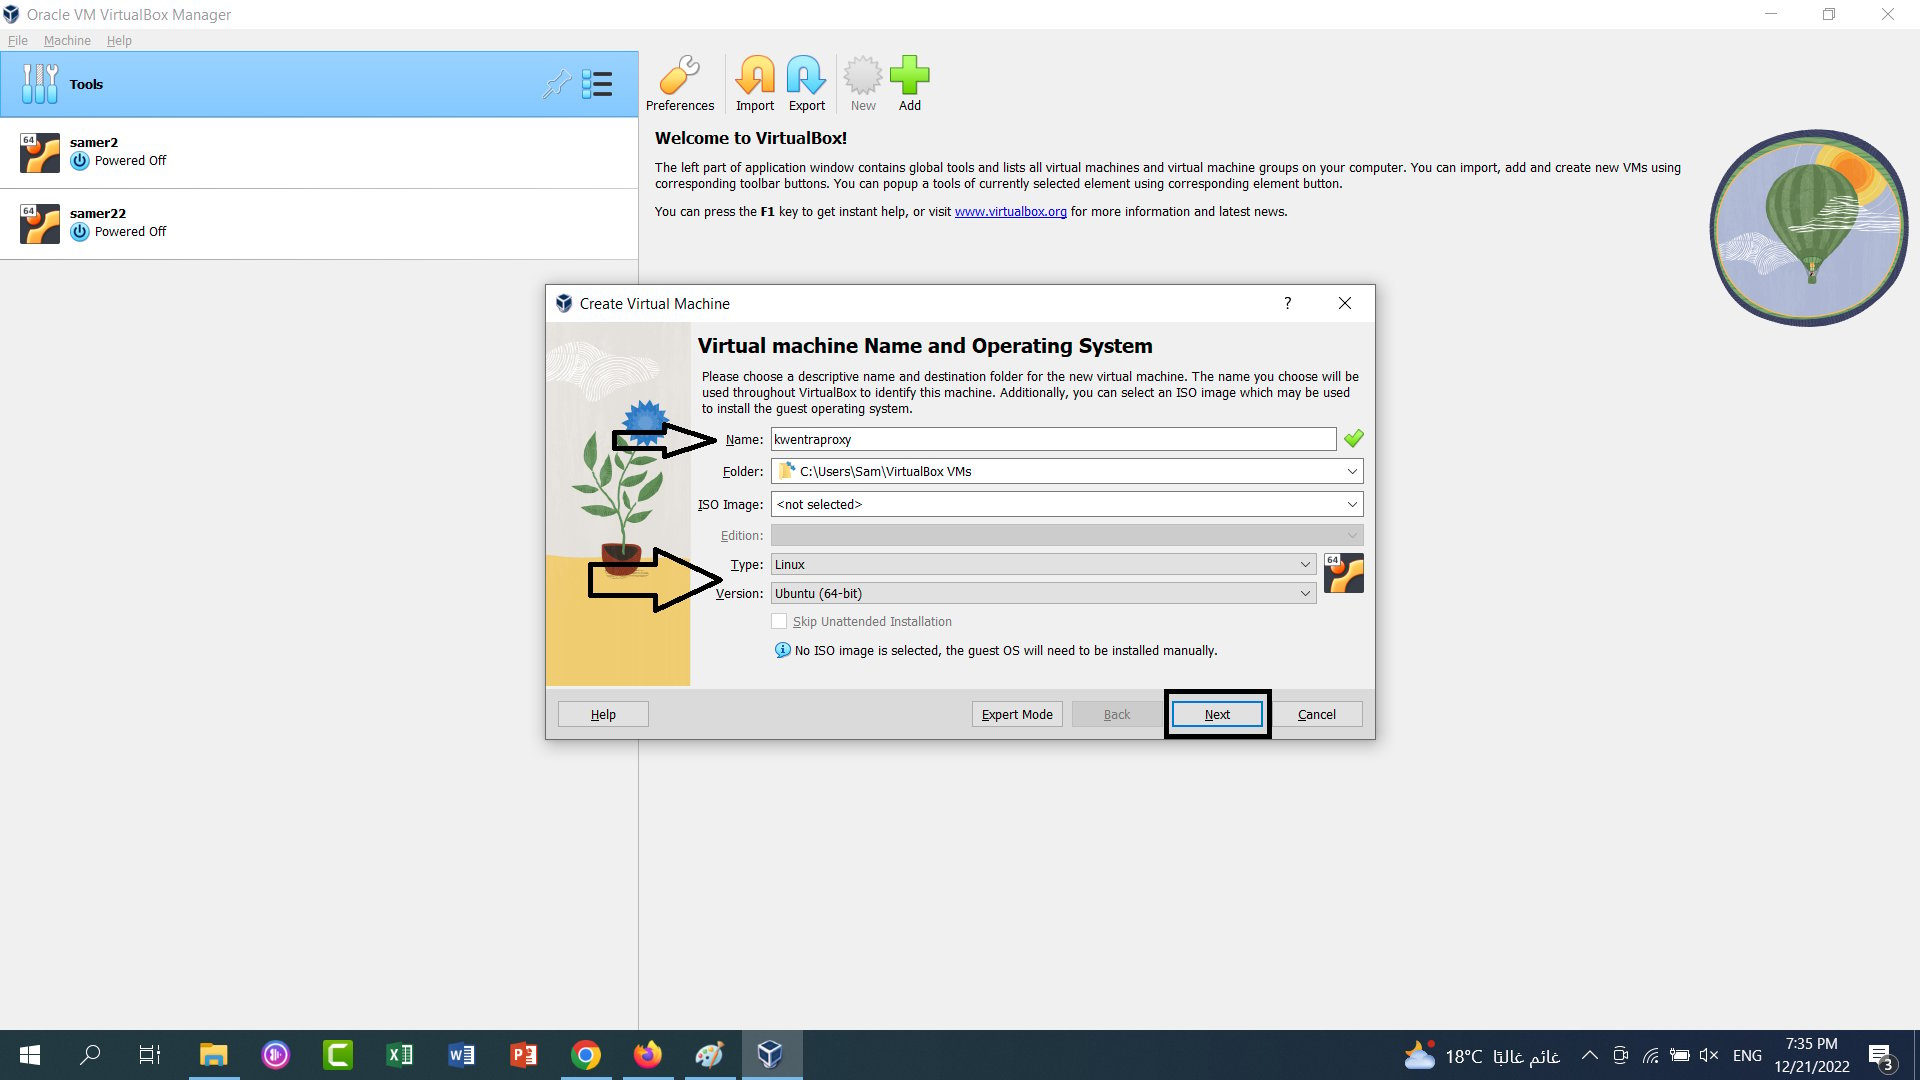
 3. Fill in the required fields as below:
* Add the desired name for your machine
* Select type **Linux**
* Select Version **Ubuntu (64-bit)**
* Don't select the iso file now it will be added at a later step.
* Click **Next**
3. Fill in the required fields as below:
* Add the desired name for your machine
* Select type **Linux**
* Select Version **Ubuntu (64-bit)**
* Don't select the iso file now it will be added at a later step.
* Click **Next**
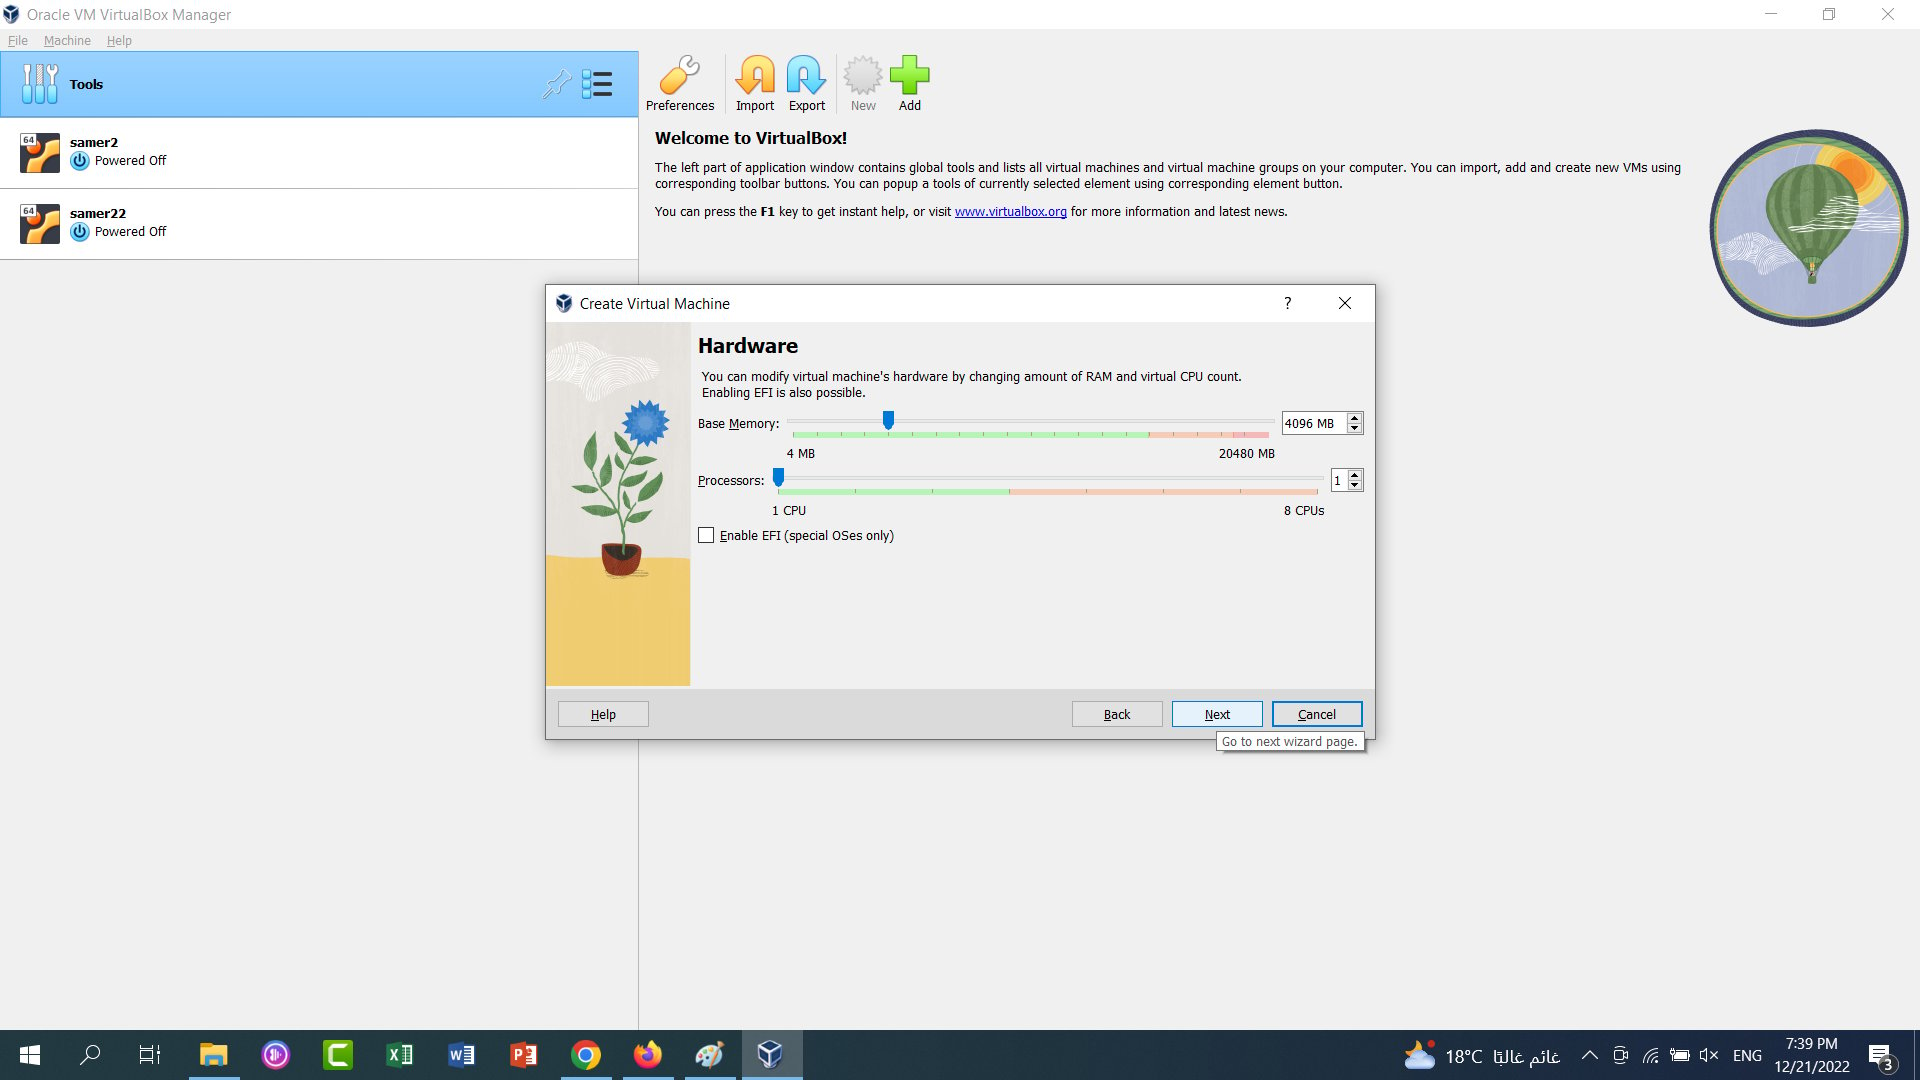
 4. In the step for **Hardware** and memory allocation, we recommend using a memory size between 2048 MB and 4096 MB and 1 CPU to be allocated for the new VM, click **Next** after you are done.
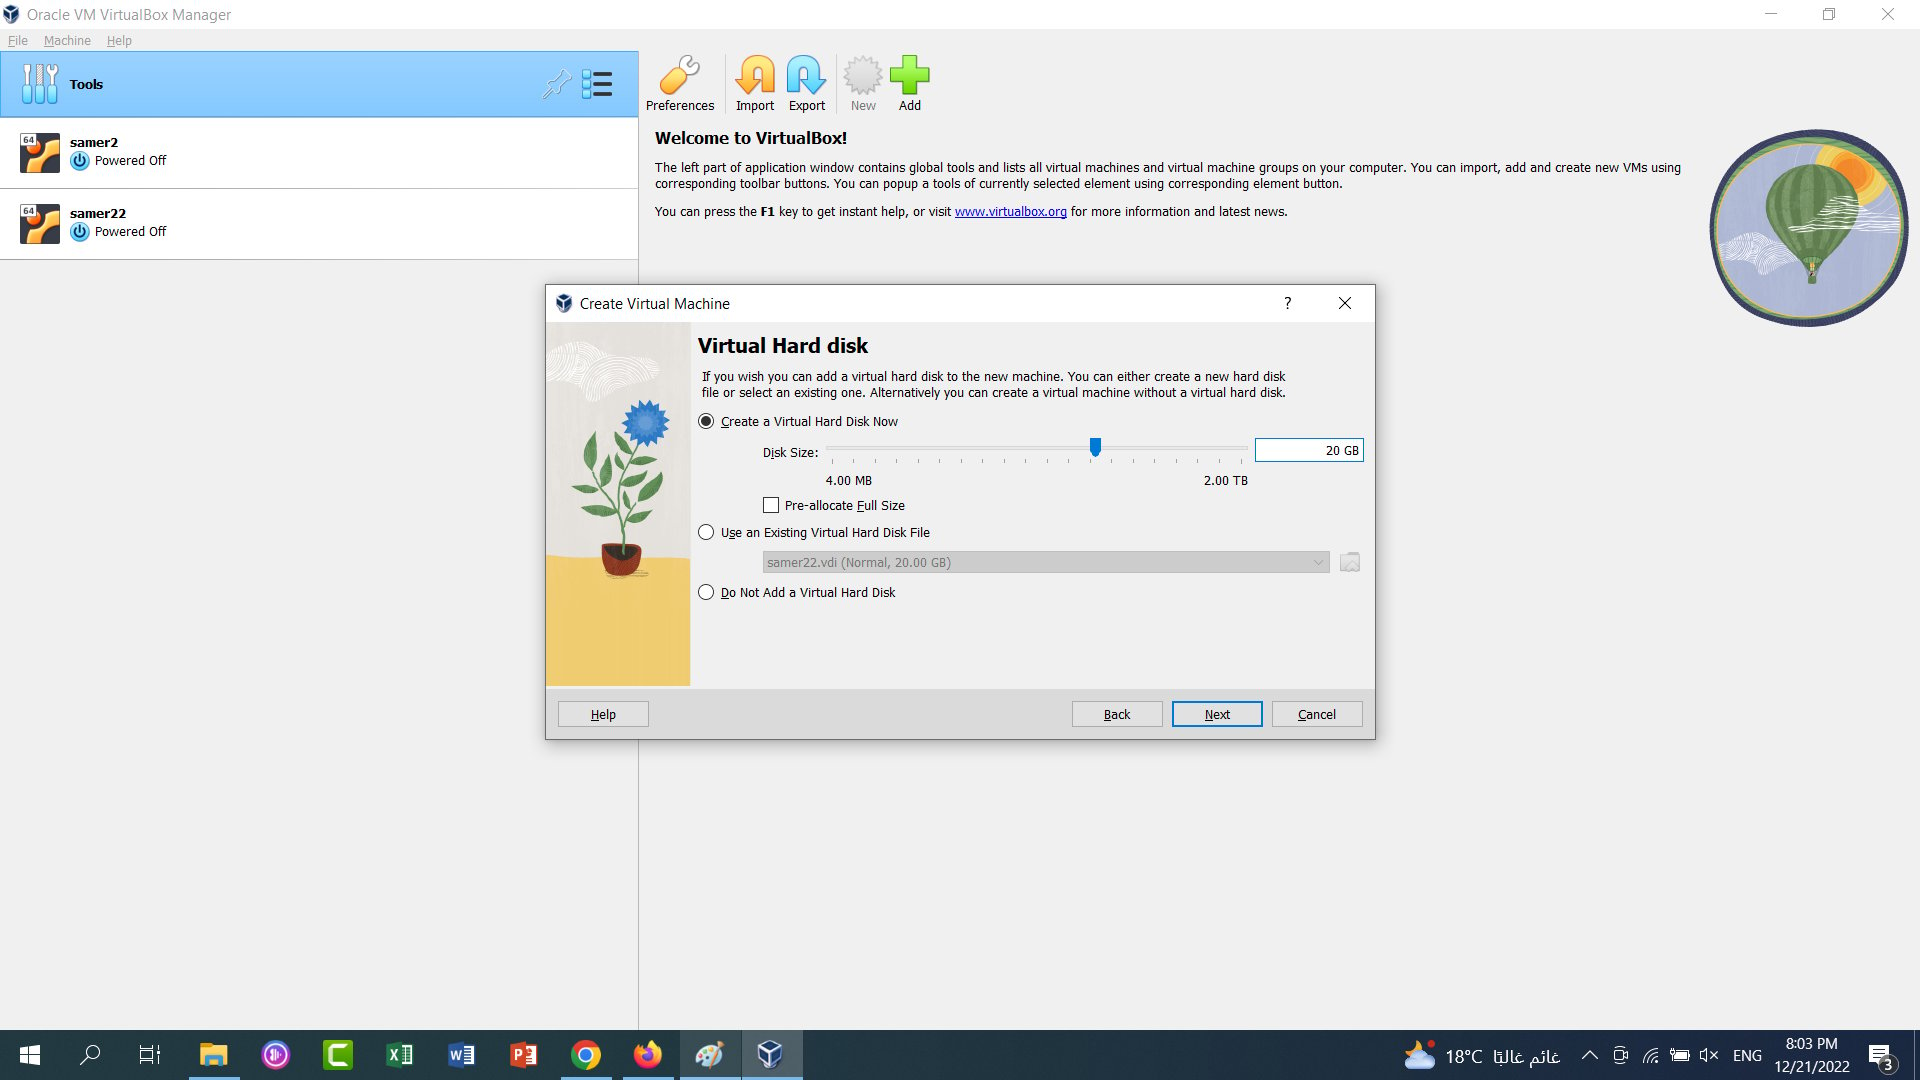
 5. Create a **virtual hard disk**, we recommend to allocate a capacity between 10 GB and 20 GB for the virtual hard disk drive. Click **Next** after you are done.
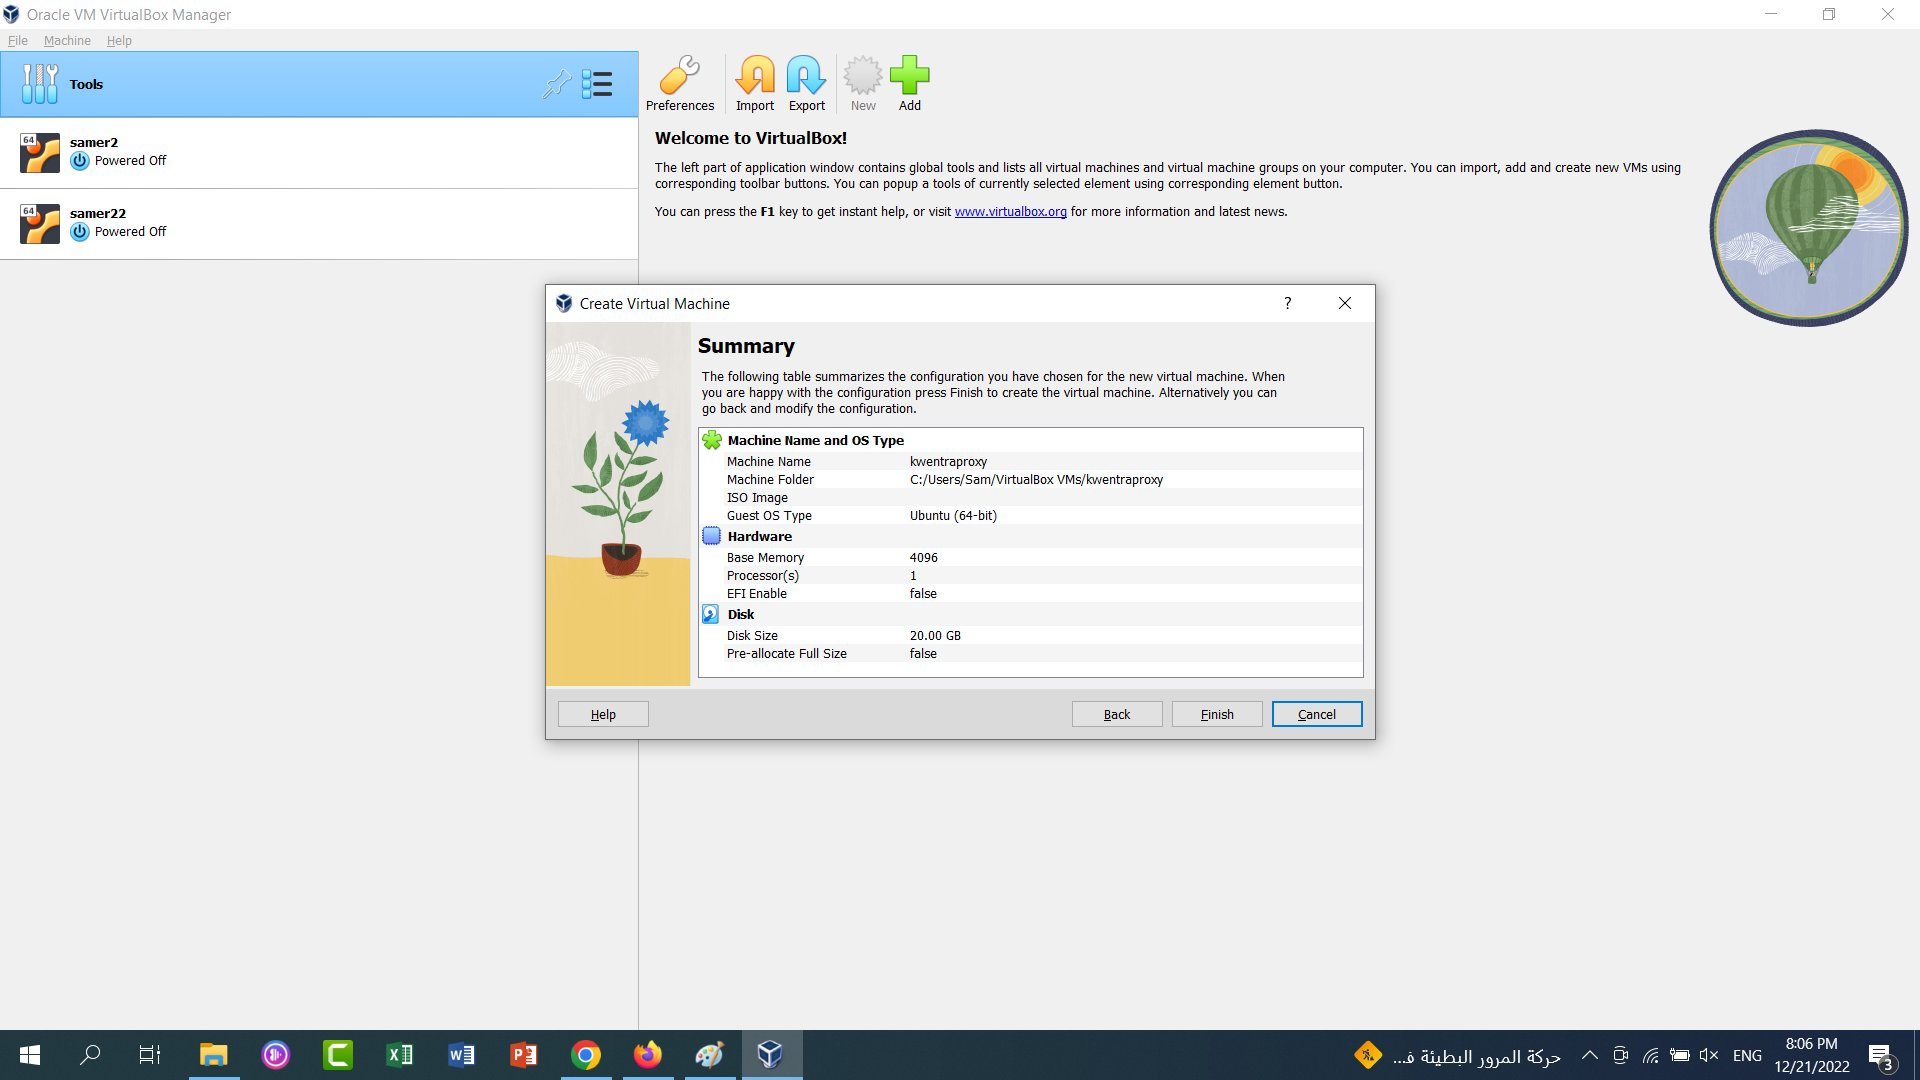
 6. You will get to see a summary of the machine's details before creation, click **Finish** to create the VM.
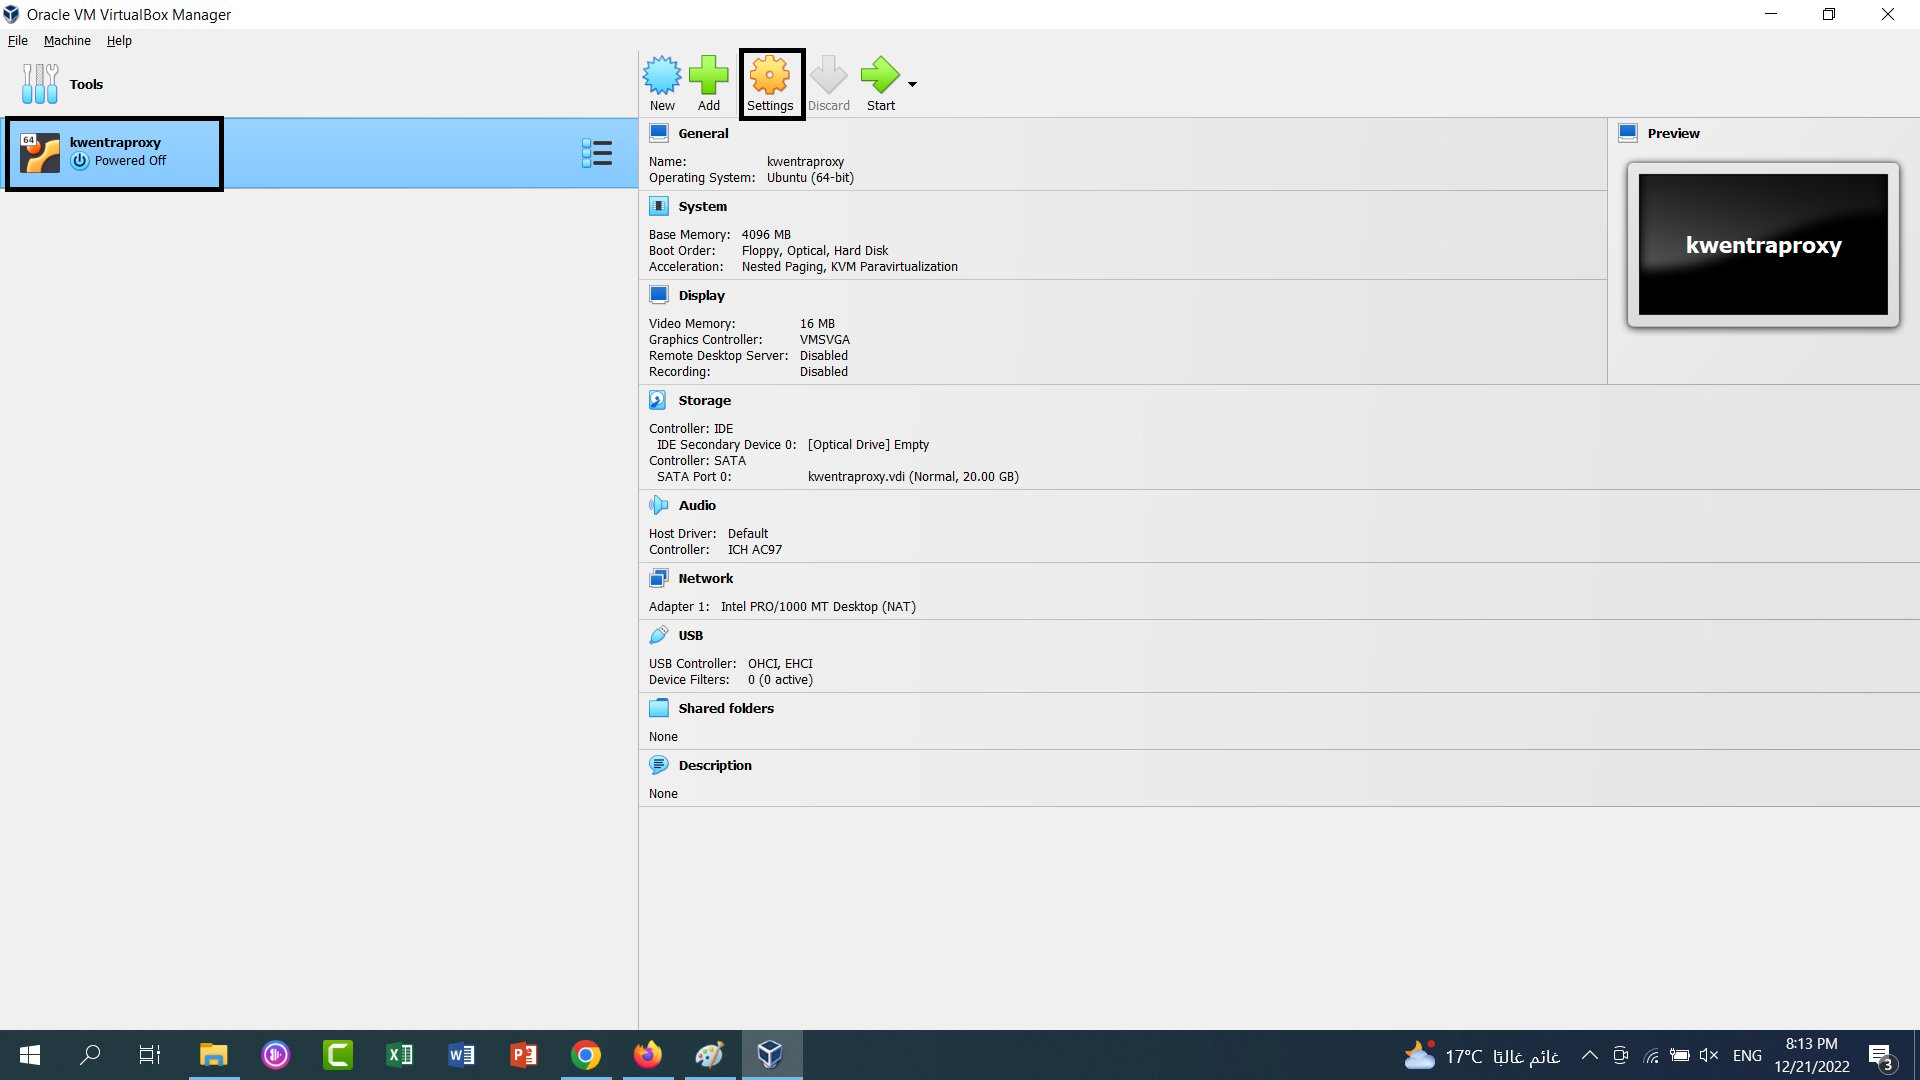
 8. Now your machine is created and powered off, **go to machine settings.**
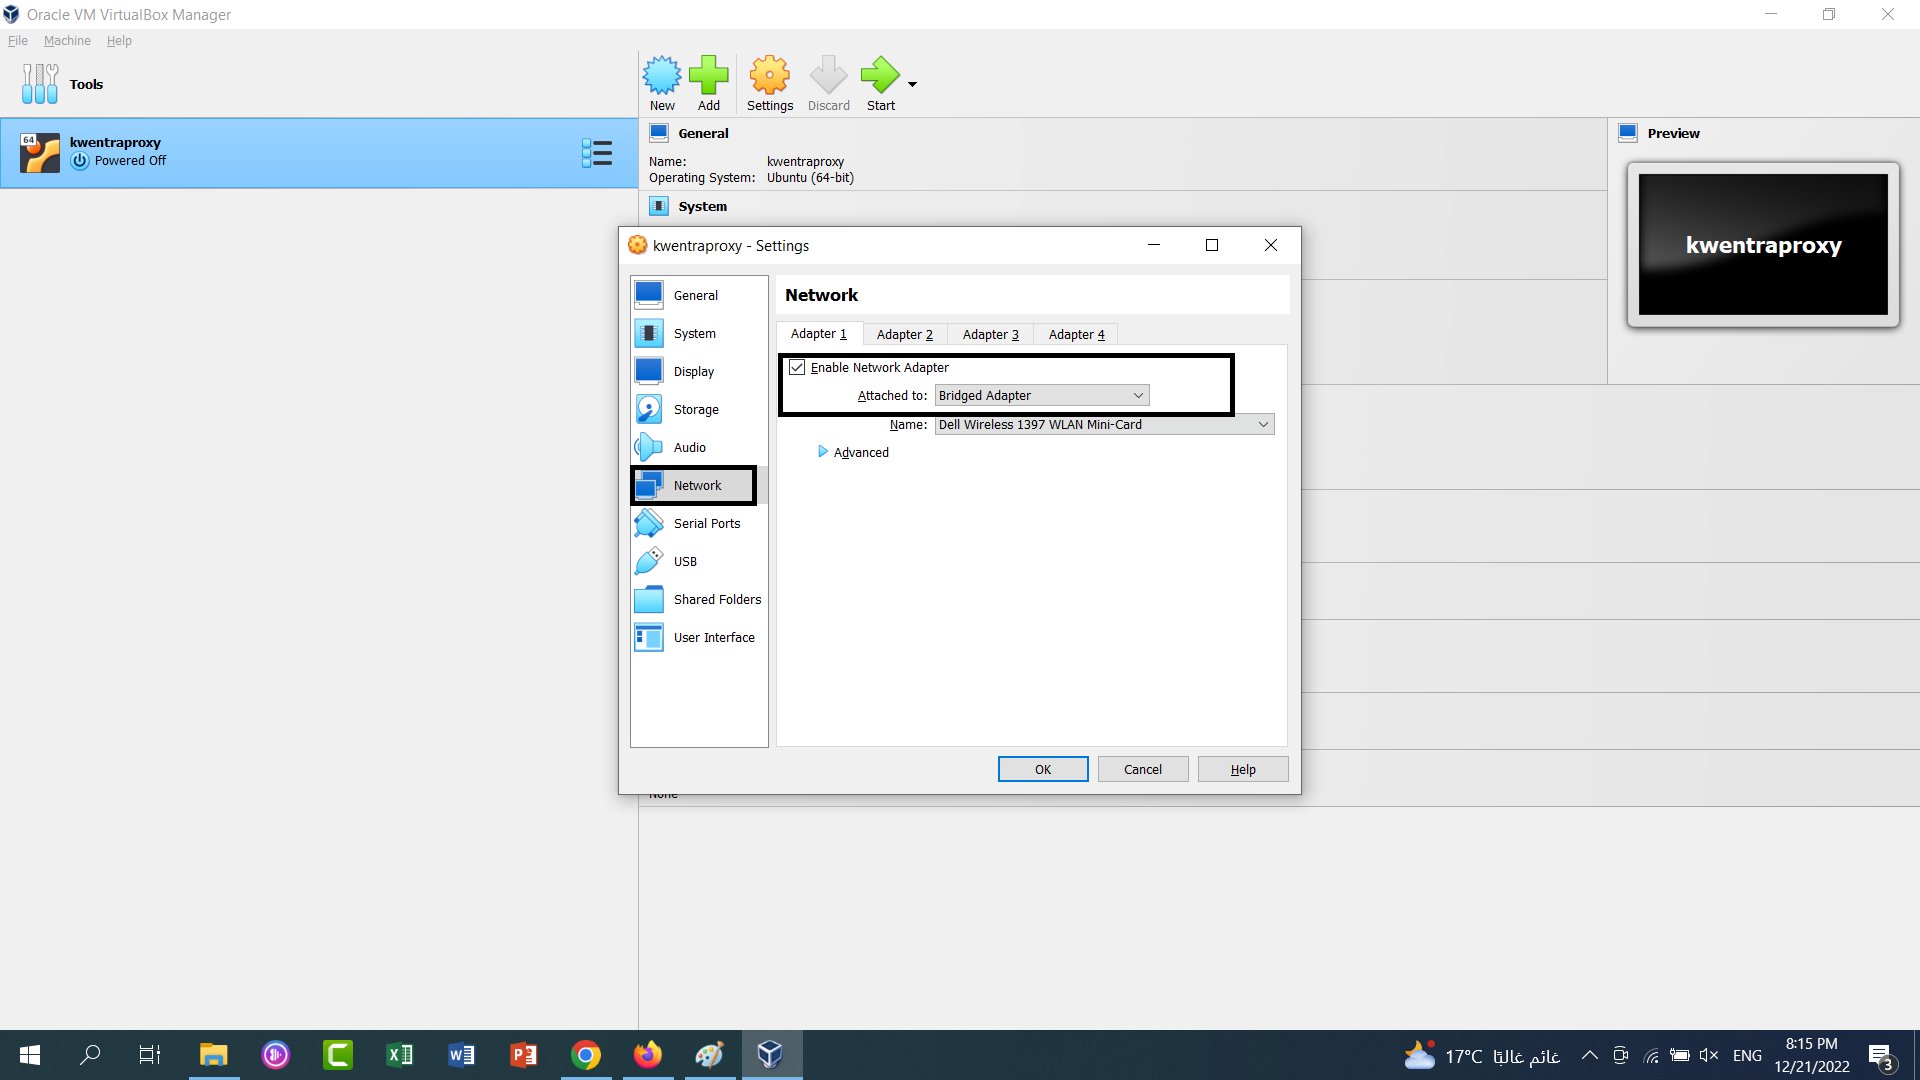
 9. From **Network** go to the **attached to** field and select **Bridged Adapter.** make sure you click on **OK** to save your changes.
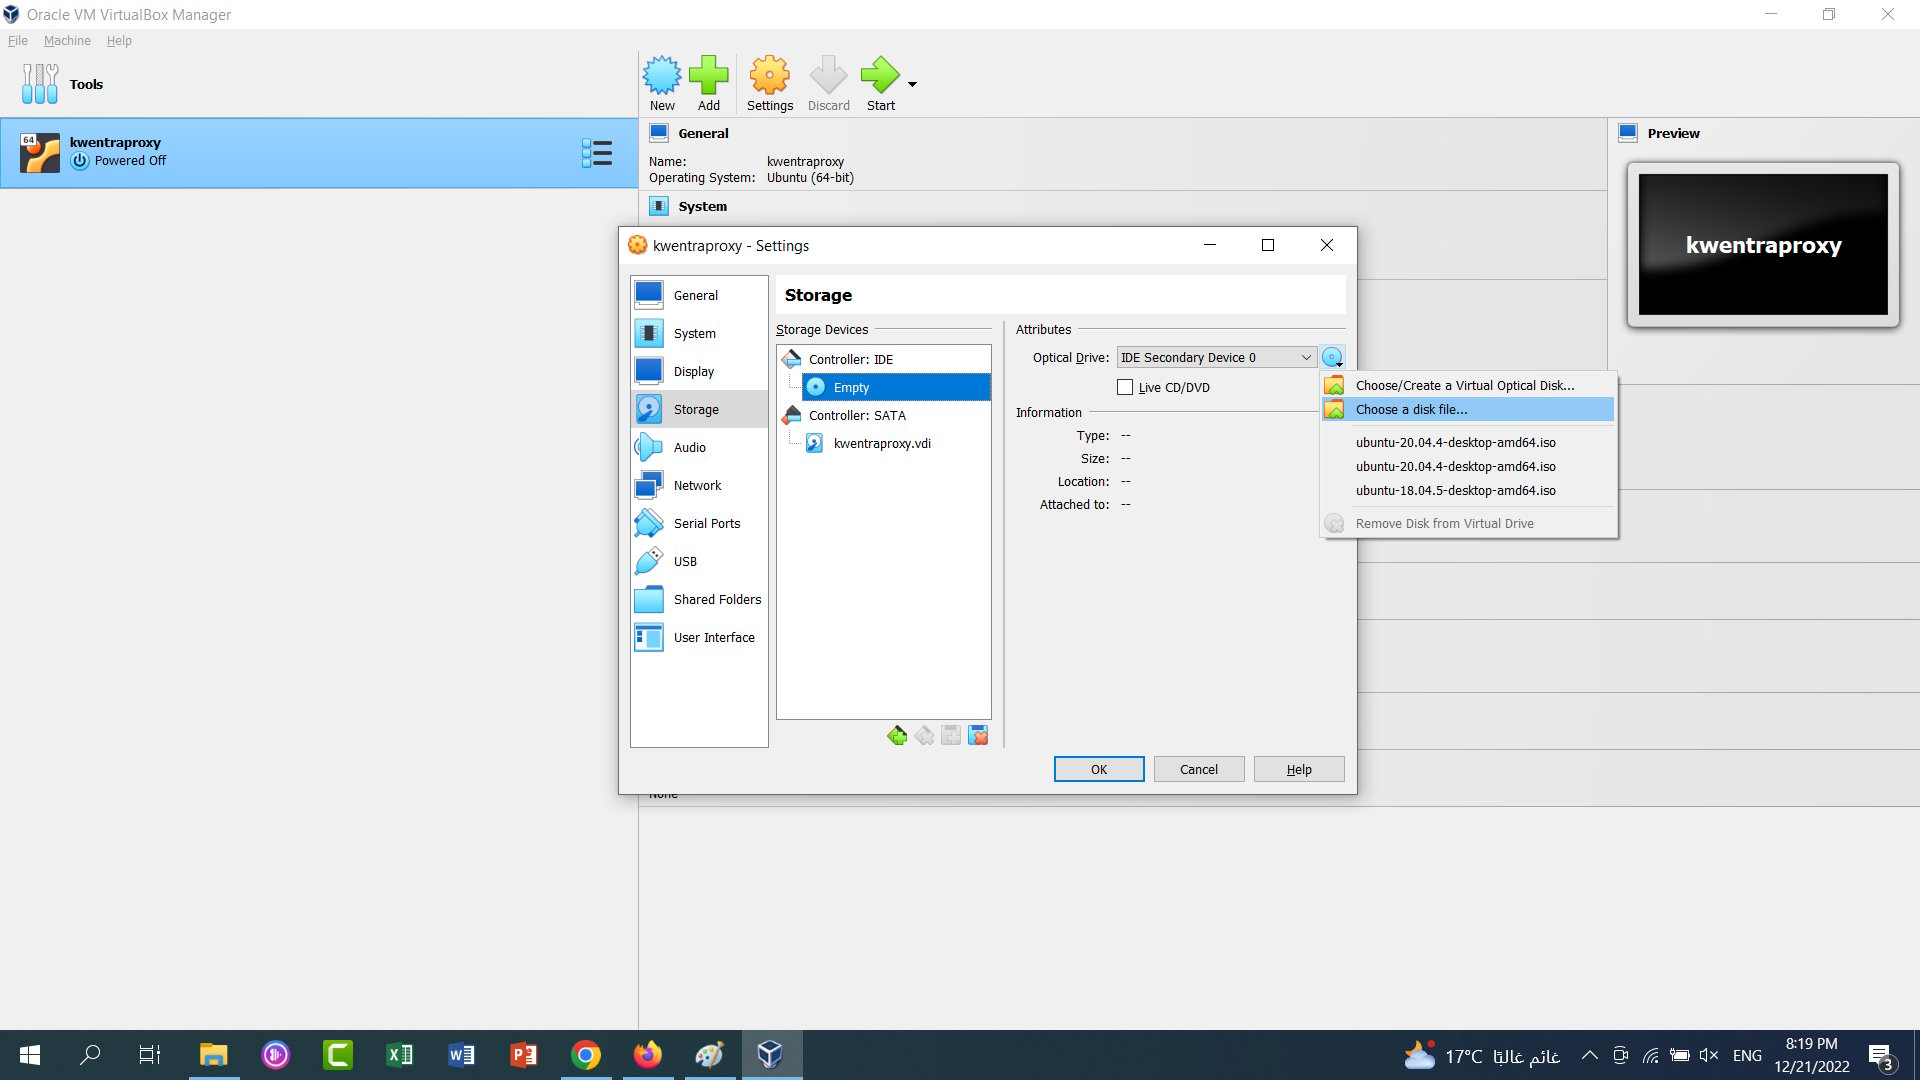
 10. From **Storage** select **Controller: IDE** and highlight the disk under it, click on the optical disc to be able to insert the virtual optical disc "the iso file" that was downloaded from the torrent in step 1. Don't forget to click **OK** after you are done selecting the iso file.
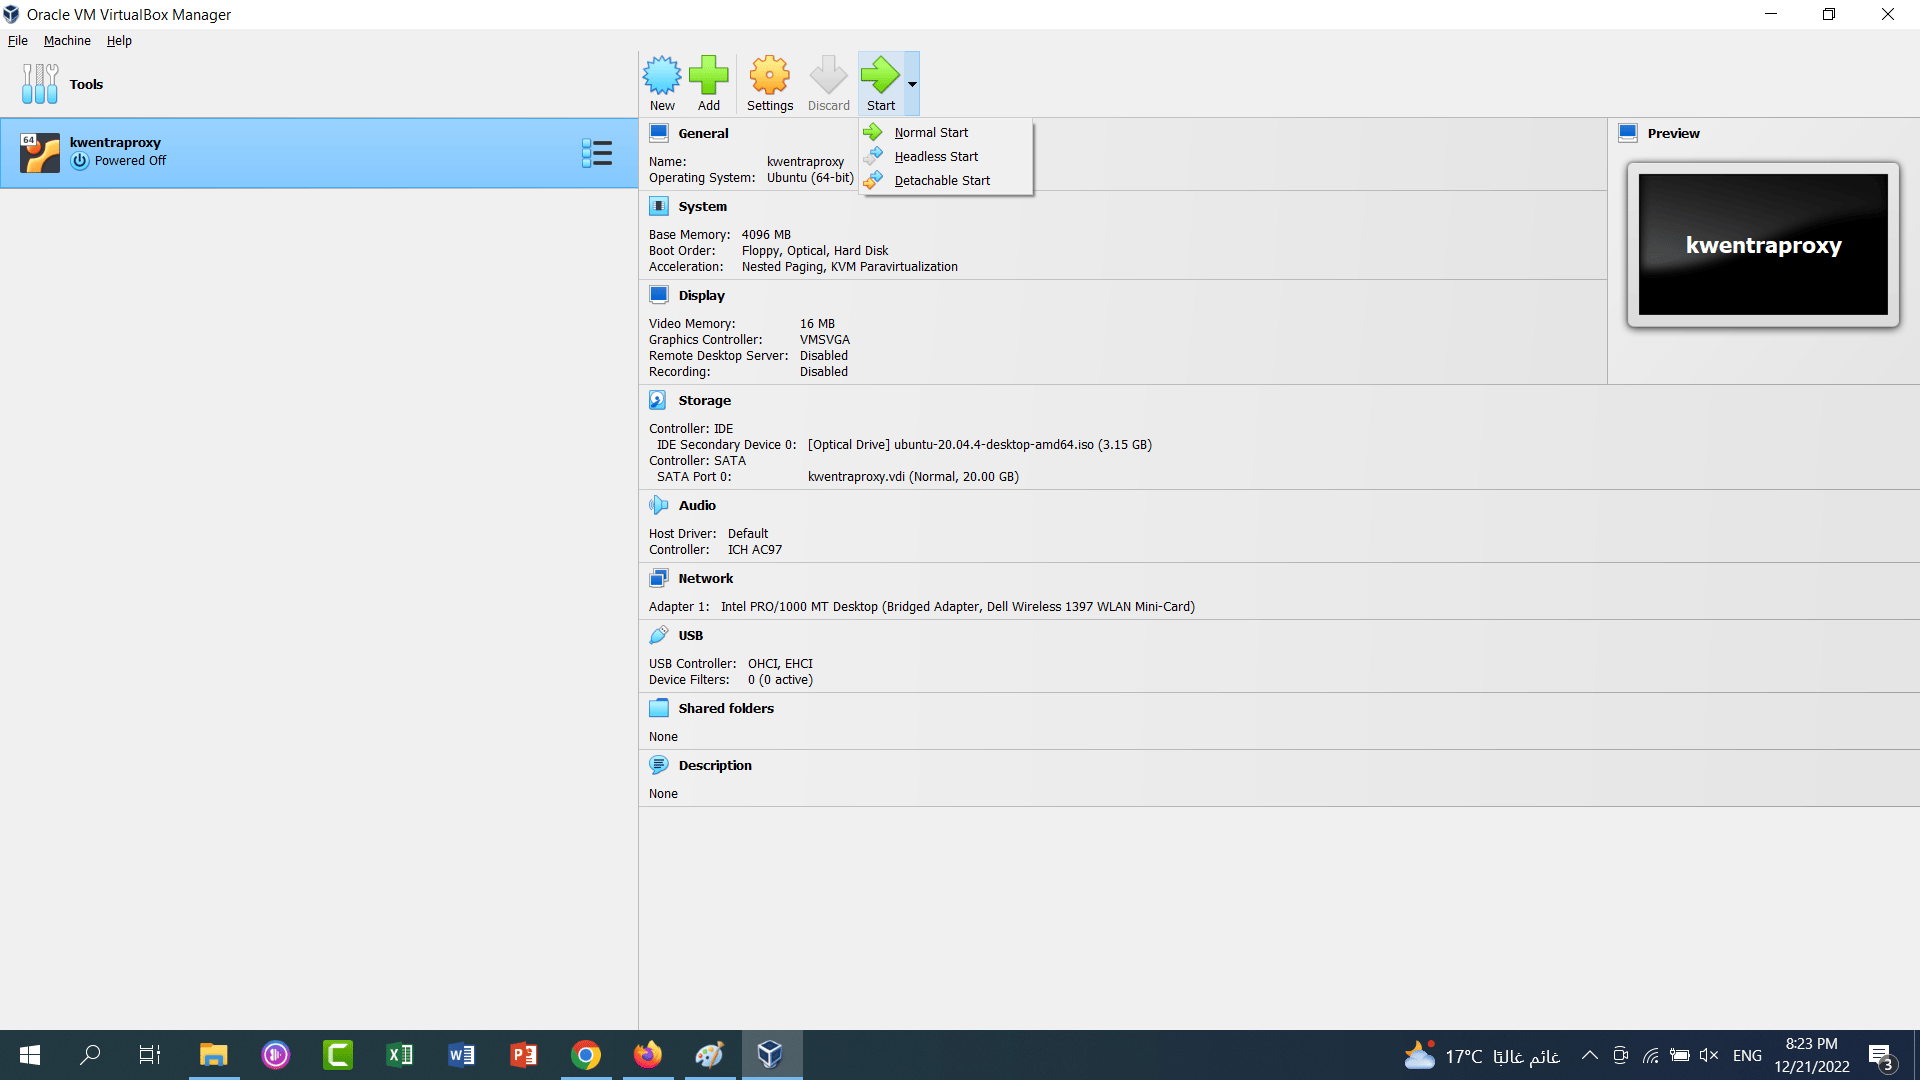
 11. Now you can perform a **Normal start**
 12. Your setup has successfully started:
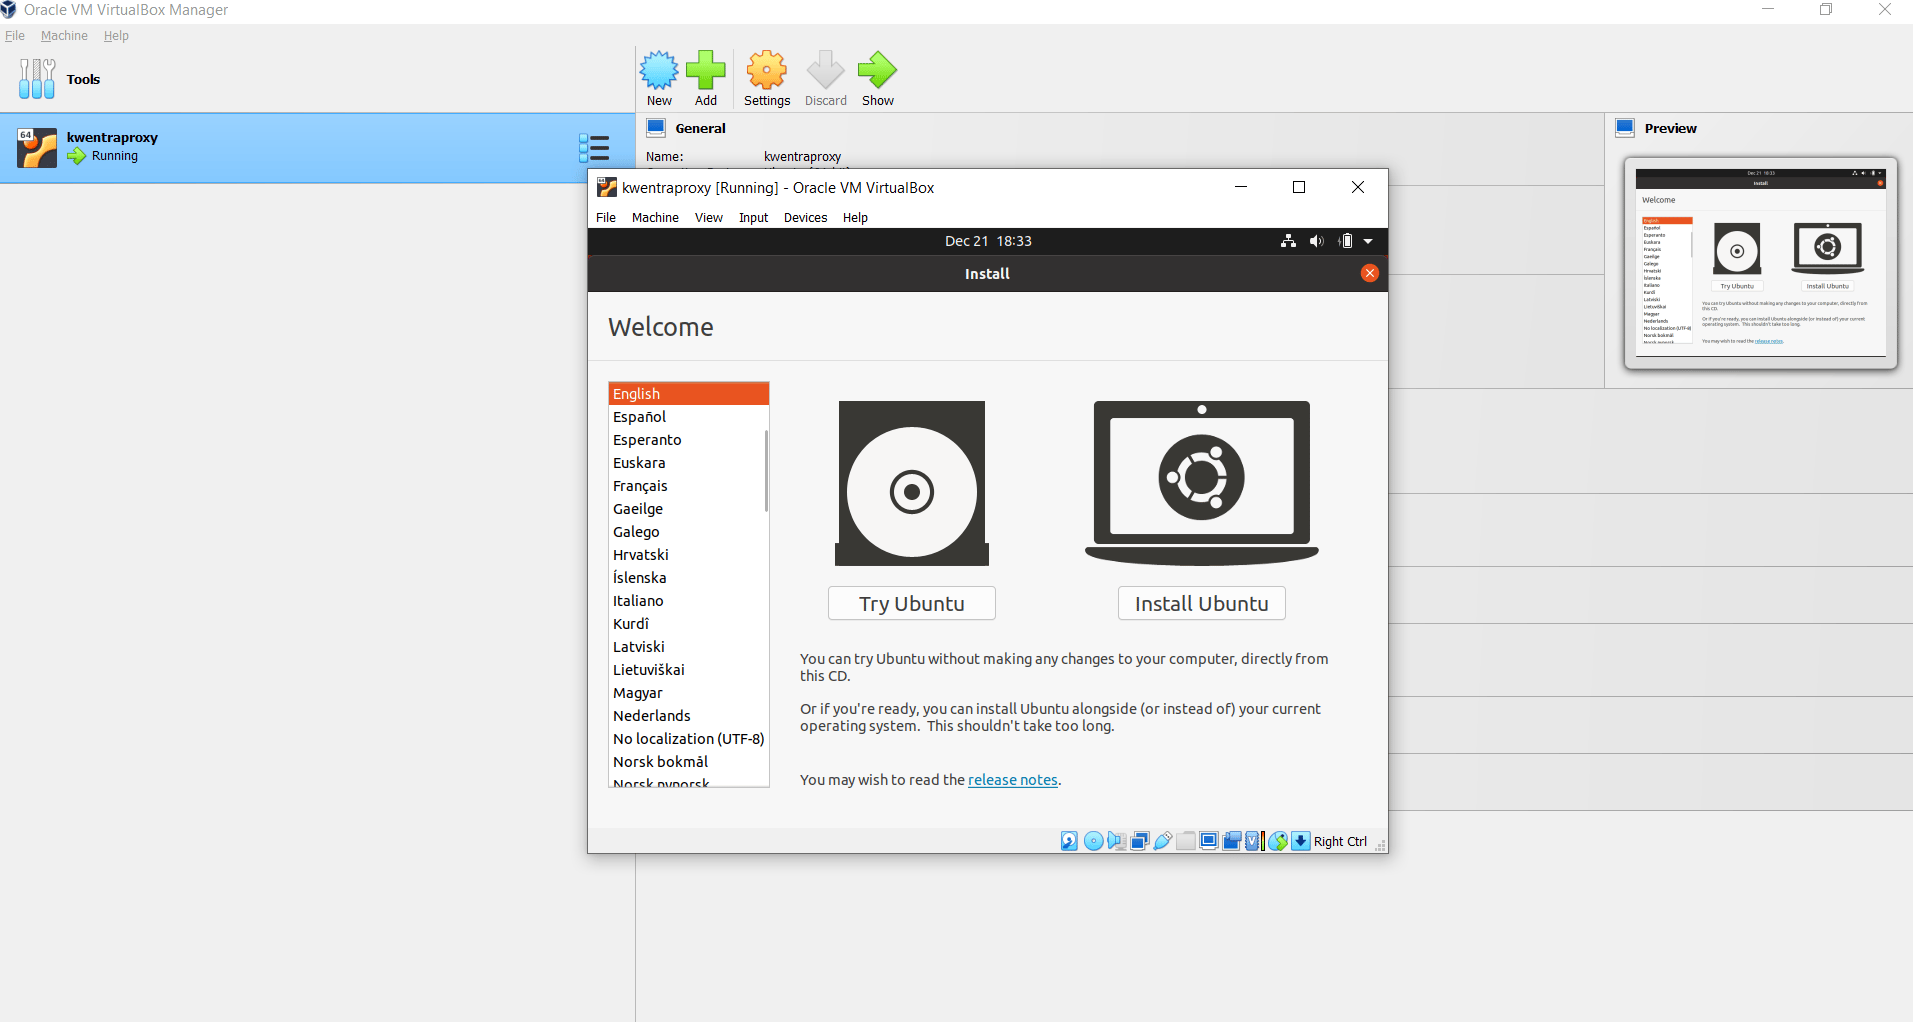
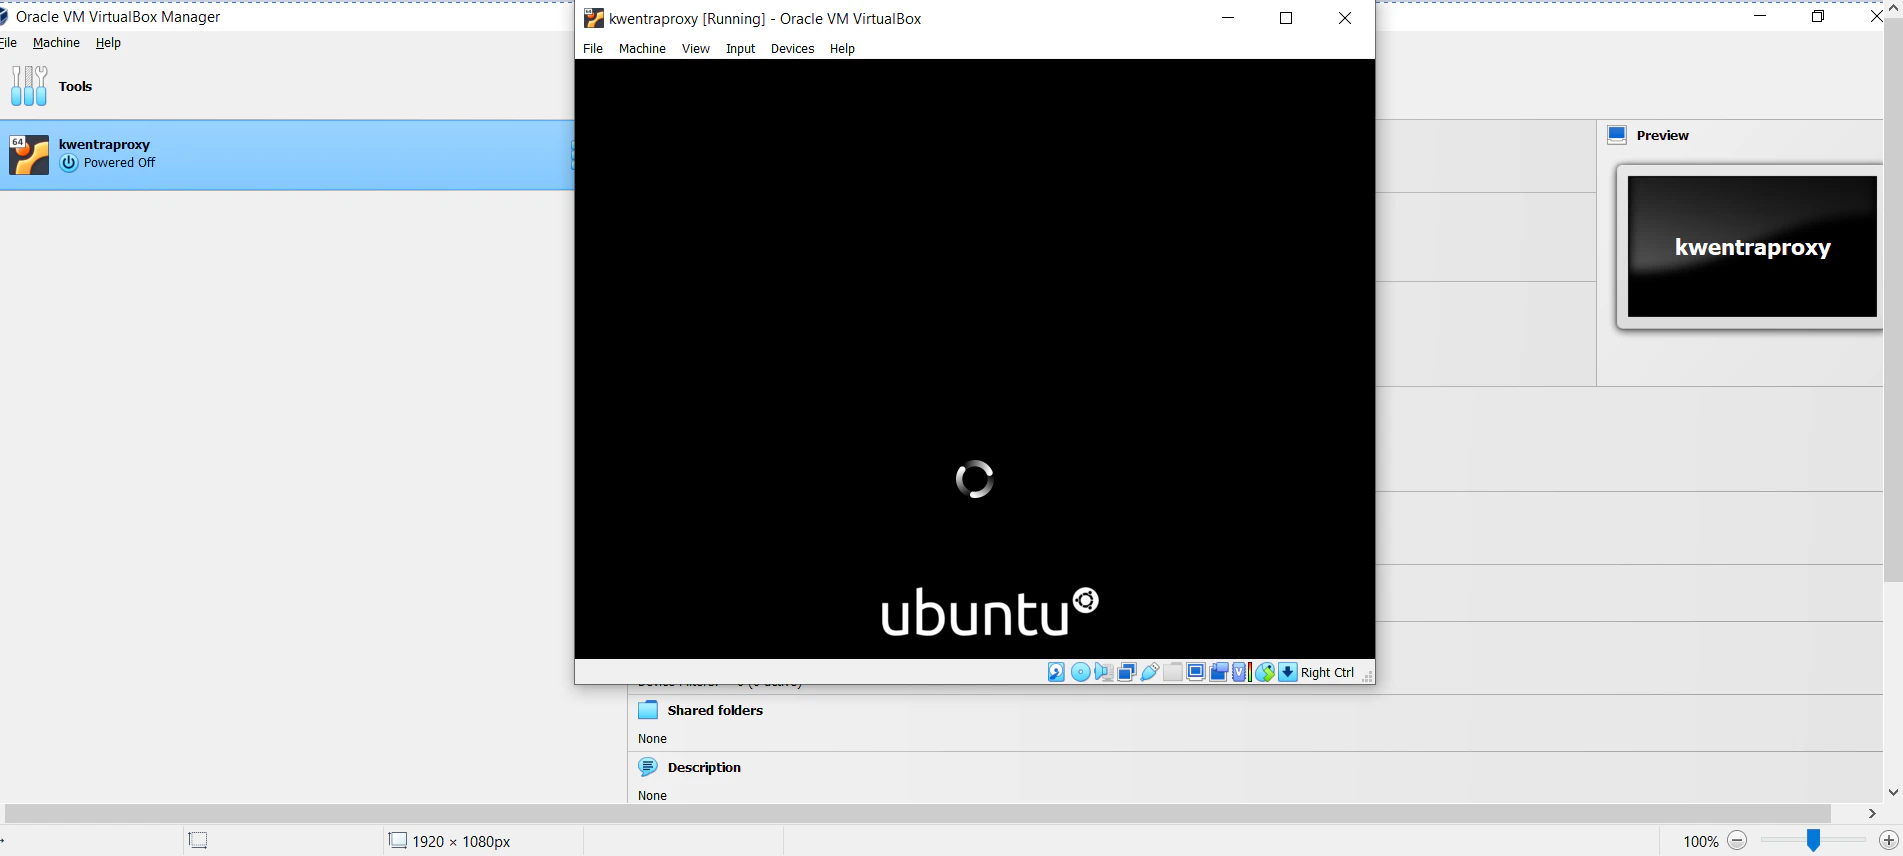 13. It would take about 5 minutes to reach the below screen so that you can **install Ubuntu.** Select Language and click **Install Ubuntu.**
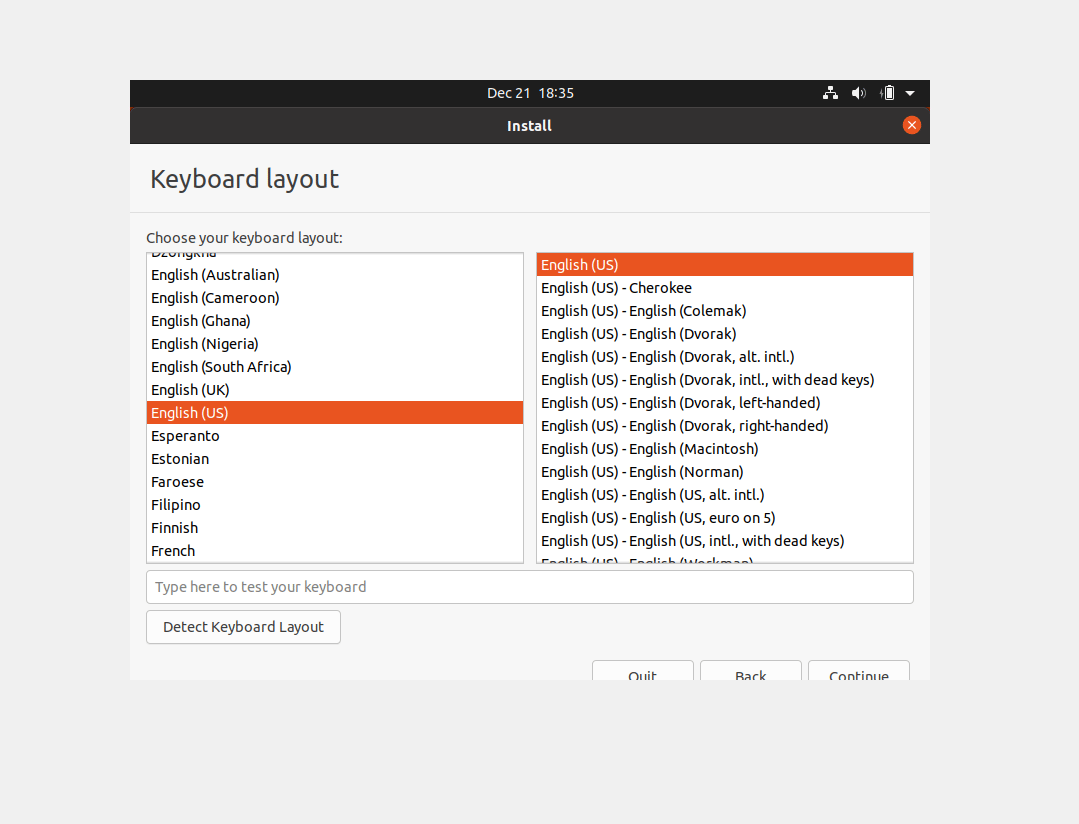
 14. Select the keyboard layout you desire. The best and recommended options are **English (US).** Click **Continue** after you are done.
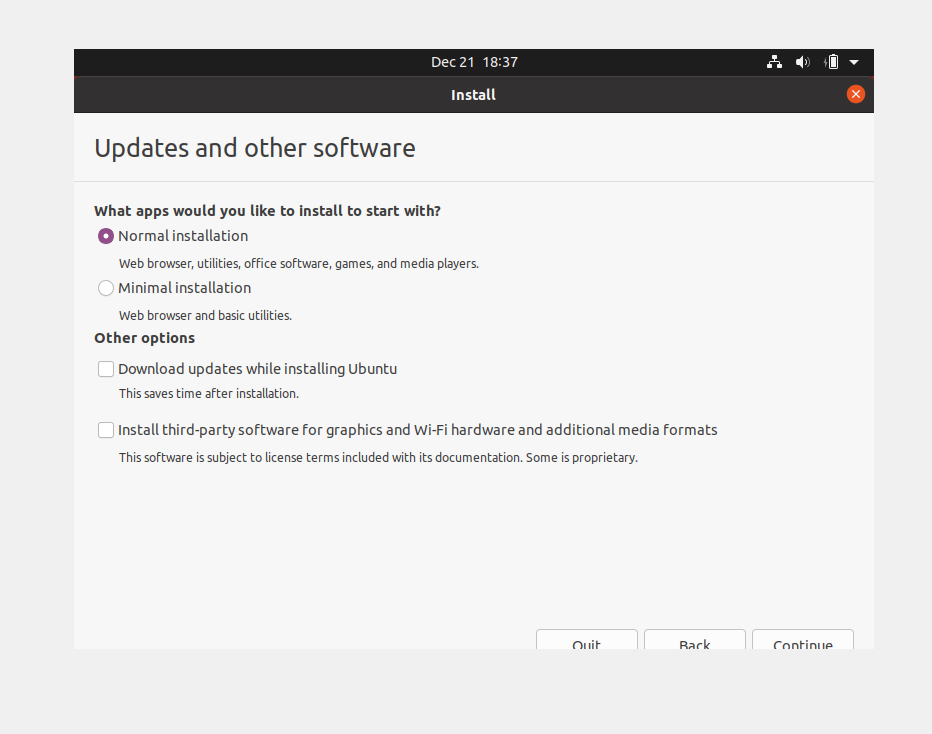
 15. Select the below boxes only when proceeding with the installation then click **Continue:**
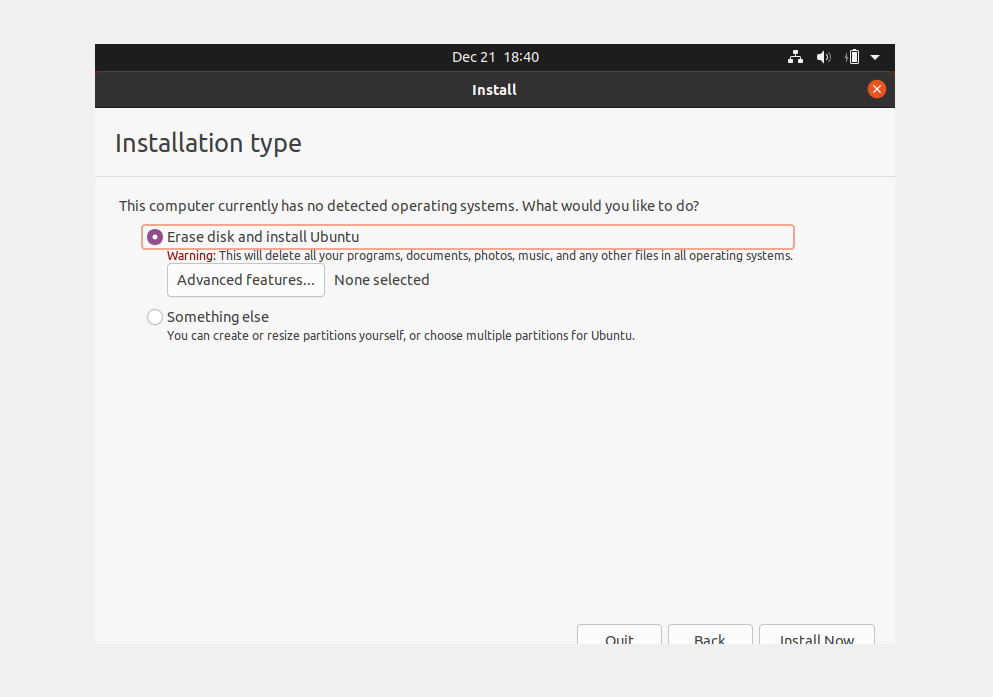
 16. Since that this is a new disc, it is OK to keep the selection as below and click **Install Now:**
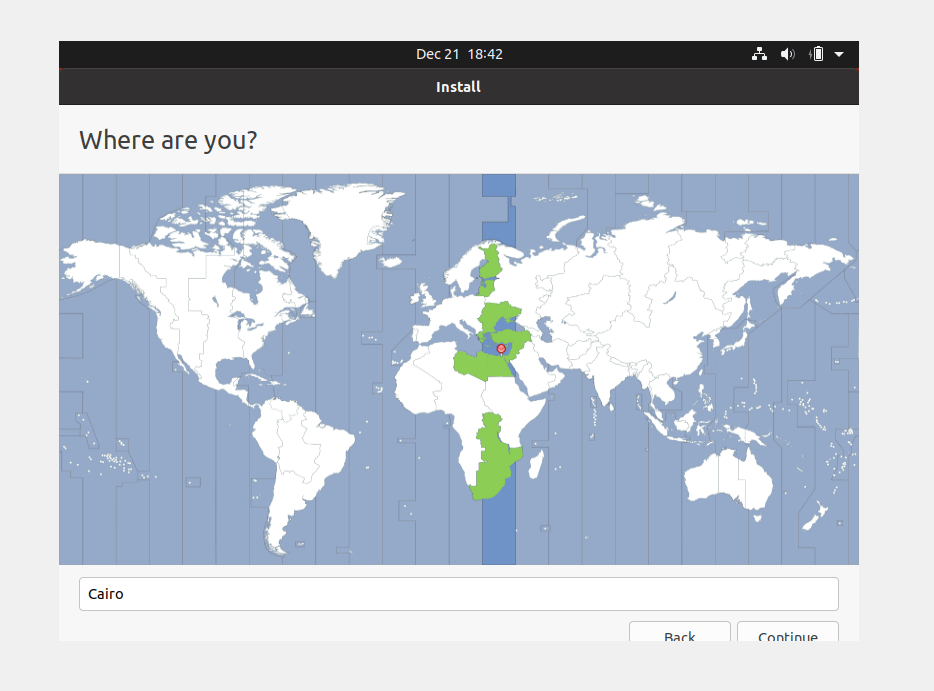
 17. Select the city you are located in by clicking on the map then click **continue.**
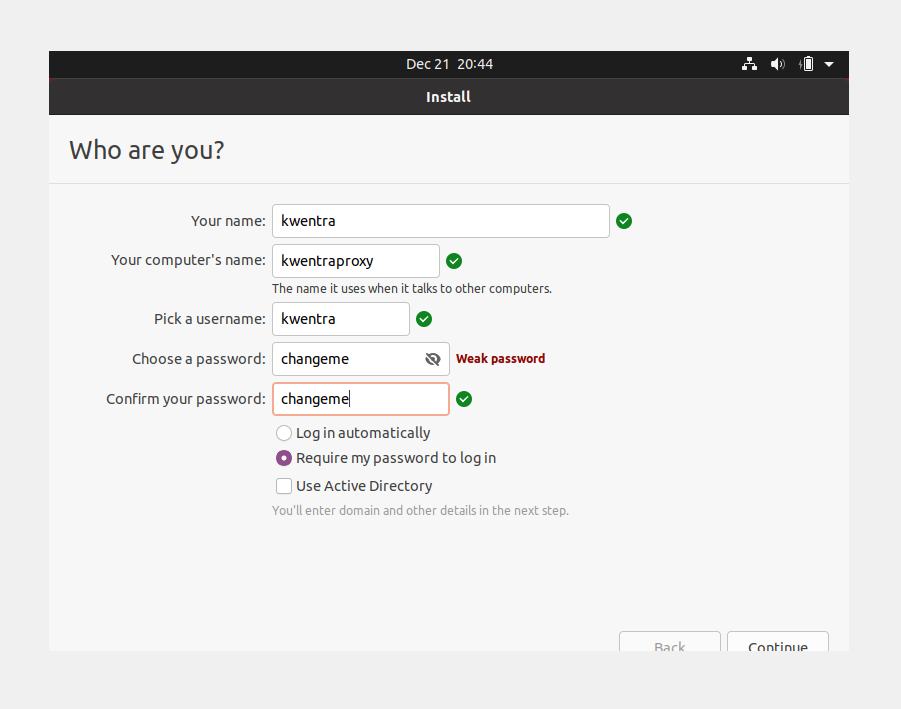
 18. Enter your name, your computer's name, a username and a password similar to the below example then click **Continue:**
*Please do not forget the password you created for the virtual machine during the installation process as it will be impossible to proceed with the proxy installation without it.*
18. Enter your name, your computer's name, a username and a password similar to the below example then click **Continue:**
*Please do not forget the password you created for the virtual machine during the installation process as it will be impossible to proceed with the proxy installation without it.*
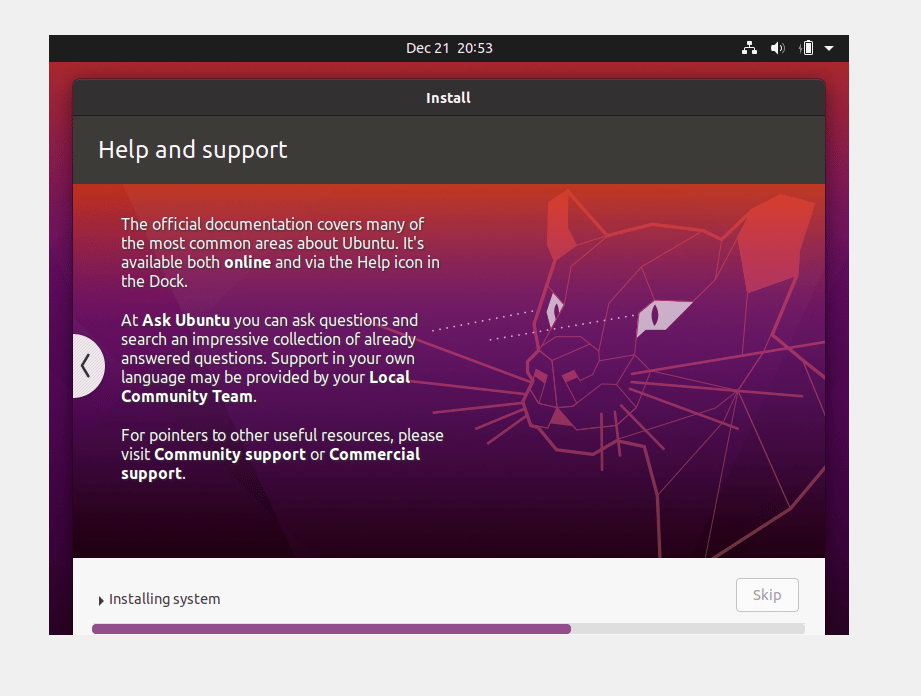
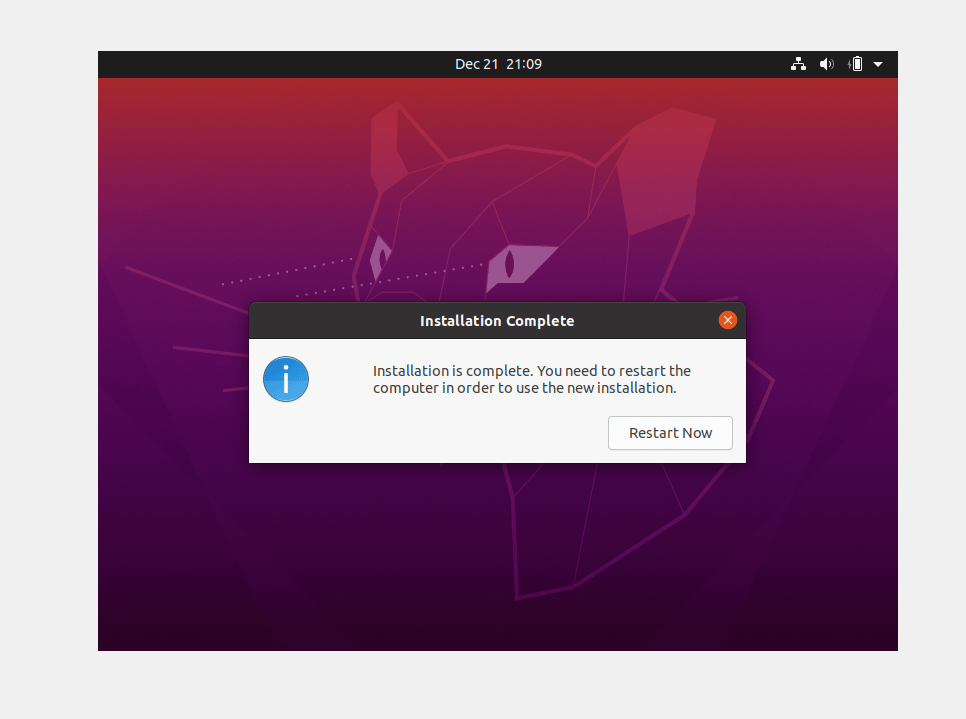
 19. It would take about 20-30 minutes for the Operating System to install, it will ask you to restart at the end to finalize the installation.
 20. Click **Restart Now.**
 Congratulations! The virtual machine is now ready for proxy server setup, please contact your dedicated accounts manager or [support@kwentra.com](mailto:support@kwentra.com) to proceed with the proxy installation.
*Please do not forget the password you created for the virtual machine during the installation process as it will be impossible to proceed with the proxy installation without it.*
Congratulations! The virtual machine is now ready for proxy server setup, please contact your dedicated accounts manager or [support@kwentra.com](mailto:support@kwentra.com) to proceed with the proxy installation.
*Please do not forget the password you created for the virtual machine during the installation process as it will be impossible to proceed with the proxy installation without it.*