> ## Documentation Index
> Fetch the complete documentation index at: https://help.kwentra.com/llms.txt
> Use this file to discover all available pages before exploring further.
# 2024 Release Notes
> All Kwentra product updates released in 2024.
## Enhancements to Channel Nationality Daily Summary Report
**Overview**
The Channel Nationality Daily Summary report now includes new features to provide more granular insights into reservation data. These updates allow users to analyze data by gender and age groups, enhancing their ability to understand guest demographics.
**Key Features**
1. **Gender-Specific Columns**
* **New Columns Added**:
* **Male**: Displays the count of adults identified as male.
* **Female**: Displays the count of adults identified as female.
* **Unspecified Gender**: Displays the count of adults whose gender is not specified.
* **Behavior**:
* These columns are visible by default in the report view and appear across all report grouping settings.
* Data for these columns is retrieved from the guest details associated with each reservation.
* Only adults, as defined by the system, are included in these counts.
2. **New Parameter: Show Ages**
* **Functionality**:
* A new dropdown parameter, **Show Ages**, has been added to the report settings.
* Options:
* **Yes**: Displays additional age segment columns.
* **No**: Hides age segment columns (default setting).
3. **Age Segment Columns**
* **When Show Ages is Set to Yes**:
* The report displays the following age segment columns:
* Ages 15-20
* Ages 21-25
* Ages 26-30
* Ages 31-35
* Ages 36-40
* Ages 41-45
* Ages 46-50
* Ages 51-55
* Ages 56-60
* Ages 61-65
* Ages 66-70
* Ages 70+
* **Behavior**:
* Age is calculated as the difference between the guest’s Date of Birth and the current date.
* Guests are grouped into the appropriate segment based on their calculated age.
* Guests with no Date of Birth will not appear in any age segment column.
**Technical Details**
1. **Gender Column Logic**
* Data is sourced from the reservation guest details.
* The Male, Female, and Unspecified Gender columns dynamically update based on the report’s grouping settings.
2. **Age Segment Logic**
* Age is computed at runtime using the following formula: **Current Date – Date of Birth**.
* Each guest is assigned to one of the predefined age segments.
* Guests without a valid Date of Birth are excluded from age segment counts.
3. **Report Parameter Behavior**
* The **Show Ages** parameter defaults to **No**.
* When set to **Yes**, the report layout dynamically adjusts to display the additional age segment columns.
**How to Use the Enhanced Report**
1. **Access the Report**:
* Navigate to **Reports > [Channel Nationality Daily Summary](https://manage.kwentra.com/reports/Reservation/Channel/Nationality%20Daily%20Summary/)**.
2. **Analyze Gender Data**:
* View the Male, Female, and Unspecified Gender columns in the default report view.
3. **Enable Age Segments**:
* In the report settings, set the **Show Ages** parameter to **Yes** to display age segment columns.
4. **Interpret Data**:
* Use the gender-specific and age segment columns to gain deeper insights into guest demographics.
**FAQs**
1. **What happens if a guest’s Date of Birth is missing?**
* The guest will not be included in any age segment column.
2. **Can I use grouping settings with these new columns?**
* Yes, the gender and age segment columns are compatible with all existing grouping settings.
3. **What is the default setting for the Show Ages parameter?**
* The default value is **No**, which hides the age segment columns.
## Hotel Supplier VAT Tax Report
## Support Article: How to Generate the
The **[Supplier VAT Tax](https://manage.kwentra.com/reports/Accounts%20Payable/VAT%20Tax/) Report** is a new feature designed to provide detailed and structured tax-related information. It compiles data from multiple sources, including receiving orders, manual receiving orders, and return requests, ensuring accuracy and transparency for tax reporting. This article outlines how to use this report, its features, and key details.
### **Purpose of the Report**
The Hotel Supplier VAT Tax Report helps you:
* Track VAT-related details from vendor transactions.
* Consolidate data from multiple sources.
* Filter and export detailed tax records for compliance and reporting.
### **Data Sources**
The report includes information from the following sources:
1. **Receiving Orders**
2. **Manual Receiving Orders**
3. **Return Requests**
### **Report Columns**
Each column in the report provides essential tax and transaction details:
Serial : Displays the JV (Journal Voucher) number.
INV Number : Displays the receiving order number.
INV Date : Displays the date of the receiving order.
Supplier VAT Number : Displays the vendor’s tax registration number.
Supplier Name : Displays the vendor's name.
Description : Displays the description from the receiving order.
Before-Tax Amount : Displays the net amount from the receiving order (excluding VAT).
VAT Amount : Displays the VAT amount from the receiving order.
After-Tax Amount : Displays the gross amount from the receiving order (including VAT).
### **Report Parameters**
You can customize the report using the following parameters:
1. **Date Range**
* Use "From" and "To" fields to select a specific date range.
* Only records within the specified range will appear in the report.
2. **Vendor**
* Optional multi-select autocomplete field to filter by vendor(s).
* If left blank, data for all vendors will be included.
### **Calculation Details**
The report ensures all calculations are accurate and consistent with the data sources. Below are the key formulas:
* **Before-Tax Amount**: Total order amount based on quantity, excluding VAT.
* **VAT Amount**: VAT calculated on the net order amount.
* **After-Tax Amount**: Total order amount based on quantity, including VAT.
**Return Requests:** Adjustments for return requests are handled appropriately to reflect correct VAT amounts.
### **How to Access the Report**
1. Navigate to the **Reports** section in your system.
2. Select **[Supplier VAT Tax](https://manage.kwentra.com/reports/Accounts%20Payable/VAT%20Tax/) Report**.
3. Set the desired parameters (Date Range, Vendor).
4. Click **Generate** to view the report on-screen.
5. Use the **Export** button to save the report in Excel or PDF format.
### **Common Use Cases**
* **Tax Reporting:** Consolidate VAT details for monthly or quarterly submissions.
* **Vendor Analysis:** Review VAT-related data for specific suppliers.
* **Audit Preparation:** Provide clear and accurate records for audits.
[Read more](/front-office/reports/income-reports/tax-report)
## Introducing the New "Level of Detail" Parameter in Account Listing Details Report
#### Overview
The Account Listing Details report in **[Reports → Back Office](https://manage.kwentra.com/reports/GL/Account%20Listing%20Details/)** has been enhanced to give users more flexibility in analyzing transactions. With the new **Level of Detail** parameter, users can now choose between a summarized or detailed view of transaction data. This enhancement ensures a clearer breakdown of transactions while maintaining the report's efficiency and user-friendliness.
#### Key Feature: **Level of Detail Parameter**
A new parameter called **Level of Detail** has been added to the Account Listing Details report. This parameter provides two options:
1. **Summary (Default)**
Displays a summarized view of Journal Vouchers (JVs), with one line per JV under each account.
* Groups transactions by JV and displays the JV description.
* Ideal for high-level account analysis.
2. **Detailed**
Displays individual transaction lines for each account, breaking down multiple transactions on the same JV.
* Shows transaction-level details, including debit, credit, and line-specific descriptions.
* Useful for in-depth account auditing.
#### Report Behavior
**1. Summary Level**
When the **Summary** option is selected, the report groups transactions by JV and displays only one line per JV. The description shown is for the JV itself, not individual transactions.
**2. Detailed Level**
When the **Detailed** option is selected, the report breaks down transactions into individual lines, showing specific details for each.
#### User Interaction
* The **Level of Detail** parameter is available in the report's configuration screen.
* Users can easily switch between **Summary** and **Detailed** options before generating the report.
#### Important Note
Previously, the report always displayed transactions in a detailed format. This enhancement introduces the **Summary** view, providing users with a new, summarized way to analyze data grouped by JV.
## Adding a Voucher Number Field to Paymaster Billing Profiles
This article outlines the new feature enhancements for Paymaster Billing Profiles, including the introduction of a "Voucher Number" field. These enhancements aim to improve usability and provide better filtering and visibility for paymaster records.
## Feature Overview
### Paymaster Billing Profile
* **New Field:** A field labeled "Voucher Number" is added to the paymaster billing profile.
* **Automatic Fetching:** When a paymaster billing profile is created from a reservation, the Voucher Number automatically fetches and displays the value from the associated reservation.
* **Field Behavior:**
* **Individual Reservations:** When creating a paymaster from an individual reservation, the Voucher Number field remains editable since there is no confirmation number.
* **Group Reservations:** When creating a paymaster from a group reservation, the Voucher Number field is non-editable and can only be modified through the group reservation.
### Paymaster Listing Table
* **New Column:** The Voucher Number is added as a column in the paymaster listing table.
* **Customizable Display:** Users can include or exclude this column using the Table Edit button.
### Paymaster Search Form
* **New Filter:** A filter labeled "Voucher Number" is added to the paymaster search form.
* **Enhanced Search:** Users can search and filter the paymaster listing table by Voucher Number values.
## Technical Details
* The Voucher Number field is non-editable in the paymaster billing profile when created from group reservations and is directly derived from the associated reservation.
* Editable fields are only applicable when the paymaster is created from individual reservations without a confirmation number.
## User Workflow
### Creating a Paymaster Billing Profile
1. **From Individual Reservation:**
* The Voucher Number field is editable.
* Users can manually input the Voucher Number if necessary.
2. **From Group Reservation:**
* The Voucher Number field auto-populates and is non-editable.
* Any changes to the Voucher Number must be made through the group reservation.
### Viewing the Voucher Number in the Listing Table
* Use the Table Edit button to include the Voucher Number column in the paymaster listing table.
* The column displays the Voucher Number for each paymaster billing profile.
### Searching by Voucher Number
1. Open the paymaster search form.
2. Use the new "Voucher Number" filter to enter the desired Voucher Number.
3. View filtered results in the paymaster listing table.
## Automatic VAT Calculation for Receiving Orders, Return Requests, and Manual Receiving
**Introduction**
We're excited to announce a new feature that will simplify your purchasing process and streamline VAT calculations! This update introduces automatic VAT calculation for Receiving Orders, Return Requests, and Manual Receiving.
**How it Works**
1. **Tax Definition Setup:**
* **Create a New Tax Definition:**
* Navigate to the Tax Definitions section.
* Create a new tax definition specifically for VAT purchasing.
* Set the tax department to "Payable" and the tax type to "Excluded"
2. **Using the New Feature:**
* **Select the Tax Definition:**
* When creating a new Receiving Order, Return Request, or Manual Receiving, select the appropriate VAT purchasing tax definition.
* **Automatic VAT Calculation:**
* The system will automatically calculate the VAT amount based on the total amount of the order and the defined tax rate.
* **Line-Item Level VAT Control:**
* You can now control VAT calculation at the line-item level.
* Change VAT to a different tax definition per line-item.
* Remove VAT from line items you want to exclude.

**Benefits of the New Feature:**
* **Reduced Manual Effort:** No more manual VAT calculations.
* **Increased Accuracy:** Ensures accurate VAT calculations.
* **Streamlined Workflow:** Simplifies the purchasing process.
* **Enhanced Control:** Allows for granular control over VAT calculations at the line-item level.
**Example:**
If your VAT rate is 14% and the total amount of your order is 100, the system will automatically calculate the VAT amount to be 14.
**Additional Tips:**
* Ensure that your VAT purchasing tax definition is correctly configured.
* Double-check the VAT calculation on your orders to verify accuracy.
* Contact our support team if you have any questions or encounter any issues.
By leveraging this new feature, you can save time, reduce errors, and improve the efficiency of your purchasing processes.
## Updates to Reservation Hold Settings - Ability to Disable the Automatic Reservation Cancellation
Previously the Reservation Hold feature allows you to set a date and time for the selected reservation. In case the hold date is reached and the reservation was not confirmed yet (the hold date and time are still set to the reservation), the system automatically cancels the reservation.
The system now allows you to control the behavior when the hold date is reached.
Within the Settings page for the reservation hold (**Front Office → Settings → Front Office → Reservations → Reservation Hold Settings**) you will find the new checkbox "Automatically Cancel Reservation".
In case the checkbox is checked, this means that the system should automatically cancel the reservation once the hold date & time are reached. This is the current default setting for all existing properties.
In case the checkbox is unchecked, the system won't do any automatic action once the reservation hold date & time are reached.
[Read more](/front-office/front-office-settings/front-office/reservation-hold-settings)
## Purchase requests Report
### Help Article: Purchase Requests Report in Back Office
#### Overview
The **Purchase Requests** report is a new addition to the Inventory section of the Back Office reports, enabling users to view summarized or detailed information on purchase requests over a selected date range.
#### Accessing the Report
Navigate to: Reports → Back Office → Inventory → Purchase Requests
#### Report Parameters
1. **From Date** (mandatory): Start date for the report.
2. **To Date** (mandatory): End date for the report.
3. **Status** (optional): Multi-select field to filter by request status, such as Closed, Pending Approval, etc.
4. **Details**: Choose between:
* **Summarized**: High-level view of each purchase request.
* **Detailed (default)**: Detailed breakdown, including item-specific information.
#### Report Output
##### Summarized Report
The summarized report provides a high-level view of each purchase request, displaying:
* **Number**: Purchase request number.
* **Description**: Brief description of the request.
* **Date**: Date of the request.
* **Buyer**: Name of the person who requested the purchase.
* **Status**: Current status (e.g., Closed, Pending Approval, Partially Ordered).
* **Item**: Item name.
* **Store**: Location where the item is stored.
* **Qty**: Quantity requested.
* **Unit**: Measurement unit.
* **Ordered Qty**: Quantity ordered.
* **Received Qty**: Quantity received.
* **Last Received Price**: Price at the last receipt.
* **Unit Price**: Price per unit.
* **Discount**: Any discount applied.
* **Total**: Total cost.
* **Vendor**: Supplier of the item.
\| |
\| |
\| --- | --- | --- |
## Room Rack Update - Ability to See Reservation Notes
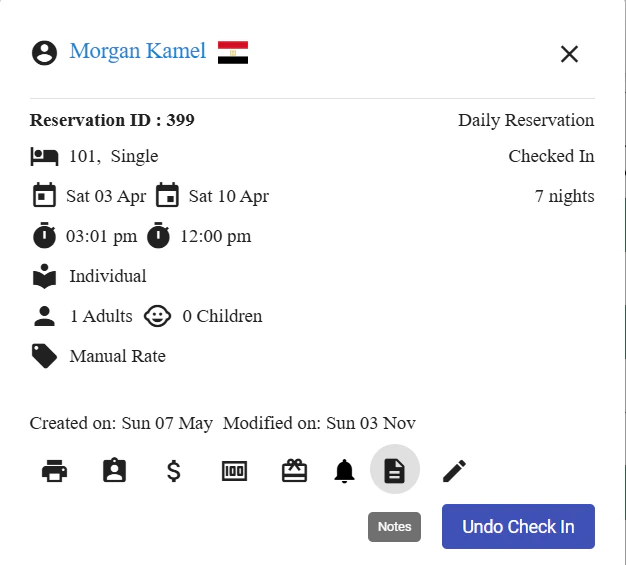
Now you have the ability to view the Reservation Notes directly from the Room Rack screen.
Upon selecting any Reservation, a Summary Card is displayed showing. Within this Card you can see the new button "Notes".
The button is dimmed in case the reservation does not have any notes on it.
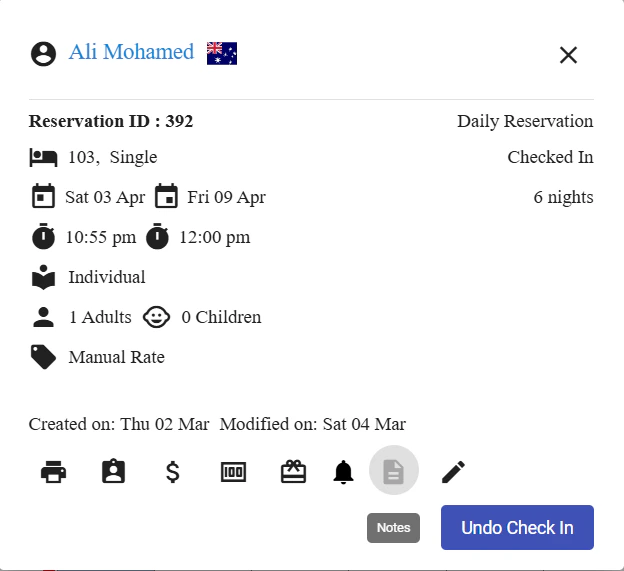 In case the reservation has notes, the button is enabled. Upon clicking the Notes button, a pop up window is shown with the list of notes linked to this reservation.
 [Read more](/front-office/reservations/room-rack/add-new-reservation-from-room-rack)
## Room Rack Update - Ability to Set Out of Service Maintenance State
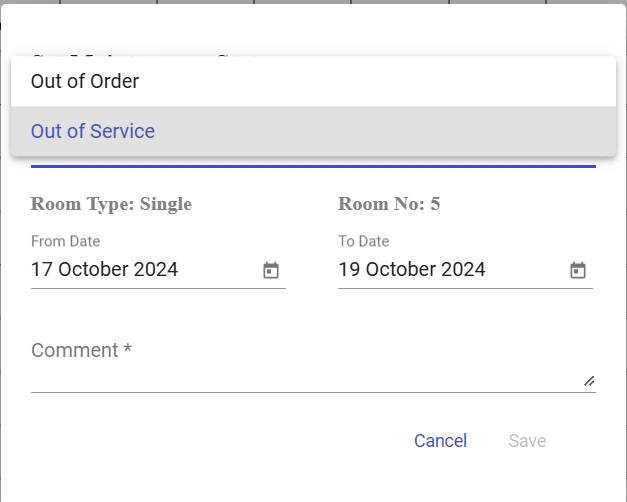
Now we have the ability to set Out of Service maintenance state from the Room Rack screen directly.
In order to do so you have kindly follow these steps:
1. Select the dates for the room you wish to set as Out of Service
[Read more](/front-office/reservations/room-rack/add-new-reservation-from-room-rack)
## Room Rack Update - Ability to Set Out of Service Maintenance State
Now we have the ability to set Out of Service maintenance state from the Room Rack screen directly.
In order to do so you have kindly follow these steps:
1. Select the dates for the room you wish to set as Out of Service
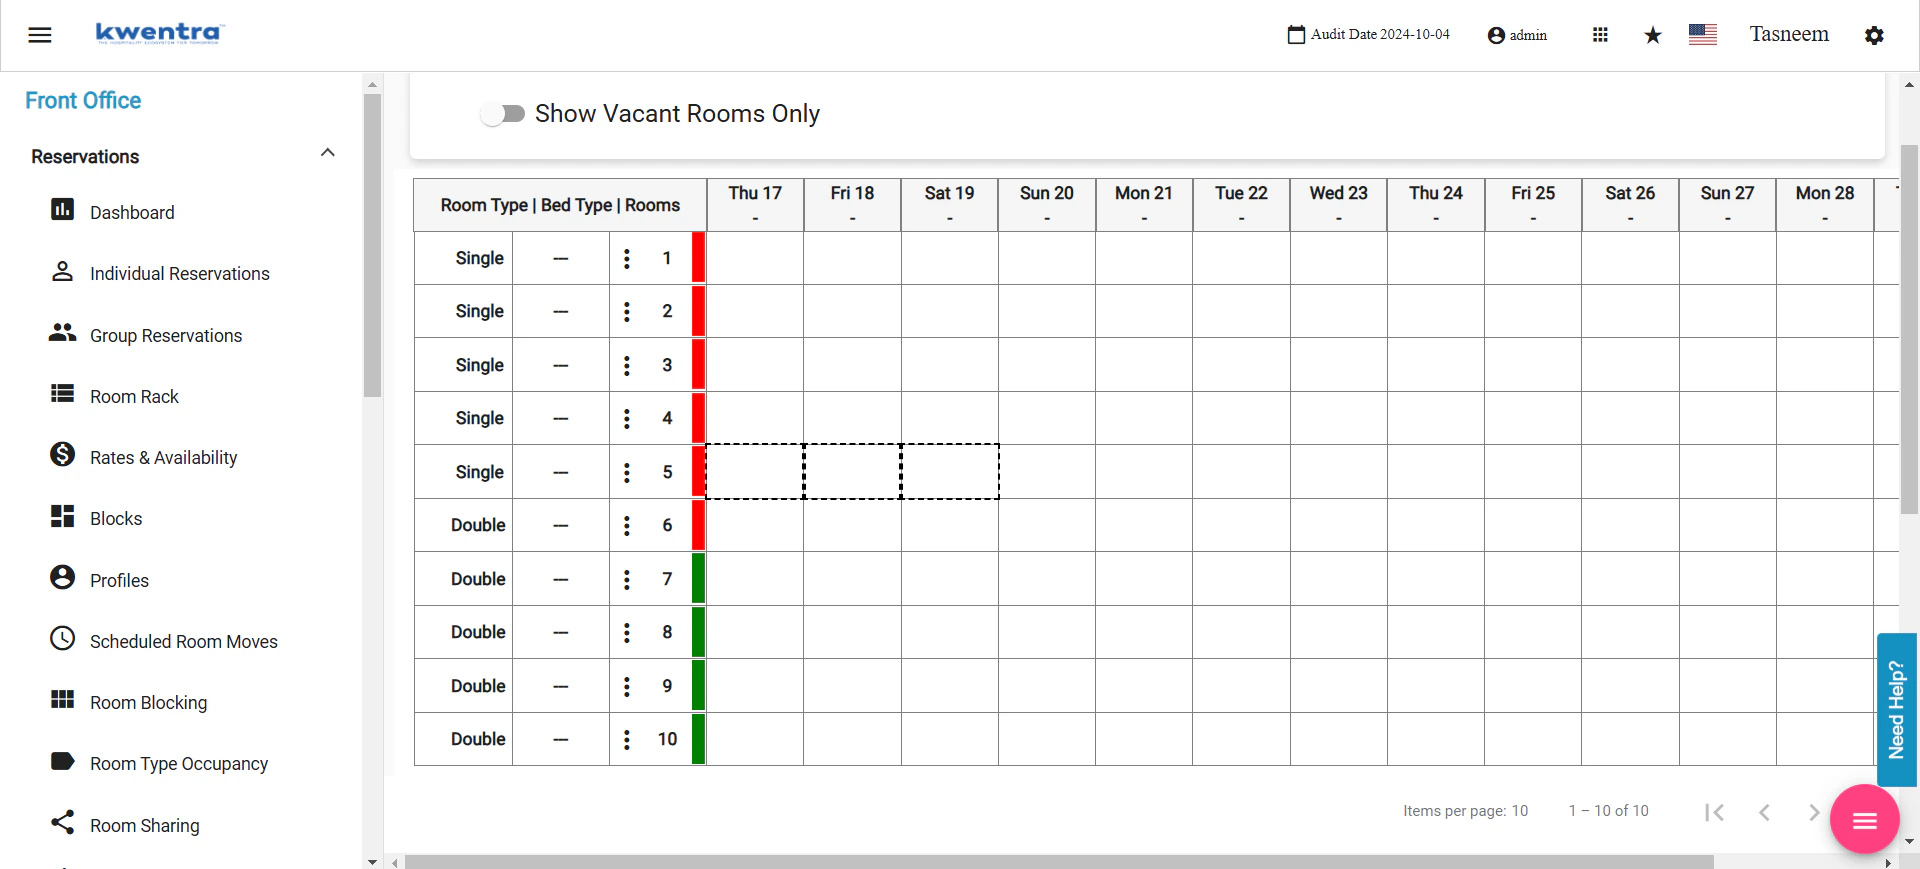 2. Click on "Set Maintenance State" button found under "Options"
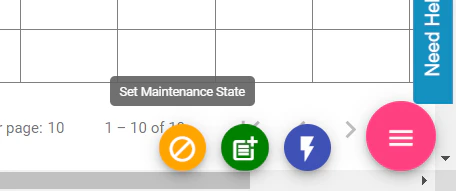 3. A pop is shown that allows you to select the applicable Maintenance state (Out of Service or Out of Order)
 [Read more](/front-office/new-front-office-navigation-menu/room-rack)
## Update On Closing Purchase Orders
**What's New?**
We're excited to introduce a new feature that enhances the flexibility of closing Purchase Orders (POs) in our system. This update allows you to close individual line items within a PO, providing greater control over your purchasing process.
**How Does it Work?**
1. **Select Line Items:**
* Navigate to the PO you want to update.
* Select the specific line items you wish to close.
* You can select multiple line items at once.
2. **Close the Selected Line Items:**
* Add comment per lineitem
* Click the "Close" button.
* The selected line items will be marked as closed.
**PO Status Updates**
The status of your PO will now dynamically update based on the state of its line items:
* **Closed:** All line items are closed.
* **Received:** All line items are received.
* **Partially Received + Closed:** Some line items are received, and some are closed.
* **Pending:** Any other combination of line item statuses including pending lineitems (e.g., some pending, some received, some closed or some pending, some received or all pending, etc.)
**Improved Search Functionality**
We've also enhanced the PO search functionality to include the new statuses:
* Pending
* Received
* Closed
* Partially Received + Closed
You can now use the autocomplete multi-select filter to quickly find POs based on their status.
**Why This Change?**
This new feature offers greater flexibility and precision in managing your purchasing process. You can now close specific line items as needed, without affecting the overall status of the PO.
**Need More Help?**
If you have any questions or encounter issues while using this new feature, please don't hesitate to contact our support team. We're here to assist you.
## Ability to Generate Information Invoice for Selected Postings
We are happy to announce our most recent update within our Front Office's billing screen.
Now you have the ability to select one or more than one posting and generate an "Information Invoice" that only includes the selected postings.
This is to allow you to generate an invoice template with specific charges in order for the guest to sign and confirm it.
You can generate an Information Invoice by accessing the billing screen (for a reservation or a paymaster) → Click on "Tools" button found on the top right of a given billing window → Select Information Invoice
## VingCard Door Locks Support
We are happy to announce that Kwentra now integrates with VingCard (Assa Abbloy) doorlocks.
You can now connect your VingCard server with Kwentra using the following steps:
1. Browse the Front Office module
2. Go to Settings (by clicking the gear button on the top right of the screen)
3. Go to "Integrations"
4. Select "Door Locks"
5. Click on "Add New"
6. In the "Provider" & the "Protocol" fields select the option "VingCard"
7. Set the IP Address of the VingCard server within the field "IP Address"
8. Set the Port Number of the VingCard server within the field "Port Number"
9. For each encoder that's connected to VingCard server, set a name and an ID for it in the system
1. The field "Encoder Name" represent the name of the encoder that will be presented to any user within Kwentra system. Try to set a friendly name that expresses the location or the function of the encoder.
2. The field "Encoder ID" represents the identifier of this encoder on VingCard server application, kindly reach out to VingCard support in case you are unable to identify the encoder ID.
10. Click on the "Save" button to finalize the setup
Noting that this integration requires an existing "Kwentra Proxy" machine installed at the property. If you are not sure if a proxy machine is installed at your property or not, kindly reach out to your Kwentra support representative for guidance.
## Introducing the "Room Category" Filter Within the "Occupancy by Room Type" Report
We are excited to announce a new update to our "Occupancy by Room Type" report!
With this latest enhancement, we have added a powerful filter called "Room Category" to help you gain deeper insights into your occupancy data by segmenting the report result by the category of rooms. This article will guide you through the functionalities of the "Room Category" filter and how it can enhance your reporting experience.
**Newly Added Filters:**
* Filter Name: Date Type
* This filter allows you to select the data type for the report segmentation. You can chose between "Room Types" or "Room Categories". The "Room Type" option is selected by default.
* Filter Name: Room Category
* Filter Type: Multiselect Autocomplete
**How it Works:**
1. Select Specific Room Category:
* When using the "Occupancy by Room Type" report, you now have the option to choose specific room categories that you want to analyze. Simply click on the "Room Category" filter, and a convenient multiselect autocomplete dropdown will appear, displaying all available categories in your property.
* Select one or multiple room categories from the dropdown that you wish to include in your report analysis. The report will generate occupancy data solely for the selected room categories, providing you with focused insights into each category.
2. Generate Report for All Room Categories:
* If you prefer to view the occupancy data for all room categories without any specific filtering, leave the "Room Category" filter empty. In this case, the report will be generated normally, encompassing all room categories within your property.
## Importing and Exporting accounting budget in British System
#### Change Overview
A new version of the budgeting import/Export file has been created for the British Accounting System, providing enhanced visibility into account details.
#### What’s New?
The import file now includes the following fields before the 12-month budgeting columns:
* **Main Account Number**
* **Main Account Description**
* **T0 to T4 Numbers and Descriptions:**
* T0 Number & Description
* T1 Number & Description
* T2 Number & Description
* T3 Number & Description
* T4 Number & Description
[Read more](/front-office/new-front-office-navigation-menu/room-rack)
## Update On Closing Purchase Orders
**What's New?**
We're excited to introduce a new feature that enhances the flexibility of closing Purchase Orders (POs) in our system. This update allows you to close individual line items within a PO, providing greater control over your purchasing process.
**How Does it Work?**
1. **Select Line Items:**
* Navigate to the PO you want to update.
* Select the specific line items you wish to close.
* You can select multiple line items at once.
2. **Close the Selected Line Items:**
* Add comment per lineitem
* Click the "Close" button.
* The selected line items will be marked as closed.
**PO Status Updates**
The status of your PO will now dynamically update based on the state of its line items:
* **Closed:** All line items are closed.
* **Received:** All line items are received.
* **Partially Received + Closed:** Some line items are received, and some are closed.
* **Pending:** Any other combination of line item statuses including pending lineitems (e.g., some pending, some received, some closed or some pending, some received or all pending, etc.)
**Improved Search Functionality**
We've also enhanced the PO search functionality to include the new statuses:
* Pending
* Received
* Closed
* Partially Received + Closed
You can now use the autocomplete multi-select filter to quickly find POs based on their status.
**Why This Change?**
This new feature offers greater flexibility and precision in managing your purchasing process. You can now close specific line items as needed, without affecting the overall status of the PO.
**Need More Help?**
If you have any questions or encounter issues while using this new feature, please don't hesitate to contact our support team. We're here to assist you.
## Ability to Generate Information Invoice for Selected Postings
We are happy to announce our most recent update within our Front Office's billing screen.
Now you have the ability to select one or more than one posting and generate an "Information Invoice" that only includes the selected postings.
This is to allow you to generate an invoice template with specific charges in order for the guest to sign and confirm it.
You can generate an Information Invoice by accessing the billing screen (for a reservation or a paymaster) → Click on "Tools" button found on the top right of a given billing window → Select Information Invoice
## VingCard Door Locks Support
We are happy to announce that Kwentra now integrates with VingCard (Assa Abbloy) doorlocks.
You can now connect your VingCard server with Kwentra using the following steps:
1. Browse the Front Office module
2. Go to Settings (by clicking the gear button on the top right of the screen)
3. Go to "Integrations"
4. Select "Door Locks"
5. Click on "Add New"
6. In the "Provider" & the "Protocol" fields select the option "VingCard"
7. Set the IP Address of the VingCard server within the field "IP Address"
8. Set the Port Number of the VingCard server within the field "Port Number"
9. For each encoder that's connected to VingCard server, set a name and an ID for it in the system
1. The field "Encoder Name" represent the name of the encoder that will be presented to any user within Kwentra system. Try to set a friendly name that expresses the location or the function of the encoder.
2. The field "Encoder ID" represents the identifier of this encoder on VingCard server application, kindly reach out to VingCard support in case you are unable to identify the encoder ID.
10. Click on the "Save" button to finalize the setup
Noting that this integration requires an existing "Kwentra Proxy" machine installed at the property. If you are not sure if a proxy machine is installed at your property or not, kindly reach out to your Kwentra support representative for guidance.
## Introducing the "Room Category" Filter Within the "Occupancy by Room Type" Report
We are excited to announce a new update to our "Occupancy by Room Type" report!
With this latest enhancement, we have added a powerful filter called "Room Category" to help you gain deeper insights into your occupancy data by segmenting the report result by the category of rooms. This article will guide you through the functionalities of the "Room Category" filter and how it can enhance your reporting experience.
**Newly Added Filters:**
* Filter Name: Date Type
* This filter allows you to select the data type for the report segmentation. You can chose between "Room Types" or "Room Categories". The "Room Type" option is selected by default.
* Filter Name: Room Category
* Filter Type: Multiselect Autocomplete
**How it Works:**
1. Select Specific Room Category:
* When using the "Occupancy by Room Type" report, you now have the option to choose specific room categories that you want to analyze. Simply click on the "Room Category" filter, and a convenient multiselect autocomplete dropdown will appear, displaying all available categories in your property.
* Select one or multiple room categories from the dropdown that you wish to include in your report analysis. The report will generate occupancy data solely for the selected room categories, providing you with focused insights into each category.
2. Generate Report for All Room Categories:
* If you prefer to view the occupancy data for all room categories without any specific filtering, leave the "Room Category" filter empty. In this case, the report will be generated normally, encompassing all room categories within your property.
## Importing and Exporting accounting budget in British System
#### Change Overview
A new version of the budgeting import/Export file has been created for the British Accounting System, providing enhanced visibility into account details.
#### What’s New?
The import file now includes the following fields before the 12-month budgeting columns:
* **Main Account Number**
* **Main Account Description**
* **T0 to T4 Numbers and Descriptions:**
* T0 Number & Description
* T1 Number & Description
* T2 Number & Description
* T3 Number & Description
* T4 Number & Description
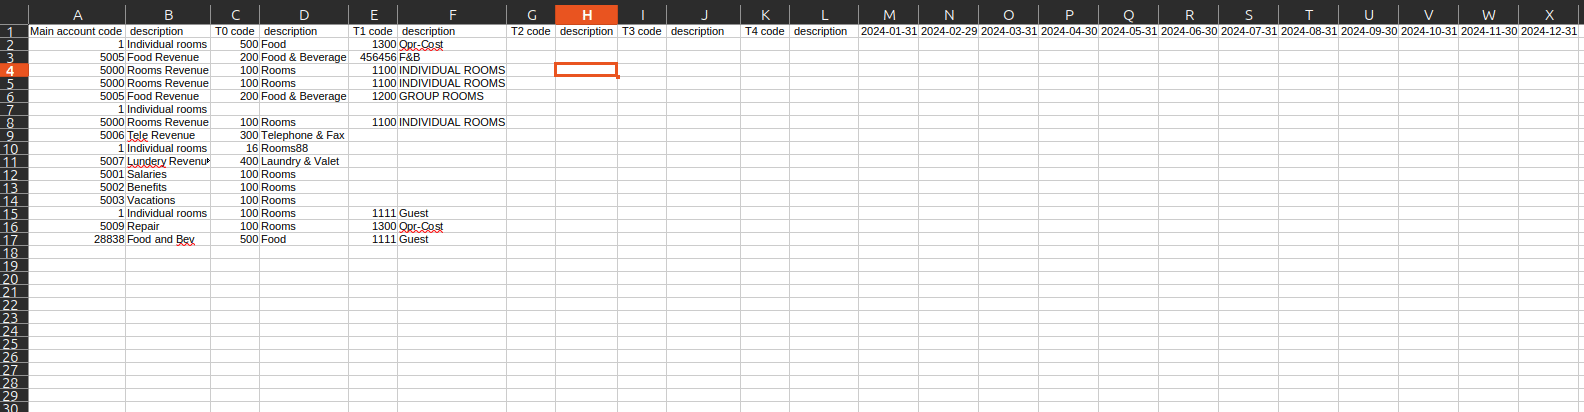 Also, the Import page is now accessible from a new [link](https://manage.kwentra.com/gl/budget/import/)
 ## Importing and Exporting accounting budget in Hijri enabled Hotels
#### Change Overview
We have introduced new functionality to the Budgeting Import process for the Hijri calendar system.
#### What’s New?
* **New Buttons Added:**
* **Upload Hijri:** Allows you to upload budgeting data using the Hijri calendar.
* **Download Hijri Template:** Provides a template for budgeting in the Hijri calendar.
These buttons are added alongside the existing **Download Template** and **Upload** buttons, which operate on the Gregorian calendar.
This will work on either with the British accounting system or the Normal accounting system
## New "Group RC" Button and Template for Group Reservations
**Overview**:
In the Front Office system, under **Reservations** → **[Group Reservations](https://manage.kwentra.com/frontoffice/#/groupreservation)**, a new feature has been added: the **Group RC** button. This button allows users to generate an RC (Reservation Confirmation) document that consolidates and summarizes group reservation details. This feature is particularly useful for managing complex group reservations that may include multiple room types and split reservations.
#### Purpose of the Group RC Button:
The **Group RC** button simplifies the management of group reservations by generating an RC template that provides essential details about the reservation group. It automatically compiles information from all grouped reservations that share the same confirmation number. The RC template is especially helpful in tracking multiple arrivals and departures across different rooms while maintaining clarity on reservation data.
#### Features of the Group RC Template:
The RC template generated by the **Group RC** button includes the following data points:
1. **Group Name**: Displays the name of the group reservation. If multiple group reservations share the same confirmation number, all grouped reservations’ names will be displayed.
2. **Group Number**: Shows the unique ID of the group reservation. Grouped by confirmation number for multiple group reservations.
3. **Group Nationality**: Displays the nationality of the group reservation. Multiple nationalities are shown for grouped reservations under the same confirmation number.
4. **Voucher Number**: Lists the group reservation’s voucher number. In the case of multiple group reservations, all voucher numbers are grouped by confirmation number.
5. **Arrival Date & Time**: The group reservation’s arrival date and check-in time. If there are multiple reservations with different arrival dates, all dates will be displayed.
6. **Departure Date & Time**: Similar to the arrival information, the departure date and check-out time are grouped by confirmation number.
7. **Total Rooms Required**: The total number of rooms booked for the group. This value is calculated based on the sum of room types for the grouped reservations.
8. **Number of Pax (Adults)**: Displays the total number of adults across all split and group reservations. This value is summed for the entire group.
9. **Confirmation Number**: The confirmation number that ties all reservations within the group together.
10. **PM Number**: The paymaster number linked to the group reservation. If no paymaster is associated, this field will remain empty.
11. **Room Types Table**: A table displaying the various room types included in the group reservation. Each room type is listed along with the count of reservations associated with it, including both group and split reservations.
#### How the Group RC Template Works:
* **Data Grouping**: The data in the RC is grouped by **confirmation number**. If multiple reservations share the same confirmation number, the RC will display their combined data in a single template.
* **Split Reservations**: If a group reservation is split, it can be individually managed while keeping the same confirmation number. For split reservations:
* If the split reservation’s arrival date matches the group reservation’s arrival date, it will be included in the RC.
* Split reservations with different arrival dates will not be counted in the total room calculation but can have their own individual RC printed.
* **Room Type Calculations**: The template will only display room types for reservations arriving on the same day the RC is generated. Future reservations or those not arriving on the selected day will be excluded from the room type count.
* This button will not show for cencelled group reservations and will exclude individual split reservations with status "Canceled" or "No Show"
## GL Journal Voucher Report - New Closing Balance Column
We have added a new "Closing Balance" column to the GL Journal Voucher Report to provide a clearer financial summary.
#### What’s New?
* **Closing Balance Column:**
* After the Closing Debit and Credit columns, a new "Closing" column has been added.
* **Calculation:** The Closing Balance is calculated by subtracting the Closing Credit from the Closing Debit values.
[Read more](/back-office/bo-reports/gl-journal-voucher-gl-trial-balance-report)
## Reservation List Guest Flag view
We have enhanced the Reservation List to improve the visual identification of guests by showing the guest flag color as the background for the guest name.
#### What’s New?
* **Guest Flag Color as Background:**
* The background of the guest name in the Reservation List will now reflect the guest’s flag color.
* This change helps in quickly identifying guests based on their status or other flag-related criteria.
## Importing and Exporting accounting budget in Hijri enabled Hotels
#### Change Overview
We have introduced new functionality to the Budgeting Import process for the Hijri calendar system.
#### What’s New?
* **New Buttons Added:**
* **Upload Hijri:** Allows you to upload budgeting data using the Hijri calendar.
* **Download Hijri Template:** Provides a template for budgeting in the Hijri calendar.
These buttons are added alongside the existing **Download Template** and **Upload** buttons, which operate on the Gregorian calendar.
This will work on either with the British accounting system or the Normal accounting system
## New "Group RC" Button and Template for Group Reservations
**Overview**:
In the Front Office system, under **Reservations** → **[Group Reservations](https://manage.kwentra.com/frontoffice/#/groupreservation)**, a new feature has been added: the **Group RC** button. This button allows users to generate an RC (Reservation Confirmation) document that consolidates and summarizes group reservation details. This feature is particularly useful for managing complex group reservations that may include multiple room types and split reservations.
#### Purpose of the Group RC Button:
The **Group RC** button simplifies the management of group reservations by generating an RC template that provides essential details about the reservation group. It automatically compiles information from all grouped reservations that share the same confirmation number. The RC template is especially helpful in tracking multiple arrivals and departures across different rooms while maintaining clarity on reservation data.
#### Features of the Group RC Template:
The RC template generated by the **Group RC** button includes the following data points:
1. **Group Name**: Displays the name of the group reservation. If multiple group reservations share the same confirmation number, all grouped reservations’ names will be displayed.
2. **Group Number**: Shows the unique ID of the group reservation. Grouped by confirmation number for multiple group reservations.
3. **Group Nationality**: Displays the nationality of the group reservation. Multiple nationalities are shown for grouped reservations under the same confirmation number.
4. **Voucher Number**: Lists the group reservation’s voucher number. In the case of multiple group reservations, all voucher numbers are grouped by confirmation number.
5. **Arrival Date & Time**: The group reservation’s arrival date and check-in time. If there are multiple reservations with different arrival dates, all dates will be displayed.
6. **Departure Date & Time**: Similar to the arrival information, the departure date and check-out time are grouped by confirmation number.
7. **Total Rooms Required**: The total number of rooms booked for the group. This value is calculated based on the sum of room types for the grouped reservations.
8. **Number of Pax (Adults)**: Displays the total number of adults across all split and group reservations. This value is summed for the entire group.
9. **Confirmation Number**: The confirmation number that ties all reservations within the group together.
10. **PM Number**: The paymaster number linked to the group reservation. If no paymaster is associated, this field will remain empty.
11. **Room Types Table**: A table displaying the various room types included in the group reservation. Each room type is listed along with the count of reservations associated with it, including both group and split reservations.
#### How the Group RC Template Works:
* **Data Grouping**: The data in the RC is grouped by **confirmation number**. If multiple reservations share the same confirmation number, the RC will display their combined data in a single template.
* **Split Reservations**: If a group reservation is split, it can be individually managed while keeping the same confirmation number. For split reservations:
* If the split reservation’s arrival date matches the group reservation’s arrival date, it will be included in the RC.
* Split reservations with different arrival dates will not be counted in the total room calculation but can have their own individual RC printed.
* **Room Type Calculations**: The template will only display room types for reservations arriving on the same day the RC is generated. Future reservations or those not arriving on the selected day will be excluded from the room type count.
* This button will not show for cencelled group reservations and will exclude individual split reservations with status "Canceled" or "No Show"
## GL Journal Voucher Report - New Closing Balance Column
We have added a new "Closing Balance" column to the GL Journal Voucher Report to provide a clearer financial summary.
#### What’s New?
* **Closing Balance Column:**
* After the Closing Debit and Credit columns, a new "Closing" column has been added.
* **Calculation:** The Closing Balance is calculated by subtracting the Closing Credit from the Closing Debit values.
[Read more](/back-office/bo-reports/gl-journal-voucher-gl-trial-balance-report)
## Reservation List Guest Flag view
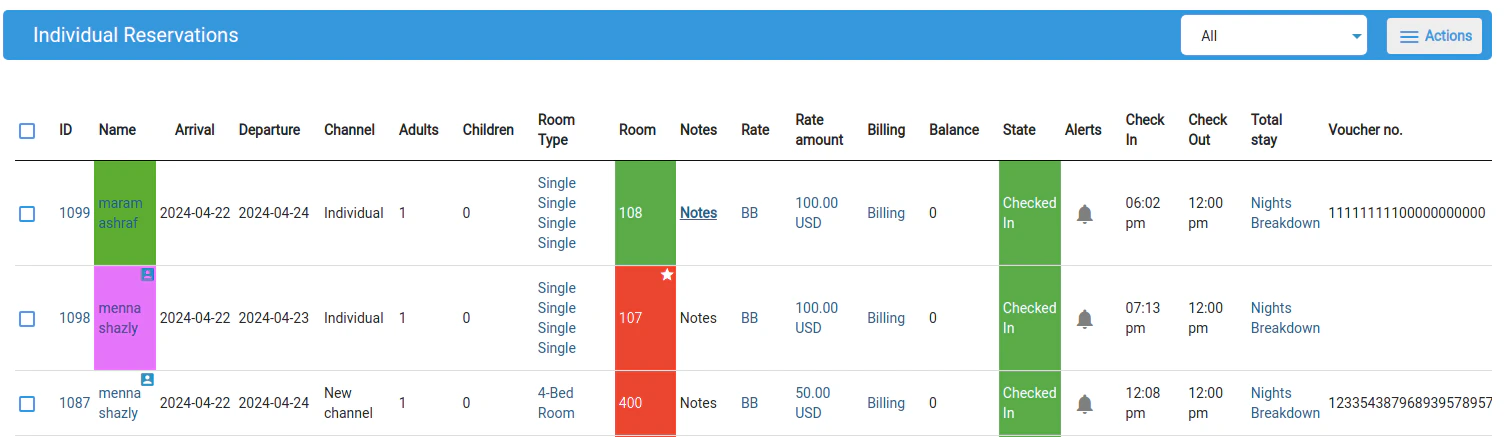
We have enhanced the Reservation List to improve the visual identification of guests by showing the guest flag color as the background for the guest name.
#### What’s New?
* **Guest Flag Color as Background:**
* The background of the guest name in the Reservation List will now reflect the guest’s flag color.
* This change helps in quickly identifying guests based on their status or other flag-related criteria.
 ## POS Day Summary Report - Report now is filtered by cashier
#### Change Overview
A new feature has been added to the Day Summary Report for POS, allowing you to filter the report by cashier.
#### What’s New?
* **Filter by Cashier:**
* You can now filter the Day Summary Report by cashier, making viewing transactions and summaries specific to individual cashiers easier.
* The report will now work by getting and displaying the invoices done by the cashier who entered the pin after clicking Generate
* Any user now run this report using his or her pin
* If run by an administrator/staff pin the report will be running on all cashiers
## POS Day Summary Report - Report now is filtered by cashier
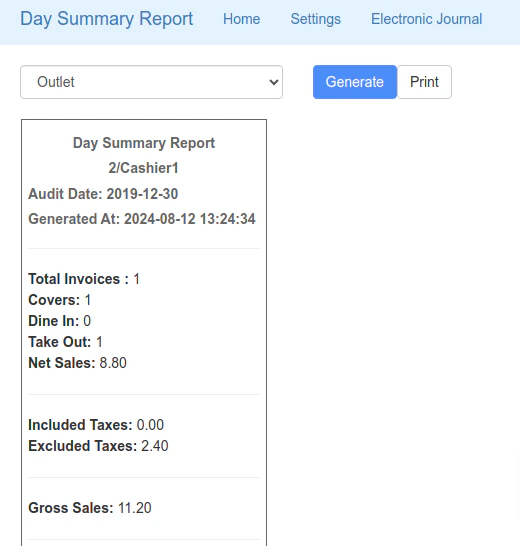
#### Change Overview
A new feature has been added to the Day Summary Report for POS, allowing you to filter the report by cashier.
#### What’s New?
* **Filter by Cashier:**
* You can now filter the Day Summary Report by cashier, making viewing transactions and summaries specific to individual cashiers easier.
* The report will now work by getting and displaying the invoices done by the cashier who entered the pin after clicking Generate
* Any user now run this report using his or her pin
* If run by an administrator/staff pin the report will be running on all cashiers
 [Read more](/front-office/reports/income-reports/cashier-summary-report)
## Enhancing the Reservation List Report with Voucher Number Features
We are excited to announce improvements to the "[Reservation List](https://manage.kwentra.com/reports/FrontDesk/Reservation%20List/)" report to enhance its functionality and usability. The new features include a voucher number filter and an option to sort the report by voucher number. These enhancements will help users quickly find and organize reservations based on voucher numbers.
#### New Features
1. **Voucher Number Filter**
2. **Sort by Voucher Number**
### Voucher Number Filter
#### Purpose:
The voucher number filter allows users to search for reservations associated with specific voucher numbers. This feature is particularly useful for quickly locating reservations that were made using a particular voucher.
#### How to Use:
1. **Navigate to the Reservation List Report:**
* Go to the report section in the front office system.
* Select the "Reservation List" report from the list of available reports.
2. **Locate the Voucher Number Filter:**
* In the report filters section, find the new "Voucher Number" filter field.
3. **Enter Voucher Number:**
* Input the voucher number you wish to search for in the text box.
4. **Preview the Report:**
* Click on the "Preview" button to generate the report based on the entered voucher number.
* The report will display all reservations that match the entered voucher number.
#### Example:
If you enter the voucher number "ABC123" and click on "Preview," the report will show all reservations that have the voucher number "ABC123."
### Sort by Voucher Number
#### Purpose:
The sort by voucher number feature allows users to organize the report based on voucher numbers. Users can sort the reservations in ascending order, making it easier to review and manage reservations.
#### How to Use:
1. **Navigate to the Reservation List Report:**
* Go to the report section in the front office system.
* Select the "Reservation List" report from the list of available reports.
2. **Locate the Sort by Dropdown:**
* In the report filters section, find the "Sort by" dropdown menu.
3. **Select Voucher Number:**
* Choose "Voucher Number" from the list of sorting options.
4. **Preview the Report:**
* Click on the "Preview" button to generate the report sorted by voucher numbers.
* The report will display reservations sorted by voucher numbers in the selected order (ascending).
#### Example:
If you select "Voucher Number" from the "Sort by" dropdown and click "Preview," the report will display reservations sorted by voucher numbers. You can then easily review the reservations in a sequential order based on voucher numbers.
## Changes to Gl Journal Voucher
## Gl Journal Voucher Updates
#### Overview
We are implementing changes to the GL Journal Voucher to enhance clarity and functionality.
#### Key Changes
1. **Display City ledger first level children Control Account of the Instance:**
* The GL Journal Voucher will now show the control account specific to the instance (parent account). only the first level of children under our city ledger
2. **Hide Default Parent Account of Kwentra:**
* The default parent account City ledger will be hidden to avoid confusion and ensure relevance to the instance.
3. **This change will affect both the British and American versions of the report:**
4. **Name Update:**
* The existing name of the GL Journal Voucher will now include "(GL Trial Balance)" for better clarity and understanding.
## Journal Voucher by Module
#### Overview
We are excited to announce the addition of two new reports in the Backoffice section under Reports:
1. **GL Journal Voucher by Module**
2. **British GL Journal Voucher by Module**
These reports provide enhanced granularity by allowing filtering by modules.
#### Key Features
1. **2 New Reports:**
* **GL Journal Voucher by Module**
* **British GL Journal Voucher by Module**
* Both reports use the same query and template as the existing GL Journal Voucher, but exclude closing and opening entries.
* These reports are accessible to the same user groups that can access the GL Journal Voucher.
* **Parameters:**
* **From Date:** Select the starting date for the report.
* **To Date:** Select the ending date for the report.
* **Modules:** Filter results by selecting a module from the drop-down list.
* **Values:**
* **current system Modules**
* **All (default)**
* If a module is selected, results are filtered accordingly.
* **British Version Specifics:**
* The British GL Journal Voucher by Module works on main accounts instead of individual accounts.
* This report appears only if the British system is enabled.
## Enhancing the Reservation Listing Screen with Bulk Checkout Action
We are excited to introduce a new feature to the reservation listing screen in the Front Office module. This enhancement allows users to perform a bulk checkout action on multiple reservations simultaneously, streamlining the checkout process for eligible reservations. This article provides a detailed guide on the new feature, including its functionality, user interface enhancements, validation criteria, and notifications.
## New Feature: Bulk Checkout Action
### Purpose
The bulk checkout action is designed to make the checkout process more efficient by allowing users to check out multiple reservations at once, provided they meet specific criteria.
### Accessing Bulk Checkout
To access the bulk checkout feature, navigate to:
**Front Office → Reservations → Individual Reservations**
[Read more](/front-office/reports/income-reports/cashier-summary-report)
## Enhancing the Reservation List Report with Voucher Number Features
We are excited to announce improvements to the "[Reservation List](https://manage.kwentra.com/reports/FrontDesk/Reservation%20List/)" report to enhance its functionality and usability. The new features include a voucher number filter and an option to sort the report by voucher number. These enhancements will help users quickly find and organize reservations based on voucher numbers.
#### New Features
1. **Voucher Number Filter**
2. **Sort by Voucher Number**
### Voucher Number Filter
#### Purpose:
The voucher number filter allows users to search for reservations associated with specific voucher numbers. This feature is particularly useful for quickly locating reservations that were made using a particular voucher.
#### How to Use:
1. **Navigate to the Reservation List Report:**
* Go to the report section in the front office system.
* Select the "Reservation List" report from the list of available reports.
2. **Locate the Voucher Number Filter:**
* In the report filters section, find the new "Voucher Number" filter field.
3. **Enter Voucher Number:**
* Input the voucher number you wish to search for in the text box.
4. **Preview the Report:**
* Click on the "Preview" button to generate the report based on the entered voucher number.
* The report will display all reservations that match the entered voucher number.
#### Example:
If you enter the voucher number "ABC123" and click on "Preview," the report will show all reservations that have the voucher number "ABC123."
### Sort by Voucher Number
#### Purpose:
The sort by voucher number feature allows users to organize the report based on voucher numbers. Users can sort the reservations in ascending order, making it easier to review and manage reservations.
#### How to Use:
1. **Navigate to the Reservation List Report:**
* Go to the report section in the front office system.
* Select the "Reservation List" report from the list of available reports.
2. **Locate the Sort by Dropdown:**
* In the report filters section, find the "Sort by" dropdown menu.
3. **Select Voucher Number:**
* Choose "Voucher Number" from the list of sorting options.
4. **Preview the Report:**
* Click on the "Preview" button to generate the report sorted by voucher numbers.
* The report will display reservations sorted by voucher numbers in the selected order (ascending).
#### Example:
If you select "Voucher Number" from the "Sort by" dropdown and click "Preview," the report will display reservations sorted by voucher numbers. You can then easily review the reservations in a sequential order based on voucher numbers.
## Changes to Gl Journal Voucher
## Gl Journal Voucher Updates
#### Overview
We are implementing changes to the GL Journal Voucher to enhance clarity and functionality.
#### Key Changes
1. **Display City ledger first level children Control Account of the Instance:**
* The GL Journal Voucher will now show the control account specific to the instance (parent account). only the first level of children under our city ledger
2. **Hide Default Parent Account of Kwentra:**
* The default parent account City ledger will be hidden to avoid confusion and ensure relevance to the instance.
3. **This change will affect both the British and American versions of the report:**
4. **Name Update:**
* The existing name of the GL Journal Voucher will now include "(GL Trial Balance)" for better clarity and understanding.
## Journal Voucher by Module
#### Overview
We are excited to announce the addition of two new reports in the Backoffice section under Reports:
1. **GL Journal Voucher by Module**
2. **British GL Journal Voucher by Module**
These reports provide enhanced granularity by allowing filtering by modules.
#### Key Features
1. **2 New Reports:**
* **GL Journal Voucher by Module**
* **British GL Journal Voucher by Module**
* Both reports use the same query and template as the existing GL Journal Voucher, but exclude closing and opening entries.
* These reports are accessible to the same user groups that can access the GL Journal Voucher.
* **Parameters:**
* **From Date:** Select the starting date for the report.
* **To Date:** Select the ending date for the report.
* **Modules:** Filter results by selecting a module from the drop-down list.
* **Values:**
* **current system Modules**
* **All (default)**
* If a module is selected, results are filtered accordingly.
* **British Version Specifics:**
* The British GL Journal Voucher by Module works on main accounts instead of individual accounts.
* This report appears only if the British system is enabled.
## Enhancing the Reservation Listing Screen with Bulk Checkout Action
We are excited to introduce a new feature to the reservation listing screen in the Front Office module. This enhancement allows users to perform a bulk checkout action on multiple reservations simultaneously, streamlining the checkout process for eligible reservations. This article provides a detailed guide on the new feature, including its functionality, user interface enhancements, validation criteria, and notifications.
## New Feature: Bulk Checkout Action
### Purpose
The bulk checkout action is designed to make the checkout process more efficient by allowing users to check out multiple reservations at once, provided they meet specific criteria.
### Accessing Bulk Checkout
To access the bulk checkout feature, navigate to:
**Front Office → Reservations → Individual Reservations**
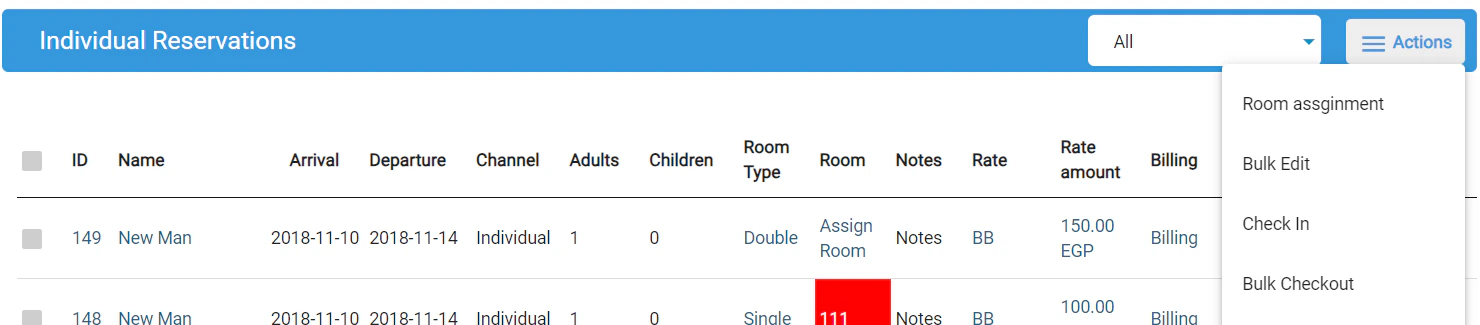 In the reservation listing screen, the "Bulk Checkout" option will now be available in the existing bulk actions menu.
### Functionality
The bulk checkout action can only be applied to reservations that meet the following criteria:
* **Checked-in status**: Only reservations that are currently checked in are eligible.
* **Zero balance**: Reservations must have a balance of 0 to be eligible for bulk checkout.
### Validation Criteria
The system will perform validation to ensure only eligible reservations are processed. The criteria are as follows:
**Eligible Reservations:**
* Reservations in a checked-in state
* Reservations with a zero balance
**Non-Eligible Reservations:**
* Open POS invoices linked to the selected room
* Missing guest profile info for ETA enabled instances
* Reservations in states: expected, checked out, no show, canceled
### Error Messages
If any selected reservations do not meet the criteria, the system will notify the user, and the process will not start. The error message will indicate the state of the first selected reservation not meeting the criteria:
### Tooltips in Confirmation Dialogue
Two tooltips will be displayed in the confirmation dialogue for user clarity:
1. **Early Checkout Notice**: "Selected reservation(s) with departure dates later than the current audit date will be checked out early."
2. **Scheduled Room Moves**: "Scheduled room moves on selected reservation(s) will be canceled."
### Notifications
After performing the bulk checkout action, the system will provide feedback on the process:
1. **Success Message**: A confirmation message listing the number of reservations successfully checked out.
2. **Failure Message**: A message listing the reservations that were not checked out and the reasons (e.g., not checked in, non-zero balance).
## Channel/Nationality Daily Summary Report
We're excited to announce a new report available in the **Reports** section: **Channel/Nationality Daily Summary**. This report provides valuable insights into your reservations by channel or by nationality of the guest.
**What can you do with this report?**
* Analyze reservation trends by channel or nationality.
* Track guest arrivals, departures, and in-house occupancy for better resource allocation.
**Accessing the Report**
1. Navigate to **Reports** > **Front Office** > **Reservations**.
2. Select **Channel/Nationality Daily Summary** from the report list.
**Using the Report**
* **Date:** Enter a single date to view reservation data for that specific night.
* **Show Report By:** Choose to view the report by **Channel** or **Nationality**.
**Report Columns**
* **Channel/Nationality:** This column displays the selected channel name or nationality of the main guest, if applicable. A blank line will show reservations with no guest nationality.
* **Inhouse Reservations:** This shows the number of reservations with a stay overlapping the selected date.
* **Inhouse Adults/Children:** These columns display the total number of adults and children for in-house reservations for the chosen channel/nationality.
* **Arrival Reservations/Adults/Children:** These columns show the number of reservations with an arrival date matching the selected date, along with the total number of adults and children for those reservations.
* **Departure Reservations/Adults/Children:** These columns display the number of reservations with a departure date matching the selected date, along with the total number of adults and children for those reservations.
**Additional Notes**
* This report only includes reservations with the following statuses: Expected, Checked In, and Checked Out.
We hope this new report helps you gain valuable insights into your reservations and improve your overall property management efficiency. If you have any questions about this report or need further assistance, please don't hesitate to contact our support team.
## ETA Invoices Manual Import
### **Introduction**
This guide explains how to manually import ETA invoices using a predefined sheet format.
This feature ensures that all necessary invoice data is accurately captured and sent to the ETA Portal.
### **Steps to Import ETA Invoices**
1. **Access the Manual Invoices Tab**:
* Navigate to **Settings → Integrations → ETA**.
* Click on the **Manual Invoices** tab.
2. **Prepare Your Import Sheet**:
* Download the template by clicking the **Download Template** button.
* Fill in the required information in the template. Each column corresponds to specific invoice data.
3. **Import Invoices**:
* Ensure your import sheet includes the following columns with the specified details:
| **Column Name** | **Description** |
| ---------------- | -------------------------------------------------------------------------------------------------------------------------------------------------------------------------------------------------------------------------------------- |
| Internal ID | Unique identifier for the document (max 40 characters). Must be unique within the same sheet. **Prefix of EIN00 will automatically be added before the internal ID (e.g., EIN00-1234).** |
| Document Type | Type of document (Invoice, Credit Note, or Debit Note). |
| References | You can add UUID references of sent documents to ETA.(max 30 characters). **This can only be used for Document Types Credit Note and Debit Note.** |
| Receiver Type | Type of receiver (P, B, or F). |
| Receiver ID | Unique identifier for the receiver (max 20 characters). Must be 14 characters if Receiver Type is P. |
| Receiver Name | Full name of the receiver (max 200 characters). |
| Receiver Address | Street address of the receiver (max 100 characters). |
| Receiver City | City of the receiver (max 100 characters). |
| Receiver Country | Country ISO code of the receiver. You can refer to Country Codes for a list of accepted [Country Codes](https://sdk.invoicing.eta.gov.eg/codes/countries/). |
| Department Code | Valid Kwentra department code, Applied tax definition on this department will be applied automatically. Make sure all the tax department mapping is done correctly. **Should be added within the next line(s) of Document Main data.** |
| Amount | Invoice amount. Must be greater than 0 and accepts up to 5 decimal points. **Should be added within the next line(s) of Document Main data.** |
| Currency | ISO code for the currency. **Should be added within the next line(s) of Document Main data.** |
| Exchange Factor | Exchange factor for the selected currency. Defaults to 1 for EGP. **Should be added within the next line(s) of Document Main data.** |
| Comments | Additional notes (optional, max 500 characters). If comments are added in the sheet line of Invoice Lines, it will be a max of 50 characters. |
1. **Upload Your Sheet**:
* Click the **Import Invoices** button.
* Select your filled template and upload it.
2. **Validation and Import Process**:
* The system will validate your data. If any mandatory fields are missing or incorrect, you'll receive specific error messages, such as:
* “Document Type is not of the accepted types”
* “Receiver Type is not of the accepted types P, B, or F”
* “Receiver ID Must be 14 as Receiver type is P”
* “Country ISO format is not valid”
* “Currency Code is not in ISO format”
* “Can't create documents with empty Invoice Lines” …etc.
* Correct any errors and re-upload the sheet if needed.
3. **Handling Duplicates**:
* If an internal ID already exists in the system:
* For Invalid or Empty statuses: The old document will be deleted and a new one created.
* For other statuses: The new document will be ignored, and you'll see a warning message: “Document \{internal ID} already created in the system with status \{status}”.
4. **Success Confirmation**:
* Upon successful import, your documents will be created in the system with a status of Pending.
### **Help and Support**
* **Help Instructions**:
* Click the **Instructions** tap for detailed instructions on filling out the template and troubleshooting common issues.
### **Example Import Sheet**
* Download and refer to the example import sheet to ensure your data is formatted correctly.
By following this guide, you can ensure your ETA invoices are accurately imported and processed, helping maintain seamless integration and compliance.
## Manager Report Update
### Manager Report Update
Context:
We have updated the Manager Report to show Day Use data separately. This change provides better visibility into day-use reservations.
Changes:
1. Paid Guests:
* Guest Inhouse minus Comp. & House use: Excludes Day Use Pax.
* Day Use Guests: Only Day Use Pax.
2. Paid Adults:
* Inhouse Adults minus Comp. & House use: Excludes Day Use adults.
* Day Use Adults: Only Day Use Adults.
3. Paid Children:
* Inhouse Adults minus Comp. & House use: Excludes Day Use children.
* Day Use Children: Only Day Use Children.
4. Paid Rooms:
* Inhouse Children minus Comp. & House use: Excludes Day Use reservations.
* Day Use Rooms: Only Day Use reservations (including non-count rooms).
[Read more](/front-office/reports/front-desk-reports/manager-report-insights-and-formula)
## Automatic Channel Branch/Profile Selection (Based on Currency)
We're excited to announce a new feature that simplifies channel profile selection within the reservation! This update streamlines the process by automatically suggesting a default channel branch/profile based on the reservation's currency.
**What's New?**
* **Checkbox:** A new checkbox labeled "Default based on rate and branch currencies" has been added to the channel default charging instruction screen.
In the reservation listing screen, the "Bulk Checkout" option will now be available in the existing bulk actions menu.
### Functionality
The bulk checkout action can only be applied to reservations that meet the following criteria:
* **Checked-in status**: Only reservations that are currently checked in are eligible.
* **Zero balance**: Reservations must have a balance of 0 to be eligible for bulk checkout.
### Validation Criteria
The system will perform validation to ensure only eligible reservations are processed. The criteria are as follows:
**Eligible Reservations:**
* Reservations in a checked-in state
* Reservations with a zero balance
**Non-Eligible Reservations:**
* Open POS invoices linked to the selected room
* Missing guest profile info for ETA enabled instances
* Reservations in states: expected, checked out, no show, canceled
### Error Messages
If any selected reservations do not meet the criteria, the system will notify the user, and the process will not start. The error message will indicate the state of the first selected reservation not meeting the criteria:
### Tooltips in Confirmation Dialogue
Two tooltips will be displayed in the confirmation dialogue for user clarity:
1. **Early Checkout Notice**: "Selected reservation(s) with departure dates later than the current audit date will be checked out early."
2. **Scheduled Room Moves**: "Scheduled room moves on selected reservation(s) will be canceled."
### Notifications
After performing the bulk checkout action, the system will provide feedback on the process:
1. **Success Message**: A confirmation message listing the number of reservations successfully checked out.
2. **Failure Message**: A message listing the reservations that were not checked out and the reasons (e.g., not checked in, non-zero balance).
## Channel/Nationality Daily Summary Report
We're excited to announce a new report available in the **Reports** section: **Channel/Nationality Daily Summary**. This report provides valuable insights into your reservations by channel or by nationality of the guest.
**What can you do with this report?**
* Analyze reservation trends by channel or nationality.
* Track guest arrivals, departures, and in-house occupancy for better resource allocation.
**Accessing the Report**
1. Navigate to **Reports** > **Front Office** > **Reservations**.
2. Select **Channel/Nationality Daily Summary** from the report list.
**Using the Report**
* **Date:** Enter a single date to view reservation data for that specific night.
* **Show Report By:** Choose to view the report by **Channel** or **Nationality**.
**Report Columns**
* **Channel/Nationality:** This column displays the selected channel name or nationality of the main guest, if applicable. A blank line will show reservations with no guest nationality.
* **Inhouse Reservations:** This shows the number of reservations with a stay overlapping the selected date.
* **Inhouse Adults/Children:** These columns display the total number of adults and children for in-house reservations for the chosen channel/nationality.
* **Arrival Reservations/Adults/Children:** These columns show the number of reservations with an arrival date matching the selected date, along with the total number of adults and children for those reservations.
* **Departure Reservations/Adults/Children:** These columns display the number of reservations with a departure date matching the selected date, along with the total number of adults and children for those reservations.
**Additional Notes**
* This report only includes reservations with the following statuses: Expected, Checked In, and Checked Out.
We hope this new report helps you gain valuable insights into your reservations and improve your overall property management efficiency. If you have any questions about this report or need further assistance, please don't hesitate to contact our support team.
## ETA Invoices Manual Import
### **Introduction**
This guide explains how to manually import ETA invoices using a predefined sheet format.
This feature ensures that all necessary invoice data is accurately captured and sent to the ETA Portal.
### **Steps to Import ETA Invoices**
1. **Access the Manual Invoices Tab**:
* Navigate to **Settings → Integrations → ETA**.
* Click on the **Manual Invoices** tab.
2. **Prepare Your Import Sheet**:
* Download the template by clicking the **Download Template** button.
* Fill in the required information in the template. Each column corresponds to specific invoice data.
3. **Import Invoices**:
* Ensure your import sheet includes the following columns with the specified details:
| **Column Name** | **Description** |
| ---------------- | -------------------------------------------------------------------------------------------------------------------------------------------------------------------------------------------------------------------------------------- |
| Internal ID | Unique identifier for the document (max 40 characters). Must be unique within the same sheet. **Prefix of EIN00 will automatically be added before the internal ID (e.g., EIN00-1234).** |
| Document Type | Type of document (Invoice, Credit Note, or Debit Note). |
| References | You can add UUID references of sent documents to ETA.(max 30 characters). **This can only be used for Document Types Credit Note and Debit Note.** |
| Receiver Type | Type of receiver (P, B, or F). |
| Receiver ID | Unique identifier for the receiver (max 20 characters). Must be 14 characters if Receiver Type is P. |
| Receiver Name | Full name of the receiver (max 200 characters). |
| Receiver Address | Street address of the receiver (max 100 characters). |
| Receiver City | City of the receiver (max 100 characters). |
| Receiver Country | Country ISO code of the receiver. You can refer to Country Codes for a list of accepted [Country Codes](https://sdk.invoicing.eta.gov.eg/codes/countries/). |
| Department Code | Valid Kwentra department code, Applied tax definition on this department will be applied automatically. Make sure all the tax department mapping is done correctly. **Should be added within the next line(s) of Document Main data.** |
| Amount | Invoice amount. Must be greater than 0 and accepts up to 5 decimal points. **Should be added within the next line(s) of Document Main data.** |
| Currency | ISO code for the currency. **Should be added within the next line(s) of Document Main data.** |
| Exchange Factor | Exchange factor for the selected currency. Defaults to 1 for EGP. **Should be added within the next line(s) of Document Main data.** |
| Comments | Additional notes (optional, max 500 characters). If comments are added in the sheet line of Invoice Lines, it will be a max of 50 characters. |
1. **Upload Your Sheet**:
* Click the **Import Invoices** button.
* Select your filled template and upload it.
2. **Validation and Import Process**:
* The system will validate your data. If any mandatory fields are missing or incorrect, you'll receive specific error messages, such as:
* “Document Type is not of the accepted types”
* “Receiver Type is not of the accepted types P, B, or F”
* “Receiver ID Must be 14 as Receiver type is P”
* “Country ISO format is not valid”
* “Currency Code is not in ISO format”
* “Can't create documents with empty Invoice Lines” …etc.
* Correct any errors and re-upload the sheet if needed.
3. **Handling Duplicates**:
* If an internal ID already exists in the system:
* For Invalid or Empty statuses: The old document will be deleted and a new one created.
* For other statuses: The new document will be ignored, and you'll see a warning message: “Document \{internal ID} already created in the system with status \{status}”.
4. **Success Confirmation**:
* Upon successful import, your documents will be created in the system with a status of Pending.
### **Help and Support**
* **Help Instructions**:
* Click the **Instructions** tap for detailed instructions on filling out the template and troubleshooting common issues.
### **Example Import Sheet**
* Download and refer to the example import sheet to ensure your data is formatted correctly.
By following this guide, you can ensure your ETA invoices are accurately imported and processed, helping maintain seamless integration and compliance.
## Manager Report Update
### Manager Report Update
Context:
We have updated the Manager Report to show Day Use data separately. This change provides better visibility into day-use reservations.
Changes:
1. Paid Guests:
* Guest Inhouse minus Comp. & House use: Excludes Day Use Pax.
* Day Use Guests: Only Day Use Pax.
2. Paid Adults:
* Inhouse Adults minus Comp. & House use: Excludes Day Use adults.
* Day Use Adults: Only Day Use Adults.
3. Paid Children:
* Inhouse Adults minus Comp. & House use: Excludes Day Use children.
* Day Use Children: Only Day Use Children.
4. Paid Rooms:
* Inhouse Children minus Comp. & House use: Excludes Day Use reservations.
* Day Use Rooms: Only Day Use reservations (including non-count rooms).
[Read more](/front-office/reports/front-desk-reports/manager-report-insights-and-formula)
## Automatic Channel Branch/Profile Selection (Based on Currency)
We're excited to announce a new feature that simplifies channel profile selection within the reservation! This update streamlines the process by automatically suggesting a default channel branch/profile based on the reservation's currency.
**What's New?**
* **Checkbox:** A new checkbox labeled "Default based on rate and branch currencies" has been added to the channel default charging instruction screen.
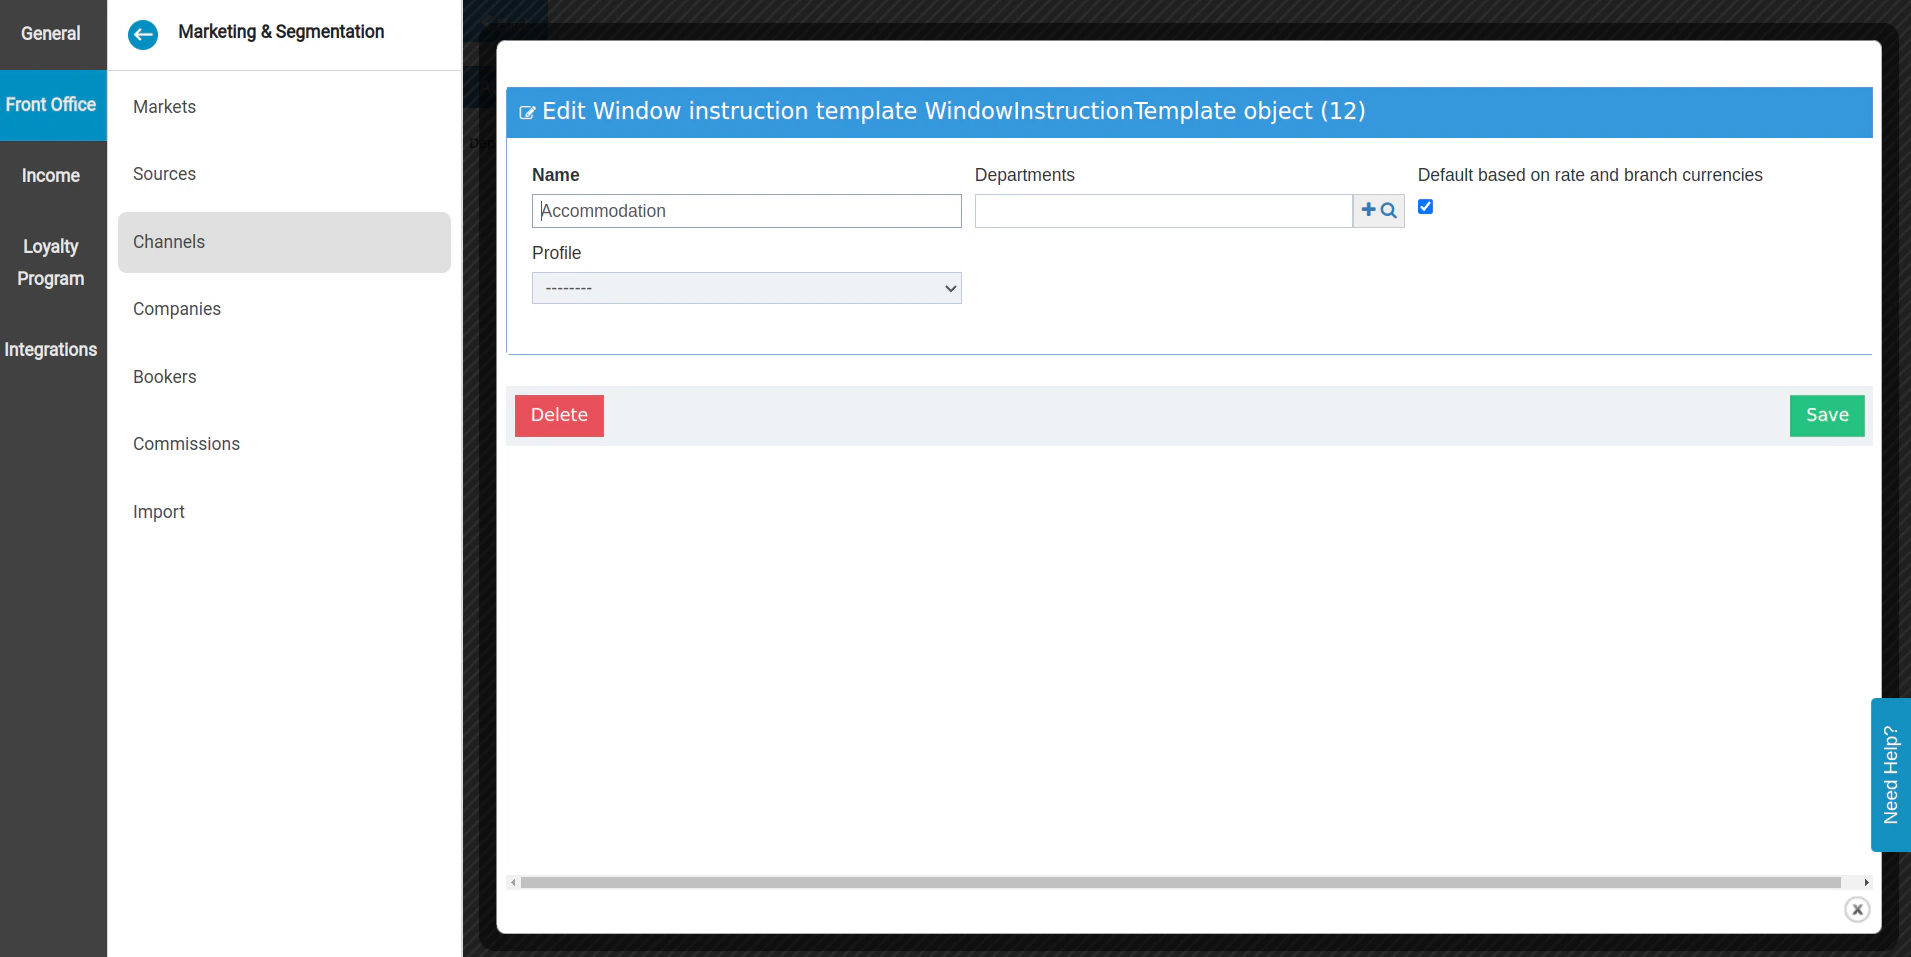 * **Automatic Profile Suggestion:** When checked, this option automatically adds a default profile based on the following logic:
* The system will consider the currency of the rate code associated with the reservation's first night.
* If the rate code currency matches the currency of any AR account linked to a branch on the chosen channel, that branch will be automatically selected as the default profile.
* If no matching AR account currency is found, no profile will be defaulted.
**Benefits:**
* **Faster Profile Selection and Checkout Process:** This new feature saves you time by automatically suggesting a profile, reducing the need for manual selection.
* **Improved Accuracy:** Automatic profile suggestion based on currency reduces the risk of errors in profile selection.
We hope this new feature enhances your efficiency and simplifies channel profile selection within the system. If you have any questions, please don't hesitate to contact our support team.
## Enabling Adjustments to Open Balances in Accounts Receivable
**Overview**
In the Back Office module of our accounting software, specifically within Accounts Receivable (AR), we are introducing a new feature that allows for adjustments to open balances even after the initial posting has been verified. This capability addresses the need for corrections and handling discrepancies that may surface after the initial posting, ensuring financial accuracy and integrity.
**Feature Details**
Adjustments in [Accounts Receivable](https://manage.kwentra.com/income/araccount/)
* **Automatic Profile Suggestion:** When checked, this option automatically adds a default profile based on the following logic:
* The system will consider the currency of the rate code associated with the reservation's first night.
* If the rate code currency matches the currency of any AR account linked to a branch on the chosen channel, that branch will be automatically selected as the default profile.
* If no matching AR account currency is found, no profile will be defaulted.
**Benefits:**
* **Faster Profile Selection and Checkout Process:** This new feature saves you time by automatically suggesting a profile, reducing the need for manual selection.
* **Improved Accuracy:** Automatic profile suggestion based on currency reduces the risk of errors in profile selection.
We hope this new feature enhances your efficiency and simplifies channel profile selection within the system. If you have any questions, please don't hesitate to contact our support team.
## Enabling Adjustments to Open Balances in Accounts Receivable
**Overview**
In the Back Office module of our accounting software, specifically within Accounts Receivable (AR), we are introducing a new feature that allows for adjustments to open balances even after the initial posting has been verified. This capability addresses the need for corrections and handling discrepancies that may surface after the initial posting, ensuring financial accuracy and integrity.
**Feature Details**
Adjustments in [Accounts Receivable](https://manage.kwentra.com/income/araccount/)
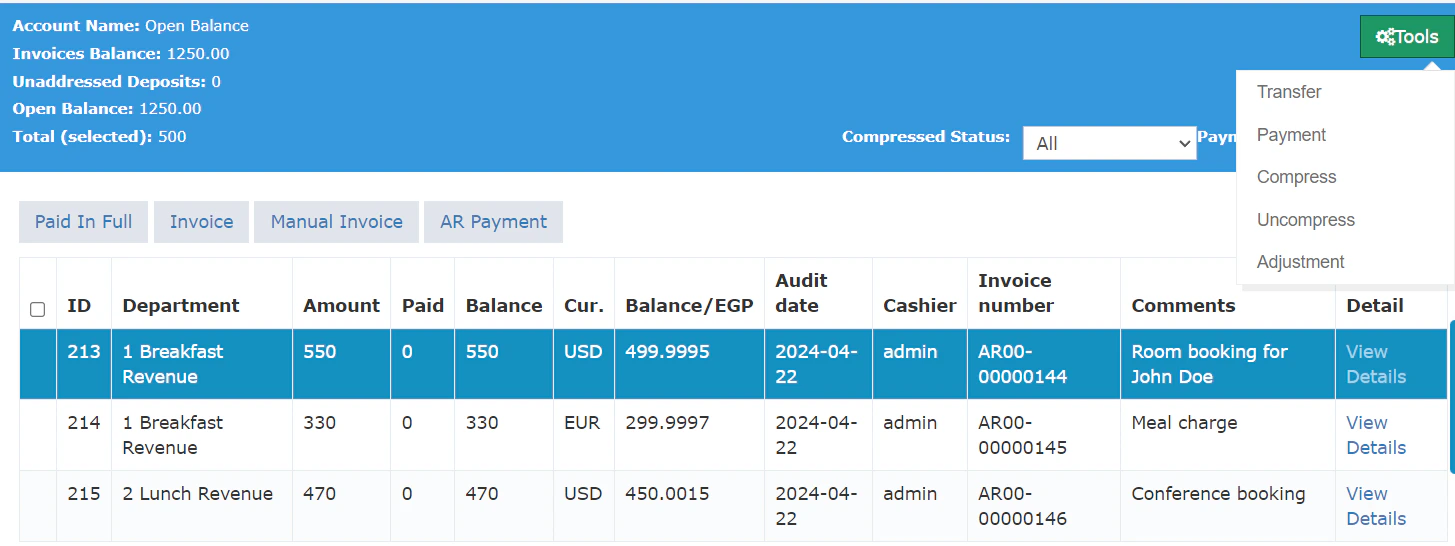 Users will now be able to make adjustments to open balances in the AR module. These adjustments can be either positive or negative, depending on the requirement:
* Negative Adjustments: Users can reduce the folio balance, but not below zero.
* **Example**: If the original folio balance is $500, the maximum negative adjustment is -$500, resulting in a balance of \$0.
* A credit note is generated for the adjustment amount and sent to the ETA, referencing the original folio.
* Positive Adjustments: Users can increase the folio balance without restriction.
* **Example**: If the original folio balance is $500, a positive adjustment of $500 will result in a new balance of \$1000.
* A debit note is created for the adjustment amount and sent to the ETA, referencing the original folio.
**Additional Features and Considerations**
* Backdating Adjustments:
* An option to "Backdate adjustment to original posting date" is available in the adjustment dialogue to address different aging scenarios.
* Validation Rules:
* Proper validation is implemented to ensure adjustments are within authorized limits.
* Negative adjustments cannot exceed the current folio balance.
* Adjustments are not allowed on fully paid invoices unless the payment is canceled first.
* Adjustments cannot be made to compressed invoices.
Users will now be able to make adjustments to open balances in the AR module. These adjustments can be either positive or negative, depending on the requirement:
* Negative Adjustments: Users can reduce the folio balance, but not below zero.
* **Example**: If the original folio balance is $500, the maximum negative adjustment is -$500, resulting in a balance of \$0.
* A credit note is generated for the adjustment amount and sent to the ETA, referencing the original folio.
* Positive Adjustments: Users can increase the folio balance without restriction.
* **Example**: If the original folio balance is $500, a positive adjustment of $500 will result in a new balance of \$1000.
* A debit note is created for the adjustment amount and sent to the ETA, referencing the original folio.
**Additional Features and Considerations**
* Backdating Adjustments:
* An option to "Backdate adjustment to original posting date" is available in the adjustment dialogue to address different aging scenarios.
* Validation Rules:
* Proper validation is implemented to ensure adjustments are within authorized limits.
* Negative adjustments cannot exceed the current folio balance.
* Adjustments are not allowed on fully paid invoices unless the payment is canceled first.
* Adjustments cannot be made to compressed invoices.
 * Adjustment Dates:
* The adjustment date will determine the aging start date for the adjusted amount.
* Adjustments cannot be set to a restricted period in the General Ledger (GL).
* Viewing and Reporting Adjustments:
* Selecting "View Details" on any adjusted AR posting will display the adjustment details.
* Generating folios with templates (Detailed, KSA legal) will show multiple folios based on the number of adjustments and payments.
* Adjustment folios in these templates will include the original folio number to maintain trackability in printouts.
* Original and adjustment folios will be rendered identically on the folio list screen.
* Multicurrency Support:
* This feature requires the AR multicurrency feature to be enabled, as adjustments should be made in the AR account currency by default.
* Resending Adjustments to ETA:
* Resending an adjustment folio to the ETA will only send the adjustment invoice, avoiding duplication of the original folio.
## How to Import AR Balances
#### Accessing the Import AR Balances Feature
Where to Find It:
* [BackOffice → AR Account → Import AR Balances](https://manage.kwentra.com/income/araccount/balancesimport/)
Steps to Use:
1. Access Import AR Balances: Navigate to the AR Account section in the BackOffice and click on the new link labeled "Import AR Balances". Note that this feature is only accessible to staff users.
2. New Page Interface: You will be directed to a new page where you can select the file to import and find a help section explaining the required fields and validations.
#### Preparing Your Import File
Ensure your file includes the following fields with the correct data:
1. AR Account Number:
* Must be an existing account number in the system.
* Validation: The system will check if the AR account number exists.
2. Date (Date of Posting):
* Must be in the correct date format.
* The date cannot be after the current audit date.
* Mandatory
3. Department Number:
* The department number where the posting will be created.
* The department must exist and be a debit department.
* Mandatory
4. Base Currency Amount:
* Must be a positive number greater than zero.
* Mandatory
5. Foreign Currency Amount:
* Must be a positive number greater than zero.
* Mandatory
6. Currency:
* Must be an existing currency code recognized by the system.
* Mandatory
7. Comment:
* Optional field for posting comments, with a limit of 76 characters.
#### Using the Import Feature
Steps to Import:
1. Select File: On the "Import AR Balances" page, use the file selection option to choose your prepared file.
2. Review Help Section: Refer to the help section on the page to ensure all fields in your file meet the required validations.
3. Submit File: Once your file is selected and verified, click the import button to upload your data.
#### Additional Options
* Publish Invoices Checkbox:
* If ETA is enabled, you can choose to publish invoices by checking this box. This option will be disabled if ETA is not enabled.
## Searching by comments in AR Accounts and AR Payments
#### Using the Comment Search Feature in AR Accounts
Where to Find It:
* [BackOffice → AR Account](https://manage.kwentra.com/income/araccount/)
Steps to Use:
1. Access AR Account: Navigate to the AR Account section in the BackOffice.
2. Locate the Search Section: You will now see a new text field labeled “comments” in the search section.
3. Search by Comment: Enter part or all of a comment into this field to search for specific invoices. This is particularly useful for finding invoices using old invoice numbers or other relevant notes.
4. View Comments in Account Details:
* On Hold Accounts: The comment field will be displayed before the "view details" option in the on hold accounts, allowing you to quickly see comments without needing to open each record.
* Open Balance Accounts: Similarly, comments will be shown before the "view details" option in open balance accounts for easy reference.
#### Using the Comment Search Feature in AR Payments
Where to Find It:
* [BackOffice → AR Account → AR Payment](https://manage.kwentra.com/income/armainpayment/)
Steps to Use:
1. Access AR Payment: Navigate to the AR Payment section within AR Account in the BackOffice.
2. Locate the Search Section: A new “comments” text field will be available in the search section.
3. Search by Comment: Enter the comment or part of it into the search field to locate specific invoices. This feature helps in quickly identifying transactions based on comments made during the import of AR balances.
4. View Comments in Invoice List: The invoice list will now include a “comments” field. This allows you to see comments directly in the list view, providing immediate context and information without extra clicks.
## Hijri Calendar in the Payment Report
Report Update: You can now choose between the **Gregorian** or **Hijri** calendar when generating the **Payment Report**, allowing you to get results aligned with the reporting needs of your country or organization.
[Read more](/front-office/reports/income-reports/payment-report)
## Rate Promotions
## Create Rate Promotions and Boost Your Bookings!
This article will guide you through our exciting new feature: Rate Promotions! With this feature, you can create special offers and automatically apply them to reservations that meet your criteria.
**What are Rate Promotions?**
Rate promotions allow you to incentivize bookings by offering free nights to guests who stay a certain number of nights. This is a great way to attract new customers, fill vacancies during slower periods, and boost your revenue.
**Creating a Rate Promotion**
1. **Navigate to Front Office Settings**
* Go to **Settings** -> **Front Office** -> **Rates**
* Click on the new **Rate Promotions** tab.
2. **Click the "Add New" button.**
3. **Enter a unique code** (maximum 30 characters) to identify your promotion.
4. **Provide a clear and concise description** (maximum 200 characters) of your promotion for guests to see.
5. **Currently, only "Free Nights" promotions are available.** Future updates may offer additional options.
6. **Set the number of nights a guest must book** to qualify for the promotion (between 1 and 99 nights).
7. **Define the number of free nights** offered (between 1 and 99 nights, and cannot exceed the number of required nights).
8. **Click "Save".**
* Adjustment Dates:
* The adjustment date will determine the aging start date for the adjusted amount.
* Adjustments cannot be set to a restricted period in the General Ledger (GL).
* Viewing and Reporting Adjustments:
* Selecting "View Details" on any adjusted AR posting will display the adjustment details.
* Generating folios with templates (Detailed, KSA legal) will show multiple folios based on the number of adjustments and payments.
* Adjustment folios in these templates will include the original folio number to maintain trackability in printouts.
* Original and adjustment folios will be rendered identically on the folio list screen.
* Multicurrency Support:
* This feature requires the AR multicurrency feature to be enabled, as adjustments should be made in the AR account currency by default.
* Resending Adjustments to ETA:
* Resending an adjustment folio to the ETA will only send the adjustment invoice, avoiding duplication of the original folio.
## How to Import AR Balances
#### Accessing the Import AR Balances Feature
Where to Find It:
* [BackOffice → AR Account → Import AR Balances](https://manage.kwentra.com/income/araccount/balancesimport/)
Steps to Use:
1. Access Import AR Balances: Navigate to the AR Account section in the BackOffice and click on the new link labeled "Import AR Balances". Note that this feature is only accessible to staff users.
2. New Page Interface: You will be directed to a new page where you can select the file to import and find a help section explaining the required fields and validations.
#### Preparing Your Import File
Ensure your file includes the following fields with the correct data:
1. AR Account Number:
* Must be an existing account number in the system.
* Validation: The system will check if the AR account number exists.
2. Date (Date of Posting):
* Must be in the correct date format.
* The date cannot be after the current audit date.
* Mandatory
3. Department Number:
* The department number where the posting will be created.
* The department must exist and be a debit department.
* Mandatory
4. Base Currency Amount:
* Must be a positive number greater than zero.
* Mandatory
5. Foreign Currency Amount:
* Must be a positive number greater than zero.
* Mandatory
6. Currency:
* Must be an existing currency code recognized by the system.
* Mandatory
7. Comment:
* Optional field for posting comments, with a limit of 76 characters.
#### Using the Import Feature
Steps to Import:
1. Select File: On the "Import AR Balances" page, use the file selection option to choose your prepared file.
2. Review Help Section: Refer to the help section on the page to ensure all fields in your file meet the required validations.
3. Submit File: Once your file is selected and verified, click the import button to upload your data.
#### Additional Options
* Publish Invoices Checkbox:
* If ETA is enabled, you can choose to publish invoices by checking this box. This option will be disabled if ETA is not enabled.
## Searching by comments in AR Accounts and AR Payments
#### Using the Comment Search Feature in AR Accounts
Where to Find It:
* [BackOffice → AR Account](https://manage.kwentra.com/income/araccount/)
Steps to Use:
1. Access AR Account: Navigate to the AR Account section in the BackOffice.
2. Locate the Search Section: You will now see a new text field labeled “comments” in the search section.
3. Search by Comment: Enter part or all of a comment into this field to search for specific invoices. This is particularly useful for finding invoices using old invoice numbers or other relevant notes.
4. View Comments in Account Details:
* On Hold Accounts: The comment field will be displayed before the "view details" option in the on hold accounts, allowing you to quickly see comments without needing to open each record.
* Open Balance Accounts: Similarly, comments will be shown before the "view details" option in open balance accounts for easy reference.
#### Using the Comment Search Feature in AR Payments
Where to Find It:
* [BackOffice → AR Account → AR Payment](https://manage.kwentra.com/income/armainpayment/)
Steps to Use:
1. Access AR Payment: Navigate to the AR Payment section within AR Account in the BackOffice.
2. Locate the Search Section: A new “comments” text field will be available in the search section.
3. Search by Comment: Enter the comment or part of it into the search field to locate specific invoices. This feature helps in quickly identifying transactions based on comments made during the import of AR balances.
4. View Comments in Invoice List: The invoice list will now include a “comments” field. This allows you to see comments directly in the list view, providing immediate context and information without extra clicks.
## Hijri Calendar in the Payment Report
Report Update: You can now choose between the **Gregorian** or **Hijri** calendar when generating the **Payment Report**, allowing you to get results aligned with the reporting needs of your country or organization.
[Read more](/front-office/reports/income-reports/payment-report)
## Rate Promotions
## Create Rate Promotions and Boost Your Bookings!
This article will guide you through our exciting new feature: Rate Promotions! With this feature, you can create special offers and automatically apply them to reservations that meet your criteria.
**What are Rate Promotions?**
Rate promotions allow you to incentivize bookings by offering free nights to guests who stay a certain number of nights. This is a great way to attract new customers, fill vacancies during slower periods, and boost your revenue.
**Creating a Rate Promotion**
1. **Navigate to Front Office Settings**
* Go to **Settings** -> **Front Office** -> **Rates**
* Click on the new **Rate Promotions** tab.
2. **Click the "Add New" button.**
3. **Enter a unique code** (maximum 30 characters) to identify your promotion.
4. **Provide a clear and concise description** (maximum 200 characters) of your promotion for guests to see.
5. **Currently, only "Free Nights" promotions are available.** Future updates may offer additional options.
6. **Set the number of nights a guest must book** to qualify for the promotion (between 1 and 99 nights).
7. **Define the number of free nights** offered (between 1 and 99 nights, and cannot exceed the number of required nights).
8. **Click "Save".**
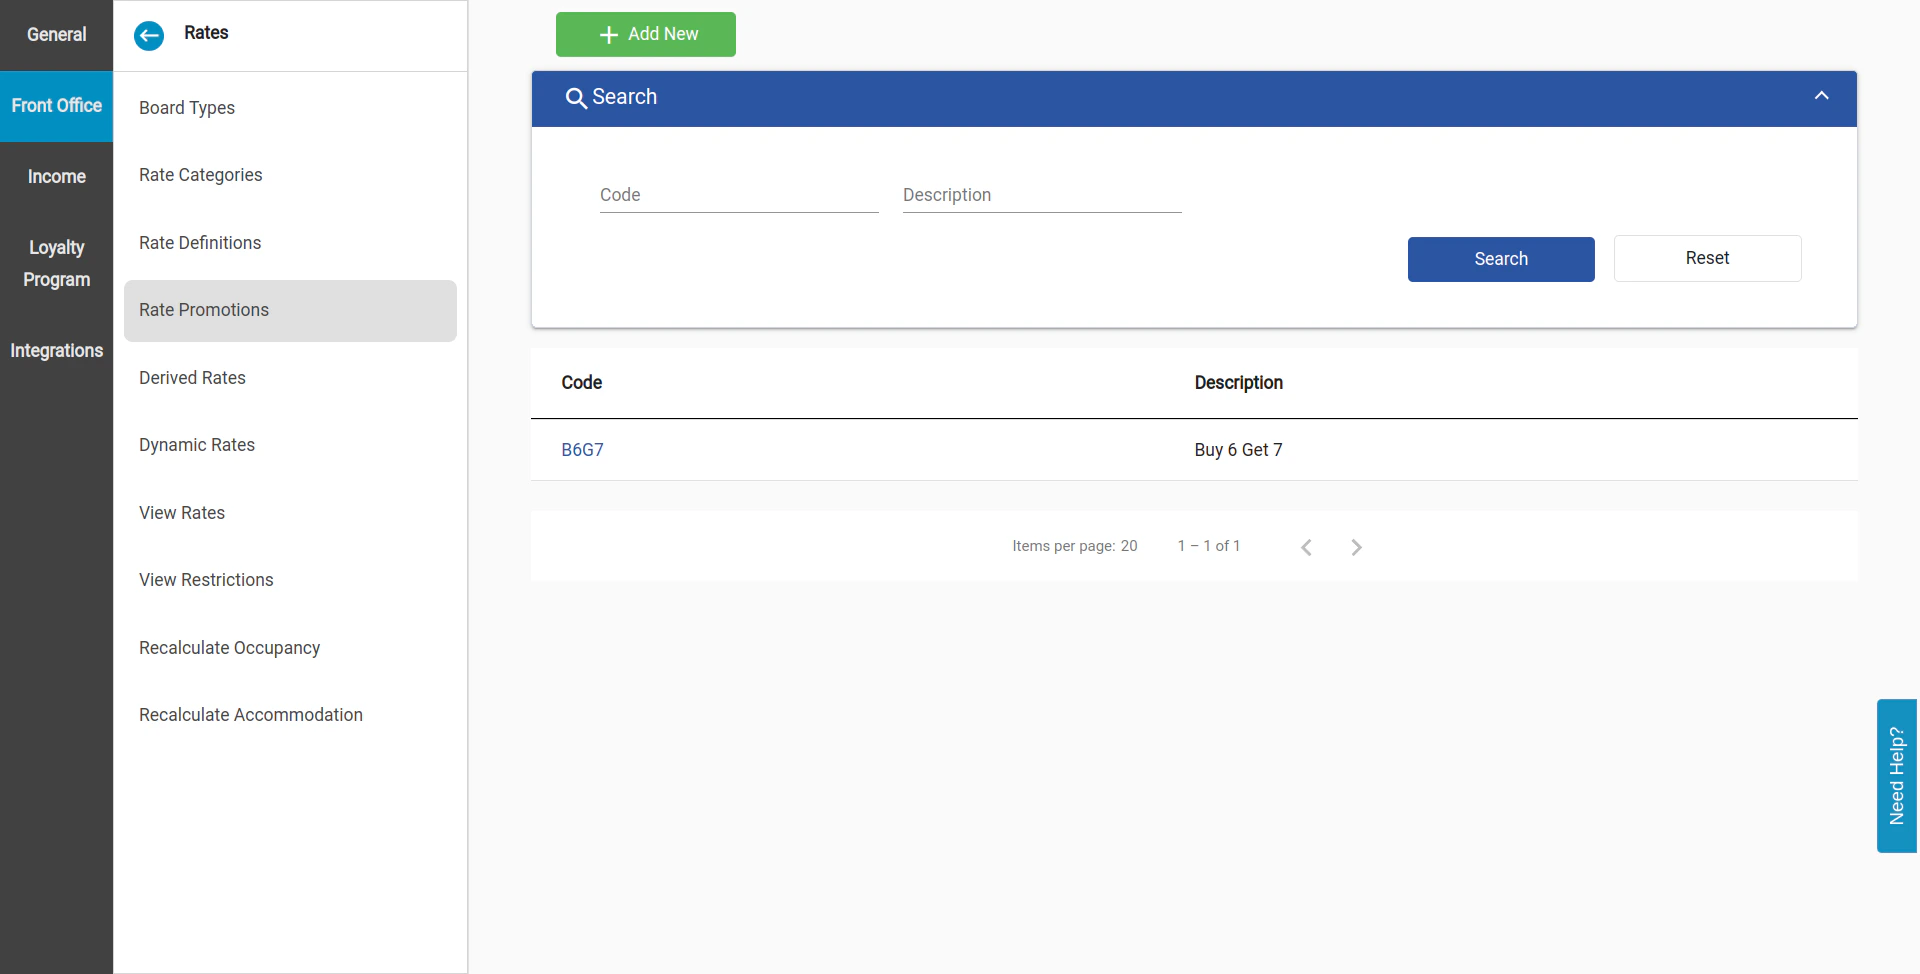 **Linking Promotions to Rate Codes**
1. **Open an existing rate code** or create a new one.
2. **In the "Promotions" section,** use the dropdown menu to select the rate promotion you want to link.
3. **Choose the validity period** for the promotion using the "From selling date" and "To selling date" or "From arrival date" and "To arrival date" options. You can even use a combination of both!
4. **Click "Save".** A confirmation message will appear, letting you know that existing reservations won't be affected.
**Linking Promotions to Rate Codes**
1. **Open an existing rate code** or create a new one.
2. **In the "Promotions" section,** use the dropdown menu to select the rate promotion you want to link.
3. **Choose the validity period** for the promotion using the "From selling date" and "To selling date" or "From arrival date" and "To arrival date" options. You can even use a combination of both!
4. **Click "Save".** A confirmation message will appear, letting you know that existing reservations won't be affected.
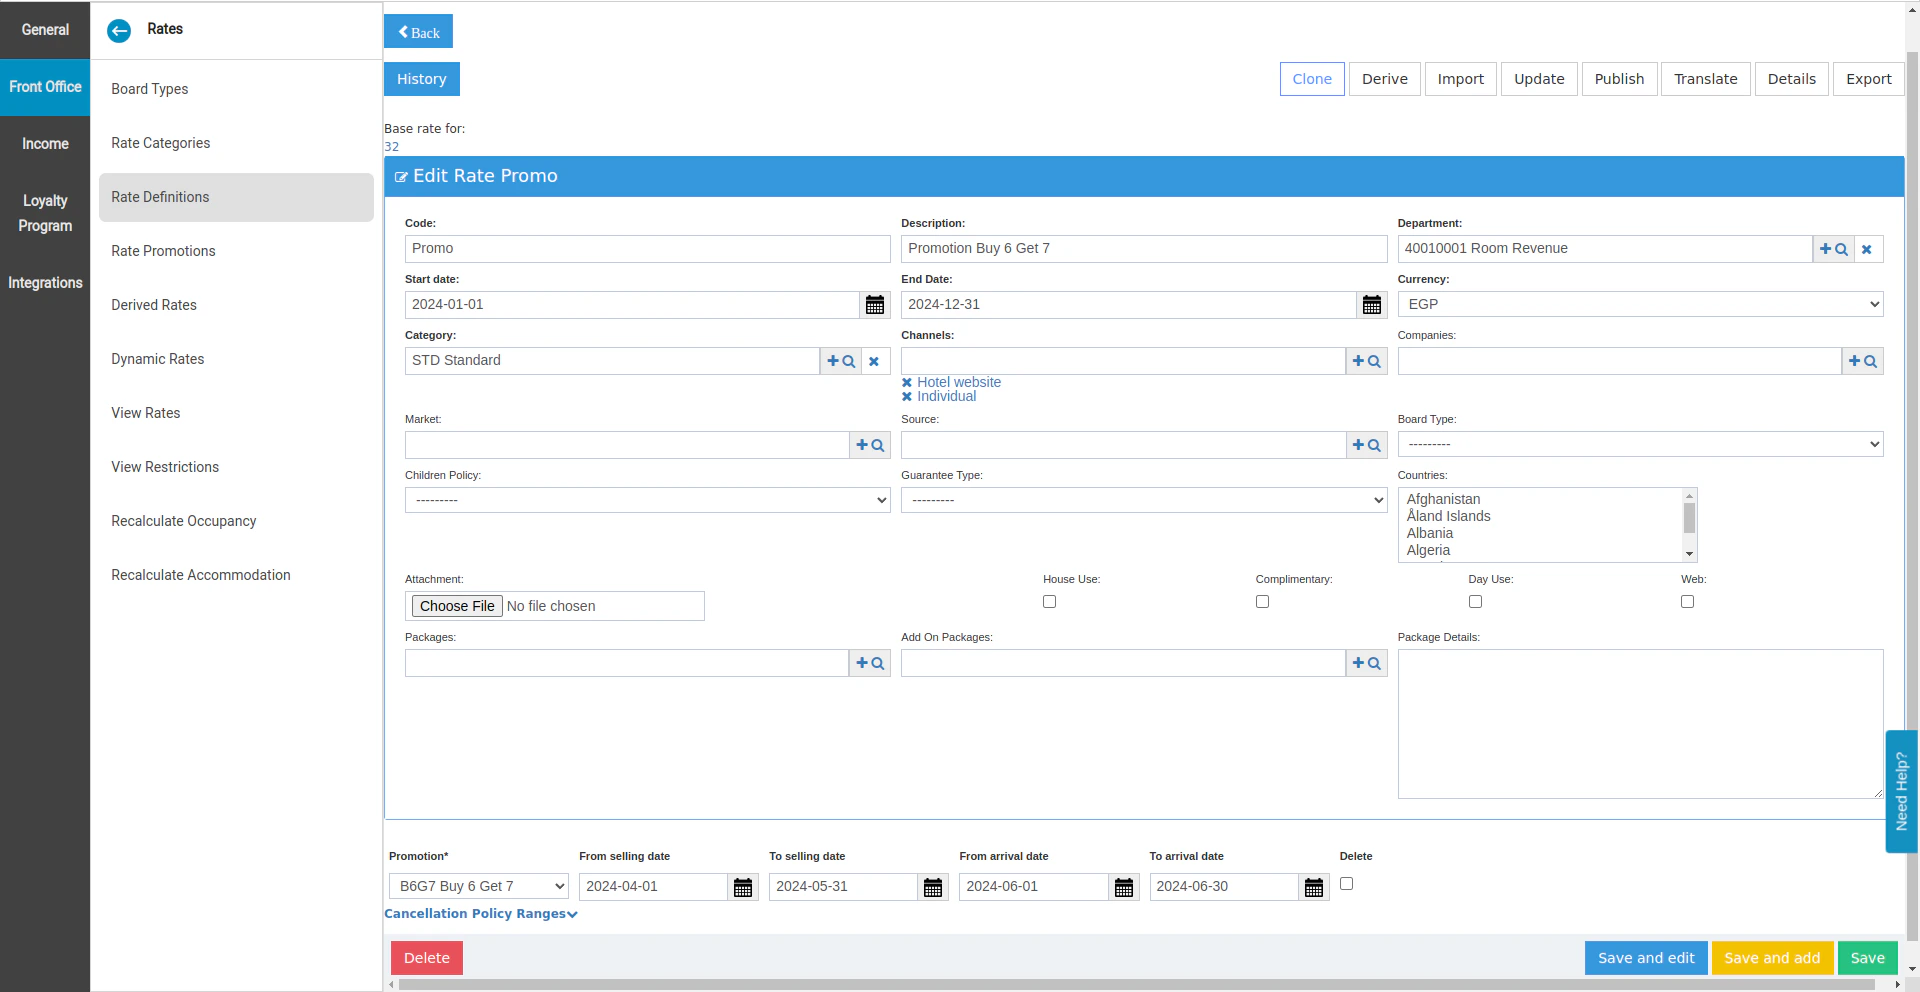 **Important Notes:**
* You can edit the promotion code and description after linking it to a rate code, but other details are read-only if reservations are already using the promotion.
* Linking a new promotion to a rate code with existing reservations won't apply the promotion to those reservations.
* Promotions are applied to new reservations that meet the criteria based on creation date, arrival date, and minimum stay requirements.
* Promotions only apply to the expected reservations and are calculated from the first night onwards.
* Promotions will be applied once per reservation.
* The promotion details will be displayed on the reservation with a "Promotion Applied" label under the rate amount.
* The rate amount is calculated as an average across the booked nights, with free nights excluded from the total cost.
* Early departures or changing reservation dates/nights outside promotion eligibility will automatically remove the promotion.
* Changing reservation dates/nights into promotion eligibility will automatically add the promotion.
* Unlinking a promotion from a rate code, the reservation with a "Tentative" rate confirmation will remove the promotion.
* Unlinking a promotion from a rate code with a "Confirmed" rate confirmation won't affect the reservations using this promotion unless you recalculate the rate (e.g., changing dates, rate code, etc.).
* Applying a manual rate to any night with an applied promotion will remove the promotion entirely.
**Important Notes:**
* You can edit the promotion code and description after linking it to a rate code, but other details are read-only if reservations are already using the promotion.
* Linking a new promotion to a rate code with existing reservations won't apply the promotion to those reservations.
* Promotions are applied to new reservations that meet the criteria based on creation date, arrival date, and minimum stay requirements.
* Promotions only apply to the expected reservations and are calculated from the first night onwards.
* Promotions will be applied once per reservation.
* The promotion details will be displayed on the reservation with a "Promotion Applied" label under the rate amount.
* The rate amount is calculated as an average across the booked nights, with free nights excluded from the total cost.
* Early departures or changing reservation dates/nights outside promotion eligibility will automatically remove the promotion.
* Changing reservation dates/nights into promotion eligibility will automatically add the promotion.
* Unlinking a promotion from a rate code, the reservation with a "Tentative" rate confirmation will remove the promotion.
* Unlinking a promotion from a rate code with a "Confirmed" rate confirmation won't affect the reservations using this promotion unless you recalculate the rate (e.g., changing dates, rate code, etc.).
* Applying a manual rate to any night with an applied promotion will remove the promotion entirely.
 **Let's find an example below:**
A promotion created as "Buy 6 Get 7" so the minimum required nights to book are 7 nights and the free nights are 1 night.
The rate code linked to this promotion is set with an amount of \$100 per night.
When a reservation is created for 7 nights matching the promotion selling/arrival dates and has the rate code with the promotion applied, the rate amount will be calculated as follows:
Original Total Amount = \$700
Last night is free (1 free night as per the promotion setup) so the total amount becomes \$600
The rate amount will be calculated as average = $600 / 7 Nights = $85.714 / Night instead of \$100 / Night
**Get Creative and Boost Your Bookings!**
With Rate Promotions, you have a powerful tool to incentivize bookings and attract new guests. Experiment with different offers and see how they impact your reservations!
**Need Help?**
If you have any questions about using Rate Promotions, please don't hesitate to contact our support team. They're always available to assist you.
## Enhancing Online Booking Payments with Add-On Packages
We're excited to introduce a new feature to our Online Booking platform that will streamline the payment process and provide greater flexibility for our users. Currently, when booking accommodations through our Online Booking Widget, users have the option to add add-on packages to their reservation. However, these add-on packages are not factored into the payment amount at checkout. To address this, we're implementing changes that will ensure the inclusion of add-on package costs in the payment step, offering a seamless booking experience for our customers.
**Key Changes:**
* New Checkbox in [Deposit Settings](https://manage.kwentra.com/reservation/depositsettings/): We're adding a new checkbox in the Deposit Settings section of the Online Booking Settings, labeled "Charge Addon Packages." This checkbox will be unchecked by default for all existing deposit settings.
**Let's find an example below:**
A promotion created as "Buy 6 Get 7" so the minimum required nights to book are 7 nights and the free nights are 1 night.
The rate code linked to this promotion is set with an amount of \$100 per night.
When a reservation is created for 7 nights matching the promotion selling/arrival dates and has the rate code with the promotion applied, the rate amount will be calculated as follows:
Original Total Amount = \$700
Last night is free (1 free night as per the promotion setup) so the total amount becomes \$600
The rate amount will be calculated as average = $600 / 7 Nights = $85.714 / Night instead of \$100 / Night
**Get Creative and Boost Your Bookings!**
With Rate Promotions, you have a powerful tool to incentivize bookings and attract new guests. Experiment with different offers and see how they impact your reservations!
**Need Help?**
If you have any questions about using Rate Promotions, please don't hesitate to contact our support team. They're always available to assist you.
## Enhancing Online Booking Payments with Add-On Packages
We're excited to introduce a new feature to our Online Booking platform that will streamline the payment process and provide greater flexibility for our users. Currently, when booking accommodations through our Online Booking Widget, users have the option to add add-on packages to their reservation. However, these add-on packages are not factored into the payment amount at checkout. To address this, we're implementing changes that will ensure the inclusion of add-on package costs in the payment step, offering a seamless booking experience for our customers.
**Key Changes:**
* New Checkbox in [Deposit Settings](https://manage.kwentra.com/reservation/depositsettings/): We're adding a new checkbox in the Deposit Settings section of the Online Booking Settings, labeled "Charge Addon Packages." This checkbox will be unchecked by default for all existing deposit settings.
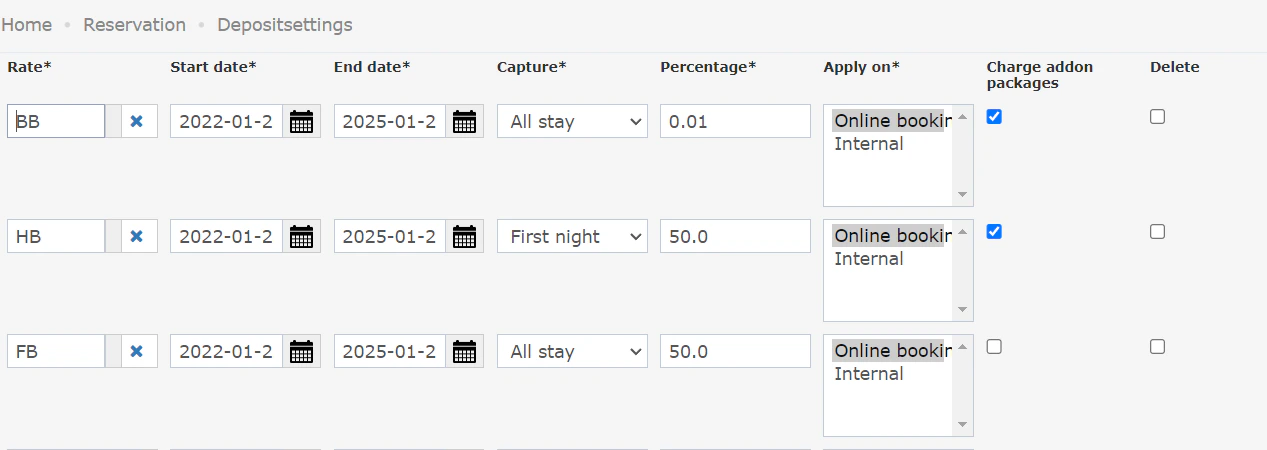 * Inclusion of Add-On Package Costs: When the "Charge Addon Packages" checkbox is enabled, the system will include the cost of add-on packages in the payment step. This ensures that users are charged the full amount for their reservation, including add-on packages.
* Calculation Based on Deposit Settings: The system will calculate the amount to be charged for add-on packages based on the percentage set in the deposit settings. For example, if the deposit setting is set to 100%, the system will charge the full amount for the add-on package. If set to 50%, the system will charge 50% of the add-on package cost.
* Widget and Confirmation Screen Modification: We'll also be modifying the design of both the Online Booking Widget and the confirmation page to include the "capture percentage" configured in the deposit settings. This change will not affect the amounts displayed, only the total payment.
* Inclusion of Add-On Package Costs: When the "Charge Addon Packages" checkbox is enabled, the system will include the cost of add-on packages in the payment step. This ensures that users are charged the full amount for their reservation, including add-on packages.
* Calculation Based on Deposit Settings: The system will calculate the amount to be charged for add-on packages based on the percentage set in the deposit settings. For example, if the deposit setting is set to 100%, the system will charge the full amount for the add-on package. If set to 50%, the system will charge 50% of the add-on package cost.
* Widget and Confirmation Screen Modification: We'll also be modifying the design of both the Online Booking Widget and the confirmation page to include the "capture percentage" configured in the deposit settings. This change will not affect the amounts displayed, only the total payment.
 * Technical Validation: To ensure data integrity and accuracy, a validation will be added to the deposit settings to prevent users from entering a percentage less than or equal to 0. Additionally, amounts lower than 1 in the payment step will be rounded up to 1, as per payment gateway requirements.
## Scheduled Room Moves
## Introducing Scheduled Room Moves: More Flexibility for Your Guests
We're excited to announce a new feature that gives you more control over room assignments and enhances the guest experience: Scheduled Room Moves!
**What are Scheduled Room Moves?**
This feature allows you to plan room changes for guests who are already checked in. You can book a new room for them on a specific future date within their reservation period, but the actual move will only happen after your approval on the day of the move.
**Benefits for You:**
* **Improved Guest Experience:** Cater to guest requests for room changes seamlessly without immediate disruption to their stay.
* **Enhanced Flexibility:** Plan room changes in advance to optimize occupancy and meet guest preferences.
* **Reduced Errors:** Minimize the risk of assigning rooms unavailable due to scheduled moves.
**How it Works:**
1. **Schedule the Move:** For reservations with a "Checked In" status, a new "Scheduled Room Move" button appears in the reservation header. Clicking it opens a pop-up window.
2. **Select the New Room:** Choose a new room from the available options. The system automatically fills in details like room type and room type to charge based on your selection and you can always choose a different room type to charge.
3. **Save and Track:** Once saved, the scheduled move appears in the reservation history and is reflected in the rate plan section and scheduled room moves screen.
* Technical Validation: To ensure data integrity and accuracy, a validation will be added to the deposit settings to prevent users from entering a percentage less than or equal to 0. Additionally, amounts lower than 1 in the payment step will be rounded up to 1, as per payment gateway requirements.
## Scheduled Room Moves
## Introducing Scheduled Room Moves: More Flexibility for Your Guests
We're excited to announce a new feature that gives you more control over room assignments and enhances the guest experience: Scheduled Room Moves!
**What are Scheduled Room Moves?**
This feature allows you to plan room changes for guests who are already checked in. You can book a new room for them on a specific future date within their reservation period, but the actual move will only happen after your approval on the day of the move.
**Benefits for You:**
* **Improved Guest Experience:** Cater to guest requests for room changes seamlessly without immediate disruption to their stay.
* **Enhanced Flexibility:** Plan room changes in advance to optimize occupancy and meet guest preferences.
* **Reduced Errors:** Minimize the risk of assigning rooms unavailable due to scheduled moves.
**How it Works:**
1. **Schedule the Move:** For reservations with a "Checked In" status, a new "Scheduled Room Move" button appears in the reservation header. Clicking it opens a pop-up window.
2. **Select the New Room:** Choose a new room from the available options. The system automatically fills in details like room type and room type to charge based on your selection and you can always choose a different room type to charge.
3. **Save and Track:** Once saved, the scheduled move appears in the reservation history and is reflected in the rate plan section and scheduled room moves screen.
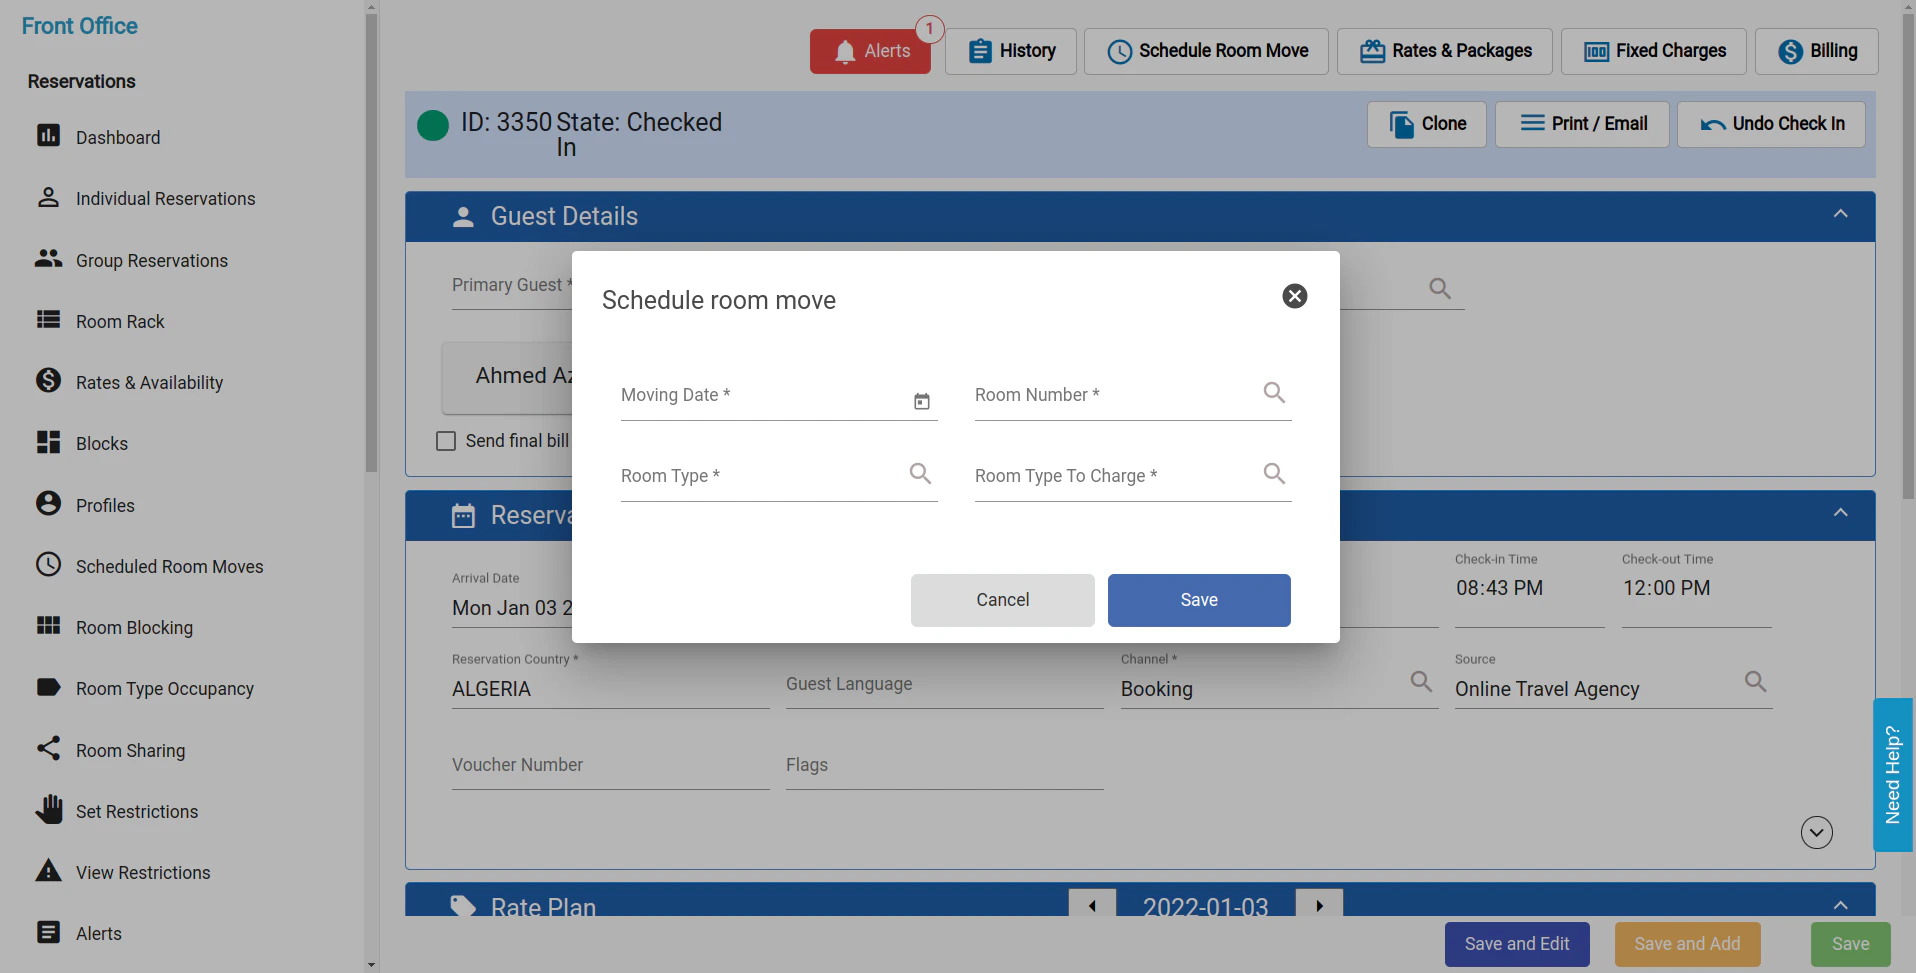 **What to Expect in Other Areas:**
* **Room Availability:** The chosen room for the scheduled move will be blocked for selection on other reservations with overlapping dates but will not affect room type availability.
* **Room Rack:** The nights of the scheduled move will be highlighted on the room rack, indicating the upcoming change.
**What to Expect in Other Areas:**
* **Room Availability:** The chosen room for the scheduled move will be blocked for selection on other reservations with overlapping dates but will not affect room type availability.
* **Room Rack:** The nights of the scheduled move will be highlighted on the room rack, indicating the upcoming change.
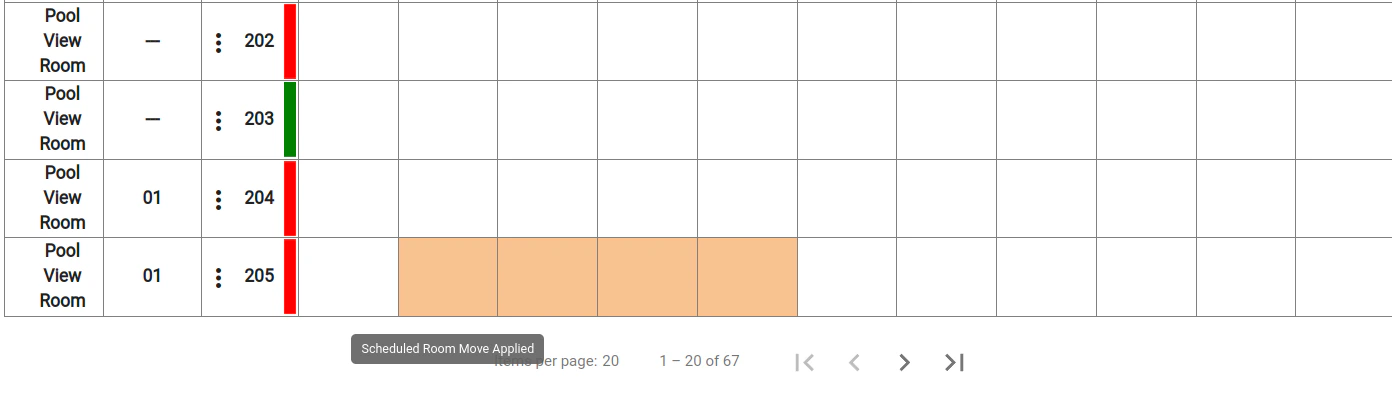 * **Night Turn Screen:** A dedicated table displays all scheduled moves for the current date that require your approval. Clicking on a move opens the reservation details for confirmation.
 **The Scheduled Room Moves Screen:**
A new screen in the navigation menu provides a complete overview of all scheduled moves for the current audit date. You can see reservation details, current and future room assignments (including the chosen room for the scheduled move). To initiate the move, simply click the "Move" button next to the desired reservation. This will open the reservation details in a pop-up window, with the room number, room type, and room type to charge already populated based on the scheduled move. **Just by saving the reservation, the move is confirmed and completed.**
**The Scheduled Room Moves Screen:**
A new screen in the navigation menu provides a complete overview of all scheduled moves for the current audit date. You can see reservation details, current and future room assignments (including the chosen room for the scheduled move). To initiate the move, simply click the "Move" button next to the desired reservation. This will open the reservation details in a pop-up window, with the room number, room type, and room type to charge already populated based on the scheduled move. **Just by saving the reservation, the move is confirmed and completed.**
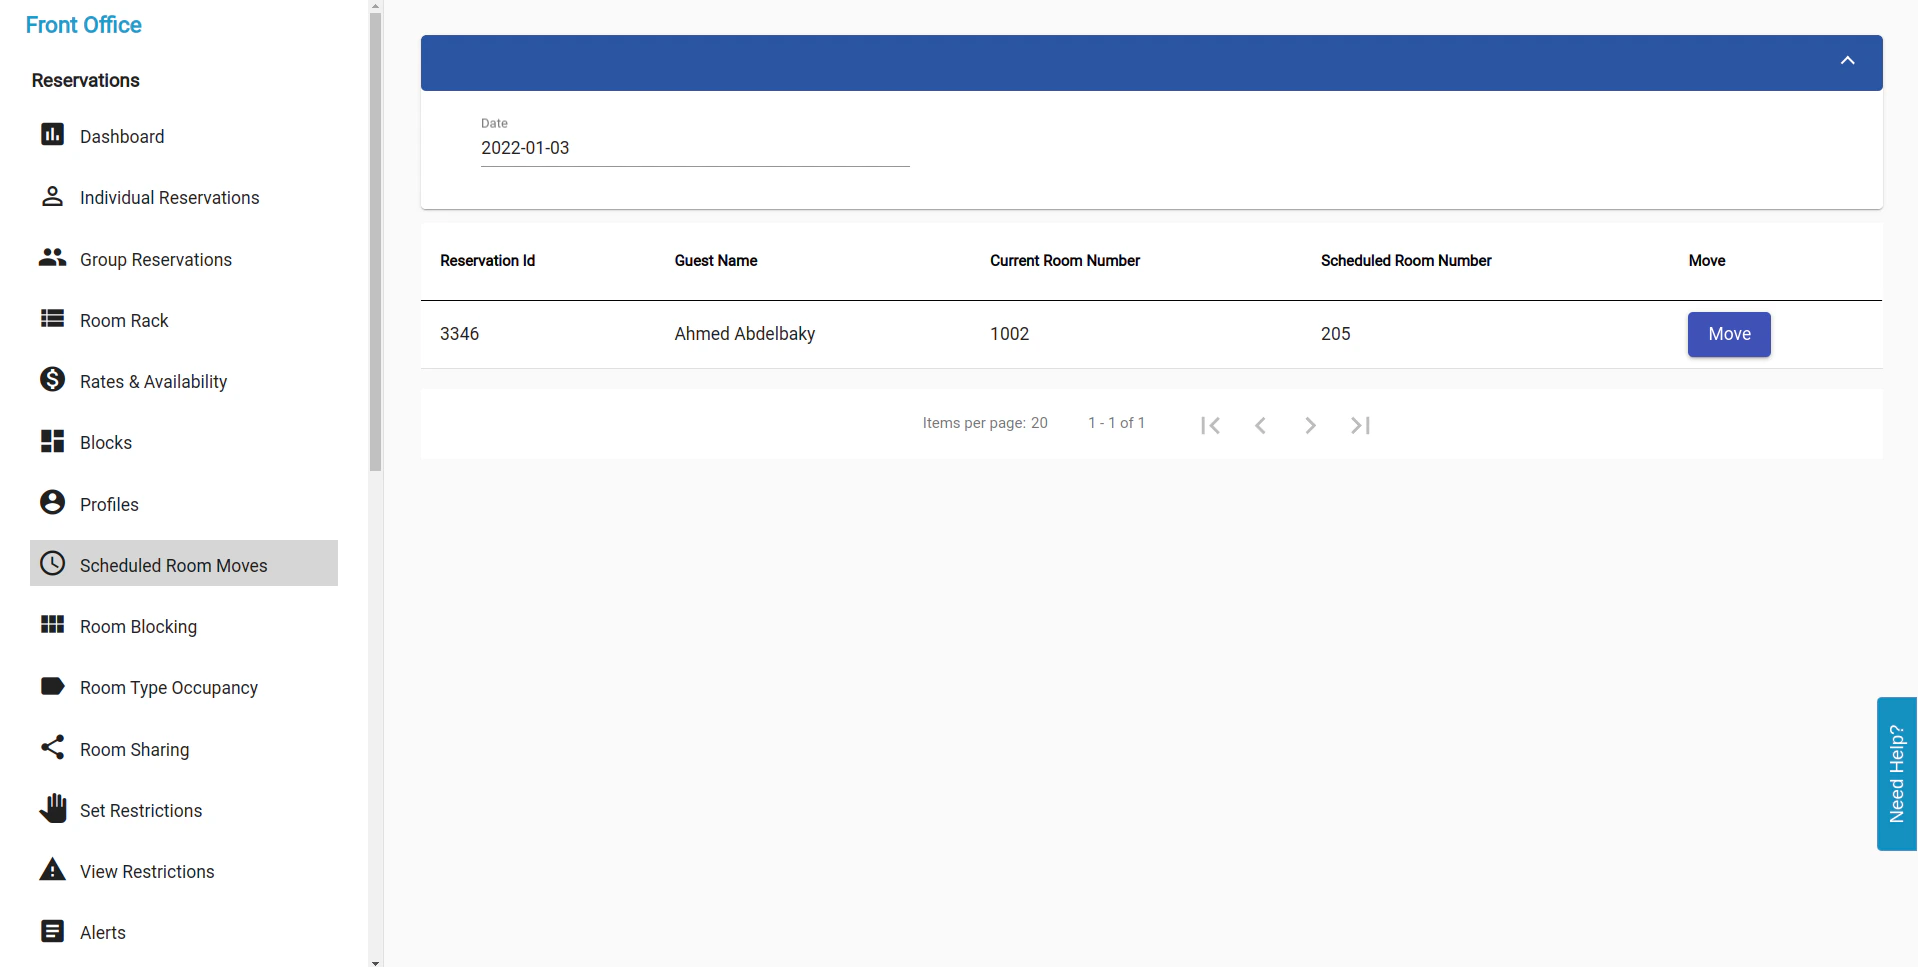 **Ready to Get Started?**
With Scheduled Room Moves, you can ensure a smooth and flexible experience for your guests while maintaining control over your room inventory.
## Manual Receiving with British Accounting System Integration
### Accessing Manual Receiving
* System Requirements: Ensure the British Accounting System is enabled in your back office.
* Navigation: Go to the manual receiving section in the back office to start the process.
* **[Back Office → Accounts Payable → Manual Receiving → Add New](https://manage.kwentra.com/income/receivefromvendor/)**
### Updated Manual Receiving Screen
When the British system is active, the manual receiving screen will include additional fields for enhanced accounting precision:
1. Main Account Selection:
* The account field becomes read-only.
* A new 'Main Account' field is added, which uses a single select and autocomplete feature, drawing values from the main account model.
2. Tcode Fields Addition:
* Five Tcode fields are introduced, each with a single select and autocomplete functionality, allowing for detailed analysis code selection.
### Process Workflow
* Creating a New Manual Receiving:
* If using account numbers, the system automatically associates the relevant main account and Tcodes.
* Conversely, selecting a main account and Tcodes will prompt the system to link the appropriate account.
* Editing Manual Receiving:
* Removing an account will automatically clear associated main accounts and Tcodes.
* Deleting a main account or a T code individually will prompt the system to adjust the linked account and T codes accordingly.
### Validation and Error Handling
* The system verifies the compatibility of the main account and Tcodes combinations. Any discrepancies will trigger a validation message, ensuring data accuracy.
## Stock Usage with British Accounting System Integration
### Accessing Stock Usage
* System Requirements: Ensure the British Accounting System is enabled in your back office.
* Navigation: Go to the Stock Usage section in the back office to start the process.
* [**Back Office → Accounts Payable → Stock Usage → Add New**](https://manage.kwentra.com/income/receivefromvendor/)
### Updated Stock Usage Screen
When the British system is active, the Stock Usage screen will include additional fields for enhanced accounting precision:
1. Main Account Selection:
* The account field becomes read-only.
* A new 'Main Account' field is added, which uses a single select and autocomplete feature, drawing values from the main account model.
2. Tcode Fields Addition:
* Five Tcode fields are introduced, each with a single select and autocomplete functionality, allowing for detailed analysis code selection.
### Process Workflow
* Creating a New Stock Usage:
* If using account numbers, the system automatically associates the relevant main account and Tcodes.
* Conversely, selecting a main account and Tcodes will prompt the system to link the appropriate account.
* Editing Stock Usage:
* Removing an account will automatically clear associated main accounts and Tcodes.
* Deleting a main account or a T code individually will prompt the system to adjust the linked account and T codes accordingly.
### Validation and Error Handling
* The system verifies the compatibility of the main account and Tcodes combinations. Any discrepancies will trigger a validation message, ensuring data accuracy.
## 1st if April - Automatic Vendor Account Configuration in British Backoffice System
## Overview
This guide provides instructions on how to automatically create Main accounts and T3 Analysis codes when adding a new vendor with a parent account in the British Backoffice system. This feature is designed to streamline operations by reducing manual data entry, thereby enhancing user experience and efficiency.
## Prerequisites
* Access rights to `BackOffice → Settings → Add and Edit Vendor`.
* Existing parent account (e.g., "payable trade") setup.
### Steps for Creating a Vendor after the update
1. Navigate to Vendor Settings:
* Go to `BackOffice → Settings → Add and Edit Vendor`.
2. Create a New Vendor:
* Input the vendor code (e.g., `V123`) and description (e.g., `Food Vendor`).
* The system will perform checks to ensure both the vendor code and name are unique. If the vendor code corresponds to an existing T3 Analysis code, the system will prompt for a different code.
3. Automatic Account and Code Generation:
* Upon successful validation, the system will:
* Link the Main account of the parent account (e.g., `Payple Trade`) to the new vendor account.
* Create a new T3 Analysis code:
* Code: Vendor code prefixed with an identifier (e.g., `V123`).
* Description: Vendor name (e.g., `Food Vendor`).
### Additional System Checks and Validation
* Unique Analysis Code: The system will check if the T3 Analysis code already exists. If a duplicate is found, a message will prompt to change the vendor code.
* Character Allowance in Analysis Code: The Analysis code field is configured to accept alphanumeric characters, facilitating unique identifiers.
* Unique Vendor Name Validation: Ensure no other vendor in the system shares the same name to maintain data integrity.
[Read more](/back-office/back-office-settings/how-do-i-add-a-new-vendor-to-the-system)
## Enhancing Room Assignment with Bed Type Display andd Filter in the Room Rack
## Enhanced [Room Rack](https://manage.kwentra.com/frontoffice/#/roomrack) Display
The Room Rack will now feature a "Bed Type" column, which is positioned between the existing "Room Type" and "Rooms" columns.
This column will display the specific bed type for each room, such as "Twin Beds," "King Bed," or "Queen Bed." In instances where a room’s bed type is not specified, the system will show "---" as a placeholder.
### Bed Type Filter for Streamlined Search
A bed-type filter will be introduced to the room search parameters to allow for a more targeted room selection process.
This filter is an autocomplete feild containing all the bed types stored in the system. The list will also include an option ("---") for rooms that lack a defined bed type, ensuring all rooms are searchable regardless of their bed type status.
Note you cannot select ("---") with other bed type
### Importance of Bed Type Data
For Bed Types to be effectively displayed in the Room Rack with their bed type, it's necessary for each room in the system to have a bed type assigned.
Rooms without a bed type will be displayed as "---" in the Bed Type column.
## Importing AP balances as Manual receivings
## Importing AP Balances: A Comprehensive Guide
## Now you can Import AP balances when a client migrates from another system as Manual receiving's
### Accessing the Import Function
The import feature is accessible only during maintenance mode to ensure data integrity and system performance. Limited to staff users, ensuring that sensitive financial data is managed by authorized personnel.
### Navigating to the Import Page
1. Locate the Import Link: In BackOffice, under the 'Account Payable' section, find and click on the "[Import AP balances](https://Manage.kwentra.com/income/receivefromvendor/import/)" link,
2. Page Overview: The import page is equipped with a file selection tool and a help section to guide you through the process.
### Preparing the Data Sheet
Your data sheet should include the following fields:
* Vendor Code: A mandatory field that identifies the vendor. This code must exist in the system for the import to be successful.
* Date: The date of the transaction, adhering to the instance’s date format, and is a required field.
* Receiving Number: An optional field to specify the receiving transaction number.
* JV Code: Required for identifying the associated journal voucher.
* Amount: Represents the transaction value. This float field is mandatory and must be positive.
* Expense Account Number: Required for each transaction, and must be an active account in the system.
* Description: Allows for a brief explanation of the transaction, mirroring the limitations of the manual receiving screen.
* Tax Code: An optional field to include the applicable tax code for the transaction.
**Note: For the Vendor Code, Date, Receiving Number, and JV Code, enter these only once for each Manual Receiving and leave blank in subsequent lines. Amount, Expense Account Number, Description, and Tax Code should be entered on separate lines under each vendor.**
### Important Validation Checks
* Date Restrictions: Ensure the transaction date is not set in the future.
* Active Accounts: Both the vendor and expense accounts must be active for the import to proceed.
* Amount Verification: The transaction amount must be greater than zero.
### Importing the File
Once your data sheet is prepared and validated, upload it via the file selection tool on the import page. The system will process the data, applying the validations as manual receiving entries to ensure accuracy.
### After Import the Manual receiving will be submitted and Its JVs will be posted
## Detailed Profit and Loss Report in the British Accounting System
### Generating the Detailed Profit and Loss Report in the British Accounting System
#### New P\&L Detailed
1. System Requirements: Ensure the British Accounting System is enabled in your back office settings.
2. Accessing Reports: In the back office, navigate to 'Reports', where you will find '[Profit and Loss Detailed](https://manage.kwentra.com/reports/GL/Profit%20and%20Loss%20Detailed/)' as an option.
#### Report Parameters
* Date Selection: Choose the reporting month.
* Department Filtering: Use autocomplete to select analysis codes linked to T0 (Departments).
### Report Columns
Includes Month-to-Date, Year-to-Date, and corresponding last year and budget figures
* The report displays the accounts categorized under Revenue and Expenses with a non-empty T0 field.
* Group these accounts first by Account Type, then by Account Subtype, and finally by T1/Analysis codes.
* Calculate each group's totals and overall department revenue (Revenue minus Expenses per T0).
#### Financial Metrics
* Month-to-Date (MTD): Sum entries in Journal Vouchers (JVs) from the month's start to the report date, matching specific T0 and T1 codes.
* Year-to-Date (YTD): Aggregate entries from the financial year's start to the report date, according to the same T0 and T1 criteria.
#### Percentage:
Any line percentage is the line value over the department's total revenue
If a department has no revenue, the percentage will be calculated over total revenue same as for the department profit
## Important note:
**Any Revenue** or **Expenses** Accounts must have **T0 (Department) for** their balance to be considered in the Profit and Loss Detailed Report.
**Ready to Get Started?**
With Scheduled Room Moves, you can ensure a smooth and flexible experience for your guests while maintaining control over your room inventory.
## Manual Receiving with British Accounting System Integration
### Accessing Manual Receiving
* System Requirements: Ensure the British Accounting System is enabled in your back office.
* Navigation: Go to the manual receiving section in the back office to start the process.
* **[Back Office → Accounts Payable → Manual Receiving → Add New](https://manage.kwentra.com/income/receivefromvendor/)**
### Updated Manual Receiving Screen
When the British system is active, the manual receiving screen will include additional fields for enhanced accounting precision:
1. Main Account Selection:
* The account field becomes read-only.
* A new 'Main Account' field is added, which uses a single select and autocomplete feature, drawing values from the main account model.
2. Tcode Fields Addition:
* Five Tcode fields are introduced, each with a single select and autocomplete functionality, allowing for detailed analysis code selection.
### Process Workflow
* Creating a New Manual Receiving:
* If using account numbers, the system automatically associates the relevant main account and Tcodes.
* Conversely, selecting a main account and Tcodes will prompt the system to link the appropriate account.
* Editing Manual Receiving:
* Removing an account will automatically clear associated main accounts and Tcodes.
* Deleting a main account or a T code individually will prompt the system to adjust the linked account and T codes accordingly.
### Validation and Error Handling
* The system verifies the compatibility of the main account and Tcodes combinations. Any discrepancies will trigger a validation message, ensuring data accuracy.
## Stock Usage with British Accounting System Integration
### Accessing Stock Usage
* System Requirements: Ensure the British Accounting System is enabled in your back office.
* Navigation: Go to the Stock Usage section in the back office to start the process.
* [**Back Office → Accounts Payable → Stock Usage → Add New**](https://manage.kwentra.com/income/receivefromvendor/)
### Updated Stock Usage Screen
When the British system is active, the Stock Usage screen will include additional fields for enhanced accounting precision:
1. Main Account Selection:
* The account field becomes read-only.
* A new 'Main Account' field is added, which uses a single select and autocomplete feature, drawing values from the main account model.
2. Tcode Fields Addition:
* Five Tcode fields are introduced, each with a single select and autocomplete functionality, allowing for detailed analysis code selection.
### Process Workflow
* Creating a New Stock Usage:
* If using account numbers, the system automatically associates the relevant main account and Tcodes.
* Conversely, selecting a main account and Tcodes will prompt the system to link the appropriate account.
* Editing Stock Usage:
* Removing an account will automatically clear associated main accounts and Tcodes.
* Deleting a main account or a T code individually will prompt the system to adjust the linked account and T codes accordingly.
### Validation and Error Handling
* The system verifies the compatibility of the main account and Tcodes combinations. Any discrepancies will trigger a validation message, ensuring data accuracy.
## 1st if April - Automatic Vendor Account Configuration in British Backoffice System
## Overview
This guide provides instructions on how to automatically create Main accounts and T3 Analysis codes when adding a new vendor with a parent account in the British Backoffice system. This feature is designed to streamline operations by reducing manual data entry, thereby enhancing user experience and efficiency.
## Prerequisites
* Access rights to `BackOffice → Settings → Add and Edit Vendor`.
* Existing parent account (e.g., "payable trade") setup.
### Steps for Creating a Vendor after the update
1. Navigate to Vendor Settings:
* Go to `BackOffice → Settings → Add and Edit Vendor`.
2. Create a New Vendor:
* Input the vendor code (e.g., `V123`) and description (e.g., `Food Vendor`).
* The system will perform checks to ensure both the vendor code and name are unique. If the vendor code corresponds to an existing T3 Analysis code, the system will prompt for a different code.
3. Automatic Account and Code Generation:
* Upon successful validation, the system will:
* Link the Main account of the parent account (e.g., `Payple Trade`) to the new vendor account.
* Create a new T3 Analysis code:
* Code: Vendor code prefixed with an identifier (e.g., `V123`).
* Description: Vendor name (e.g., `Food Vendor`).
### Additional System Checks and Validation
* Unique Analysis Code: The system will check if the T3 Analysis code already exists. If a duplicate is found, a message will prompt to change the vendor code.
* Character Allowance in Analysis Code: The Analysis code field is configured to accept alphanumeric characters, facilitating unique identifiers.
* Unique Vendor Name Validation: Ensure no other vendor in the system shares the same name to maintain data integrity.
[Read more](/back-office/back-office-settings/how-do-i-add-a-new-vendor-to-the-system)
## Enhancing Room Assignment with Bed Type Display andd Filter in the Room Rack
## Enhanced [Room Rack](https://manage.kwentra.com/frontoffice/#/roomrack) Display
The Room Rack will now feature a "Bed Type" column, which is positioned between the existing "Room Type" and "Rooms" columns.
This column will display the specific bed type for each room, such as "Twin Beds," "King Bed," or "Queen Bed." In instances where a room’s bed type is not specified, the system will show "---" as a placeholder.
### Bed Type Filter for Streamlined Search
A bed-type filter will be introduced to the room search parameters to allow for a more targeted room selection process.
This filter is an autocomplete feild containing all the bed types stored in the system. The list will also include an option ("---") for rooms that lack a defined bed type, ensuring all rooms are searchable regardless of their bed type status.
Note you cannot select ("---") with other bed type
### Importance of Bed Type Data
For Bed Types to be effectively displayed in the Room Rack with their bed type, it's necessary for each room in the system to have a bed type assigned.
Rooms without a bed type will be displayed as "---" in the Bed Type column.
## Importing AP balances as Manual receivings
## Importing AP Balances: A Comprehensive Guide
## Now you can Import AP balances when a client migrates from another system as Manual receiving's
### Accessing the Import Function
The import feature is accessible only during maintenance mode to ensure data integrity and system performance. Limited to staff users, ensuring that sensitive financial data is managed by authorized personnel.
### Navigating to the Import Page
1. Locate the Import Link: In BackOffice, under the 'Account Payable' section, find and click on the "[Import AP balances](https://Manage.kwentra.com/income/receivefromvendor/import/)" link,
2. Page Overview: The import page is equipped with a file selection tool and a help section to guide you through the process.
### Preparing the Data Sheet
Your data sheet should include the following fields:
* Vendor Code: A mandatory field that identifies the vendor. This code must exist in the system for the import to be successful.
* Date: The date of the transaction, adhering to the instance’s date format, and is a required field.
* Receiving Number: An optional field to specify the receiving transaction number.
* JV Code: Required for identifying the associated journal voucher.
* Amount: Represents the transaction value. This float field is mandatory and must be positive.
* Expense Account Number: Required for each transaction, and must be an active account in the system.
* Description: Allows for a brief explanation of the transaction, mirroring the limitations of the manual receiving screen.
* Tax Code: An optional field to include the applicable tax code for the transaction.
**Note: For the Vendor Code, Date, Receiving Number, and JV Code, enter these only once for each Manual Receiving and leave blank in subsequent lines. Amount, Expense Account Number, Description, and Tax Code should be entered on separate lines under each vendor.**
### Important Validation Checks
* Date Restrictions: Ensure the transaction date is not set in the future.
* Active Accounts: Both the vendor and expense accounts must be active for the import to proceed.
* Amount Verification: The transaction amount must be greater than zero.
### Importing the File
Once your data sheet is prepared and validated, upload it via the file selection tool on the import page. The system will process the data, applying the validations as manual receiving entries to ensure accuracy.
### After Import the Manual receiving will be submitted and Its JVs will be posted
## Detailed Profit and Loss Report in the British Accounting System
### Generating the Detailed Profit and Loss Report in the British Accounting System
#### New P\&L Detailed
1. System Requirements: Ensure the British Accounting System is enabled in your back office settings.
2. Accessing Reports: In the back office, navigate to 'Reports', where you will find '[Profit and Loss Detailed](https://manage.kwentra.com/reports/GL/Profit%20and%20Loss%20Detailed/)' as an option.
#### Report Parameters
* Date Selection: Choose the reporting month.
* Department Filtering: Use autocomplete to select analysis codes linked to T0 (Departments).
### Report Columns
Includes Month-to-Date, Year-to-Date, and corresponding last year and budget figures
* The report displays the accounts categorized under Revenue and Expenses with a non-empty T0 field.
* Group these accounts first by Account Type, then by Account Subtype, and finally by T1/Analysis codes.
* Calculate each group's totals and overall department revenue (Revenue minus Expenses per T0).
#### Financial Metrics
* Month-to-Date (MTD): Sum entries in Journal Vouchers (JVs) from the month's start to the report date, matching specific T0 and T1 codes.
* Year-to-Date (YTD): Aggregate entries from the financial year's start to the report date, according to the same T0 and T1 criteria.
#### Percentage:
Any line percentage is the line value over the department's total revenue
If a department has no revenue, the percentage will be calculated over total revenue same as for the department profit
## Important note:
**Any Revenue** or **Expenses** Accounts must have **T0 (Department) for** their balance to be considered in the Profit and Loss Detailed Report.
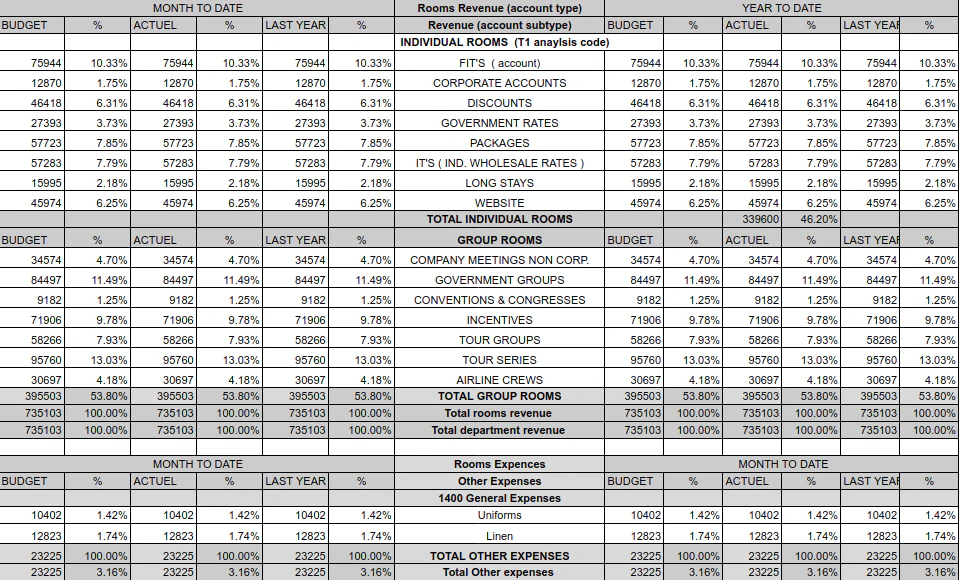 [Read more](/back-office/bo-reports/profit-and-loss-detailed-report)
## Profit and Loss Summary in the British Accounting System
## Profit and Loss Summary in the British Accounting System
## New P\&L Summary
1. System Requirements: Ensure the British Accounting System is enabled in your Backoffice settings.
2. Accessing Reports: In the Backoffice, navigate to 'Reports', where you will now find '[Profit and Loss summary](https://manage.kwentra.com/reports/GL/Profit%20and%20Loss%20Summary/)' as an option.
## British Accounting Profit and Loss Summary Structure
* Date Selection: Mandatory for report generation, ensuring the selected date does not exceed the audit date.
* Report Columns: Includes Month-to-Date, Year-to-Date, and corresponding last year and budget figures
## Report Sections
1. Revenue and Expenses:
* Displays revenue and expenses, sorted by T0 analysis codes (departments) and subtypes.
* Example: Rooms Revenue is calculated from JVs within the set period, classified under T0 = rooms and subtype = Revenue.
* Note also that only T0s (departments with revenue accounts will appear in this part )
2. Department Profit:
* Shows the profit for each department by subtracting department expenses from department revenue
* Note also that only T0s (departments with revenue accounts will appear in this part )
3. Overhead Expenses (O/H):
* Lists all the departments (T0) not associated with revenue accounts,
* Example: Sales and marketing expenses are shown for accounts with no T0 code but categorized under the relevant subtype.
4. Gross Operating Profit (GOP):
* Calculated by subtracting total expenses from total revenue
5. GOP Deductions:
* Represents accounts marked as deductions in the financial settings, shown individually and sorted by account number.
6. Net Operating Profit (NOP):
* Derived from the GOP minus total deductions.
## Important note:
**Any Revenue** or **Expenses** Accounts must have **T0 (Department) for** its balance to be considered in the Profit and Loss Summary Report.
### Example:
[Read more](/back-office/bo-reports/profit-and-loss-detailed-report)
## Profit and Loss Summary in the British Accounting System
## Profit and Loss Summary in the British Accounting System
## New P\&L Summary
1. System Requirements: Ensure the British Accounting System is enabled in your Backoffice settings.
2. Accessing Reports: In the Backoffice, navigate to 'Reports', where you will now find '[Profit and Loss summary](https://manage.kwentra.com/reports/GL/Profit%20and%20Loss%20Summary/)' as an option.
## British Accounting Profit and Loss Summary Structure
* Date Selection: Mandatory for report generation, ensuring the selected date does not exceed the audit date.
* Report Columns: Includes Month-to-Date, Year-to-Date, and corresponding last year and budget figures
## Report Sections
1. Revenue and Expenses:
* Displays revenue and expenses, sorted by T0 analysis codes (departments) and subtypes.
* Example: Rooms Revenue is calculated from JVs within the set period, classified under T0 = rooms and subtype = Revenue.
* Note also that only T0s (departments with revenue accounts will appear in this part )
2. Department Profit:
* Shows the profit for each department by subtracting department expenses from department revenue
* Note also that only T0s (departments with revenue accounts will appear in this part )
3. Overhead Expenses (O/H):
* Lists all the departments (T0) not associated with revenue accounts,
* Example: Sales and marketing expenses are shown for accounts with no T0 code but categorized under the relevant subtype.
4. Gross Operating Profit (GOP):
* Calculated by subtracting total expenses from total revenue
5. GOP Deductions:
* Represents accounts marked as deductions in the financial settings, shown individually and sorted by account number.
6. Net Operating Profit (NOP):
* Derived from the GOP minus total deductions.
## Important note:
**Any Revenue** or **Expenses** Accounts must have **T0 (Department) for** its balance to be considered in the Profit and Loss Summary Report.
### Example:
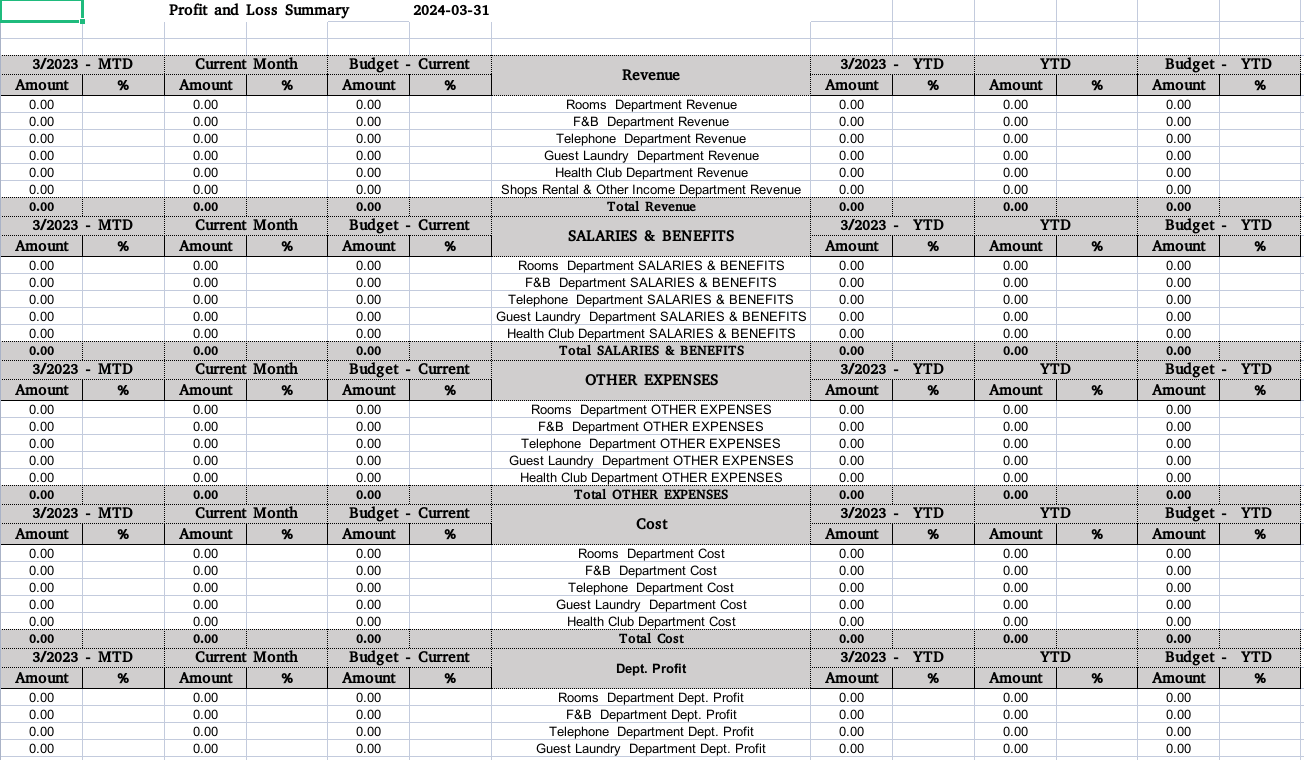 ## Alerts Export Report Functionality
New Feature: You can now export a report that contains all the alerts created in the system for a specific date.
You can access the feature from the [Alerts Listing](https://manage.kwentra.com/frontoffice/#/individualreservation/alerts) screen. Upon selecting a date and clicking "Search", the button "Export Data" is enabled.
## Alerts Export Report Functionality
New Feature: You can now export a report that contains all the alerts created in the system for a specific date.
You can access the feature from the [Alerts Listing](https://manage.kwentra.com/frontoffice/#/individualreservation/alerts) screen. Upon selecting a date and clicking "Search", the button "Export Data" is enabled.
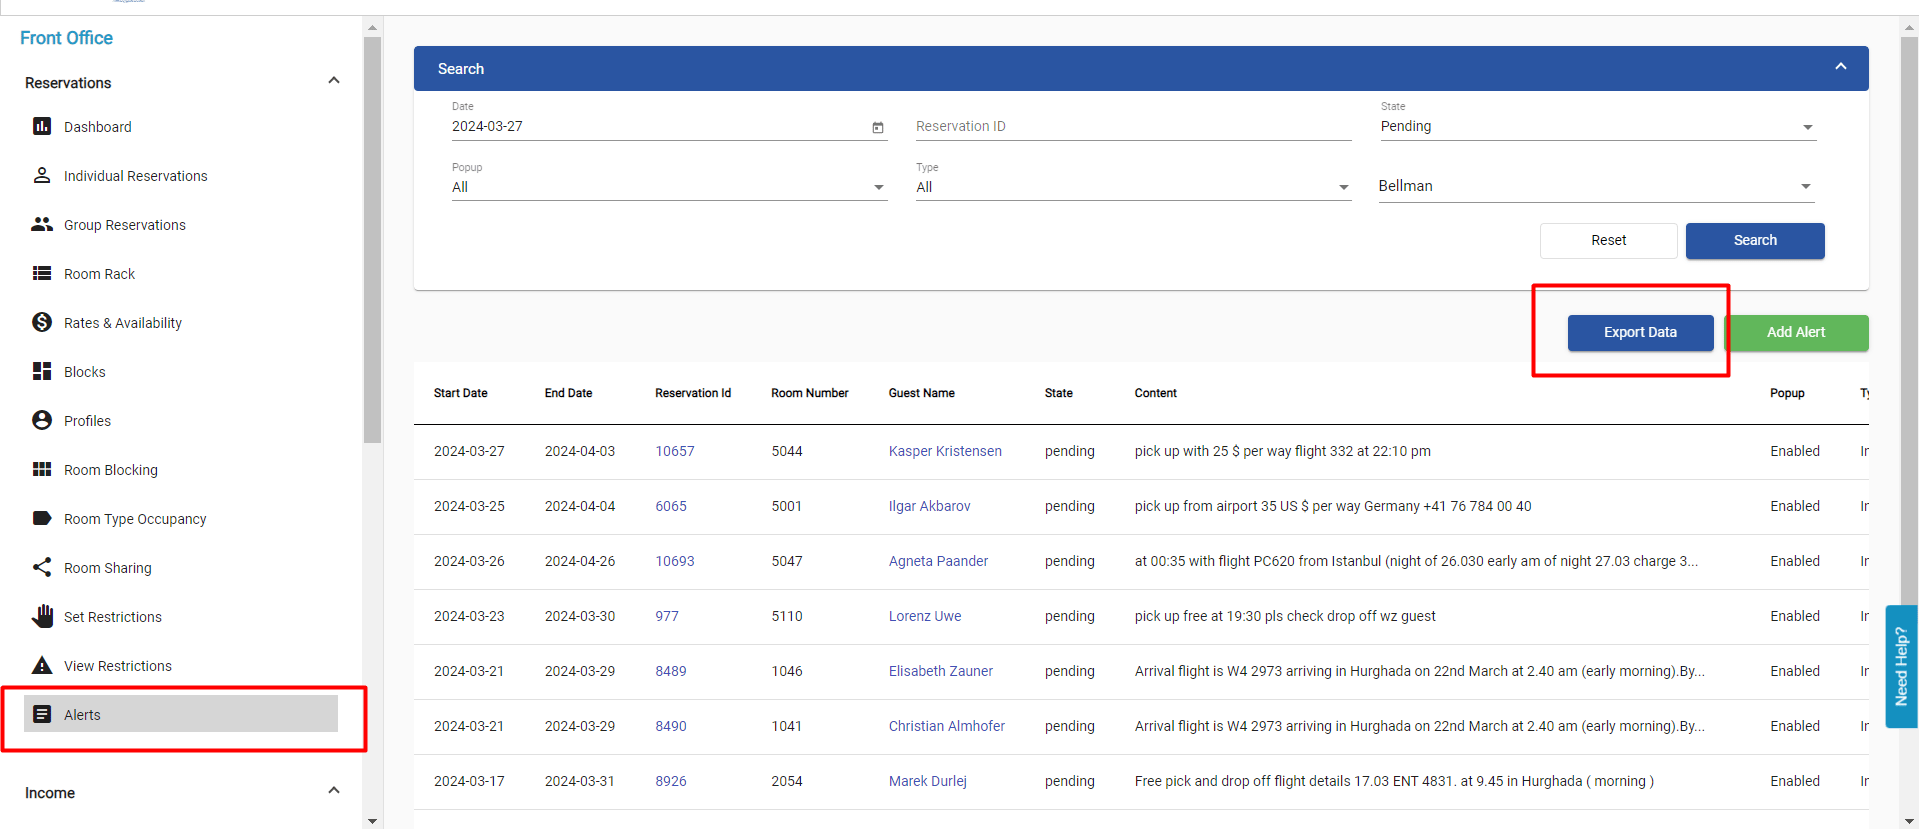 Upon clicking on "Export Data", the system downloads a report in CSV format that has all the alerts for the selected date.
You can also apply filters within the screen before clicking on "Export Data", the data within the report will be the filtered data as displayed within the screen. The report contains all alerts without any paging.
You cannot export the alerts data for more than 1 day. In order to do that you have to download one report for each day.
## Configuring Departments with Main Accounts and Analysis Codes in the British Accounting System
## Configuring Departments with Main Accounts and Analysis Codes in the British Accounting System
### Prerequisites and Access
* System Requirements: This feature is accessible only when the British Accounting System is enabled.
* Navigation: In the Front Office, go to 'Settings' and select '[Departments](https://test.kwentra.com/income/department/)' to access department configurations.
### Modifying Department Definitions
1. Locking the Account Field:
* In the department definition, the standard account field becomes read-only to prevent manual entries, ensuring data consistency and accuracy.
2. Adding Main Account Field:
* Introduce a 'Main Account' field with a single-select option.
* This field should have autocomplete functionality,
3. Incorporating Tcode Fields:
* Added five Tcode fields, each with single-select and autocomplete capabilities.
* These fields are designed to align departmental financial activities with specific transactional codes for financial analysis.
4. Autocomplete and Validation:
* Once the main account and Tcodes are selected, the system will automatically display the corresponding account, confirming a successful match.
*
Upon clicking on "Export Data", the system downloads a report in CSV format that has all the alerts for the selected date.
You can also apply filters within the screen before clicking on "Export Data", the data within the report will be the filtered data as displayed within the screen. The report contains all alerts without any paging.
You cannot export the alerts data for more than 1 day. In order to do that you have to download one report for each day.
## Configuring Departments with Main Accounts and Analysis Codes in the British Accounting System
## Configuring Departments with Main Accounts and Analysis Codes in the British Accounting System
### Prerequisites and Access
* System Requirements: This feature is accessible only when the British Accounting System is enabled.
* Navigation: In the Front Office, go to 'Settings' and select '[Departments](https://test.kwentra.com/income/department/)' to access department configurations.
### Modifying Department Definitions
1. Locking the Account Field:
* In the department definition, the standard account field becomes read-only to prevent manual entries, ensuring data consistency and accuracy.
2. Adding Main Account Field:
* Introduce a 'Main Account' field with a single-select option.
* This field should have autocomplete functionality,
3. Incorporating Tcode Fields:
* Added five Tcode fields, each with single-select and autocomplete capabilities.
* These fields are designed to align departmental financial activities with specific transactional codes for financial analysis.
4. Autocomplete and Validation:
* Once the main account and Tcodes are selected, the system will automatically display the corresponding account, confirming a successful match.
* 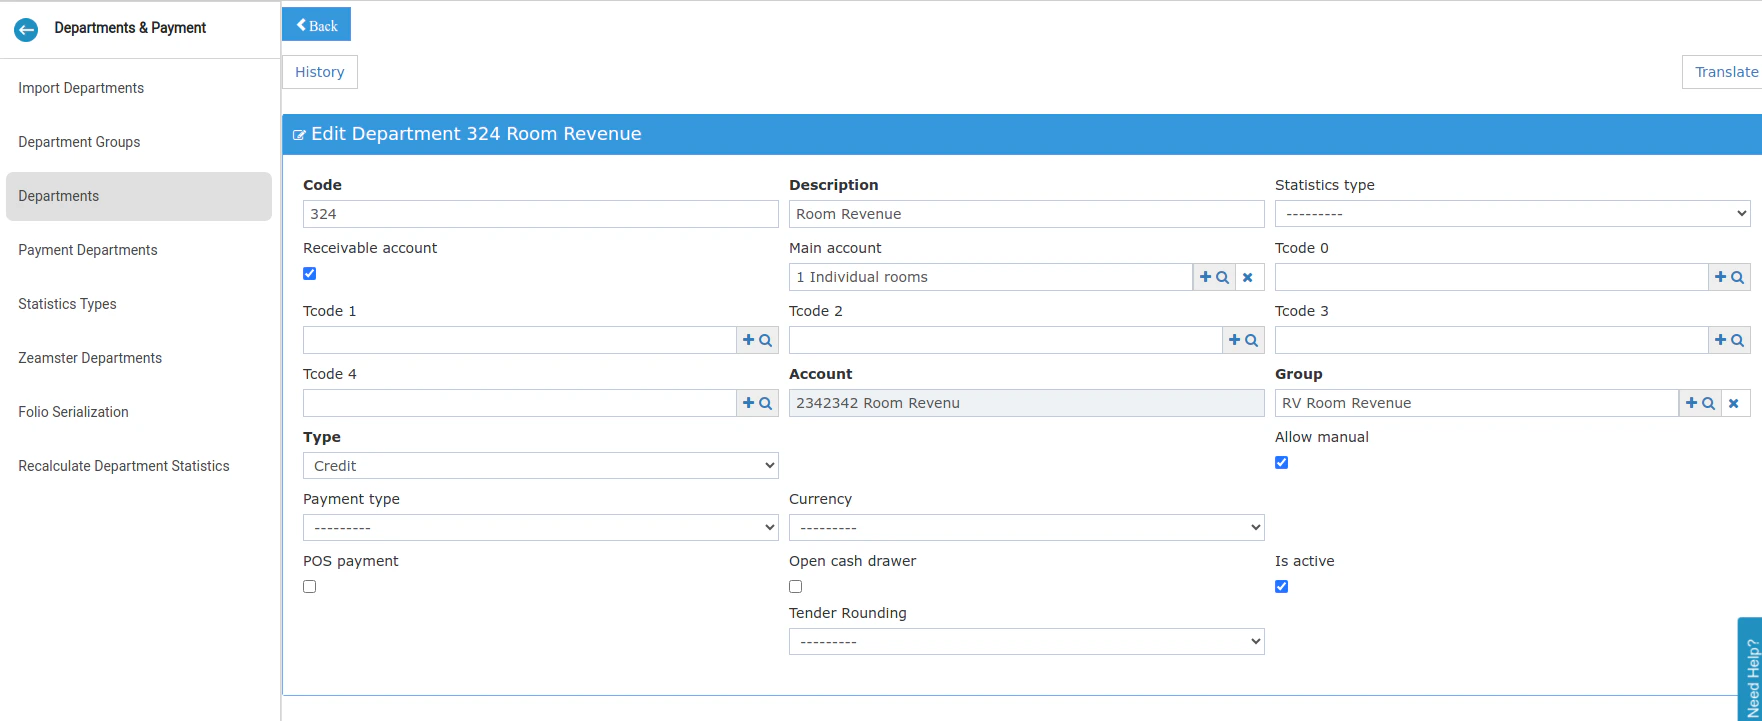 ## Non-Hotel Revenue Filter in the Revenue and Statistics Summary Report
New Report Filter: You can now filter out non-hotel revenue in the Revenue and Statistics Summary report to view KPIs based only on hotel-related income.
\*\*\[Reports > FO > Income > Revenue and Statistics Summary
]\([https://manage.kwentra.com/reports/Income/Revenue%20and%20Statistics%20Summary/](https://manage.kwentra.com/reports/Income/Revenue%20and%20Statistics%20Summary/))\*\*
## Non-Hotel Revenue Filter in the Revenue and Statistics Summary Report
New Report Filter: You can now filter out non-hotel revenue in the Revenue and Statistics Summary report to view KPIs based only on hotel-related income.
\*\*\[Reports > FO > Income > Revenue and Statistics Summary
]\([https://manage.kwentra.com/reports/Income/Revenue%20and%20Statistics%20Summary/](https://manage.kwentra.com/reports/Income/Revenue%20and%20Statistics%20Summary/))\*\*
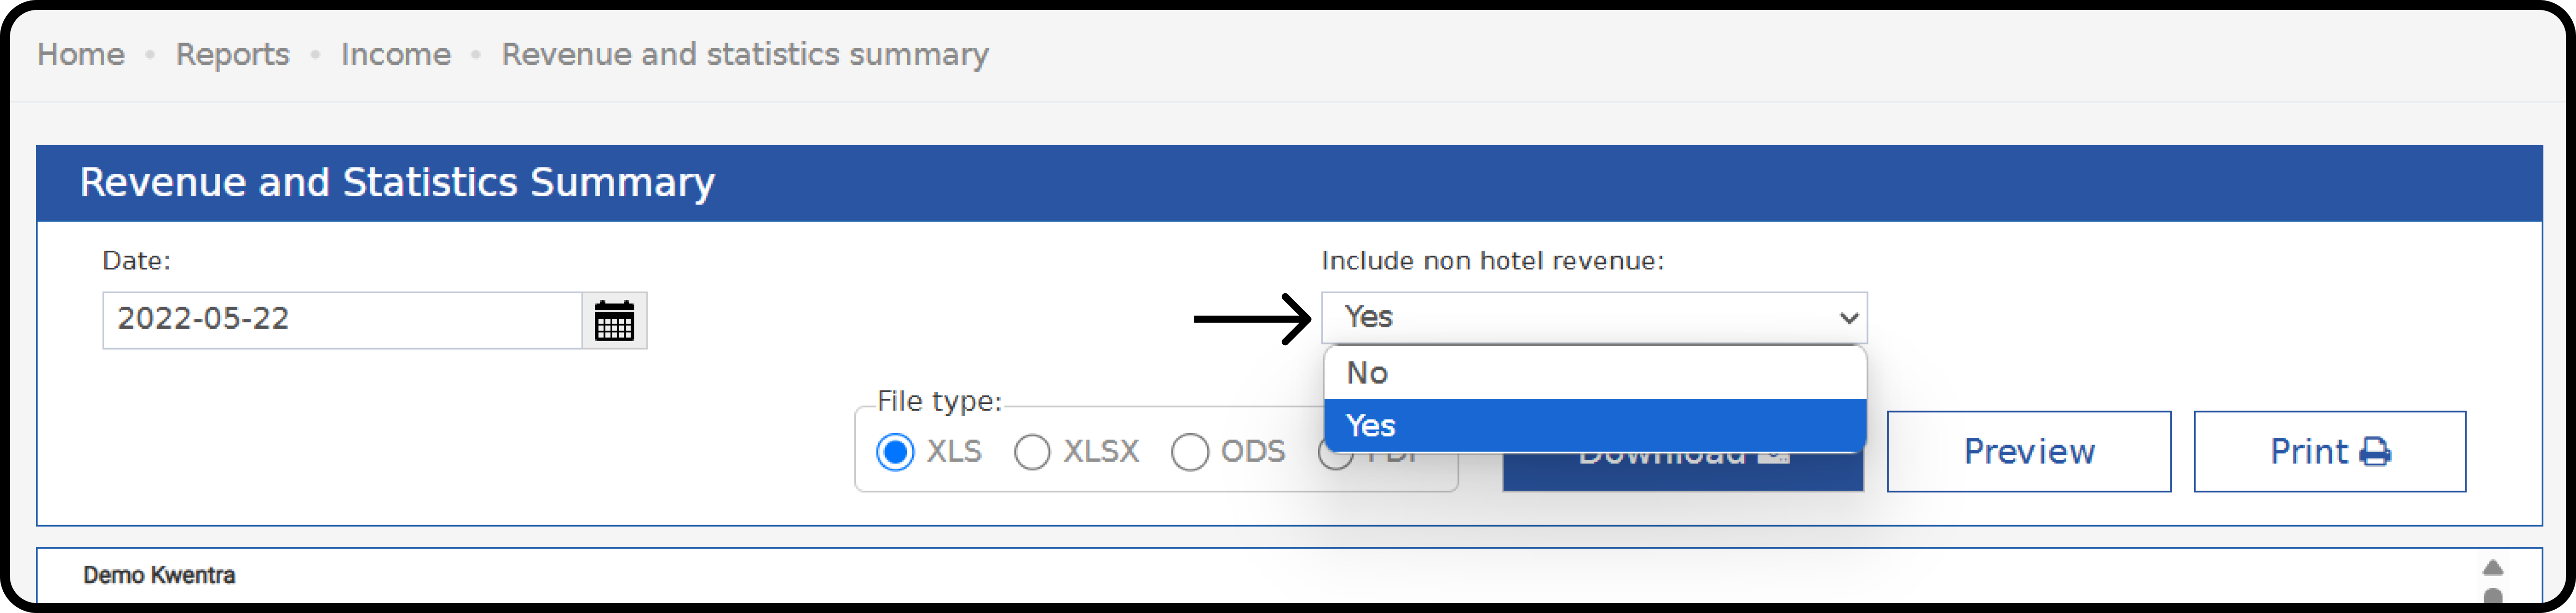 ## P\&L Detailed Report Enhancement "Hijri and Gregorian\\
Report Enhancement: You can now view Total Revenue, Expenses, GOP, and NOP in both the Gregorian and Hijri versions of the Profit and Loss Detailed report, giving a clear view of your financial performance.
**[Reports → Back Office → GL → Profit and Loss](https://manage.kwentra.com/reports/GL/Profit%20and%20Loss/)**
## Block Revenue Forecast on Revenue and Occupancy Statistics Report
New Report Filter: You can now include rated definite-blocks revenue in the **Revenue and Occupancy Statistics** report, so KPIs like **ADR and RevPAR** show a more accurate forecast of your group and hotel revenue.
Rated Definite Blocks are:
* Blocks that are created with the state **definite = affect hotel occupancy.**
* Blocks that include a rate code in its setup.
\*\*\[Reports > FO > Reservation > Revenue and Occupancy statistics
]\([https://manage.kwentra.com/reports/Reservation/Revenue%20and%20Occupancy%20statistics/](https://manage.kwentra.com/reports/Reservation/Revenue%20and%20Occupancy%20statistics/))\*\*
## P\&L Detailed Report Enhancement "Hijri and Gregorian\\
Report Enhancement: You can now view Total Revenue, Expenses, GOP, and NOP in both the Gregorian and Hijri versions of the Profit and Loss Detailed report, giving a clear view of your financial performance.
**[Reports → Back Office → GL → Profit and Loss](https://manage.kwentra.com/reports/GL/Profit%20and%20Loss/)**
## Block Revenue Forecast on Revenue and Occupancy Statistics Report
New Report Filter: You can now include rated definite-blocks revenue in the **Revenue and Occupancy Statistics** report, so KPIs like **ADR and RevPAR** show a more accurate forecast of your group and hotel revenue.
Rated Definite Blocks are:
* Blocks that are created with the state **definite = affect hotel occupancy.**
* Blocks that include a rate code in its setup.
\*\*\[Reports > FO > Reservation > Revenue and Occupancy statistics
]\([https://manage.kwentra.com/reports/Reservation/Revenue%20and%20Occupancy%20statistics/](https://manage.kwentra.com/reports/Reservation/Revenue%20and%20Occupancy%20statistics/))\*\*
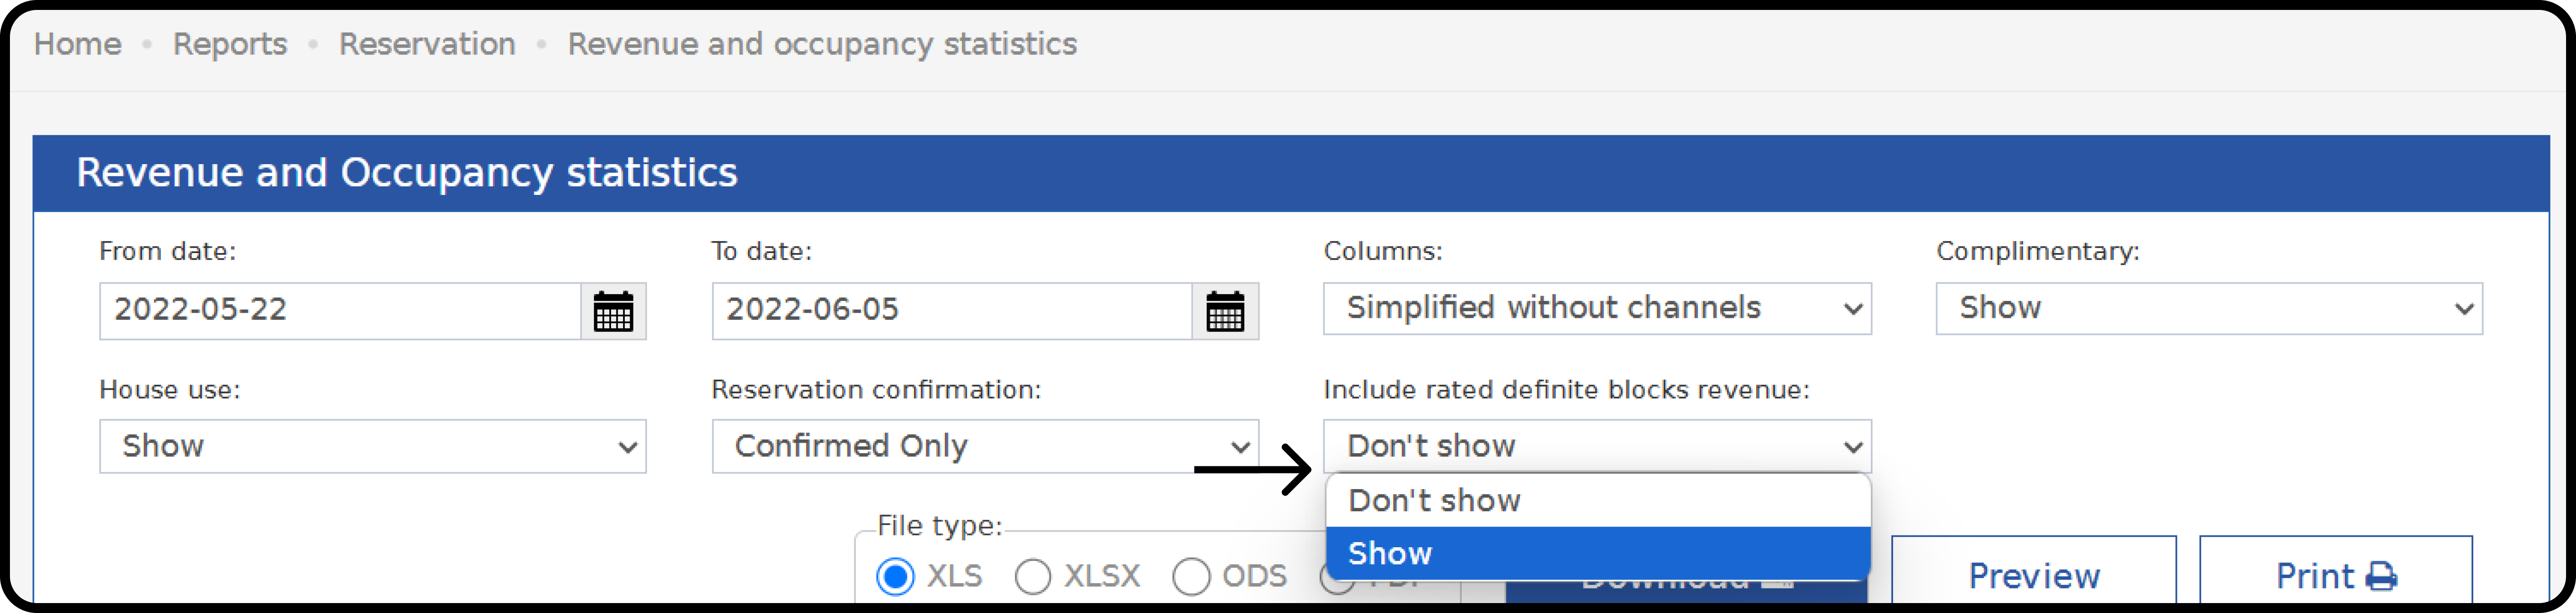 [Read more](/front-office/reports/reservation-reports/revenue-and-occupancy-statistics-report)
## British Accounting System - Export -Import accounts with British system structure
We added the ability to import/export the British Accounting System chart
## Navigate to the import/export Chart of accounts
First, make sure your instance has the British system enabled and is in Maintenance mode and you have staff user
Go to [BackOffice then settings then accounts settings then click on Import chart of accounts](https://manage.kwentra.com/gl/importaccounts/)
### Starting with Export
1. Initiating Export: Begin by exporting your current chart of accounts. This option is found under the "British Accounting System" section in the Back Office.
2. Editing the Exported File: The exported CSV file will contain all the details of your accounts. You can edit this file to update existing accounts or add new ones according to your business needs.
### Preparing Your CSV File for Import
Ensure your CSV file is correctly formatted with the following columns, each tailored to capture specific account details:
* Account ID: Leave blank for new accounts or specify an existing ID for updates. If an ID doesn't match, an error will be flagged.
* Account Number: Includes both numbers and characters. It's crucial and must adhere to the defined limits.
* English & Arabic Descriptions: Text fields, mandatory, matching the character limit in account definitions.
* Account Type: Select from Assets, Liabilities, Equity, Revenue, or Expenses. This is mandatory.
* Account Subtype Code & Description: Integer fields, required. Each code must be distinct and relevant to the account type.
* Main Account Code & Description: Mandatory integer fields, conforming to the Main Account definition limits.
* Parent Account, Control Account, Group Code & Description: Define the account's hierarchy, control status, and group affiliation.
* Family Number & Name: Categorize the account into a family for better organization.
* Analysis Code & Description (T0 - T4): Include up to five dimensions of analysis codes, specifying each with a unique number and description.
* Vendor & Vendor Code, Department Code & Name: Detail the vendor and department linked to the account for comprehensive tracking.
### Rules to Follow While Creating the Import File
Adhering to specific rules ensures the integrity of your imported data:
* Unique Combinations: Main accounts, analysis codes, and dimensions must form unique combinations. For example, "Main Account Code 101" with "T0 Analysis Code 001" should be the only instance of this pairing.
* Subtype Codes: Can only be associated with Revenue and Expenses. For instance, "Subtype Code 200" for "Revenue" cannot also be used for "Expenses".
* Analysis Code Dimensions: Each analysis code is assigned to one dimension only, ensuring accurate categorization. For example, "Analysis Code 300" designated for "T1" cannot appear under "T2".
### Initiating the Import
After editing your CSV file:
1. File Upload: Select your file for uploading through the "British Chart of Accounts Import" page.
2. Begin Import: With your file chosen, hit the "Export" button to commence the import process. Any errors or issues will prompt for your attention.
Remember to consult the help section for detailed explanations of each field requirement and troubleshooting tips.
[Read more](/front-office/reports/reservation-reports/revenue-and-occupancy-statistics-report)
## British Accounting System - Export -Import accounts with British system structure
We added the ability to import/export the British Accounting System chart
## Navigate to the import/export Chart of accounts
First, make sure your instance has the British system enabled and is in Maintenance mode and you have staff user
Go to [BackOffice then settings then accounts settings then click on Import chart of accounts](https://manage.kwentra.com/gl/importaccounts/)
### Starting with Export
1. Initiating Export: Begin by exporting your current chart of accounts. This option is found under the "British Accounting System" section in the Back Office.
2. Editing the Exported File: The exported CSV file will contain all the details of your accounts. You can edit this file to update existing accounts or add new ones according to your business needs.
### Preparing Your CSV File for Import
Ensure your CSV file is correctly formatted with the following columns, each tailored to capture specific account details:
* Account ID: Leave blank for new accounts or specify an existing ID for updates. If an ID doesn't match, an error will be flagged.
* Account Number: Includes both numbers and characters. It's crucial and must adhere to the defined limits.
* English & Arabic Descriptions: Text fields, mandatory, matching the character limit in account definitions.
* Account Type: Select from Assets, Liabilities, Equity, Revenue, or Expenses. This is mandatory.
* Account Subtype Code & Description: Integer fields, required. Each code must be distinct and relevant to the account type.
* Main Account Code & Description: Mandatory integer fields, conforming to the Main Account definition limits.
* Parent Account, Control Account, Group Code & Description: Define the account's hierarchy, control status, and group affiliation.
* Family Number & Name: Categorize the account into a family for better organization.
* Analysis Code & Description (T0 - T4): Include up to five dimensions of analysis codes, specifying each with a unique number and description.
* Vendor & Vendor Code, Department Code & Name: Detail the vendor and department linked to the account for comprehensive tracking.
### Rules to Follow While Creating the Import File
Adhering to specific rules ensures the integrity of your imported data:
* Unique Combinations: Main accounts, analysis codes, and dimensions must form unique combinations. For example, "Main Account Code 101" with "T0 Analysis Code 001" should be the only instance of this pairing.
* Subtype Codes: Can only be associated with Revenue and Expenses. For instance, "Subtype Code 200" for "Revenue" cannot also be used for "Expenses".
* Analysis Code Dimensions: Each analysis code is assigned to one dimension only, ensuring accurate categorization. For example, "Analysis Code 300" designated for "T1" cannot appear under "T2".
### Initiating the Import
After editing your CSV file:
1. File Upload: Select your file for uploading through the "British Chart of Accounts Import" page.
2. Begin Import: With your file chosen, hit the "Export" button to commence the import process. Any errors or issues will prompt for your attention.
Remember to consult the help section for detailed explanations of each field requirement and troubleshooting tips.
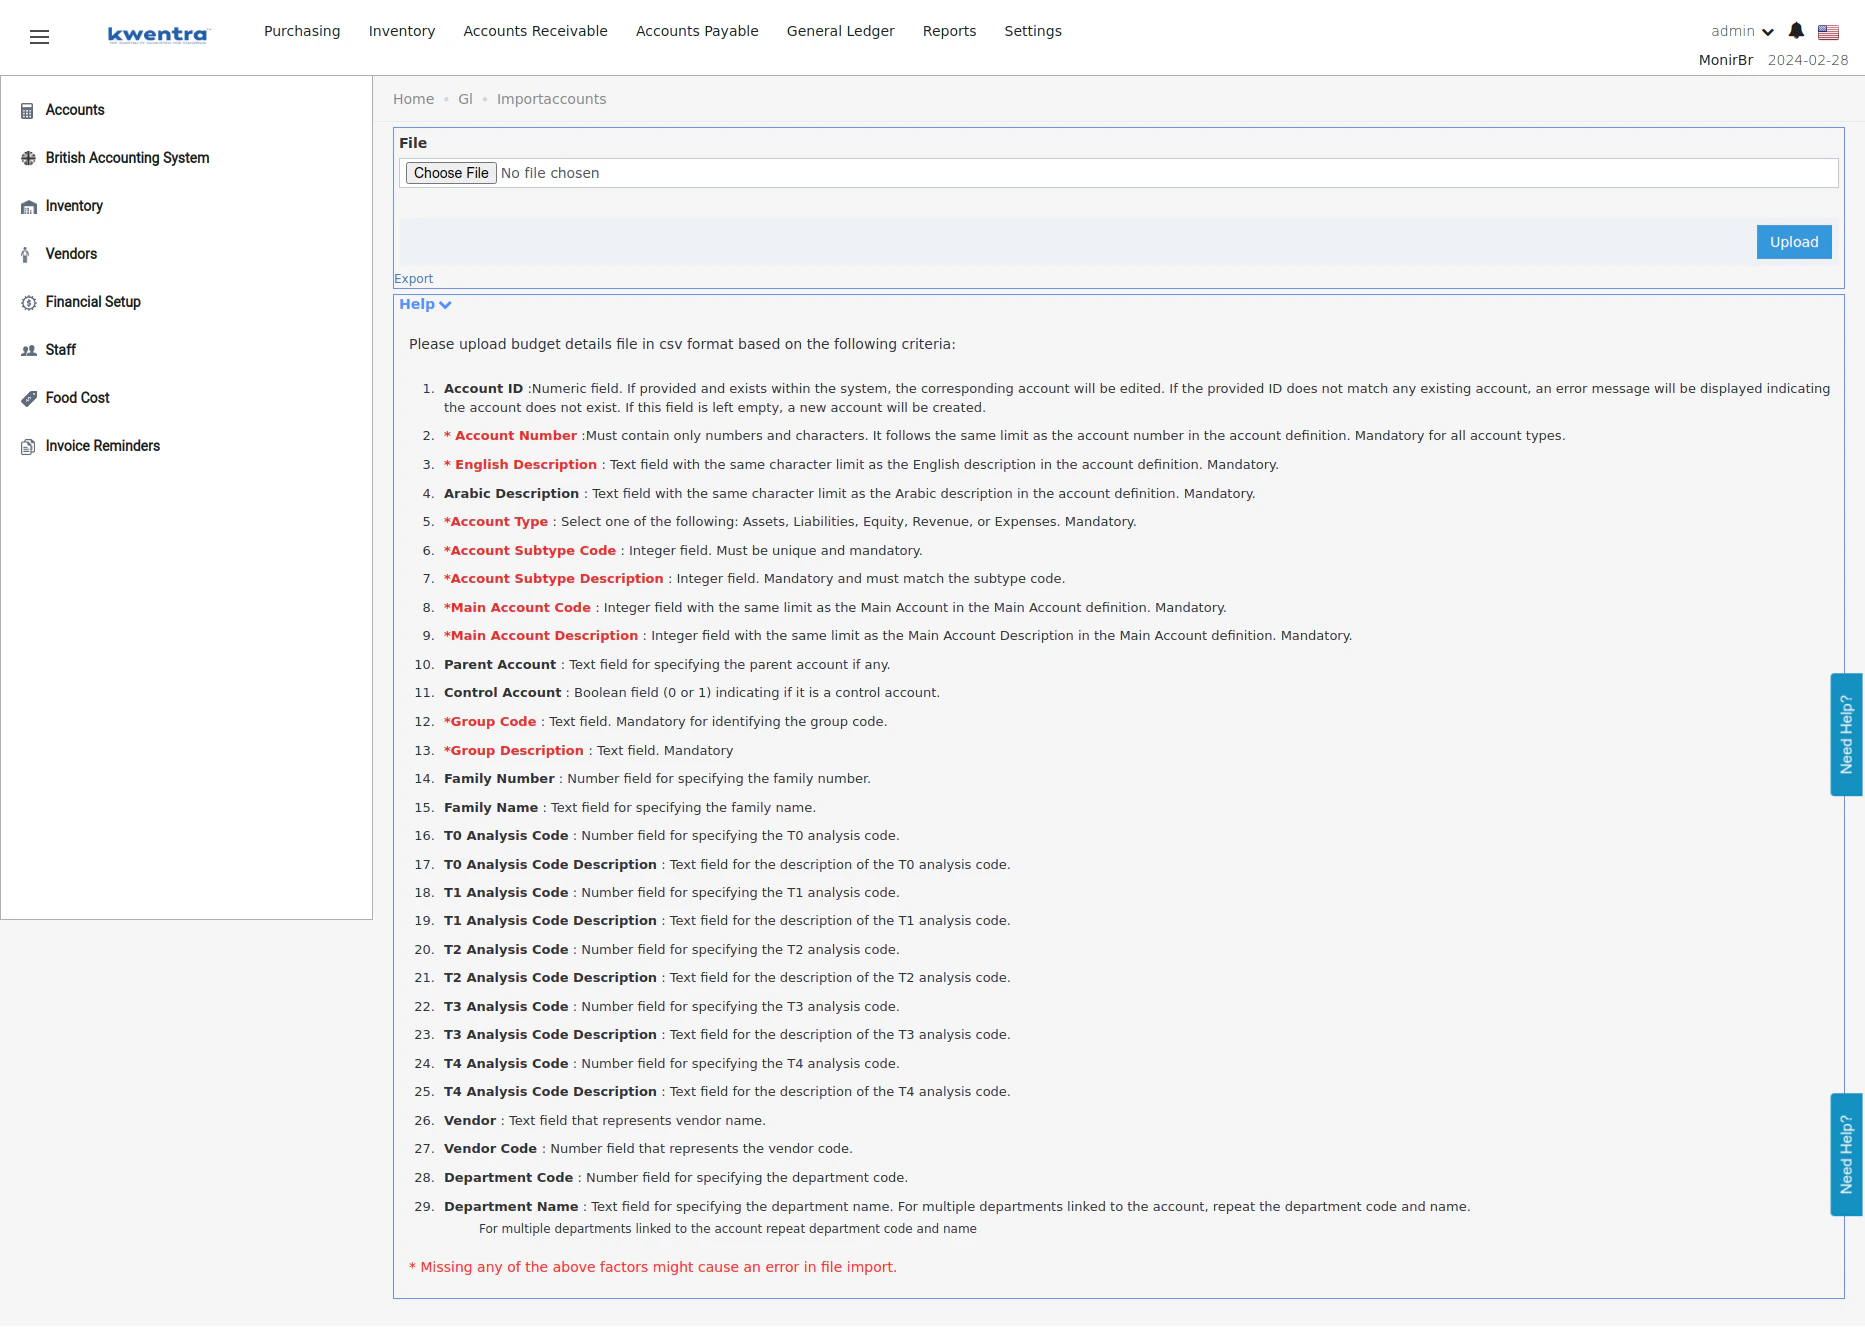 ## Non Count Rooms In manager report
We're excited to introduce a new "Non-Count Rooms" feature that allows you to exclude specific rooms and reservations, \from your manager's reports. This update aims to provide a clearer, more accurate reflection of your operational status and key performance indicators (KPIs).
Quick Guide to Activating the Feature:
1. Navigate to Room Definitions:
* Access the 'Rooms' settings under the Front Office section.
* Select any room that you want to mark as non-count
2. Exclude Specific Rooms:
* Find the “non-count room” checkbox within the room definition options.
* Check this box for any room you wish to exclude from occupancy metrics and other KPIs in the manager's reports.
*
## Non Count Rooms In manager report
We're excited to introduce a new "Non-Count Rooms" feature that allows you to exclude specific rooms and reservations, \from your manager's reports. This update aims to provide a clearer, more accurate reflection of your operational status and key performance indicators (KPIs).
Quick Guide to Activating the Feature:
1. Navigate to Room Definitions:
* Access the 'Rooms' settings under the Front Office section.
* Select any room that you want to mark as non-count
2. Exclude Specific Rooms:
* Find the “non-count room” checkbox within the room definition options.
* Check this box for any room you wish to exclude from occupancy metrics and other KPIs in the manager's reports.
* 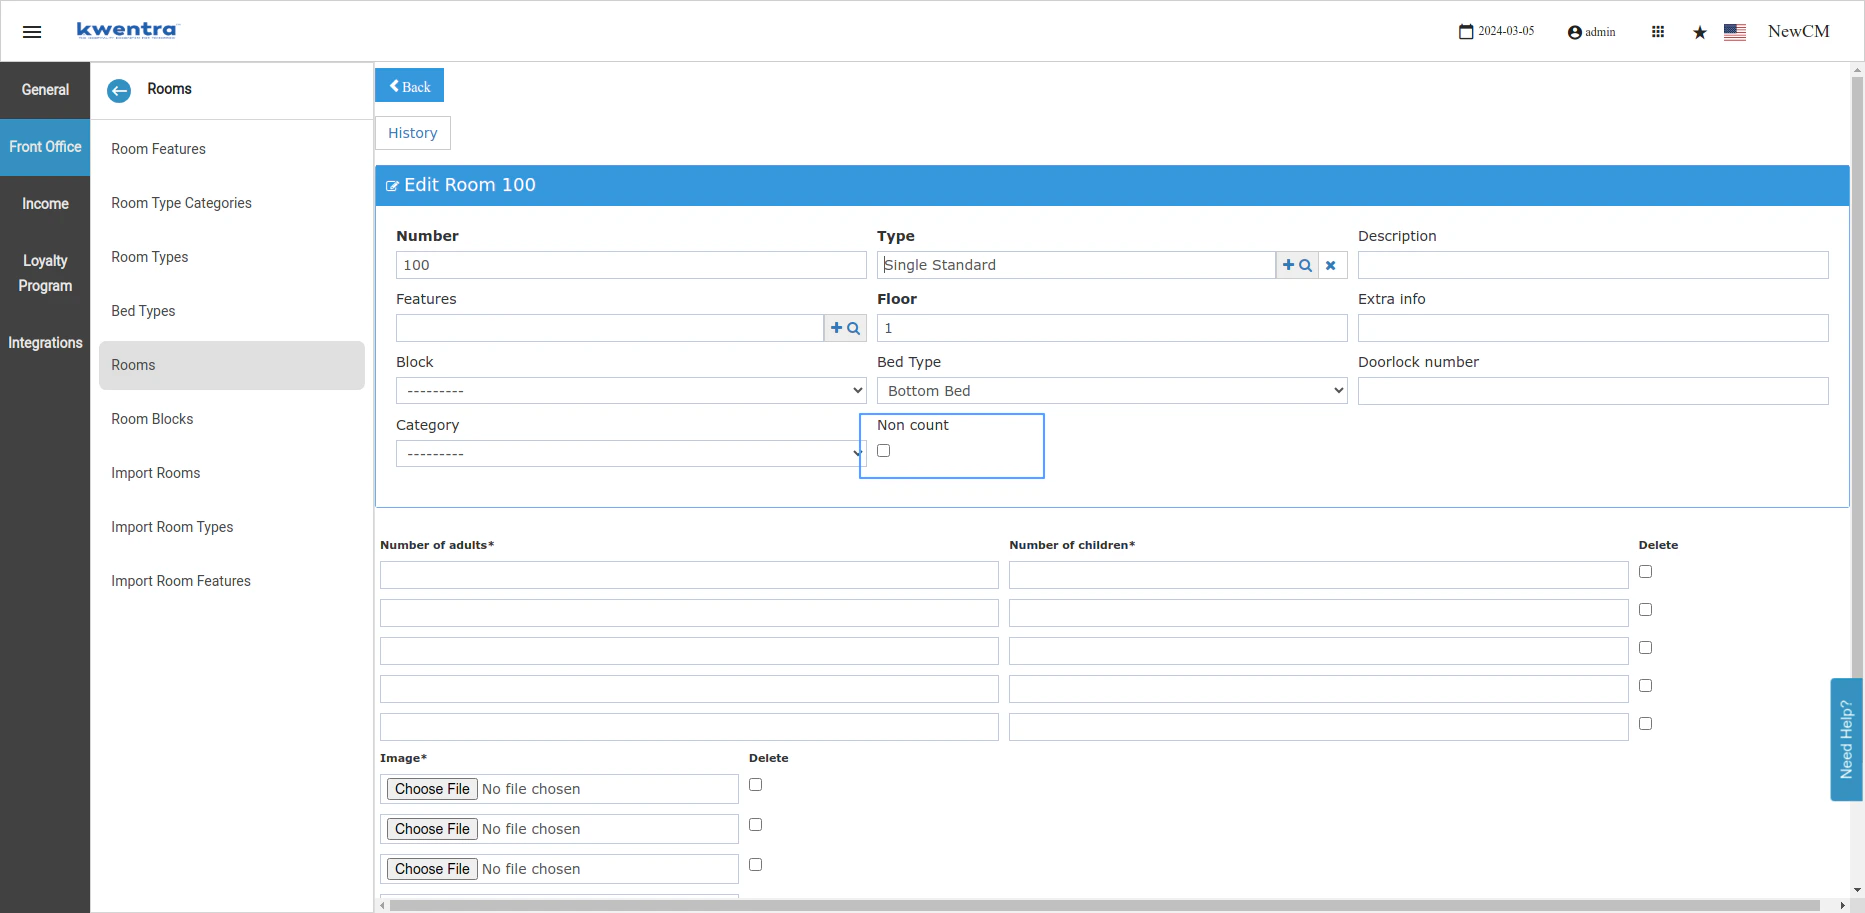 ### Manager Report - Exclude Non-Count Rooms
1. Accessing Manager Report Settings:
* In the reporting section, find and click on the 'Manager Report'.
2. Adjusting Report Settings:
* Look for a new dropdown list labeled “include non-count rooms”.
* Select 'no' to exclude non-count rooms from the report. This will adjust each row in the report to calculate KPIs without considering any guests, rooms, or reservations flagged as non-count. The default setting is 'no' to ensure standard reporting excludes these rooms automatically.
* Alternatively, if you wish to include non-count rooms in your report, simply change this setting to 'yes'.
*
### Manager Report - Exclude Non-Count Rooms
1. Accessing Manager Report Settings:
* In the reporting section, find and click on the 'Manager Report'.
2. Adjusting Report Settings:
* Look for a new dropdown list labeled “include non-count rooms”.
* Select 'no' to exclude non-count rooms from the report. This will adjust each row in the report to calculate KPIs without considering any guests, rooms, or reservations flagged as non-count. The default setting is 'no' to ensure standard reporting excludes these rooms automatically.
* Alternatively, if you wish to include non-count rooms in your report, simply change this setting to 'yes'.
* 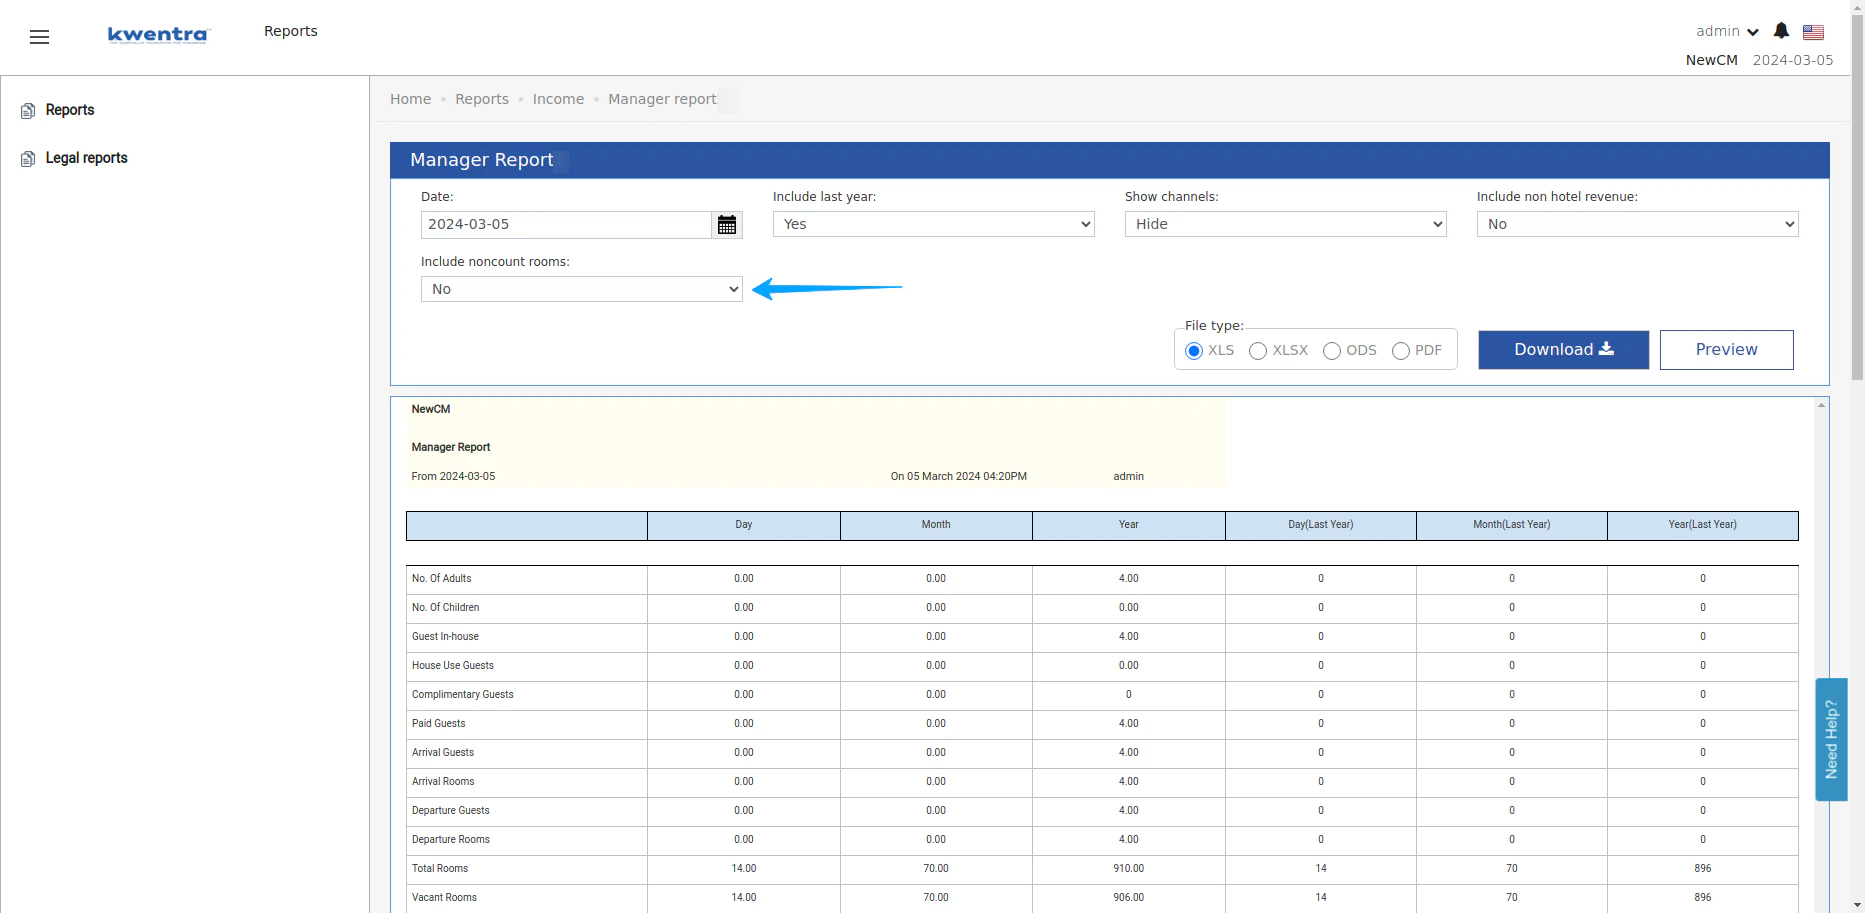 Remember, this feature is now available and can be applied to all rooms in your management system. For any questions or additional support, please contact our customer service team.
## British Accounting System
## Setting Up the British Accounting System on Your Platform
## Step 1: Enabling the British Accounting System
1. Make sure with your account manager that the British system is enabled on your instance
## Step 2: Configuring Main Accounts
[Navigate to Main Account Settings:](https://manage.kwentra.com/gl/mainaccount/add/)
1. Go to Back office, then 'Settings' select 'British Accounting System', then 'Main Accounts'.
Remember, this feature is now available and can be applied to all rooms in your management system. For any questions or additional support, please contact our customer service team.
## British Accounting System
## Setting Up the British Accounting System on Your Platform
## Step 1: Enabling the British Accounting System
1. Make sure with your account manager that the British system is enabled on your instance
## Step 2: Configuring Main Accounts
[Navigate to Main Account Settings:](https://manage.kwentra.com/gl/mainaccount/add/)
1. Go to Back office, then 'Settings' select 'British Accounting System', then 'Main Accounts'.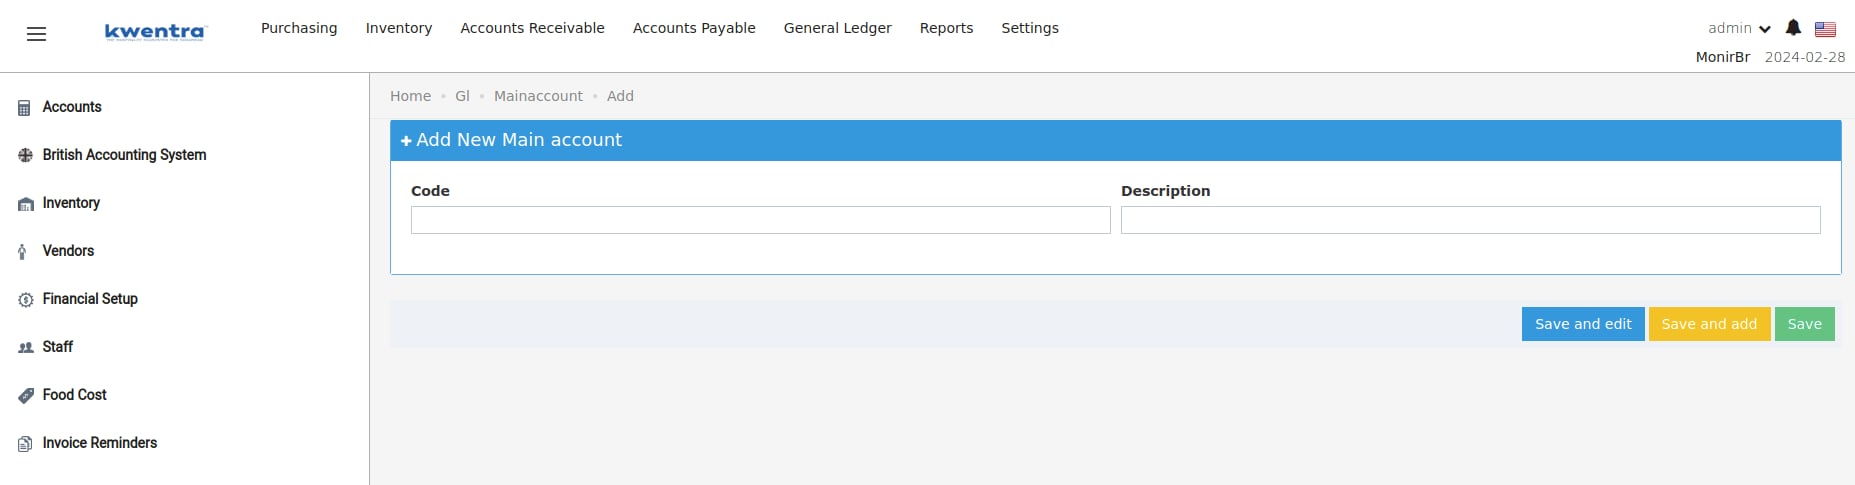 2. The main account represents the first part of the account definition in the British system
3. Adding or Editing Main Accounts:
* Click 'Add New' to create a new account. Enter a unique 'Main Account Code' (up to 15 digits, numbers only) and a 'Main account Description' (up to 100 characters), then save.
* To edit an existing account, search by code or description, click 'Edit', make your changes, and save.
## Step 3: Setting Up Analysis Codes
1. [Access Analysis Codes](https://test.kwentra.com/gl/analysiscode/add/):
* In 'Settings', click 'British Accounting System', then 'Analysis Codes'.
2. Creating and Editing Analysis Codes:
2. The main account represents the first part of the account definition in the British system
3. Adding or Editing Main Accounts:
* Click 'Add New' to create a new account. Enter a unique 'Main Account Code' (up to 15 digits, numbers only) and a 'Main account Description' (up to 100 characters), then save.
* To edit an existing account, search by code or description, click 'Edit', make your changes, and save.
## Step 3: Setting Up Analysis Codes
1. [Access Analysis Codes](https://test.kwentra.com/gl/analysiscode/add/):
* In 'Settings', click 'British Accounting System', then 'Analysis Codes'.
2. Creating and Editing Analysis Codes: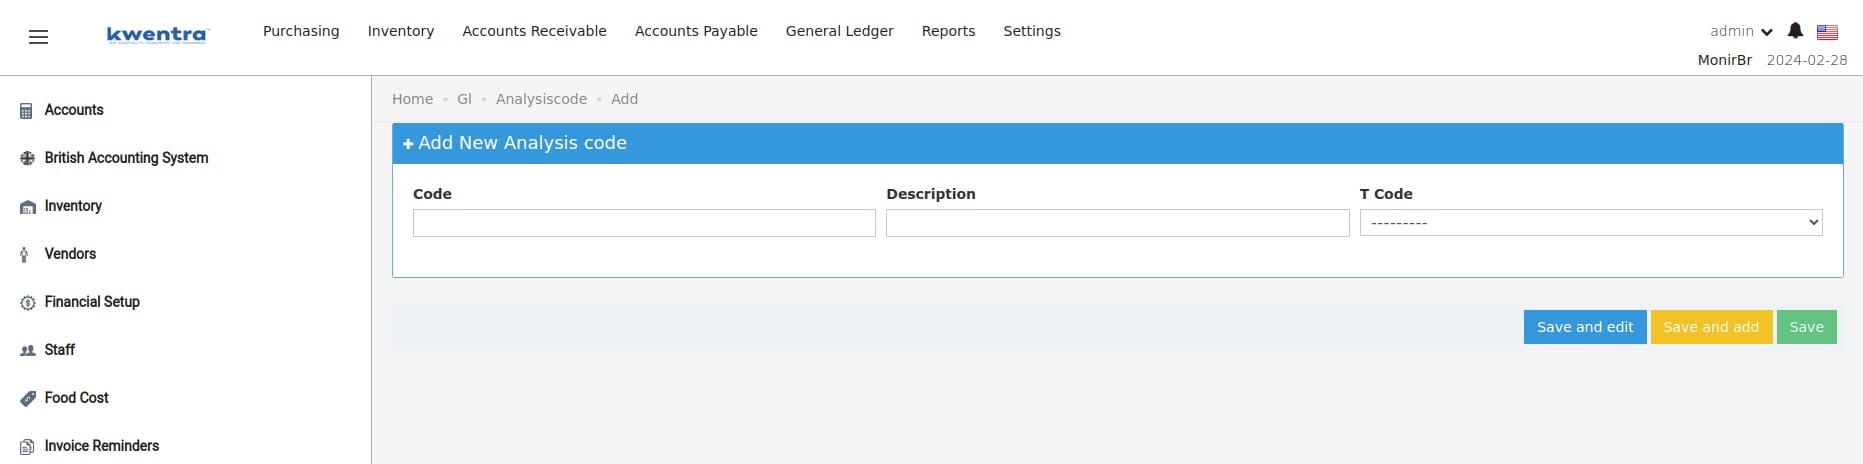 * Click 'Add New' Enter a unique 'Analysis Code' (up to 15 digits, numbers only) and an 'Analysis Code Description' (up to 100 characters),
* In the Tcode field select the dimension that the analysis code will be associated with, the system will remember that the next time you search for the analysis code in each dimension and will not allow any misplaced codes
for example, adding analysis code "200 Rooms" with Tcode:0 as a dimension, in each screen the system will filter the dimensions fields based on the analysis code Tcode so 200 rooms will appear automatically Tcode: 0 but will not be added to Tcode: 1
* For edits, find the code via search, click 'Edit', apply changes, and save.
## Step 4: Adjusting Account Subtypes
1. [Navigate to Account Subtype Settings:](https://manage.kwentra.com/gl/accountsubtype/)
2. Click 'Add New' to create a new Subtype. Enter a unique 'Subtype' (up to 15 digits, numbers only) and a 'SubtypeDescription' (up to 100 characters),
1. Subtype is further customizable categorizations for the account type so you can see the expense accounts in reports split into further categorizations
3. select the type that will include the subtype you are creating now
1. type can only be Expenses or Revenue
4. To edit an existing account, search by code or description, click 'Edit', make your changes, and save.
## **With all that setup done now, you are ready to create your accounts**
Step 5: Adjusting Account Definitions
1. [Navigate to Account Settings](https://manage.kwentra.com/gl/account/add/)
* Click 'Add New' Enter a unique 'Analysis Code' (up to 15 digits, numbers only) and an 'Analysis Code Description' (up to 100 characters),
* In the Tcode field select the dimension that the analysis code will be associated with, the system will remember that the next time you search for the analysis code in each dimension and will not allow any misplaced codes
for example, adding analysis code "200 Rooms" with Tcode:0 as a dimension, in each screen the system will filter the dimensions fields based on the analysis code Tcode so 200 rooms will appear automatically Tcode: 0 but will not be added to Tcode: 1
* For edits, find the code via search, click 'Edit', apply changes, and save.
## Step 4: Adjusting Account Subtypes
1. [Navigate to Account Subtype Settings:](https://manage.kwentra.com/gl/accountsubtype/)
2. Click 'Add New' to create a new Subtype. Enter a unique 'Subtype' (up to 15 digits, numbers only) and a 'SubtypeDescription' (up to 100 characters),
1. Subtype is further customizable categorizations for the account type so you can see the expense accounts in reports split into further categorizations
3. select the type that will include the subtype you are creating now
1. type can only be Expenses or Revenue
4. To edit an existing account, search by code or description, click 'Edit', make your changes, and save.
## **With all that setup done now, you are ready to create your accounts**
Step 5: Adjusting Account Definitions
1. [Navigate to Account Settings](https://manage.kwentra.com/gl/account/add/)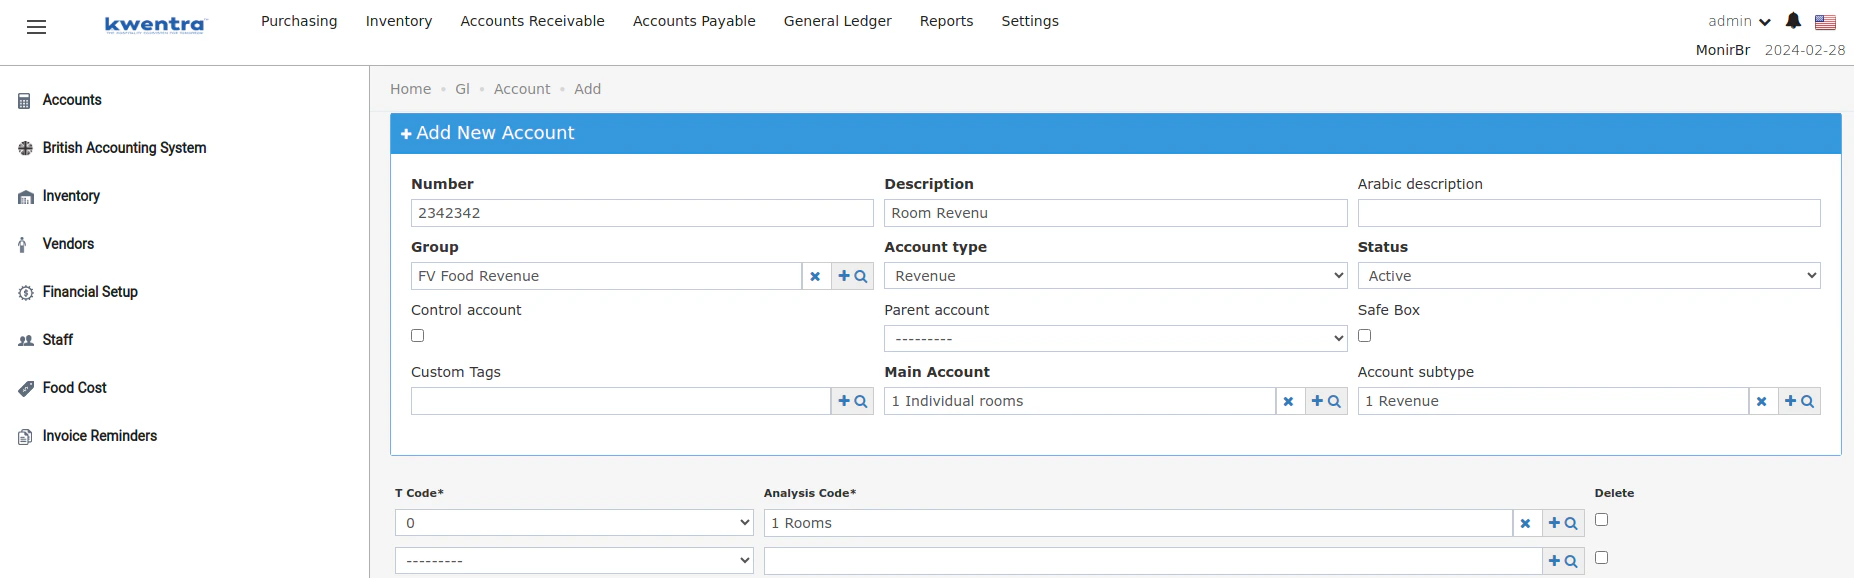
 2. Add the account like you normally would
3. If the British system is on, and the account type is Revenue or Expenses, a new 'Account sub-type' field appears. It should match the account type and is mandatory.
4. Select the main account we just created which is also mandatory
5. Tcodes are optional
## Now after adding all the necessary accounts, let's see how we create JVs in the British system
## Step 5: Updating Journal Vouchers
1. [Navigate to Journal Voucher screen](https://manage.kwentra.com/gl/journalvoucher/1/)
2. Add the account like you normally would
3. If the British system is on, and the account type is Revenue or Expenses, a new 'Account sub-type' field appears. It should match the account type and is mandatory.
4. Select the main account we just created which is also mandatory
5. Tcodes are optional
## Now after adding all the necessary accounts, let's see how we create JVs in the British system
## Step 5: Updating Journal Vouchers
1. [Navigate to Journal Voucher screen](https://manage.kwentra.com/gl/journalvoucher/1/)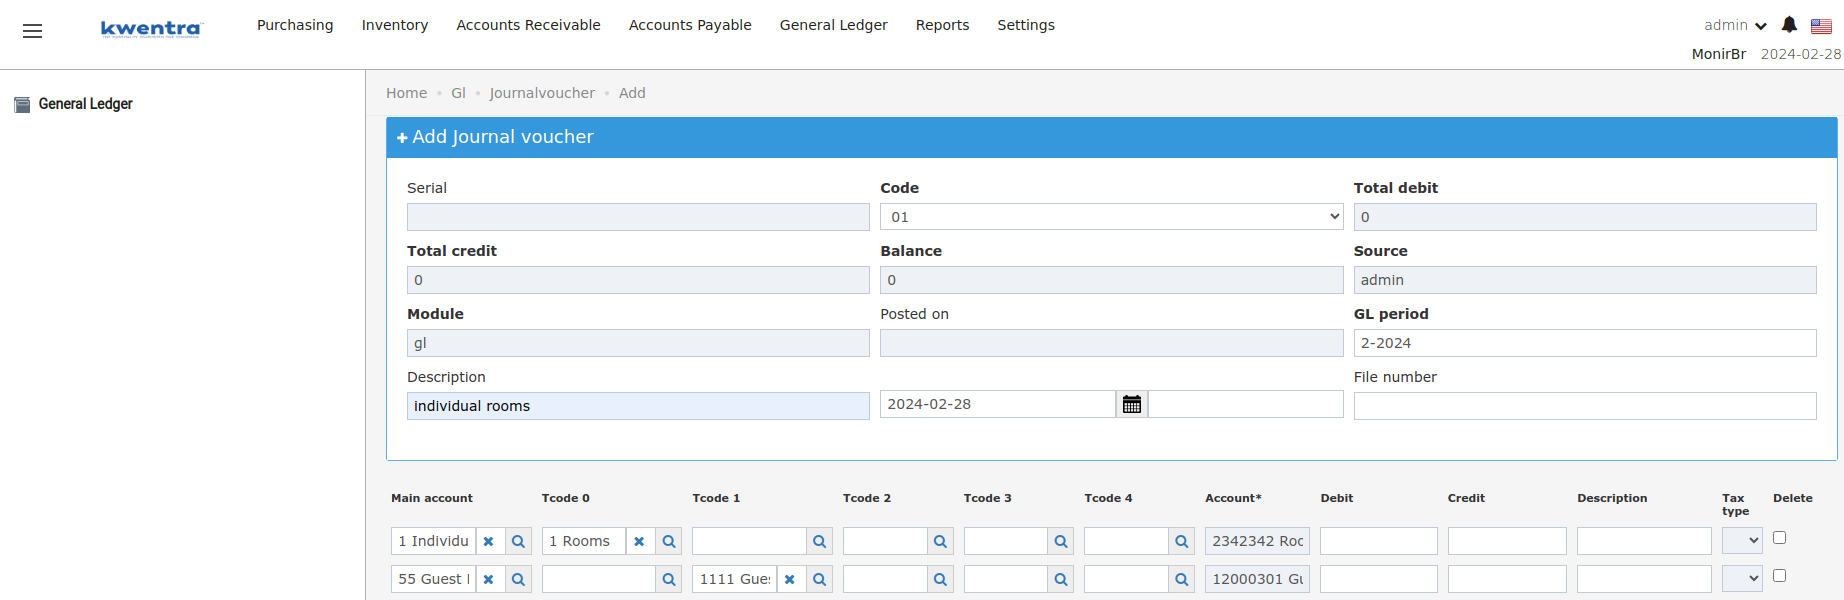 * In the 'Journal Voucher' section, check for the main account and Tcode fields. They should auto-complete based on existing data.
* With the British system active, the account field becomes read-only and will be automatically fielded with the matching account
## Room Type To Charge \[RTC]
**Introducing the New "Room Type Charge" (RTC) Field**
We're excited to announce a new feature in the individual reservation screen to enhance reservation management: the **Room Type Charge (RTC) field**. This field simplifies managing room upgrades and free room type changes while providing clearer information about the final charges.
**What is the RTC field?**
The RTC field, located in the Rate Plan section, displays the room type ultimately used to calculate the reservation's rate. It defaults to the same room type selected in the "Room Type" field. However, you can manually change it to a different room type.

**How does it work?**
* **Initial Setup:**
* The RTC field mirrors the "Room Type" field by default.
* The displayed rate amount reflects the selected room type.
* **Manual Changes:**
* If you manually change the RTC field to a different room type:
* The displayed rate amount adjusts to reflect the selected RTC.
* A "Free Room Type Upgrade is applied" message appears below the Rate Plan section, indicating the guest is charged based on the lower-priced room type.
* If you manually clear the RTC field, it automatically reverts to the "Room Type" upon saving.
* **Free Upgrade Prompt:**
* After saving any changes to the reservation, if the "Room Type" was changed, a free upgrade prompt appears:
* Clicking "Yes" assigns the new room type to "Room Type" field and original room type to "RTC" field, displaying the "Free Room Type Upgrade" message.
* Clicking "No" keeps the new room type in both the "Room Type" and "RTC" fields.
* **Manual Rates:**
* If a manual rate is applied and the RTC differs from the "Room Type", the "Free Room Type Upgrade" message appears.
* Changing either the "Room Type" or RTC with a manual rate triggers the free upgrade prompt, similar to reservations without manual rates.
**Room Upgrades Report:**
Reservations with an RTC different from the "Room Type" (including those with manual rates) are now reflected in the Room Upgrades report. This report displays:
* **Original Room Type:** The initial room type selected when the reservation was created.
* **Upgraded Room Type:** The room type currently displayed in the "Room Type" field.
**Examples:**
**Scenario 1: Free Upgrade with RTC Change**
* Room types: Standard (100 USD), Deluxe (150 USD)
* Reservation created on Deluxe Room (both "Room Type" and RTC)
* Rate: 150 USD
* You change the RTC to Standard Room
* Rate changes to 100 USD
* "Free Room Type Upgrade applied..." message appears
* Room Upgrades report: Original Room Type = Standard, Upgraded Room Type = Deluxe
**Scenario 2: Free Upgrade Prompt with Room Type Change**
* Same room types as above
* Reservation created on Standard Room (both "Room Type" and RTC)
* Rate: 100 USD
* You change the "Room Type" to Deluxe Room
* Free upgrade prompt appears
* Clicking "Yes":
* Rate remains 100 USD
* "Room Type" becomes Deluxe
* RTC remains Standard
* "Free Room Type Upgrade applied..." message appears
* Room Upgrades report: Original Room Type = Standard, Upgraded Room Type = Deluxe
* Clicking "No":
* Rate: 150 USD (Deluxe)
* Both "Room Type" and RTC become Deluxe
**Scenario 3: Manual Rate with RTC Change**
* Same room types as above
* Reservation created on Deluxe Room (both "Room Type" and RTC) with a manual rate
* Rate: (Manually entered)
* You change the RTC to Standard Room
* Rate remains unchanged (manual rate overrides)
* "Free Room Type Upgrade applied..." message appears
* Room Upgrades report: Original Room Type = Standard, Upgraded Room Type = Deluxe
**Benefits of the RTC field:**
* **Clearer rate calculations:** Easily understand the final charge based on the selected RTC.
* **Simplified upgrades:** Efficiently manage free room type upgrades and downgrades.
* **Improved reporting:** Gain insights into room upgrades through the comprehensive Room Upgrades report.
We hope this information clarifies the functionality of the new RTC field! If you have any further questions, please don't hesitate to reach out to our support team.
## Add Attachments to Purchase Requests
New Feature: Attach your best supplier quote, invoice, or supporting document to your purchase requests.
**[Back Office → Purchasing → Purchase Requests](https://manage.kwentra.com/inventory/purchaserequest/)**
* Users can **upload (max 10 files), delete, and download** attachments.
* Allowed formats: **PDF, Doc, Docx, Xls, Xlsx, JPEG, GIF, PNG, BMP, JPG**; Max size: **1 MB per file**.
* All attachment updates are recorded in the **history log**.
* Any user with access to the purchase request can manage attachments.
* In the 'Journal Voucher' section, check for the main account and Tcode fields. They should auto-complete based on existing data.
* With the British system active, the account field becomes read-only and will be automatically fielded with the matching account
## Room Type To Charge \[RTC]
**Introducing the New "Room Type Charge" (RTC) Field**
We're excited to announce a new feature in the individual reservation screen to enhance reservation management: the **Room Type Charge (RTC) field**. This field simplifies managing room upgrades and free room type changes while providing clearer information about the final charges.
**What is the RTC field?**
The RTC field, located in the Rate Plan section, displays the room type ultimately used to calculate the reservation's rate. It defaults to the same room type selected in the "Room Type" field. However, you can manually change it to a different room type.

**How does it work?**
* **Initial Setup:**
* The RTC field mirrors the "Room Type" field by default.
* The displayed rate amount reflects the selected room type.
* **Manual Changes:**
* If you manually change the RTC field to a different room type:
* The displayed rate amount adjusts to reflect the selected RTC.
* A "Free Room Type Upgrade is applied" message appears below the Rate Plan section, indicating the guest is charged based on the lower-priced room type.
* If you manually clear the RTC field, it automatically reverts to the "Room Type" upon saving.
* **Free Upgrade Prompt:**
* After saving any changes to the reservation, if the "Room Type" was changed, a free upgrade prompt appears:
* Clicking "Yes" assigns the new room type to "Room Type" field and original room type to "RTC" field, displaying the "Free Room Type Upgrade" message.
* Clicking "No" keeps the new room type in both the "Room Type" and "RTC" fields.
* **Manual Rates:**
* If a manual rate is applied and the RTC differs from the "Room Type", the "Free Room Type Upgrade" message appears.
* Changing either the "Room Type" or RTC with a manual rate triggers the free upgrade prompt, similar to reservations without manual rates.
**Room Upgrades Report:**
Reservations with an RTC different from the "Room Type" (including those with manual rates) are now reflected in the Room Upgrades report. This report displays:
* **Original Room Type:** The initial room type selected when the reservation was created.
* **Upgraded Room Type:** The room type currently displayed in the "Room Type" field.
**Examples:**
**Scenario 1: Free Upgrade with RTC Change**
* Room types: Standard (100 USD), Deluxe (150 USD)
* Reservation created on Deluxe Room (both "Room Type" and RTC)
* Rate: 150 USD
* You change the RTC to Standard Room
* Rate changes to 100 USD
* "Free Room Type Upgrade applied..." message appears
* Room Upgrades report: Original Room Type = Standard, Upgraded Room Type = Deluxe
**Scenario 2: Free Upgrade Prompt with Room Type Change**
* Same room types as above
* Reservation created on Standard Room (both "Room Type" and RTC)
* Rate: 100 USD
* You change the "Room Type" to Deluxe Room
* Free upgrade prompt appears
* Clicking "Yes":
* Rate remains 100 USD
* "Room Type" becomes Deluxe
* RTC remains Standard
* "Free Room Type Upgrade applied..." message appears
* Room Upgrades report: Original Room Type = Standard, Upgraded Room Type = Deluxe
* Clicking "No":
* Rate: 150 USD (Deluxe)
* Both "Room Type" and RTC become Deluxe
**Scenario 3: Manual Rate with RTC Change**
* Same room types as above
* Reservation created on Deluxe Room (both "Room Type" and RTC) with a manual rate
* Rate: (Manually entered)
* You change the RTC to Standard Room
* Rate remains unchanged (manual rate overrides)
* "Free Room Type Upgrade applied..." message appears
* Room Upgrades report: Original Room Type = Standard, Upgraded Room Type = Deluxe
**Benefits of the RTC field:**
* **Clearer rate calculations:** Easily understand the final charge based on the selected RTC.
* **Simplified upgrades:** Efficiently manage free room type upgrades and downgrades.
* **Improved reporting:** Gain insights into room upgrades through the comprehensive Room Upgrades report.
We hope this information clarifies the functionality of the new RTC field! If you have any further questions, please don't hesitate to reach out to our support team.
## Add Attachments to Purchase Requests
New Feature: Attach your best supplier quote, invoice, or supporting document to your purchase requests.
**[Back Office → Purchasing → Purchase Requests](https://manage.kwentra.com/inventory/purchaserequest/)**
* Users can **upload (max 10 files), delete, and download** attachments.
* Allowed formats: **PDF, Doc, Docx, Xls, Xlsx, JPEG, GIF, PNG, BMP, JPG**; Max size: **1 MB per file**.
* All attachment updates are recorded in the **history log**.
* Any user with access to the purchase request can manage attachments.
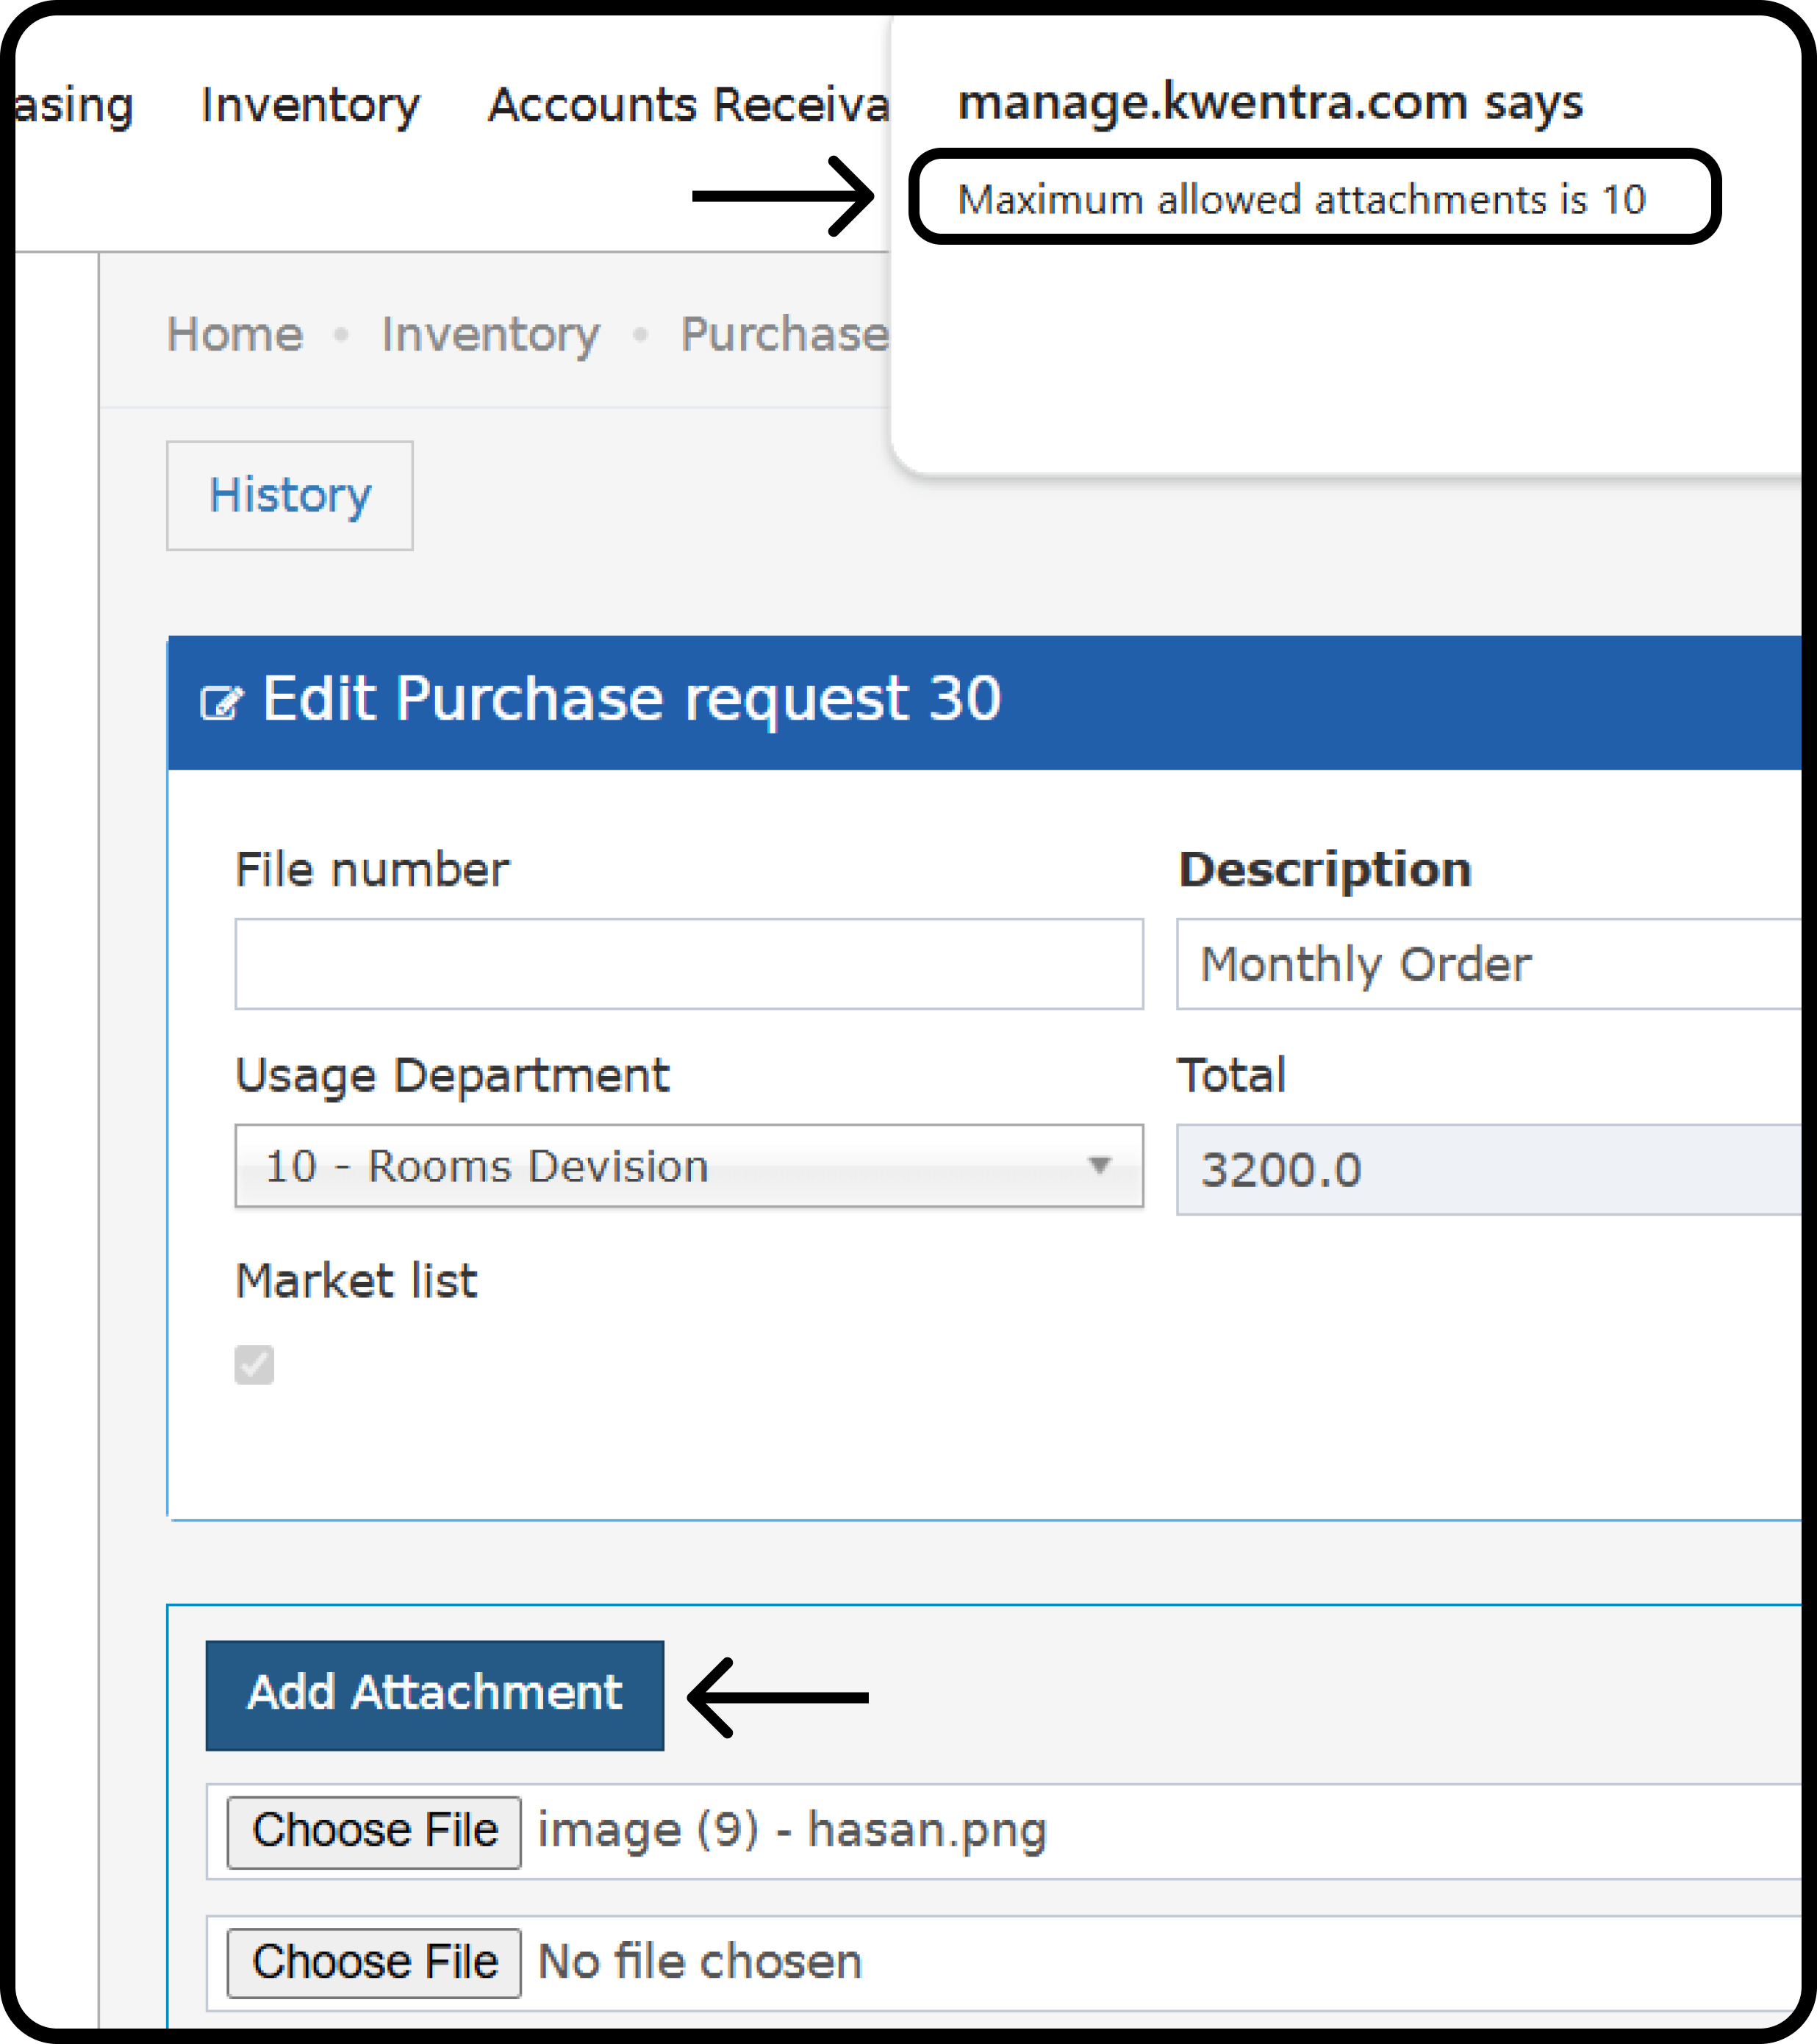 ## Add Hijri Calendar to the British GL Journal Voucher - GL Trial Balance
New Report Filter: Add a drop-down in the GL Journal Voucher to select the Hijri Financial Year for easier account data analysis.
[Go to the report.](https://manage.kwentra.com/reports/GL/British%20GL%20Journal%20Voucher%20-%20GL%20Trial%20Balance/)
## Add Hijri Calendar to the British GL Journal Voucher - GL Trial Balance
New Report Filter: Add a drop-down in the GL Journal Voucher to select the Hijri Financial Year for easier account data analysis.
[Go to the report.](https://manage.kwentra.com/reports/GL/British%20GL%20Journal%20Voucher%20-%20GL%20Trial%20Balance/)
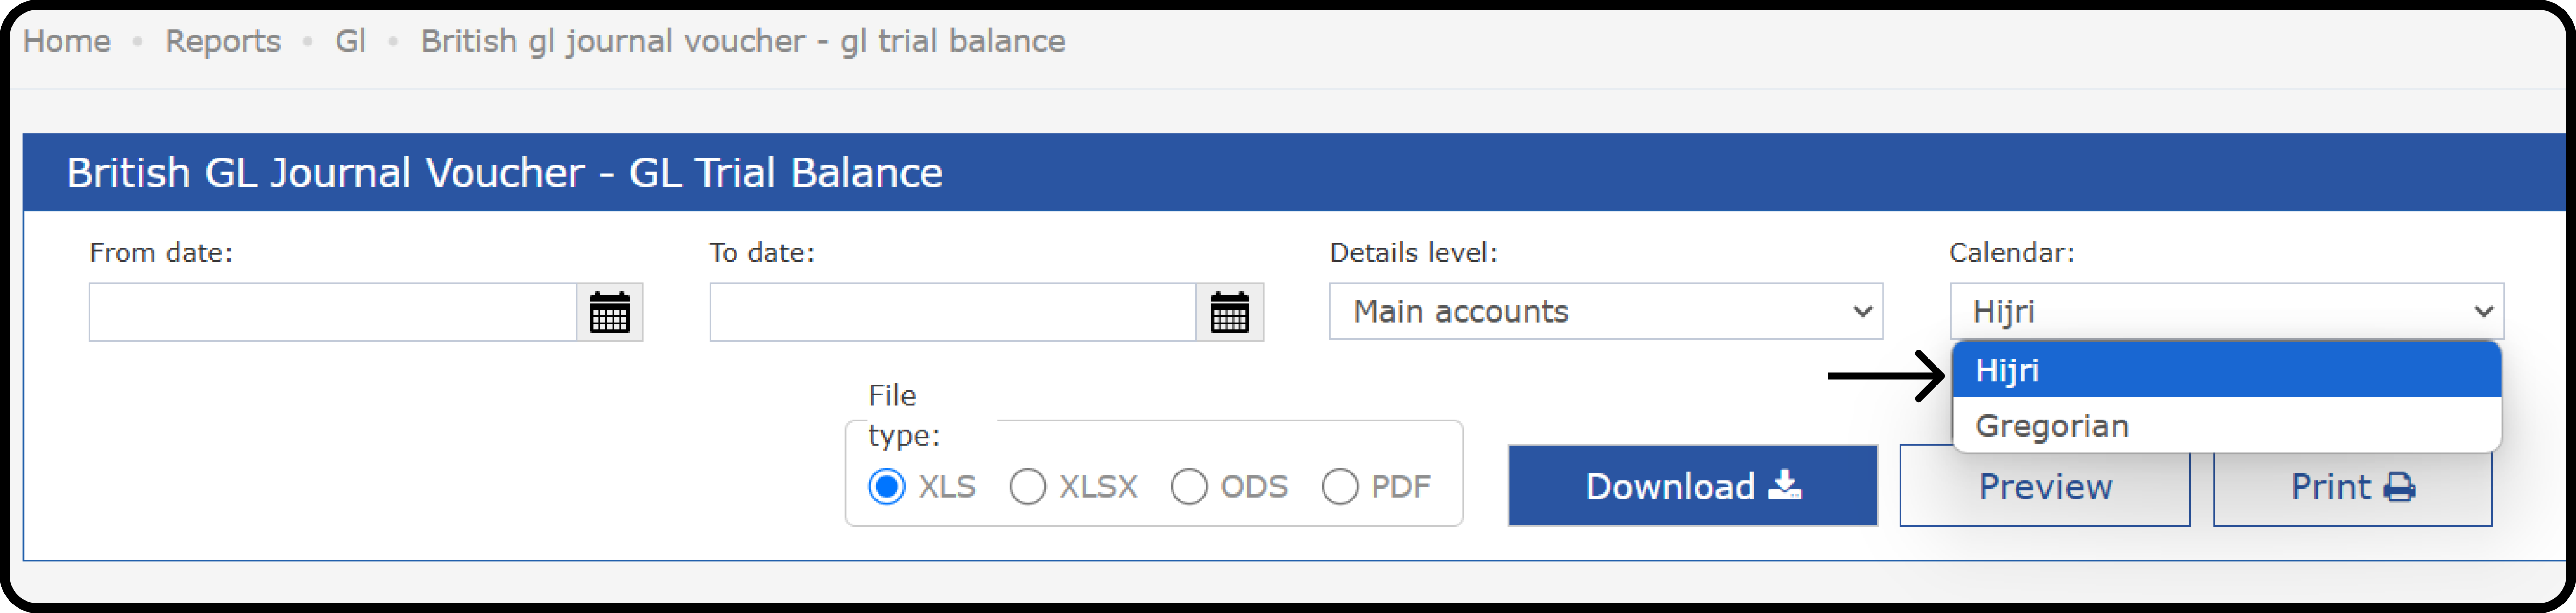 ## Enhancing Reservation Dashboard Metrics and Functionality
**Introduction:**
In response to user feedback and evolving property management needs, we've enhanced the Reservation Dashboard in the Front Office → Reservations section. These improvements provide General Managers and property management personnel with a comprehensive snapshot of property standings and metrics. This article outlines the new features and functionalities introduced in the Reservation Dashboard.
**Date Selection and Metrics:**
The Reservation Dashboard now includes a customizable date selection feature at the top of the screen. This allows users to view property metrics for different dates, enhancing flexibility and analysis capabilities.
**New Metrics Added:**
* **Reservations Block:**
* Displays the number of guest flags on reservations.
* **Extended Stays:**
* Lists reservations where the departure date was extended beyond the original departure date.
* **Early Departures:**
* Highlights reservations where guests departed earlier than planned.
* **Day Use Rooms:**
* Identifies reservations where the arrival and departure dates are the same, indicating day use.
* **Complementary Arrivals, Stayovers, and Departures:**
* Displays reservations with complementary rates for arrivals, stayovers, and departures.
* **House Use Arrivals, Stayovers, and Departures:**
* Lists reservations with house use rates for arrivals, stayovers, and departures.
## Enhancing Reservation Dashboard Metrics and Functionality
**Introduction:**
In response to user feedback and evolving property management needs, we've enhanced the Reservation Dashboard in the Front Office → Reservations section. These improvements provide General Managers and property management personnel with a comprehensive snapshot of property standings and metrics. This article outlines the new features and functionalities introduced in the Reservation Dashboard.
**Date Selection and Metrics:**
The Reservation Dashboard now includes a customizable date selection feature at the top of the screen. This allows users to view property metrics for different dates, enhancing flexibility and analysis capabilities.
**New Metrics Added:**
* **Reservations Block:**
* Displays the number of guest flags on reservations.
* **Extended Stays:**
* Lists reservations where the departure date was extended beyond the original departure date.
* **Early Departures:**
* Highlights reservations where guests departed earlier than planned.
* **Day Use Rooms:**
* Identifies reservations where the arrival and departure dates are the same, indicating day use.
* **Complementary Arrivals, Stayovers, and Departures:**
* Displays reservations with complementary rates for arrivals, stayovers, and departures.
* **House Use Arrivals, Stayovers, and Departures:**
* Lists reservations with house use rates for arrivals, stayovers, and departures.
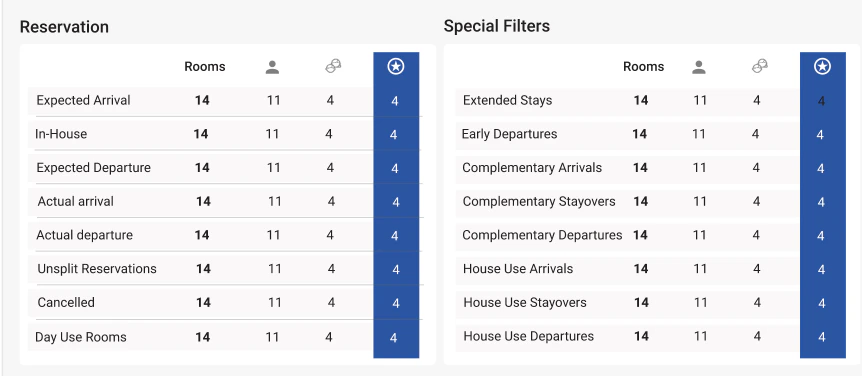 * **Improved Search Functionality:**
* The Reservation Listing screen now includes additional search fields to accommodate queries for each metric's hyperlink.
* Users can filter reservations based on original departure date and rate codes (Complementary, House Use, or both).
* **Improved Search Functionality:**
* The Reservation Listing screen now includes additional search fields to accommodate queries for each metric's hyperlink.
* Users can filter reservations based on original departure date and rate codes (Complementary, House Use, or both).
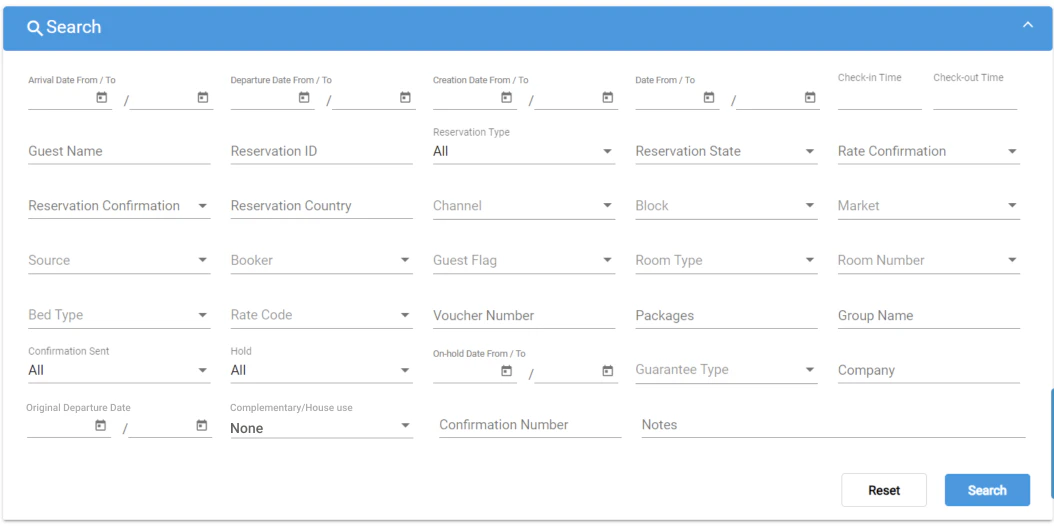 * **Housekeeping Block:**
* The Room Status Table now lists all configured housekeeping states, providing comprehensive visibility.
* A new block displays Out of Service rooms for the current audit date, with hyperlinks to the Housekeeping screen.
* **Housekeeping Block:**
* The Room Status Table now lists all configured housekeeping states, providing comprehensive visibility.
* A new block displays Out of Service rooms for the current audit date, with hyperlinks to the Housekeeping screen.
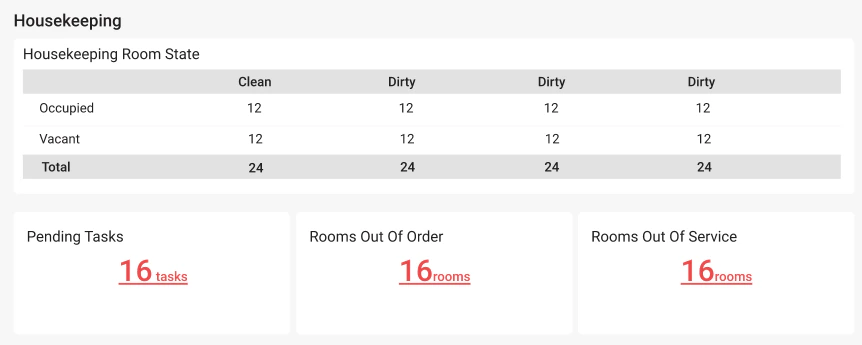 ## Enhancing ETA Integration with Critical Reservation Information
**What's Changing?**
Previously, our ETA integration for AR invoices lacked specific reservation details, which could sometimes lead to incomplete or ambiguous information. With this update, we are enhancing the integration to include the following critical reservation information:
**Profile Name:** The name associated with the reservation, which could be the guest name or paymaster name.
**How Does It Work?**
When an AR invoice is sent to ETA, the reservation details will now be appended to the existing JSON key called "salesOrderDescription." This key serves as a container for important transaction-related information. Users can now view this information directly on their ETA portal under "More Details" -> "Sales Order Description" field.
## Enhancing ETA Integration with Critical Reservation Information
**What's Changing?**
Previously, our ETA integration for AR invoices lacked specific reservation details, which could sometimes lead to incomplete or ambiguous information. With this update, we are enhancing the integration to include the following critical reservation information:
**Profile Name:** The name associated with the reservation, which could be the guest name or paymaster name.
**How Does It Work?**
When an AR invoice is sent to ETA, the reservation details will now be appended to the existing JSON key called "salesOrderDescription." This key serves as a container for important transaction-related information. Users can now view this information directly on their ETA portal under "More Details" -> "Sales Order Description" field.
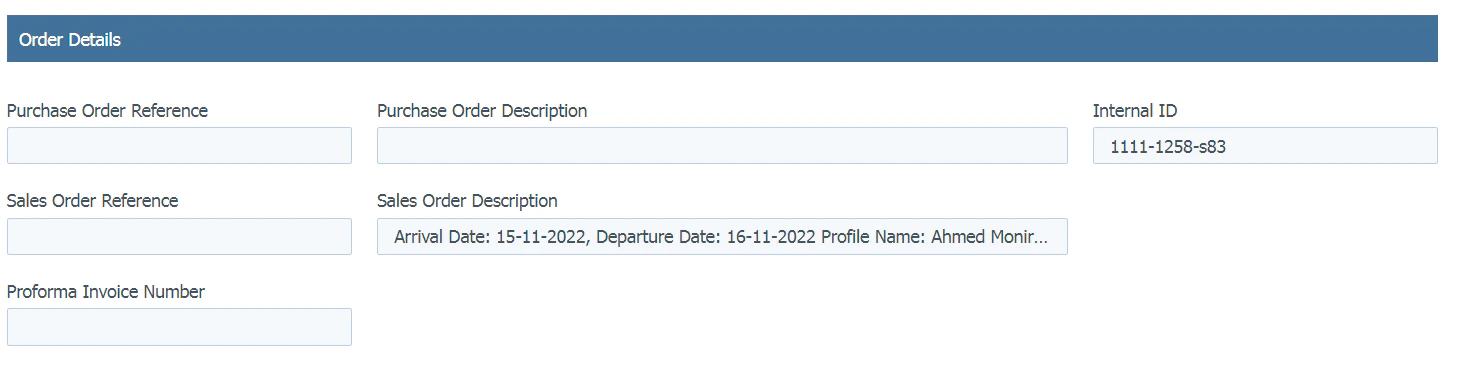 ## Housekeeping All Rooms Report New Features
We're excited to announce valuable additions to the Housekeeping All Rooms report: **Guest Flag, Arrival Time, Departure Time, and Housekeeping Remarks**. These improvements aim to streamline communication and simplify housekeeping tasks.
**What's new?**
* **Guest Flag:** This column displays the guest flag added on the reservation on the room number (if any).
* **Arrival Time:** This column shows the check-in time for each reservation.
* **Departure Time:** This column displays the check-out time for each reservation.
* **Housekeeping Remarks:** This column provides a blank field for manual notes and updates specific to housekeeping needs.
**Benefits for You:**
* **Enhanced Clarity:** Quickly identify guest preferences and prioritize tasks based on the Guest Flag information.
* **Improved Planning:** Easily access arrival and departure times to optimize workflows and staff allocation.
* **Streamlined Communication:** Utilize the Housekeeping Remarks field for room-specific notes and instructions, ensuring clear communication between team members.
* **Increased Efficiency:** Spend less time searching for information and more time delivering exceptional service.
**How to Use:**
* The new columns are automatically displayed in the Housekeeping All Rooms report.
* Simply print the report for on-site reference and task assignment.
* Utilize the Housekeeping Remarks field to record cleaning status, notes for restocking, or any other relevant information for the housekeeping team.
**Remember:**
* The report reflects real-time reservation data, ensuring you have the most up-to-date information.
* The Housekeeping Remarks field is for manual input and is not automatically populated.
We believe these new features will empower your housekeeping team to operate more efficiently and effectively. If you have any questions, feel free to reach out to our support team.
[Read more](/front-office/reports/housekeeping-reports/housekeeping-all-rooms-report)
## Introducing New Insights in the Manager Report: Early Departures & Extended Stays
We're thrilled to unveil **six new additions** to the Manager Report, providing powerful insights into guest behavior with two key metrics: **Early Departures** and **Extended Stays**.
**Early Departure Tracking:**
* **Early Departure Rooms:** This number displays the total number of rooms where guests departed **before** their originally scheduled checkout date.
* **Early Departure Adults:** This number shows the total number of adults who were part of the early departure rooms.
* **Early Departure Children:** This number displays the total number of children who were part of the early departure rooms.
**Example:** A reservation arrives on January 21, 2024, with a planned departure on January 23, 2024. If the guest checks out on January 22, 2024, this will be counted as an early departure in the report generated on that date.
## Housekeeping All Rooms Report New Features
We're excited to announce valuable additions to the Housekeeping All Rooms report: **Guest Flag, Arrival Time, Departure Time, and Housekeeping Remarks**. These improvements aim to streamline communication and simplify housekeeping tasks.
**What's new?**
* **Guest Flag:** This column displays the guest flag added on the reservation on the room number (if any).
* **Arrival Time:** This column shows the check-in time for each reservation.
* **Departure Time:** This column displays the check-out time for each reservation.
* **Housekeeping Remarks:** This column provides a blank field for manual notes and updates specific to housekeeping needs.
**Benefits for You:**
* **Enhanced Clarity:** Quickly identify guest preferences and prioritize tasks based on the Guest Flag information.
* **Improved Planning:** Easily access arrival and departure times to optimize workflows and staff allocation.
* **Streamlined Communication:** Utilize the Housekeeping Remarks field for room-specific notes and instructions, ensuring clear communication between team members.
* **Increased Efficiency:** Spend less time searching for information and more time delivering exceptional service.
**How to Use:**
* The new columns are automatically displayed in the Housekeeping All Rooms report.
* Simply print the report for on-site reference and task assignment.
* Utilize the Housekeeping Remarks field to record cleaning status, notes for restocking, or any other relevant information for the housekeeping team.
**Remember:**
* The report reflects real-time reservation data, ensuring you have the most up-to-date information.
* The Housekeeping Remarks field is for manual input and is not automatically populated.
We believe these new features will empower your housekeeping team to operate more efficiently and effectively. If you have any questions, feel free to reach out to our support team.
[Read more](/front-office/reports/housekeeping-reports/housekeeping-all-rooms-report)
## Introducing New Insights in the Manager Report: Early Departures & Extended Stays
We're thrilled to unveil **six new additions** to the Manager Report, providing powerful insights into guest behavior with two key metrics: **Early Departures** and **Extended Stays**.
**Early Departure Tracking:**
* **Early Departure Rooms:** This number displays the total number of rooms where guests departed **before** their originally scheduled checkout date.
* **Early Departure Adults:** This number shows the total number of adults who were part of the early departure rooms.
* **Early Departure Children:** This number displays the total number of children who were part of the early departure rooms.
**Example:** A reservation arrives on January 21, 2024, with a planned departure on January 23, 2024. If the guest checks out on January 22, 2024, this will be counted as an early departure in the report generated on that date.
 **Extended Stay Tracking:**
* **Extended Stay Rooms:** This number displays the total number of rooms where guests **extended their stay** beyond their originally scheduled departure date.
* **Extended Stay Adults:** This number shows the total number of adults who extended their stay in these rooms.
* **Extended Stay Children:** This number displays the total number of children who extended their stay in these rooms.
**Example:** A reservation arrives on January 21, 2024, with a planned departure on January 23, 2024. If the guest changes their departure date to January 24, 2024, this will be counted as an extended stay in the report generated on January 23, 2024.
**Extended Stay Tracking:**
* **Extended Stay Rooms:** This number displays the total number of rooms where guests **extended their stay** beyond their originally scheduled departure date.
* **Extended Stay Adults:** This number shows the total number of adults who extended their stay in these rooms.
* **Extended Stay Children:** This number displays the total number of children who extended their stay in these rooms.
**Example:** A reservation arrives on January 21, 2024, with a planned departure on January 23, 2024. If the guest changes their departure date to January 24, 2024, this will be counted as an extended stay in the report generated on January 23, 2024.
 **How can you benefit?**
These new metrics offer valuable insights to:
* **Identify trends:** Analyze both early departures and extended stays to understand guest behavior and preferences.
* **Improve guest experience:** Use this data to investigate potential issues that contribute to early departures and proactively address them, while optimizing services for extended guests.
* **Revenue management:** Understand the potential impact of both early departures and extended stays on occupancy and revenue, allowing for better informed decisions.
We believe these new features will empower you to gain deeper guest insights and optimize your operations. If you have any questions, feel free to reach out to our support team.
## Enhancing Multi-Currency Adjustments in the AR Module
**Introduction:**
In response to evolving business needs, our Back Office team is introducing enhancements to the Accounts Receivable (AR) module to facilitate multi-currency adjustments. This improvement aims to empower users to efficiently manage AR debit postings, especially those placed on hold, while considering currency-specific requirements.
**Overview:**
The latest update focuses on enhancing the AR system to accommodate multi-currency adjustments seamlessly. Users will now have the flexibility to perform currency-specific adjustments to AR accounts, ensuring accurate financial transactions across different currencies. Let's delve into the key features and changes introduced to streamline this process.
**Key Features and Changes:**
1. Multi-Currency Adjustments for AR Debit Postings (On Hold):
* The AR system has been modified to support multi-currency adjustments for AR accounts, particularly those with debit postings on hold.
* Users now have the capability to perform adjustments in different currencies, aligning with specific business requirements.
* The adjustment process considers exchange rates to accurately reflect amounts in both the base and original currencies, ensuring financial accuracy.
* The AR main posting currency serves as the default currency for adjustments associated with each AR posting.
2. Addition of New Fields:
* Two new fields have been introduced to facilitate multi-currency adjustments:
* Foreign Amount:
* This field is read-only when the currency is the base currency.
* It becomes editable when the currency is a foreign currency, allowing users to input the adjusted amount accordingly.
* When the foreign amount is edited, the "Amount" field automatically becomes read-only to maintain consistency.
* Exchange Factor:
* This field is read-only and displays the exchange rate used in currency conversion, based on the selected posting currency.
* It provides users with transparency regarding the exchange rate applied during adjustments.
## Simplifying ETA Integration for Enhanced Clarity
**Introduction:**
Currently, when ETA integration documents are sent, line items are handled individually for each product code. This results in a cluttered display in ETA, especially when dealing with credit notes or adjustments.
**The Solution:**
To address this issue and enhance clarity in ETA integration, we have implemented changes to group line items based on their product code. This means consolidating the value of each product code's line items, including adjustments and cancellations, into a single entry in the ETA document.
**Key Changes Implemented:**
1. Grouping Logic:
* Implemented grouping logic based on department, taxes, and currency.
* Ensured that the total value for each department is accurately represented.
* Set line item quantity to "1" to ensure accurate tax rate calculations.
* Ensured city ledger payment currency matches adjustment currency for grouping.
* Changed postings currency to match the AR main posting information currency for currency code match.
2. Handling Adjustments and Cancellations:
* Implemented logic to subtract the value of adjustments and cancellations from the product code total.
* Verified that adjusted and canceled postings are correctly reflected in the grouped ETA document.
## Add Creator Field To Purchase Request and Purchase Request Search Screen
New Field: A new read-only field containing the PR creator's username.
New Search Field: A new search parameter that helps filter PRs by creators.
**How can you benefit?**
These new metrics offer valuable insights to:
* **Identify trends:** Analyze both early departures and extended stays to understand guest behavior and preferences.
* **Improve guest experience:** Use this data to investigate potential issues that contribute to early departures and proactively address them, while optimizing services for extended guests.
* **Revenue management:** Understand the potential impact of both early departures and extended stays on occupancy and revenue, allowing for better informed decisions.
We believe these new features will empower you to gain deeper guest insights and optimize your operations. If you have any questions, feel free to reach out to our support team.
## Enhancing Multi-Currency Adjustments in the AR Module
**Introduction:**
In response to evolving business needs, our Back Office team is introducing enhancements to the Accounts Receivable (AR) module to facilitate multi-currency adjustments. This improvement aims to empower users to efficiently manage AR debit postings, especially those placed on hold, while considering currency-specific requirements.
**Overview:**
The latest update focuses on enhancing the AR system to accommodate multi-currency adjustments seamlessly. Users will now have the flexibility to perform currency-specific adjustments to AR accounts, ensuring accurate financial transactions across different currencies. Let's delve into the key features and changes introduced to streamline this process.
**Key Features and Changes:**
1. Multi-Currency Adjustments for AR Debit Postings (On Hold):
* The AR system has been modified to support multi-currency adjustments for AR accounts, particularly those with debit postings on hold.
* Users now have the capability to perform adjustments in different currencies, aligning with specific business requirements.
* The adjustment process considers exchange rates to accurately reflect amounts in both the base and original currencies, ensuring financial accuracy.
* The AR main posting currency serves as the default currency for adjustments associated with each AR posting.
2. Addition of New Fields:
* Two new fields have been introduced to facilitate multi-currency adjustments:
* Foreign Amount:
* This field is read-only when the currency is the base currency.
* It becomes editable when the currency is a foreign currency, allowing users to input the adjusted amount accordingly.
* When the foreign amount is edited, the "Amount" field automatically becomes read-only to maintain consistency.
* Exchange Factor:
* This field is read-only and displays the exchange rate used in currency conversion, based on the selected posting currency.
* It provides users with transparency regarding the exchange rate applied during adjustments.
## Simplifying ETA Integration for Enhanced Clarity
**Introduction:**
Currently, when ETA integration documents are sent, line items are handled individually for each product code. This results in a cluttered display in ETA, especially when dealing with credit notes or adjustments.
**The Solution:**
To address this issue and enhance clarity in ETA integration, we have implemented changes to group line items based on their product code. This means consolidating the value of each product code's line items, including adjustments and cancellations, into a single entry in the ETA document.
**Key Changes Implemented:**
1. Grouping Logic:
* Implemented grouping logic based on department, taxes, and currency.
* Ensured that the total value for each department is accurately represented.
* Set line item quantity to "1" to ensure accurate tax rate calculations.
* Ensured city ledger payment currency matches adjustment currency for grouping.
* Changed postings currency to match the AR main posting information currency for currency code match.
2. Handling Adjustments and Cancellations:
* Implemented logic to subtract the value of adjustments and cancellations from the product code total.
* Verified that adjusted and canceled postings are correctly reflected in the grouped ETA document.
## Add Creator Field To Purchase Request and Purchase Request Search Screen
New Field: A new read-only field containing the PR creator's username.
New Search Field: A new search parameter that helps filter PRs by creators.
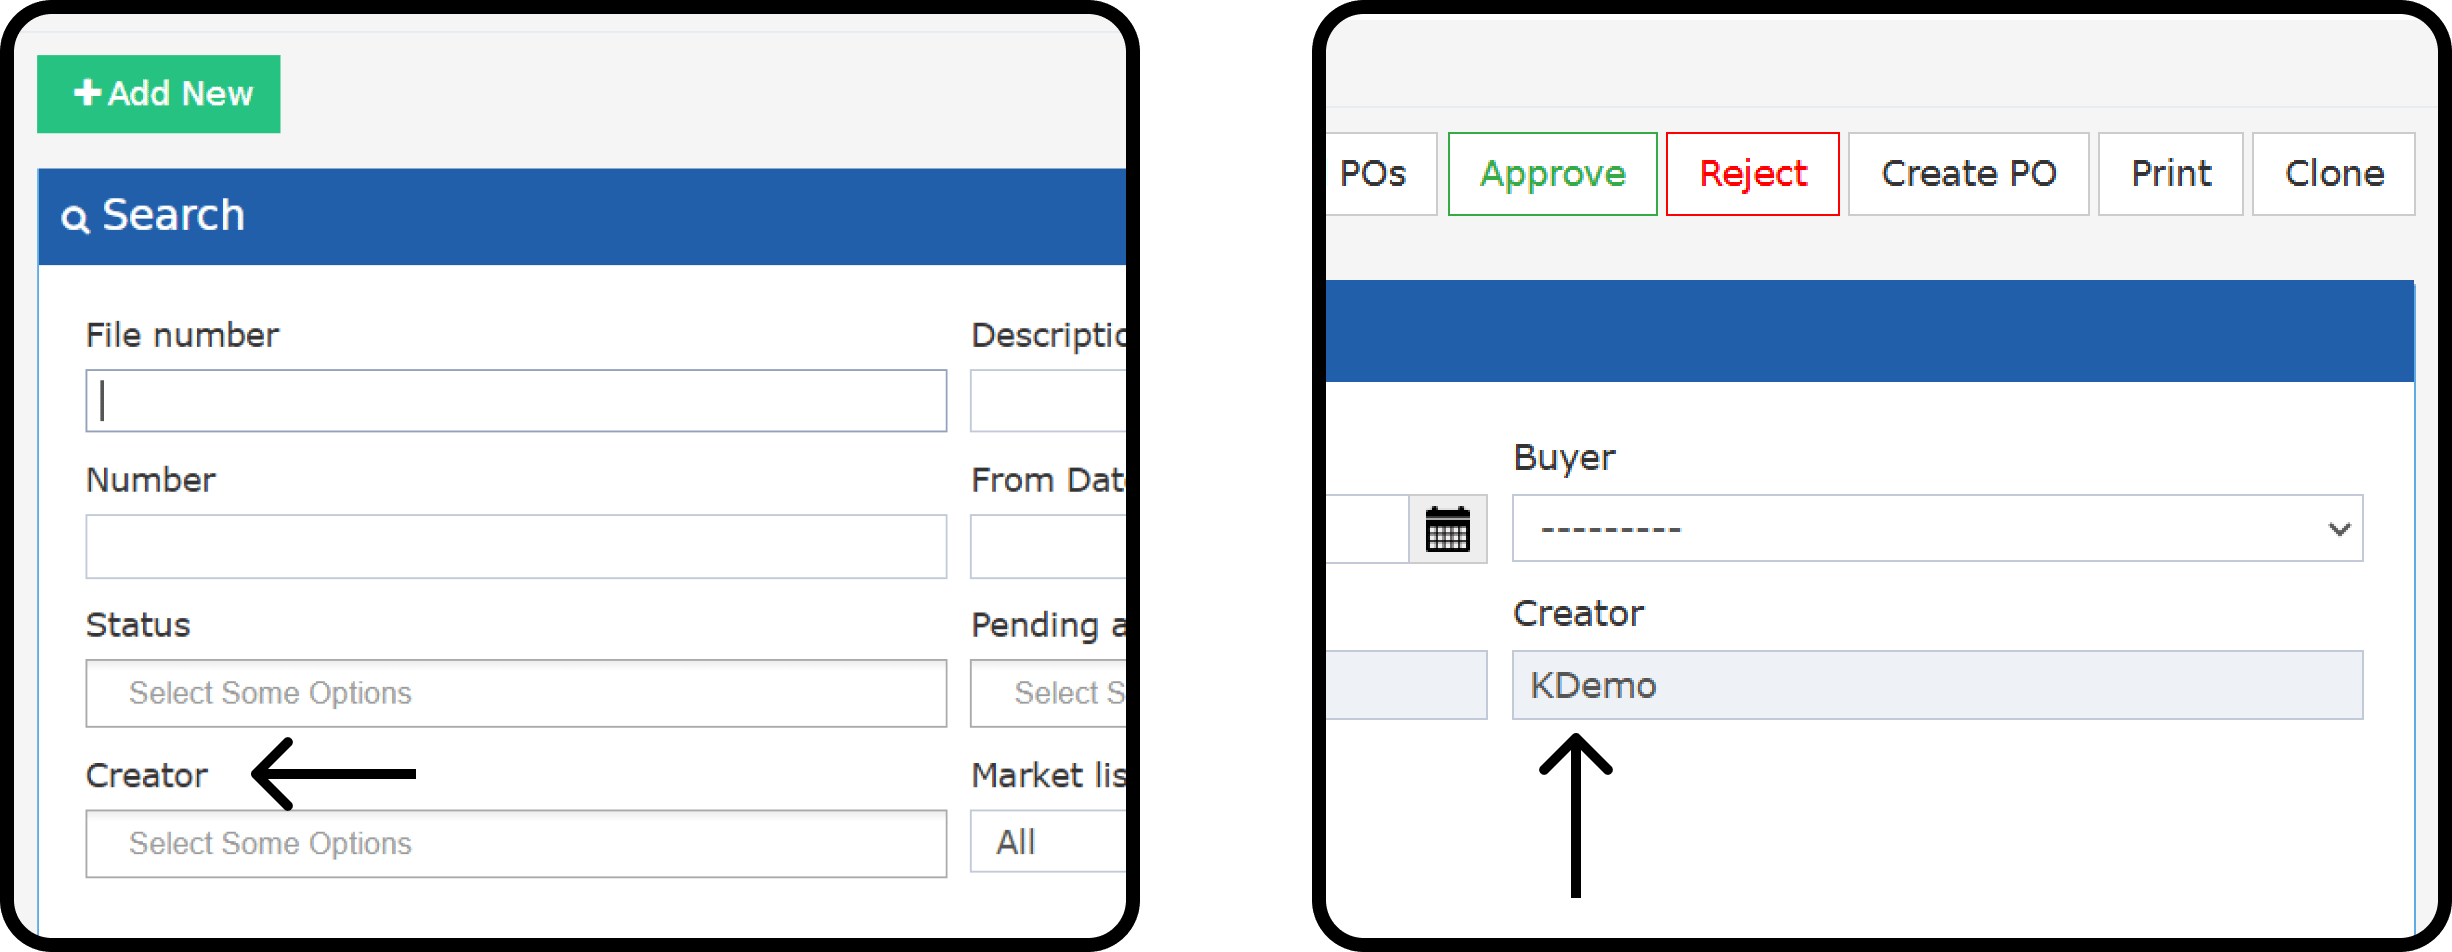 ## Customizable AR detailed and manual invoice Footer
**Now you can fully customizable footer to your AR manual and detailed invoice**
\*\*How to add a custom footer?
\*\*Head to [Front office > Settings > Front office > Templates > AR invoices Template](https://manage.kwentra.com/income/folioconfiguration/receivable/)
## Customizable AR detailed and manual invoice Footer
**Now you can fully customizable footer to your AR manual and detailed invoice**
\*\*How to add a custom footer?
\*\*Head to [Front office > Settings > Front office > Templates > AR invoices Template](https://manage.kwentra.com/income/folioconfiguration/receivable/)
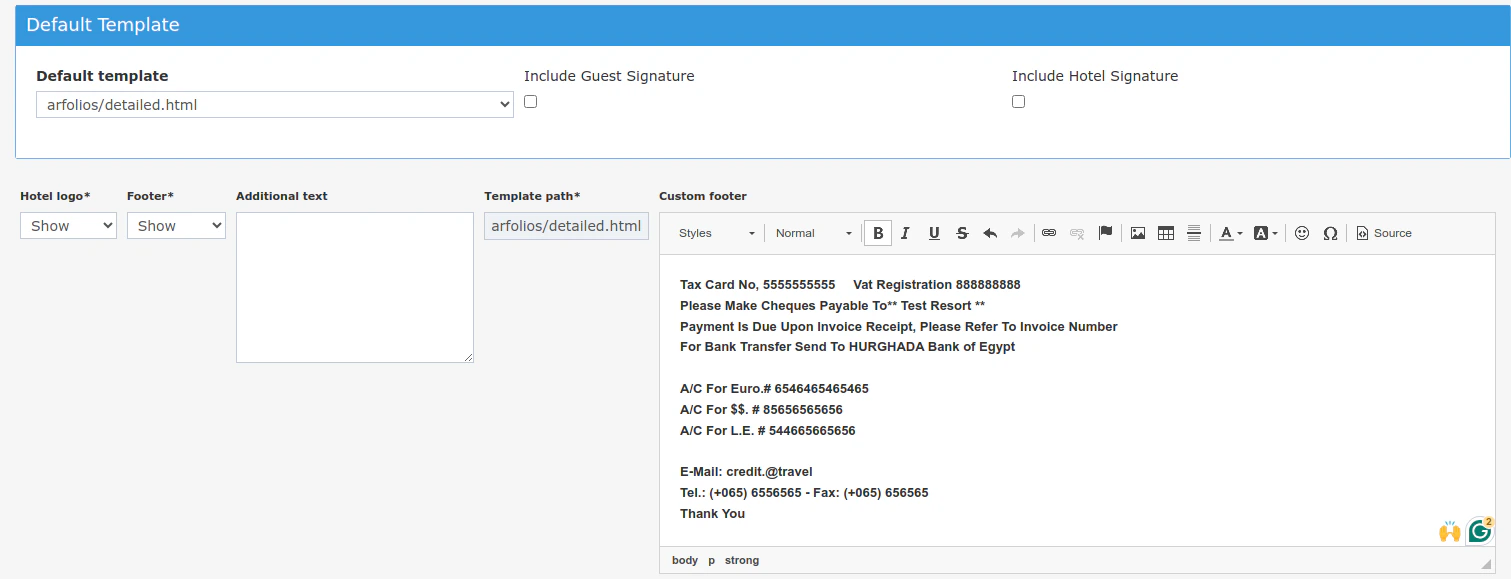 Add your text to the custom footer
Make sure you select to show the footer
Also if the text is empty the default system footer will be shown
## Enhancing Manager Report with Next Day Arrivals and Departures
Introduction:
The **[Manager Report](https://manage.kwentra.com/reports/Income/Manager%20Report/)** in the Front Office section is getting an upgrade! We are introducing new rows to provide you with a sneak peek into tomorrow's arrivals and departures. This enhancement aims to offer a more comprehensive overview of your upcoming reservations and guest movements.
New Rows Overview:
We've added four new rows exclusively for the "Day" column, ensuring that they don't clutter your monthly or yearly statistics. These rows will be positioned after the "RevPar" row and before the existing statistic types.
Add your text to the custom footer
Make sure you select to show the footer
Also if the text is empty the default system footer will be shown
## Enhancing Manager Report with Next Day Arrivals and Departures
Introduction:
The **[Manager Report](https://manage.kwentra.com/reports/Income/Manager%20Report/)** in the Front Office section is getting an upgrade! We are introducing new rows to provide you with a sneak peek into tomorrow's arrivals and departures. This enhancement aims to offer a more comprehensive overview of your upcoming reservations and guest movements.
New Rows Overview:
We've added four new rows exclusively for the "Day" column, ensuring that they don't clutter your monthly or yearly statistics. These rows will be positioned after the "RevPar" row and before the existing statistic types.
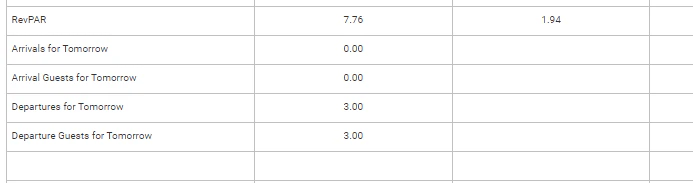 1. **Arrivals for Tomorrow**:
* Displays the number of expected arrival reservations for the next day.
2. **Arrival Guests for Tomorrow**:
* Indicates the total number of arrival guests (both adults and children) expected on the next day.
3. **Departures for Tomorrow**:
* Shows the number of expected departure reservations for the next day.
4. **Departure Guests for Tomorrow**:
* Represents the total number of departure guests (both adults and children) expected on the next day.
Counting Reservations, Not Rooms:
It's important to note that all four fields count reservations, not rooms. This means that if two reservations arriving on the same day share the same room, they will be counted as two arrivals. This approach ensures a more accurate representation of the occupancy forecast.
Placement and Visibility:
These new rows have been strategically placed after the "RevPar" row, ensuring a logical flow in your Manager Report. They provide valuable insights without overwhelming you with unnecessary information.
## Highlighting Reservation Notes in "Individual Reservations\\
Overview:
In response to user feedback and to enhance visibility in the "Individual Reservations" section of the Front Office, we have introduced a new feature. This improvement allows users to easily identify reservations with existing notes and navigate to them effortlessly.
Enhancements:
1. Marking the "Notes" Cell with an Indicator:
Change:
* The "Notes" cell in the "Individual Reservations" view will now be marked with an indicator to signify the presence of notes on the reservation.
* If any note (internal, billing, or external) is added to the reservation, the "Notes" cell will have a hyperlink and be underlined, as illustrated in the attached design.
How to Use:
* Simply navigate to the [**"Individual Reservations"**](https://manage.kwentra.com/frontoffice/#/individualreservation) section in the Front Office.
* Look for the "Notes" cell, which will now feature a hyperlink and be underlined if there are any existing notes on the reservation.
Visual Indicators:
* Hyperlink and Underline: Denotes the presence of notes on the reservation.
* Dimmed Cell: Indicates that the reservation has no notes or the existing notes have been deleted.
*
1. **Arrivals for Tomorrow**:
* Displays the number of expected arrival reservations for the next day.
2. **Arrival Guests for Tomorrow**:
* Indicates the total number of arrival guests (both adults and children) expected on the next day.
3. **Departures for Tomorrow**:
* Shows the number of expected departure reservations for the next day.
4. **Departure Guests for Tomorrow**:
* Represents the total number of departure guests (both adults and children) expected on the next day.
Counting Reservations, Not Rooms:
It's important to note that all four fields count reservations, not rooms. This means that if two reservations arriving on the same day share the same room, they will be counted as two arrivals. This approach ensures a more accurate representation of the occupancy forecast.
Placement and Visibility:
These new rows have been strategically placed after the "RevPar" row, ensuring a logical flow in your Manager Report. They provide valuable insights without overwhelming you with unnecessary information.
## Highlighting Reservation Notes in "Individual Reservations\\
Overview:
In response to user feedback and to enhance visibility in the "Individual Reservations" section of the Front Office, we have introduced a new feature. This improvement allows users to easily identify reservations with existing notes and navigate to them effortlessly.
Enhancements:
1. Marking the "Notes" Cell with an Indicator:
Change:
* The "Notes" cell in the "Individual Reservations" view will now be marked with an indicator to signify the presence of notes on the reservation.
* If any note (internal, billing, or external) is added to the reservation, the "Notes" cell will have a hyperlink and be underlined, as illustrated in the attached design.
How to Use:
* Simply navigate to the [**"Individual Reservations"**](https://manage.kwentra.com/frontoffice/#/individualreservation) section in the Front Office.
* Look for the "Notes" cell, which will now feature a hyperlink and be underlined if there are any existing notes on the reservation.
Visual Indicators:
* Hyperlink and Underline: Denotes the presence of notes on the reservation.
* Dimmed Cell: Indicates that the reservation has no notes or the existing notes have been deleted.
* 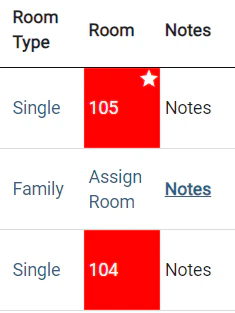 [Read more](/front-office/reservations/individual-reservations/how-do-i-add-notes-on-a-reservation)
## Viewing Historical No-Show Data in the Canceled and No-Show Reservations Report
We've enhanced the "Canceled and No-Show Reservations" report to provide a more accurate view of your no-show data. You can now see reservations marked as no-show on a specific date, **even if their status was later changed.**
**Why this change?**
Previously, the report only showed reservations based on their *current* status. This meant that if a reservation was marked as a no-show but later reinstated or canceled, it wouldn't appear in the report for the original no-show date. This limited your ability to track no-show trends accurately.
**What's new?**
The report now reflects the **historical state** of the reservation as it was on the selected date. This means you'll see all no-shows for that date, regardless of any subsequent changes to the reservation status.
**How to use it:**
1. Go to **Reports**.
2. Select **[Canceled and No-Show Reservations](https://manage.kwentra.com/reports/FrontDesk/Cancelled%20and%20No%20Show%20Reservations/)**.
3. Choose the desired date range.
4. The report will now display all reservations that were in a **No-Show** state on the selected date, even if they were later reinstated or canceled.
## Enhancing ETA Manual and Automatic Invoice Features
**Introduction:**
The ETA integration for manual and automatic invoices has been updated to ensure accurate mapping and display of guest and reservation details in invoice printouts. These updates address the need for precise handling of guest information and comments to improve the integration with ETA.
### **[Manual Invoice](https://manage.kwentra.com/settings/#/eta/manualinvoices) Updates**
#### **Import Sheet Update**
* **New Column:** A new column labeled **"SO Reference"** has been added to the import sheet.
* **Purpose:** This column is used to manually enter guest names and arrival/departure dates.
* **Mapping:** Data from this column will be included in the ETA document under **"SO Reference"**.
* **Character Limit:** The maximum character limit for this field is **100 characters**.
#### **Comment Column Updates**
1. **Invoice-Level Comments:**
* **New Mapping:** Comments entered at the invoice level will now be sent in the ETA document under **"Sales order Description".**
* **Purpose:** Ensures accurate display of invoice-level comments in the ETA invoice.
* **Character Limit:** The maximum character limit for this field is **500 characters**.
2. **Invoice Line Item-Level Comments:**
* **New Mapping:** Comments added at the line item level will be sent in the ETA document under **"line Item Description"**.
* **Updated Behavior:**
* Replace the current use of department descriptions in **"line Item Description"** with the comments entered for the line item.
* If the comment field is empty for a line item, we will use the department description in **"line Item Description"**.
* **Purpose:** Ensures that the correct comments or descriptions are displayed on the ETA invoice printout.
## Enhancements to AR Accounts Search Form
**Overview**:
In response to user feedback and in our commitment to improving user experience, we have introduced enhancements to the search form in the [**Back Office → Accounts Receivable → AR Accounts**](https://manage.kwentra.com/income/araccount/) section. These changes aim to provide greater flexibility and accuracy when searching for accounts. Below are the details of the modifications:
1. **Parent Account Dropdown**:
* The Parent Account dropdown is no longer mandatory.
* You can leave it blank to view results across all parent accounts.
2. **Exclude Zero Balance Checkbox**:
* Check the "Exclude Zero Balance" checkbox to exclude accounts with zero balances in the Total column from the search results.
* Uncheck the checkbox to display all accounts, including those with zero balances.
[Read more](/front-office/reservations/individual-reservations/how-do-i-add-notes-on-a-reservation)
## Viewing Historical No-Show Data in the Canceled and No-Show Reservations Report
We've enhanced the "Canceled and No-Show Reservations" report to provide a more accurate view of your no-show data. You can now see reservations marked as no-show on a specific date, **even if their status was later changed.**
**Why this change?**
Previously, the report only showed reservations based on their *current* status. This meant that if a reservation was marked as a no-show but later reinstated or canceled, it wouldn't appear in the report for the original no-show date. This limited your ability to track no-show trends accurately.
**What's new?**
The report now reflects the **historical state** of the reservation as it was on the selected date. This means you'll see all no-shows for that date, regardless of any subsequent changes to the reservation status.
**How to use it:**
1. Go to **Reports**.
2. Select **[Canceled and No-Show Reservations](https://manage.kwentra.com/reports/FrontDesk/Cancelled%20and%20No%20Show%20Reservations/)**.
3. Choose the desired date range.
4. The report will now display all reservations that were in a **No-Show** state on the selected date, even if they were later reinstated or canceled.
## Enhancing ETA Manual and Automatic Invoice Features
**Introduction:**
The ETA integration for manual and automatic invoices has been updated to ensure accurate mapping and display of guest and reservation details in invoice printouts. These updates address the need for precise handling of guest information and comments to improve the integration with ETA.
### **[Manual Invoice](https://manage.kwentra.com/settings/#/eta/manualinvoices) Updates**
#### **Import Sheet Update**
* **New Column:** A new column labeled **"SO Reference"** has been added to the import sheet.
* **Purpose:** This column is used to manually enter guest names and arrival/departure dates.
* **Mapping:** Data from this column will be included in the ETA document under **"SO Reference"**.
* **Character Limit:** The maximum character limit for this field is **100 characters**.
#### **Comment Column Updates**
1. **Invoice-Level Comments:**
* **New Mapping:** Comments entered at the invoice level will now be sent in the ETA document under **"Sales order Description".**
* **Purpose:** Ensures accurate display of invoice-level comments in the ETA invoice.
* **Character Limit:** The maximum character limit for this field is **500 characters**.
2. **Invoice Line Item-Level Comments:**
* **New Mapping:** Comments added at the line item level will be sent in the ETA document under **"line Item Description"**.
* **Updated Behavior:**
* Replace the current use of department descriptions in **"line Item Description"** with the comments entered for the line item.
* If the comment field is empty for a line item, we will use the department description in **"line Item Description"**.
* **Purpose:** Ensures that the correct comments or descriptions are displayed on the ETA invoice printout.
## Enhancements to AR Accounts Search Form
**Overview**:
In response to user feedback and in our commitment to improving user experience, we have introduced enhancements to the search form in the [**Back Office → Accounts Receivable → AR Accounts**](https://manage.kwentra.com/income/araccount/) section. These changes aim to provide greater flexibility and accuracy when searching for accounts. Below are the details of the modifications:
1. **Parent Account Dropdown**:
* The Parent Account dropdown is no longer mandatory.
* You can leave it blank to view results across all parent accounts.
2. **Exclude Zero Balance Checkbox**:
* Check the "Exclude Zero Balance" checkbox to exclude accounts with zero balances in the Total column from the search results.
* Uncheck the checkbox to display all accounts, including those with zero balances.
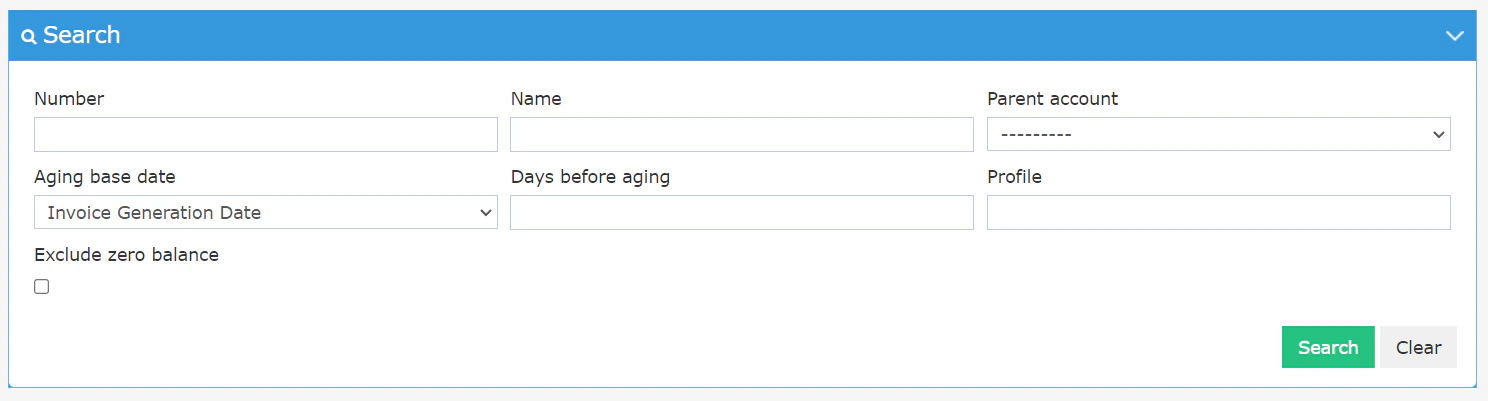 ## Enabling Multi-Currency Adjustments in Income Debit Postings
**Overview**:
We are excited to announce a significant enhancement to our system in the **Front Office → Billing → Debit Postings (Income Related)** module. This improvement enables users to perform multi-currency adjustments for Income debit postings, enhancing flexibility and accuracy in financial transactions.
**Multi-Currency Adjustments for Income Debit Postings**:
* How to Use:
* Navigate to the Debit Postings section in the Income module.
* Perform adjustments to debit postings in the same posting currency instead of the base currency, ensuring accurate currency conversion based on exchange rates.
## Enabling Multi-Currency Adjustments in Income Debit Postings
**Overview**:
We are excited to announce a significant enhancement to our system in the **Front Office → Billing → Debit Postings (Income Related)** module. This improvement enables users to perform multi-currency adjustments for Income debit postings, enhancing flexibility and accuracy in financial transactions.
**Multi-Currency Adjustments for Income Debit Postings**:
* How to Use:
* Navigate to the Debit Postings section in the Income module.
* Perform adjustments to debit postings in the same posting currency instead of the base currency, ensuring accurate currency conversion based on exchange rates.
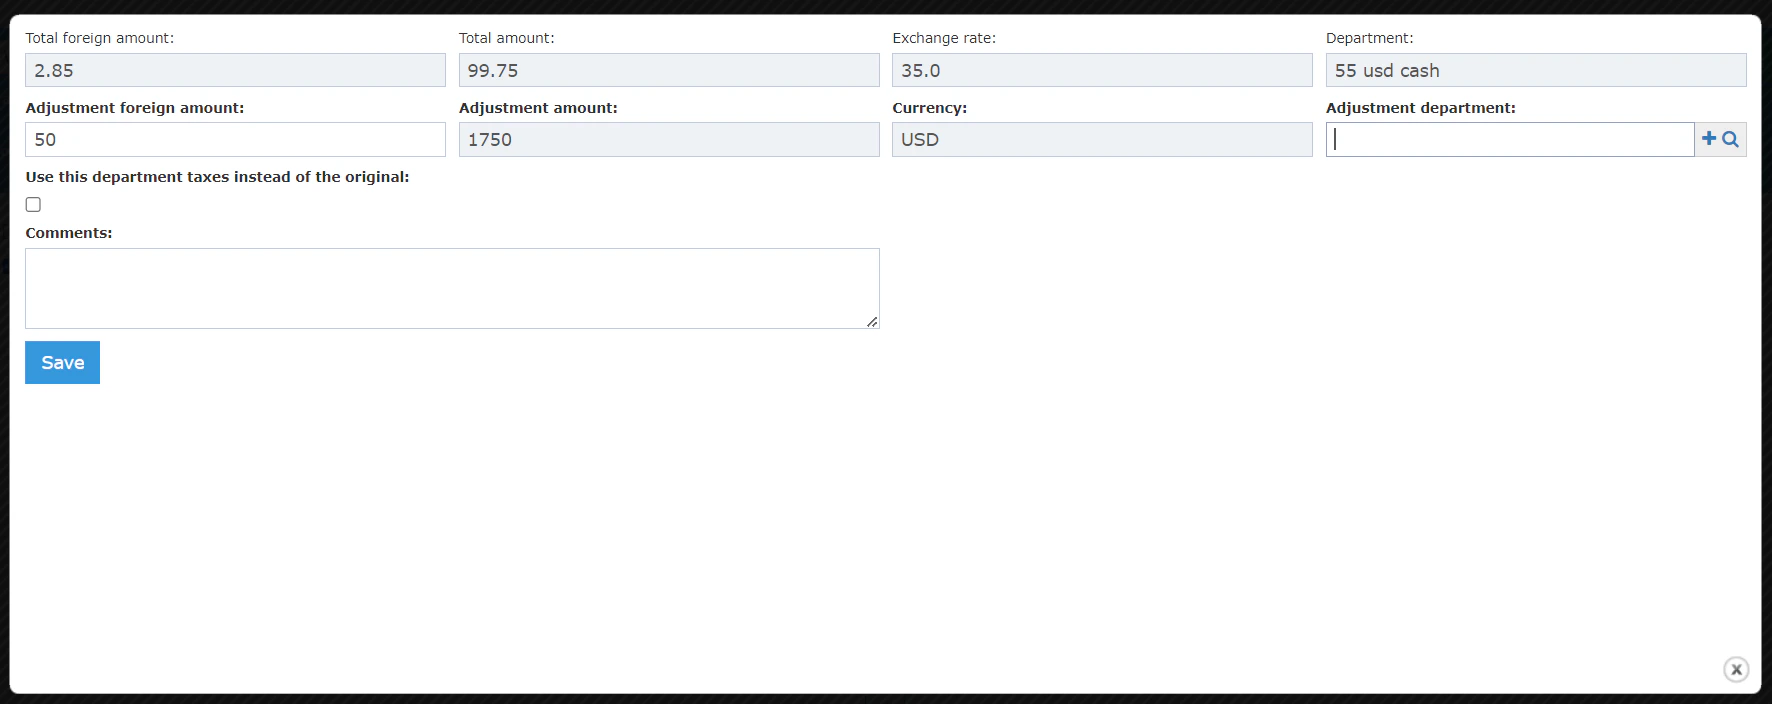 **New Fields in the Adjustment popup**:
* Addition:
* Two new fields have been added to the adjustment popup:
* Foreign Amount (Editable):
* Represents the foreign amount for the adjustment.
* Exchange Factor (Read-only):
* Represents the original posting's exchange factor used to calculate the adjustment amount concerning the base currency.
* How to Use:
* When making adjustments, enter the foreign amount in the provided editable field.
* The exchange factor field displays the original posting's exchange factor used for calculation.
## AP Aging Report Update
### **Business Need:**
1. Finance teams need to generate the Accounts Payable Aging report retrospectively — i.e., as of a past date — to match reporting periods, audit requirements, and historical payment analysis. This requires linking vendor payment dates to transactions like:
* Receiving Orders (RO)
* Receive from Vendor (RFV)
* Return Requests (RR)
2. Ensure that historical (backdated) vendor payments are correctly reflected in the AP Aging report, especially when they’re linked manually to RO, RR, or RFV transactions but weren’t properly included due to missing linkage in the many-to-many table.
### **Use Case:**
A finance manager wants to view the accounts payable balances as of the end of March. The system must consider what payments had been made **as of that date**, not just currently unpaid invoices.
### **Technical Implementation:**
1. Modify the report logic to reference the vendor payment date linked to RO, RFV, and RR transactions.
2. Ensure the aging logic recalculates payables based on this historical payment status.
[Read more](/back-office/bo-reports/ap-aging-report)
## British Account Listing Details: Balance Column & Sorting Enhancement
We’ve enhanced the **British Account Listing Details** report to include a new **"Balance"** column and apply **chronological sorting**. These improvements help finance teams better track journal vouchers (JVs) and account balances in real-time.
### **Value & Application**
This update provides:
* **Clear financial visibility** into how balances evolve per transaction.
* **Faster audits and reconciliations**, without exporting data to external tools.
* **Simplified error tracing** by matching debits and credits to resulting balances.
### **Example**
**A Financial Controller wants to verify the ending balance of a Guest Ledger account. Instead of manually calculating it from debits and credits, the controller can now scroll through the report and view the balance after each transaction.**
**Go to [manage.kwentra.com](https://manage.kwentra.com/)**
**Click "Reports"**
**New Fields in the Adjustment popup**:
* Addition:
* Two new fields have been added to the adjustment popup:
* Foreign Amount (Editable):
* Represents the foreign amount for the adjustment.
* Exchange Factor (Read-only):
* Represents the original posting's exchange factor used to calculate the adjustment amount concerning the base currency.
* How to Use:
* When making adjustments, enter the foreign amount in the provided editable field.
* The exchange factor field displays the original posting's exchange factor used for calculation.
## AP Aging Report Update
### **Business Need:**
1. Finance teams need to generate the Accounts Payable Aging report retrospectively — i.e., as of a past date — to match reporting periods, audit requirements, and historical payment analysis. This requires linking vendor payment dates to transactions like:
* Receiving Orders (RO)
* Receive from Vendor (RFV)
* Return Requests (RR)
2. Ensure that historical (backdated) vendor payments are correctly reflected in the AP Aging report, especially when they’re linked manually to RO, RR, or RFV transactions but weren’t properly included due to missing linkage in the many-to-many table.
### **Use Case:**
A finance manager wants to view the accounts payable balances as of the end of March. The system must consider what payments had been made **as of that date**, not just currently unpaid invoices.
### **Technical Implementation:**
1. Modify the report logic to reference the vendor payment date linked to RO, RFV, and RR transactions.
2. Ensure the aging logic recalculates payables based on this historical payment status.
[Read more](/back-office/bo-reports/ap-aging-report)
## British Account Listing Details: Balance Column & Sorting Enhancement
We’ve enhanced the **British Account Listing Details** report to include a new **"Balance"** column and apply **chronological sorting**. These improvements help finance teams better track journal vouchers (JVs) and account balances in real-time.
### **Value & Application**
This update provides:
* **Clear financial visibility** into how balances evolve per transaction.
* **Faster audits and reconciliations**, without exporting data to external tools.
* **Simplified error tracing** by matching debits and credits to resulting balances.
### **Example**
**A Financial Controller wants to verify the ending balance of a Guest Ledger account. Instead of manually calculating it from debits and credits, the controller can now scroll through the report and view the balance after each transaction.**
**Go to [manage.kwentra.com](https://manage.kwentra.com/)**
**Click "Reports"**
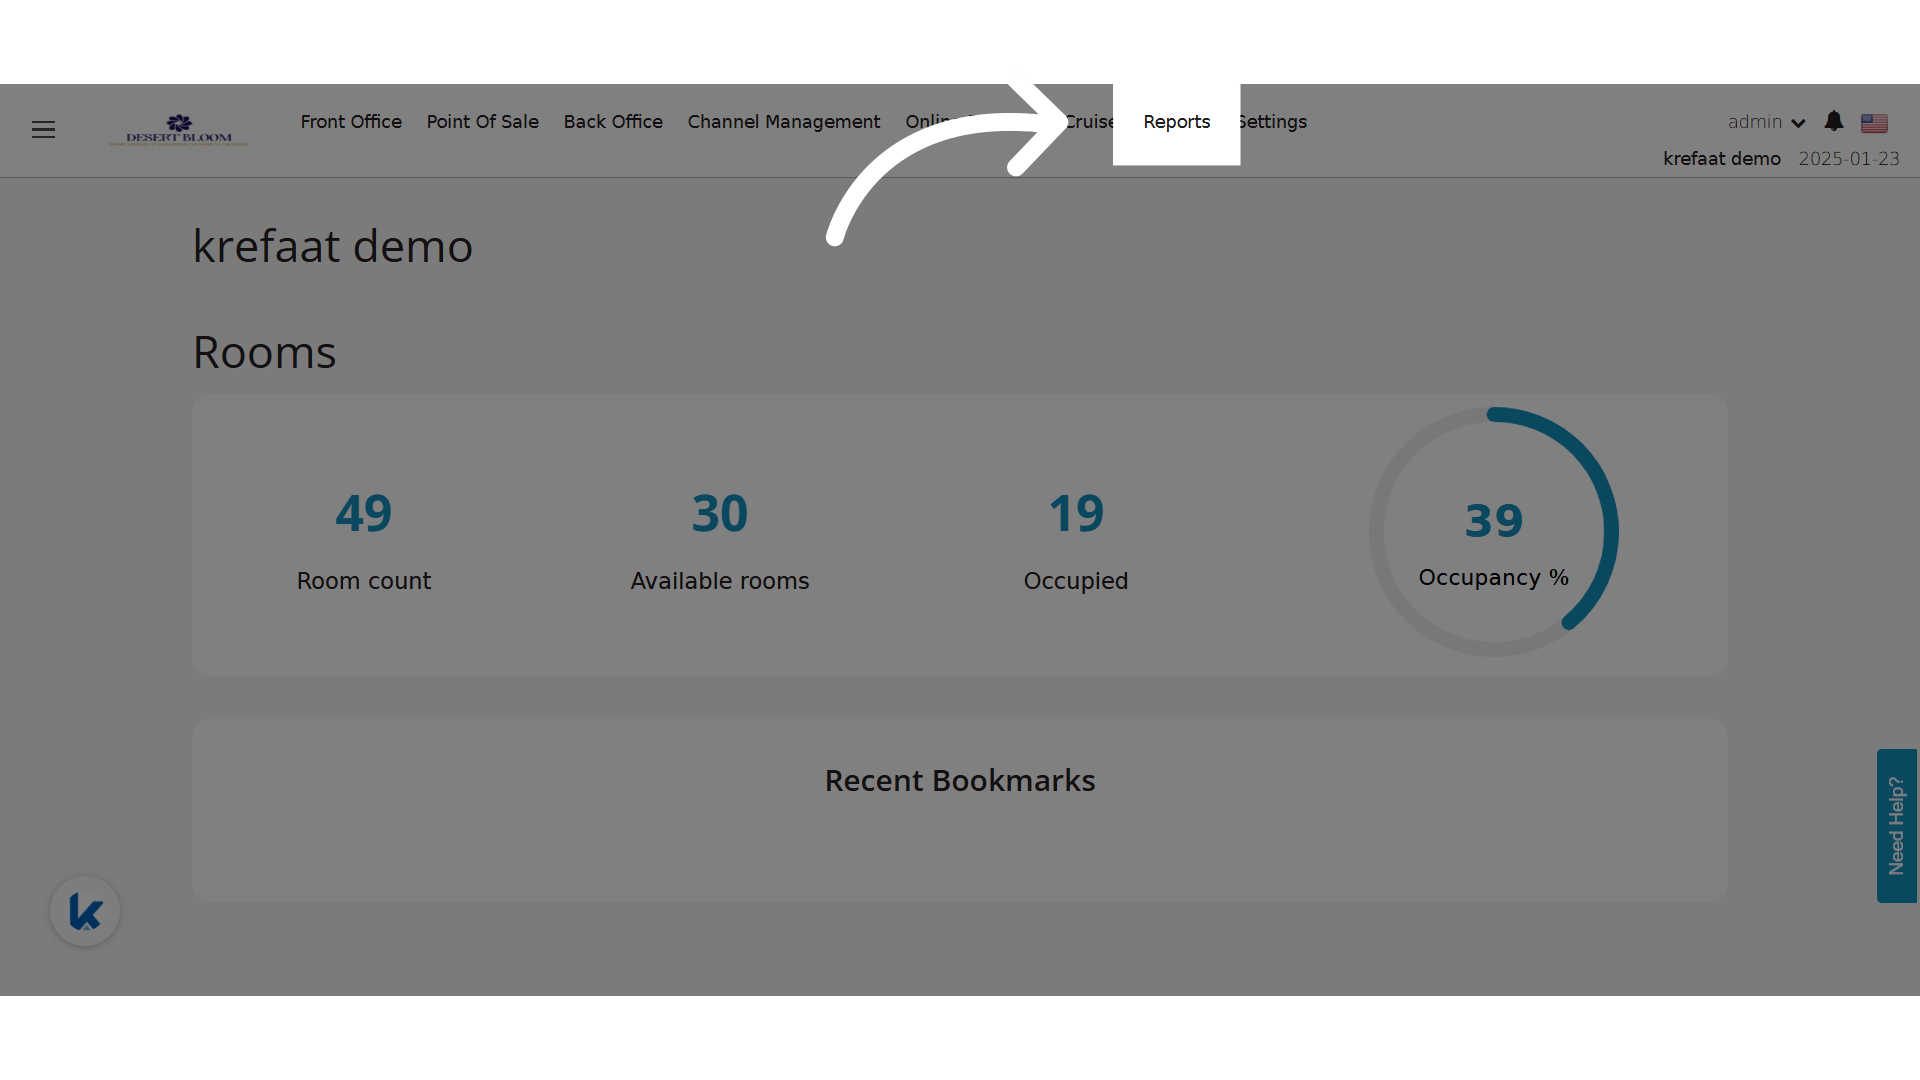 **Click BO Reports**
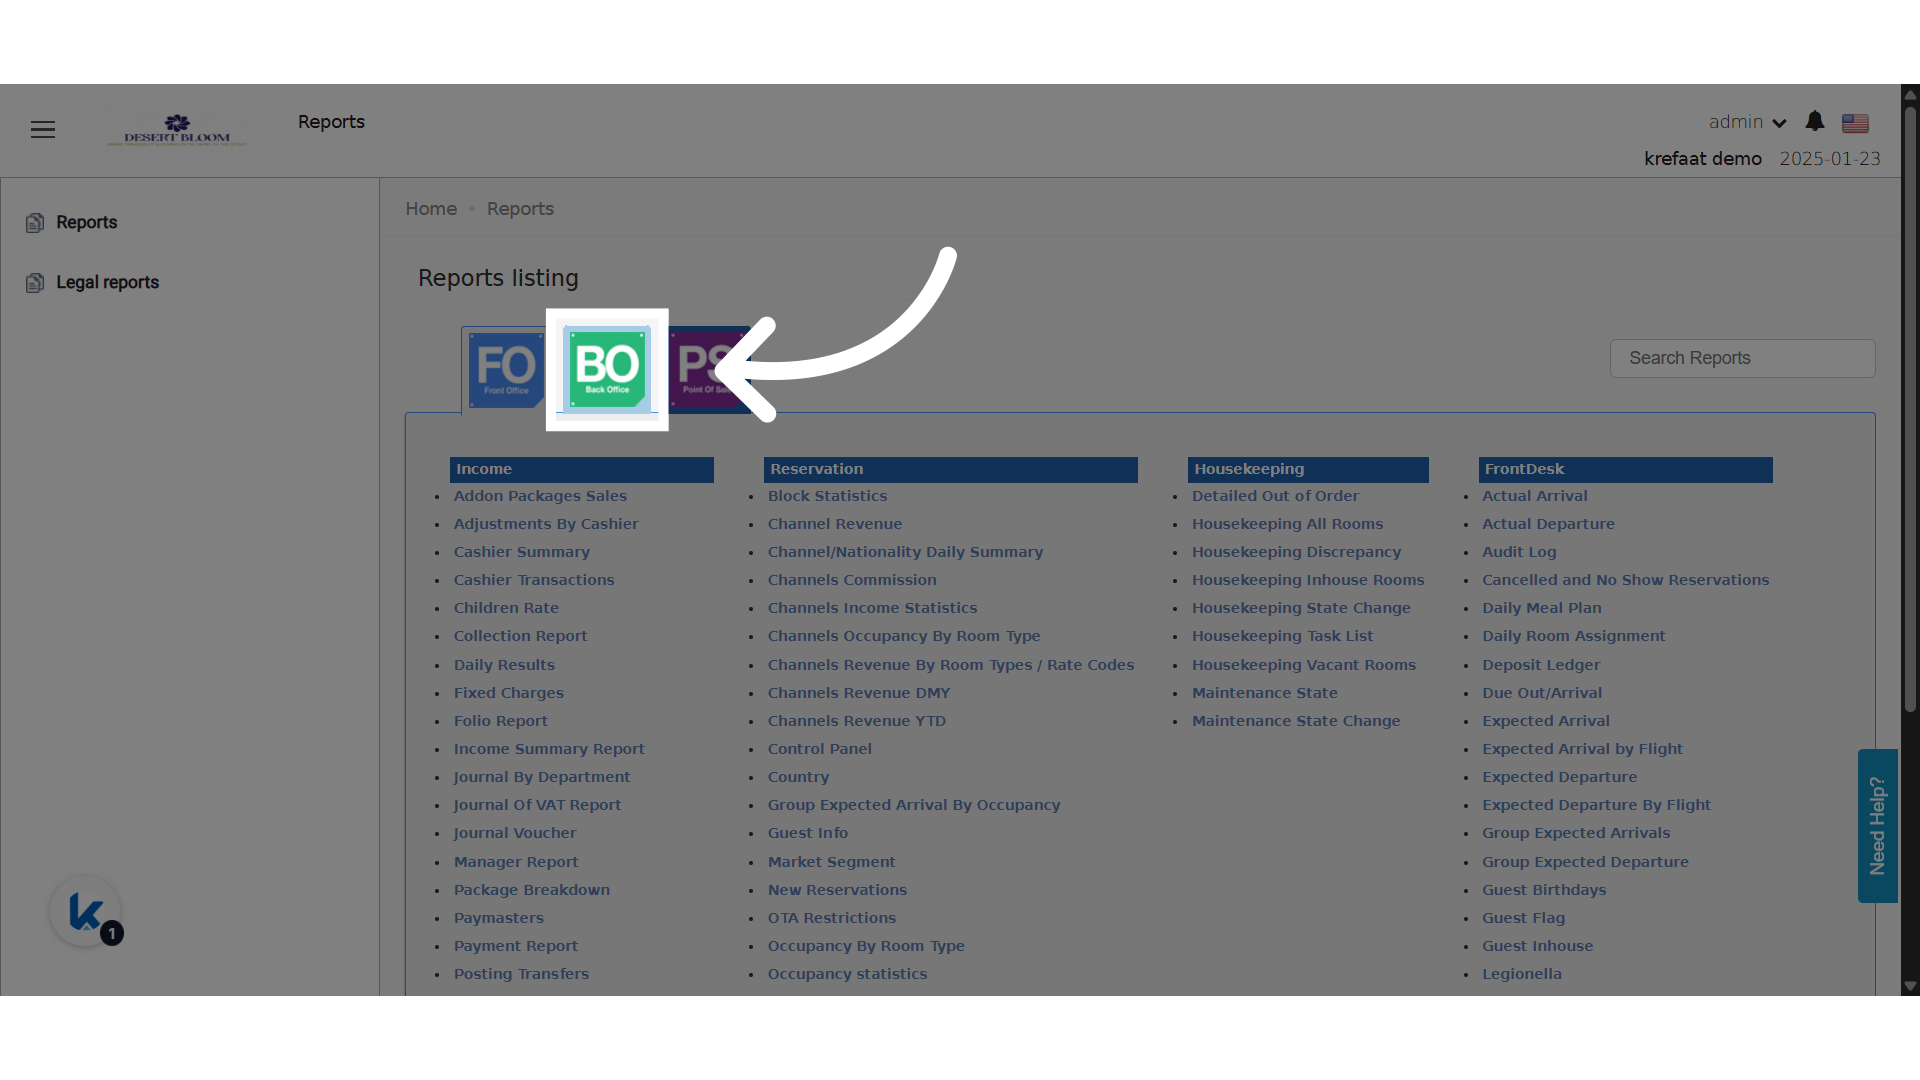 **Click "Account Listing Details"**
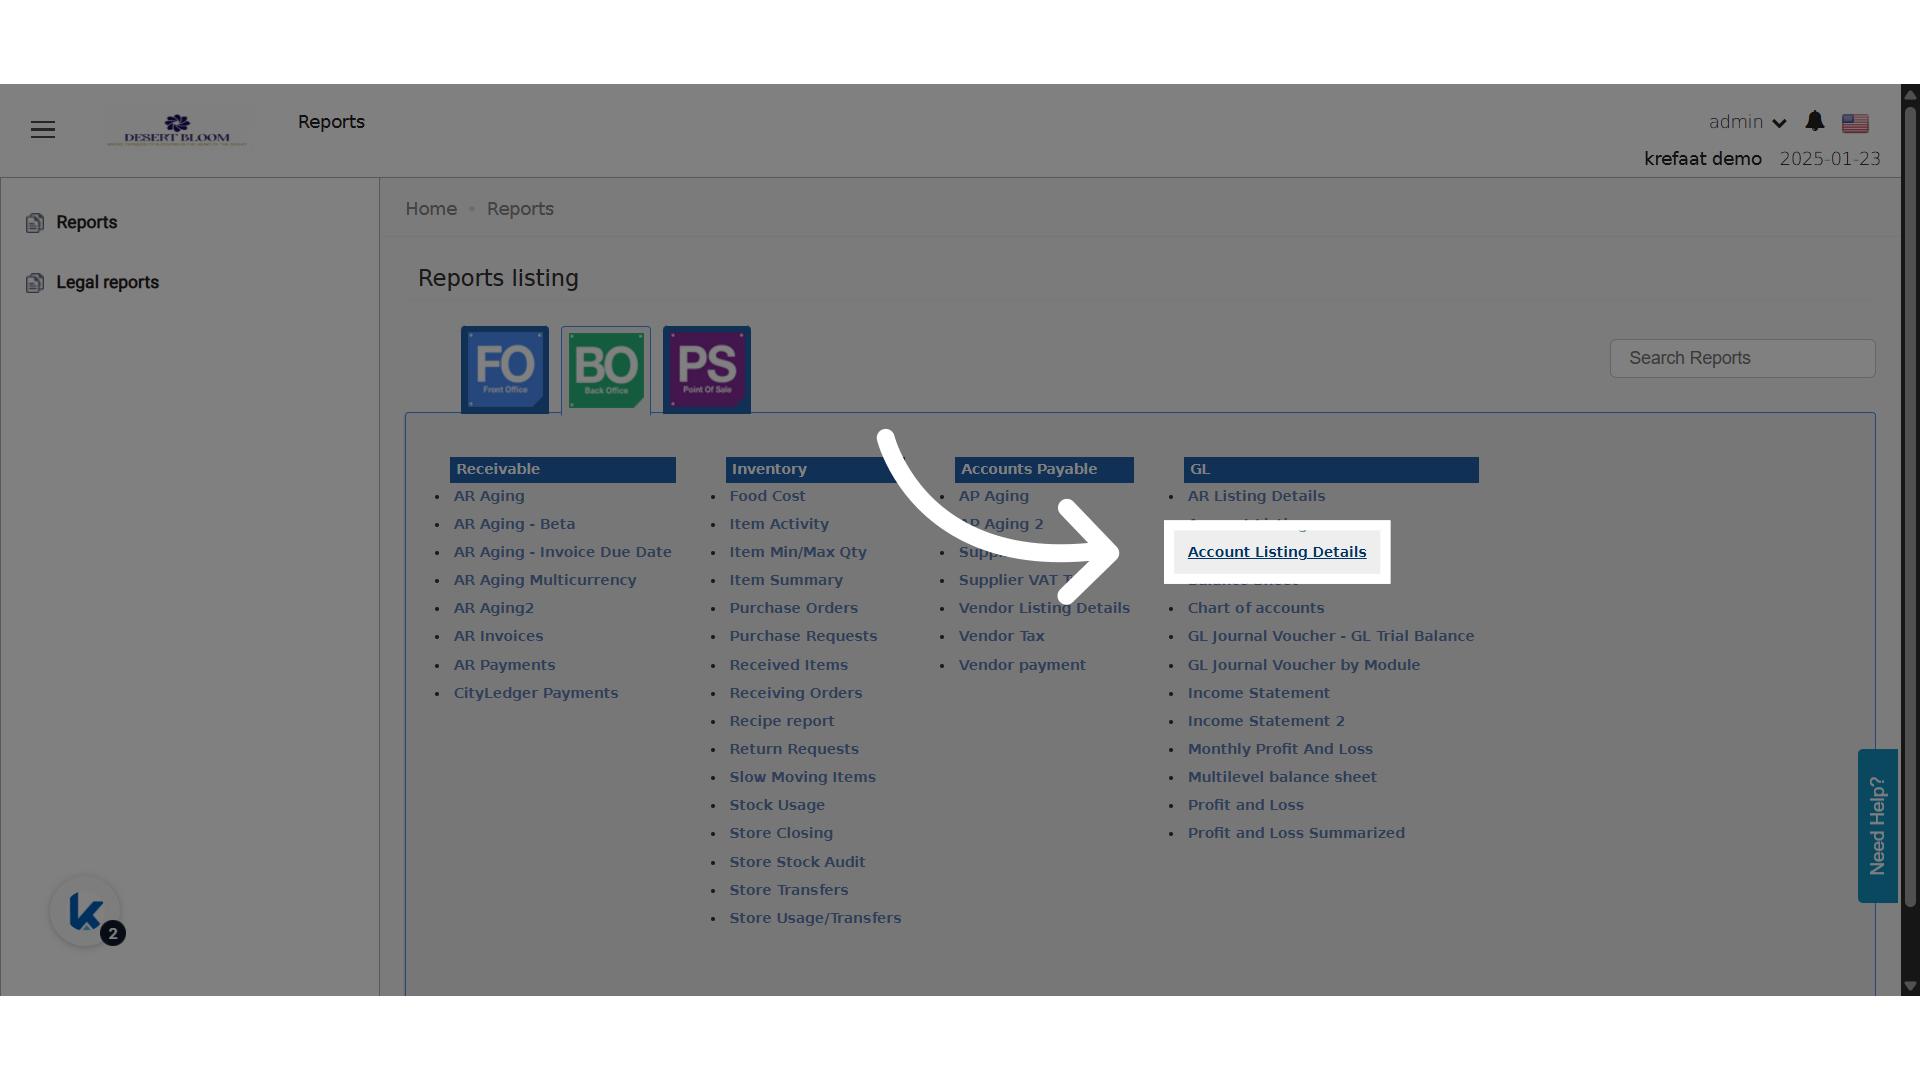 **Select your date range, account, and level of detail**
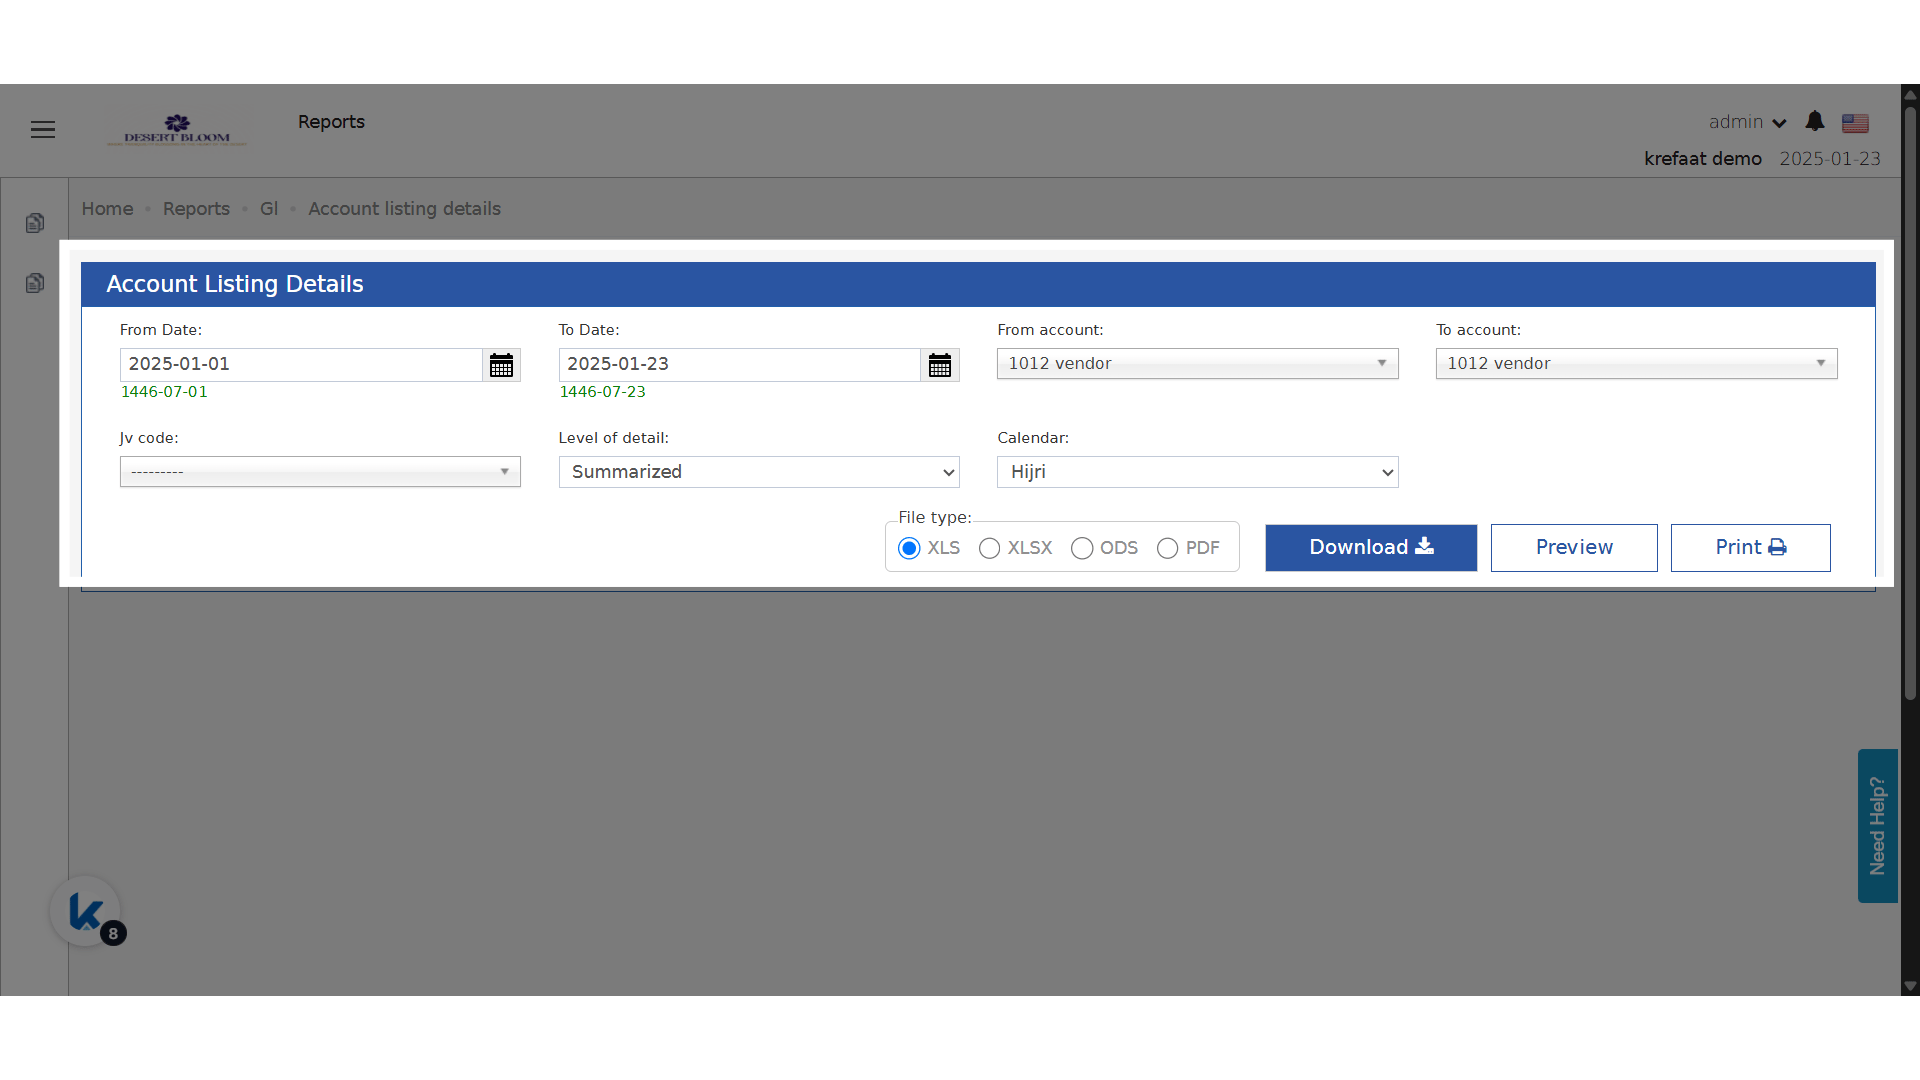 ### **📊 Balance Calculation Logic**
The system calculates the balance dynamically using the following rules:
* If the journal voucher's **account type matches** the main account type:
* The amount is **added** to the balance.
* If it **does not match**:
* The amount is **subtracted** from the balance.
*This ensures that each row in the report shows the correct balance as of that JV.*
### **📅 Sorting Behavior**
* All rows in the report are now **sorted by journal date in ascending order** (oldest first).
* This ensures balance calculation reflects the actual transaction sequence.
### **📊 Balance Calculation Logic**
The system calculates the balance dynamically using the following rules:
* If the journal voucher's **account type matches** the main account type:
* The amount is **added** to the balance.
* If it **does not match**:
* The amount is **subtracted** from the balance.
*This ensures that each row in the report shows the correct balance as of that JV.*
### **📅 Sorting Behavior**
* All rows in the report are now **sorted by journal date in ascending order** (oldest first).
* This ensures balance calculation reflects the actual transaction sequence.
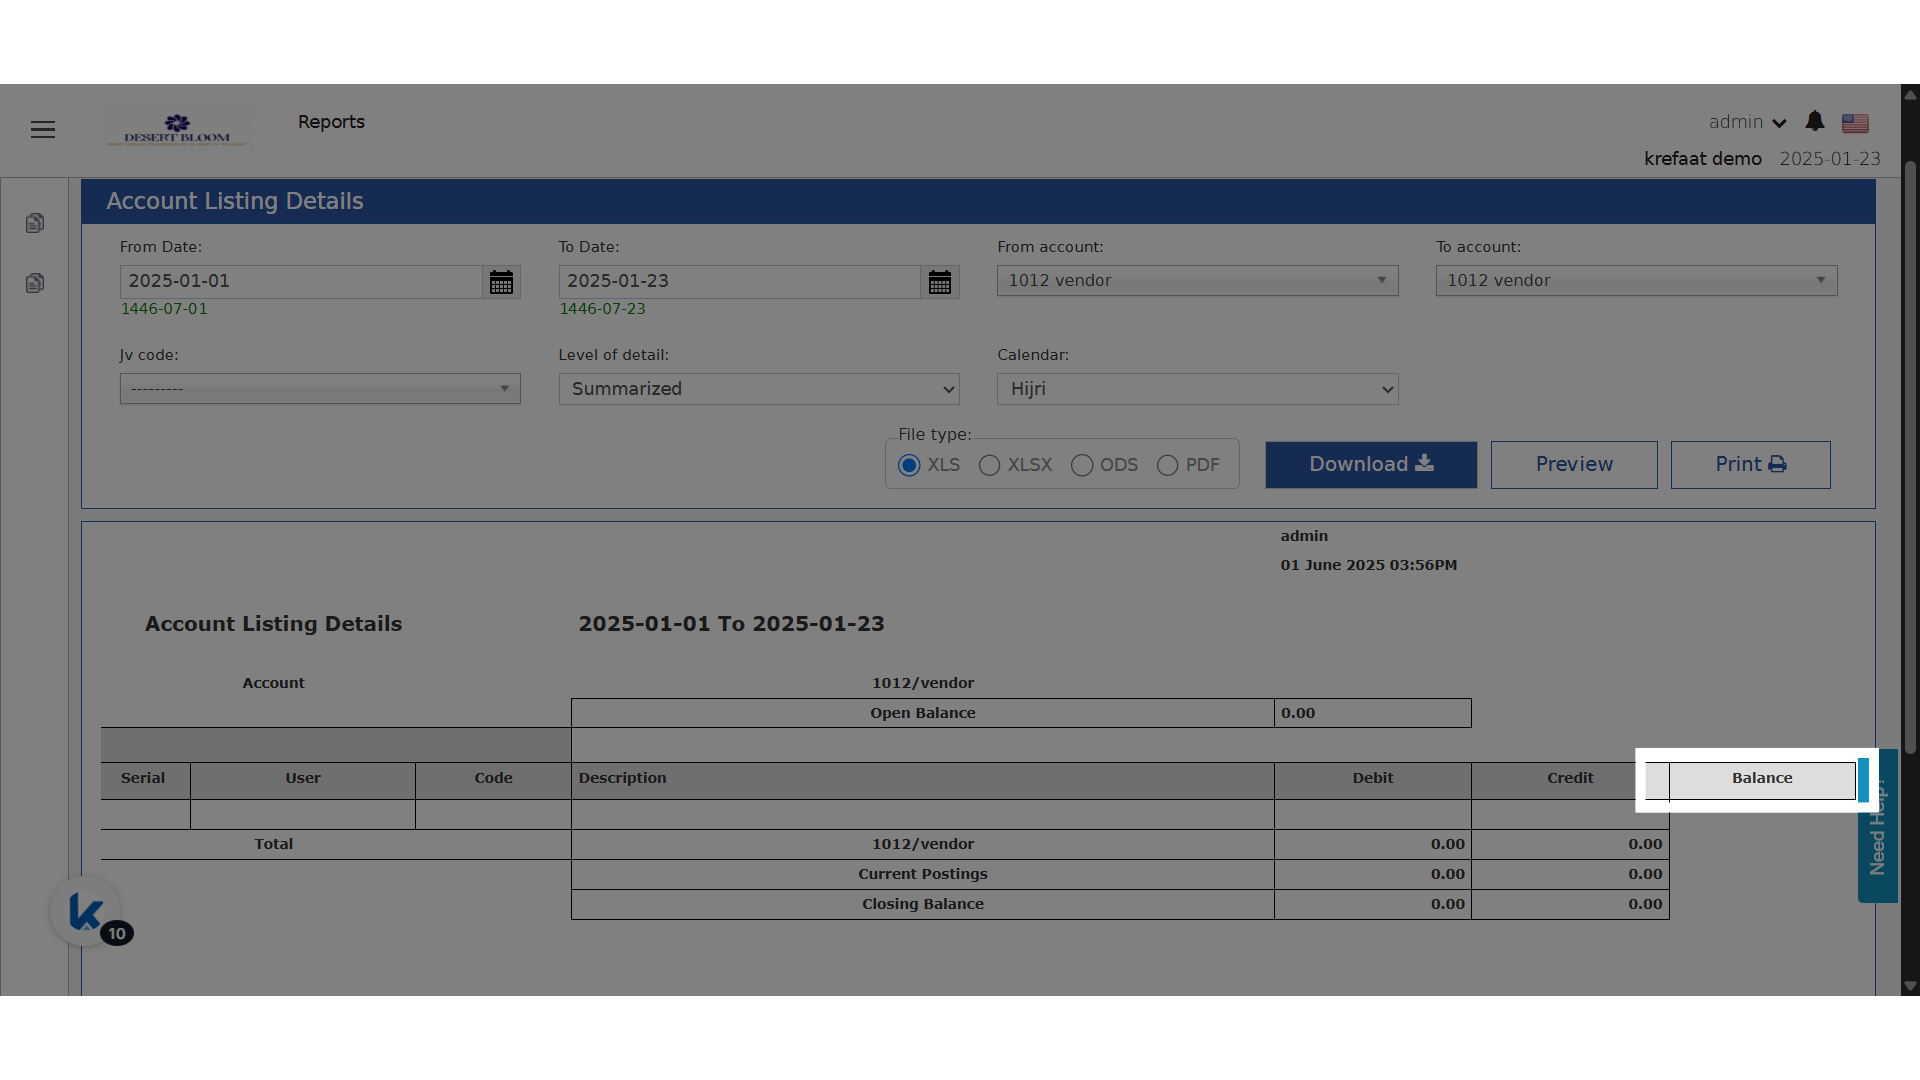 ## British Account Listing Details – Hijri Calendar Support
This feature ensures that account movement and balances can be viewed in a way that aligns with **Hijri fiscal calendars**, making reporting clearer for organizations following Hijri-based accounting.
**Go to [manage.kwentra.com](https://manage.kwentra.com/)**
**Click "Reports"**
## British Account Listing Details – Hijri Calendar Support
This feature ensures that account movement and balances can be viewed in a way that aligns with **Hijri fiscal calendars**, making reporting clearer for organizations following Hijri-based accounting.
**Go to [manage.kwentra.com](https://manage.kwentra.com/)**
**Click "Reports"**
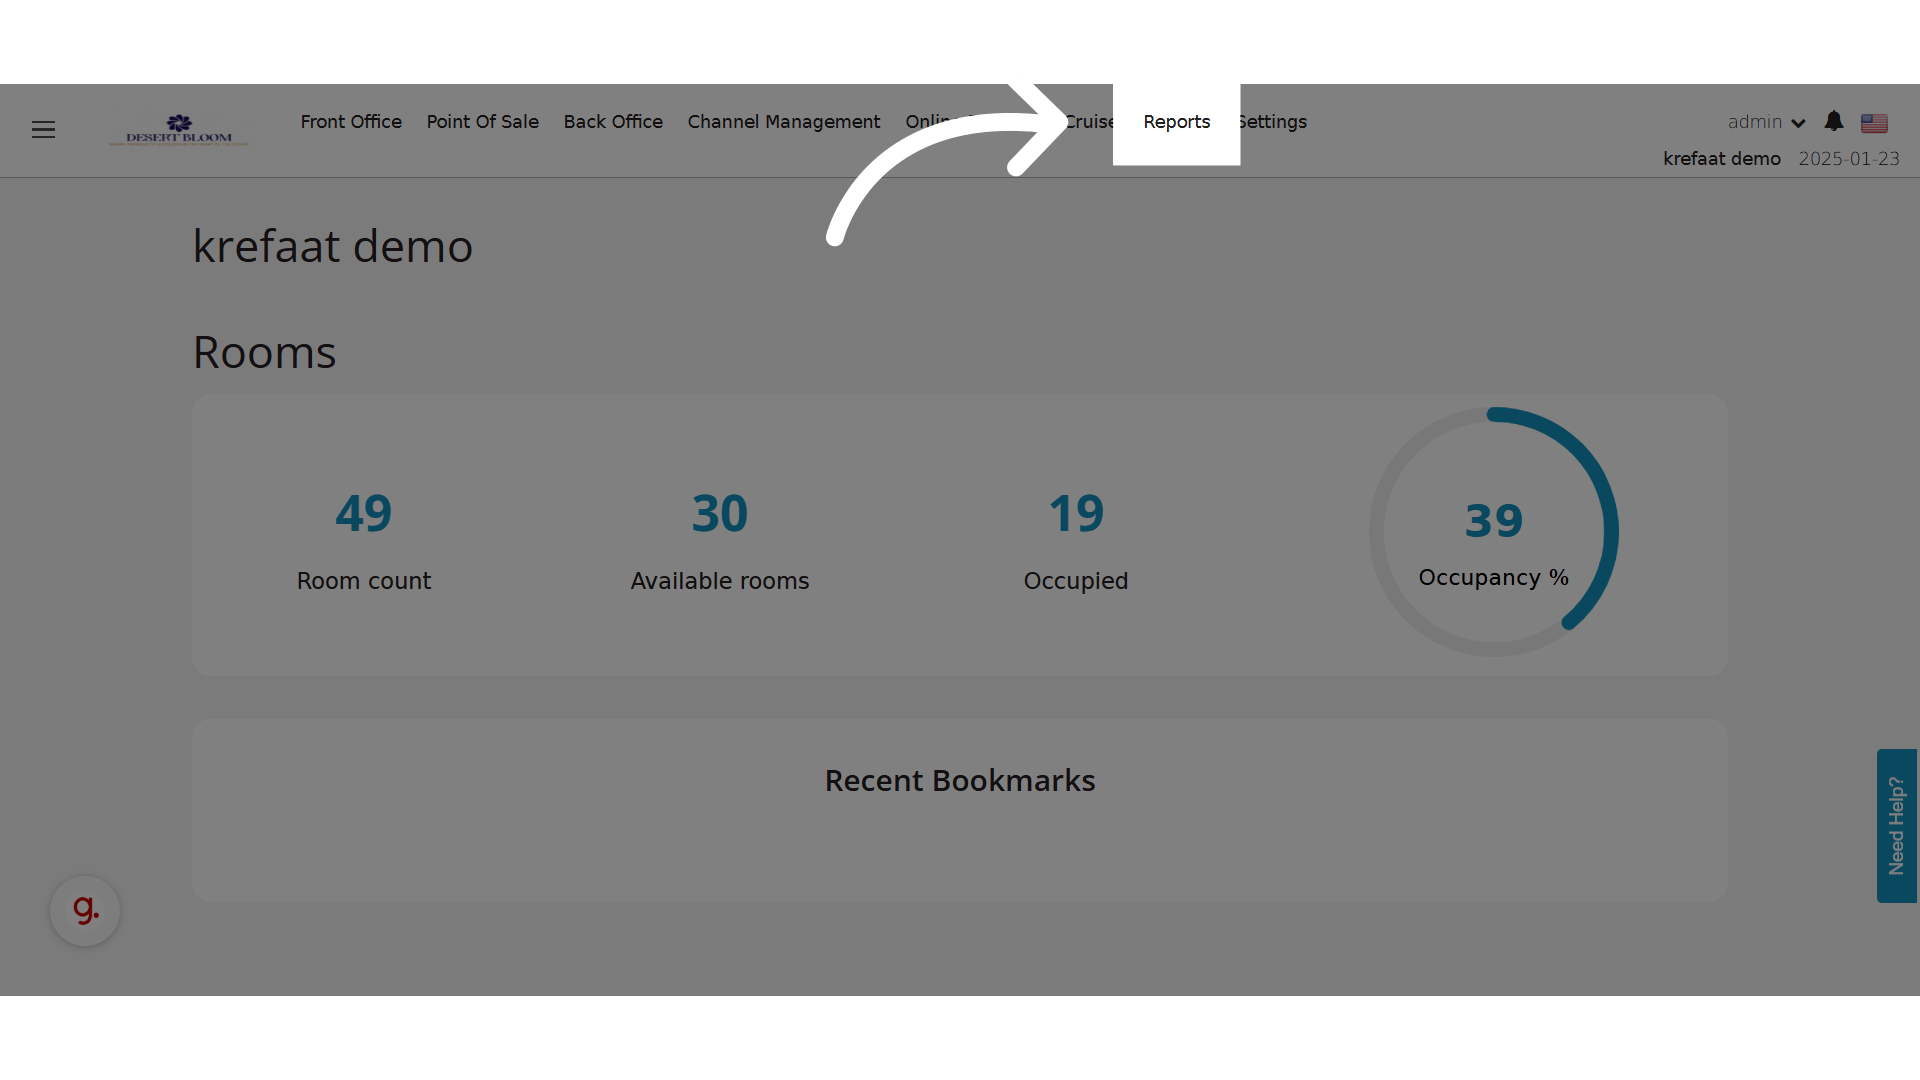 **Click BO Reports**
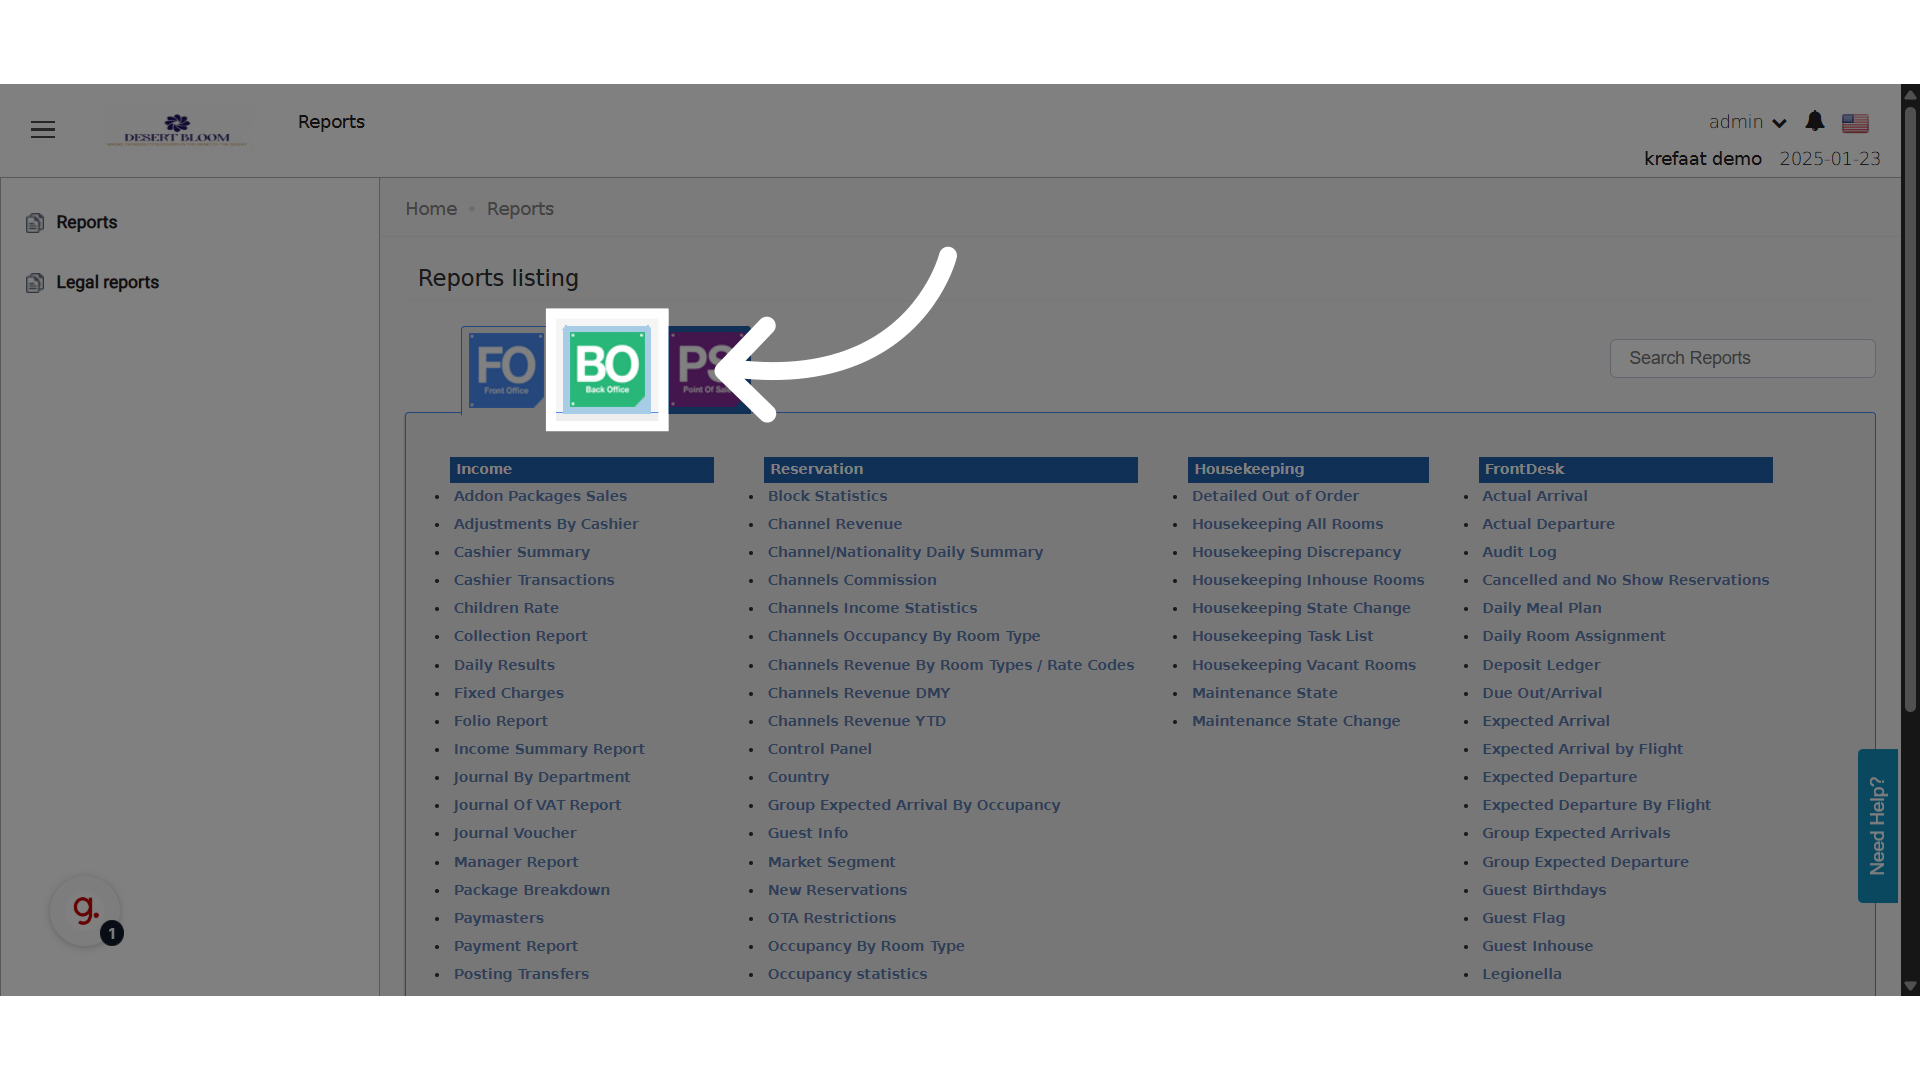 **Click "Account Listing Details"**
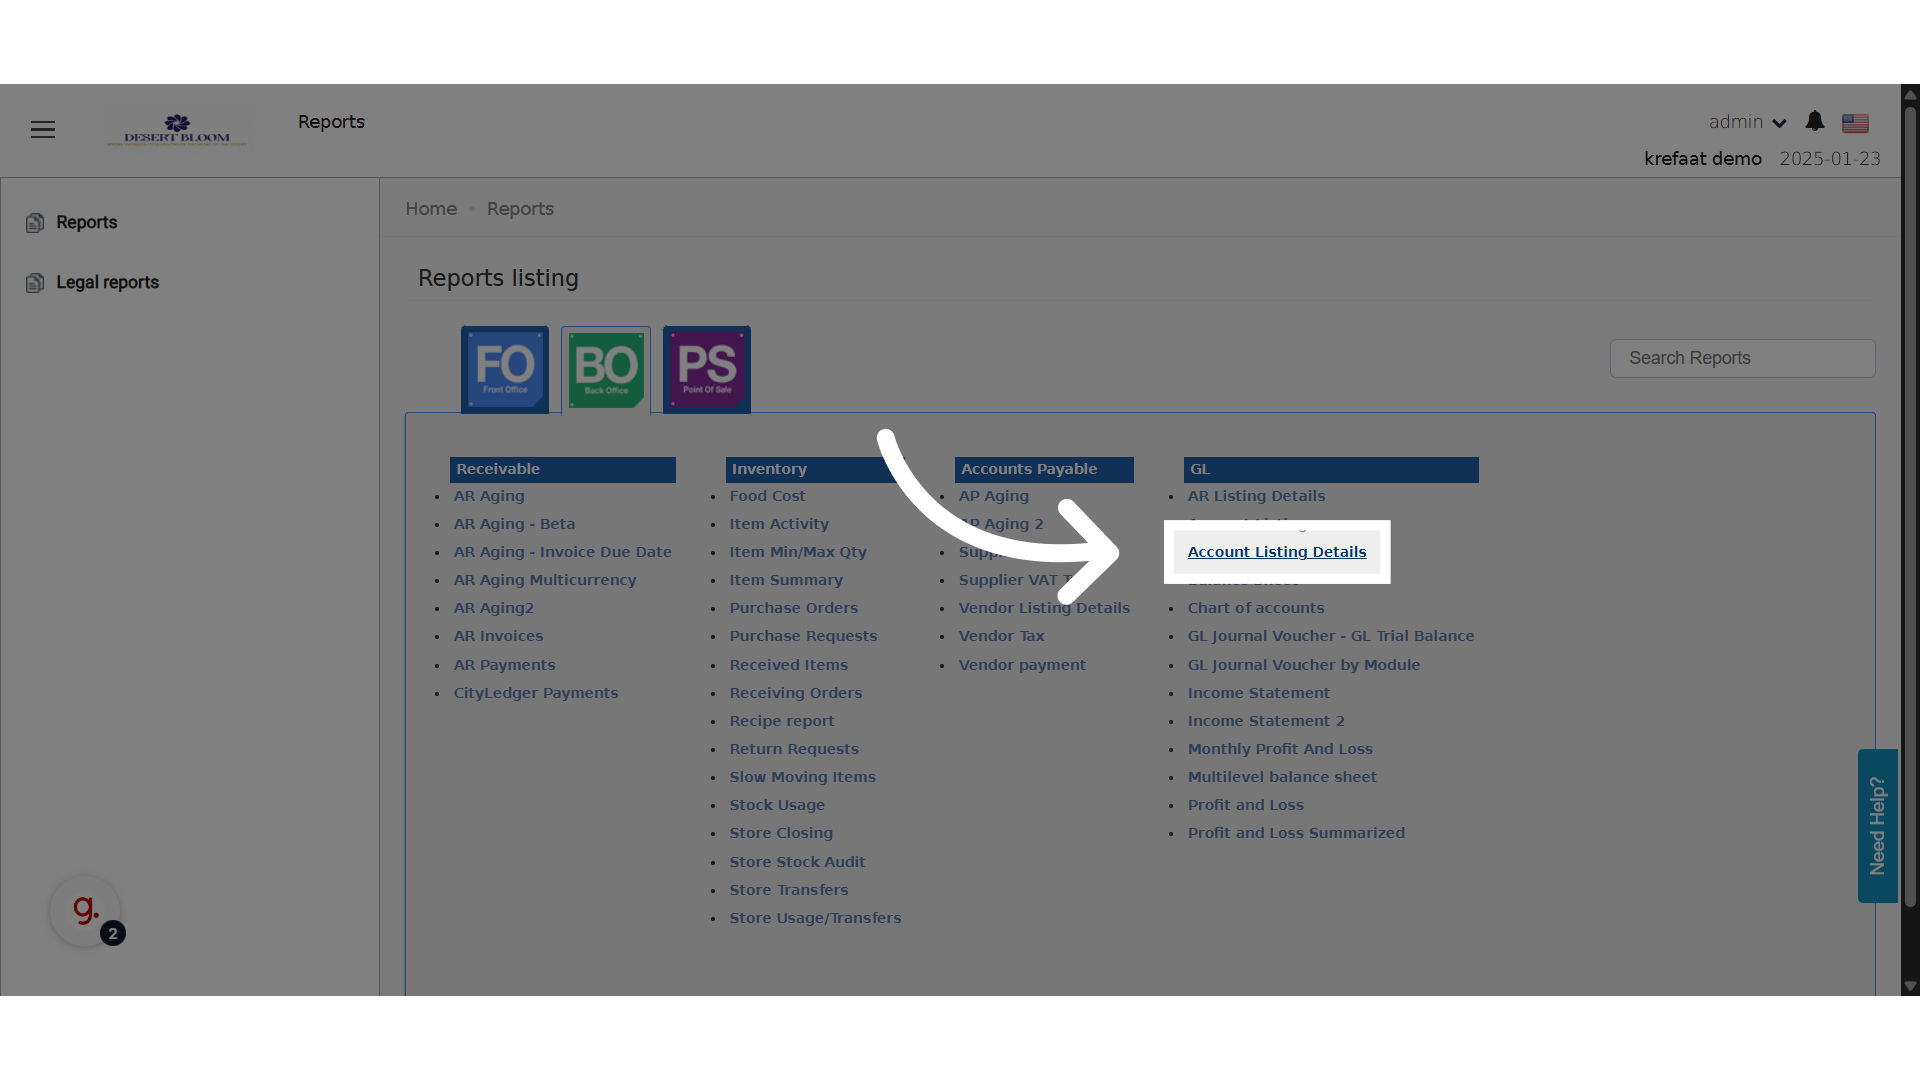 ### **🆕 What’s New?**
* A new **Calendar** parameter has been added to the report.
* You can select between the **Gregorian** and **Hijri** calendars.
* When **Hijri** is selected:
* All displayed dates in the report follow the Hijri format.
* The opening balance is calculated based on the start of the **Hijri year**.
### **🆕 What’s New?**
* A new **Calendar** parameter has been added to the report.
* You can select between the **Gregorian** and **Hijri** calendars.
* When **Hijri** is selected:
* All displayed dates in the report follow the Hijri format.
* The opening balance is calculated based on the start of the **Hijri year**.
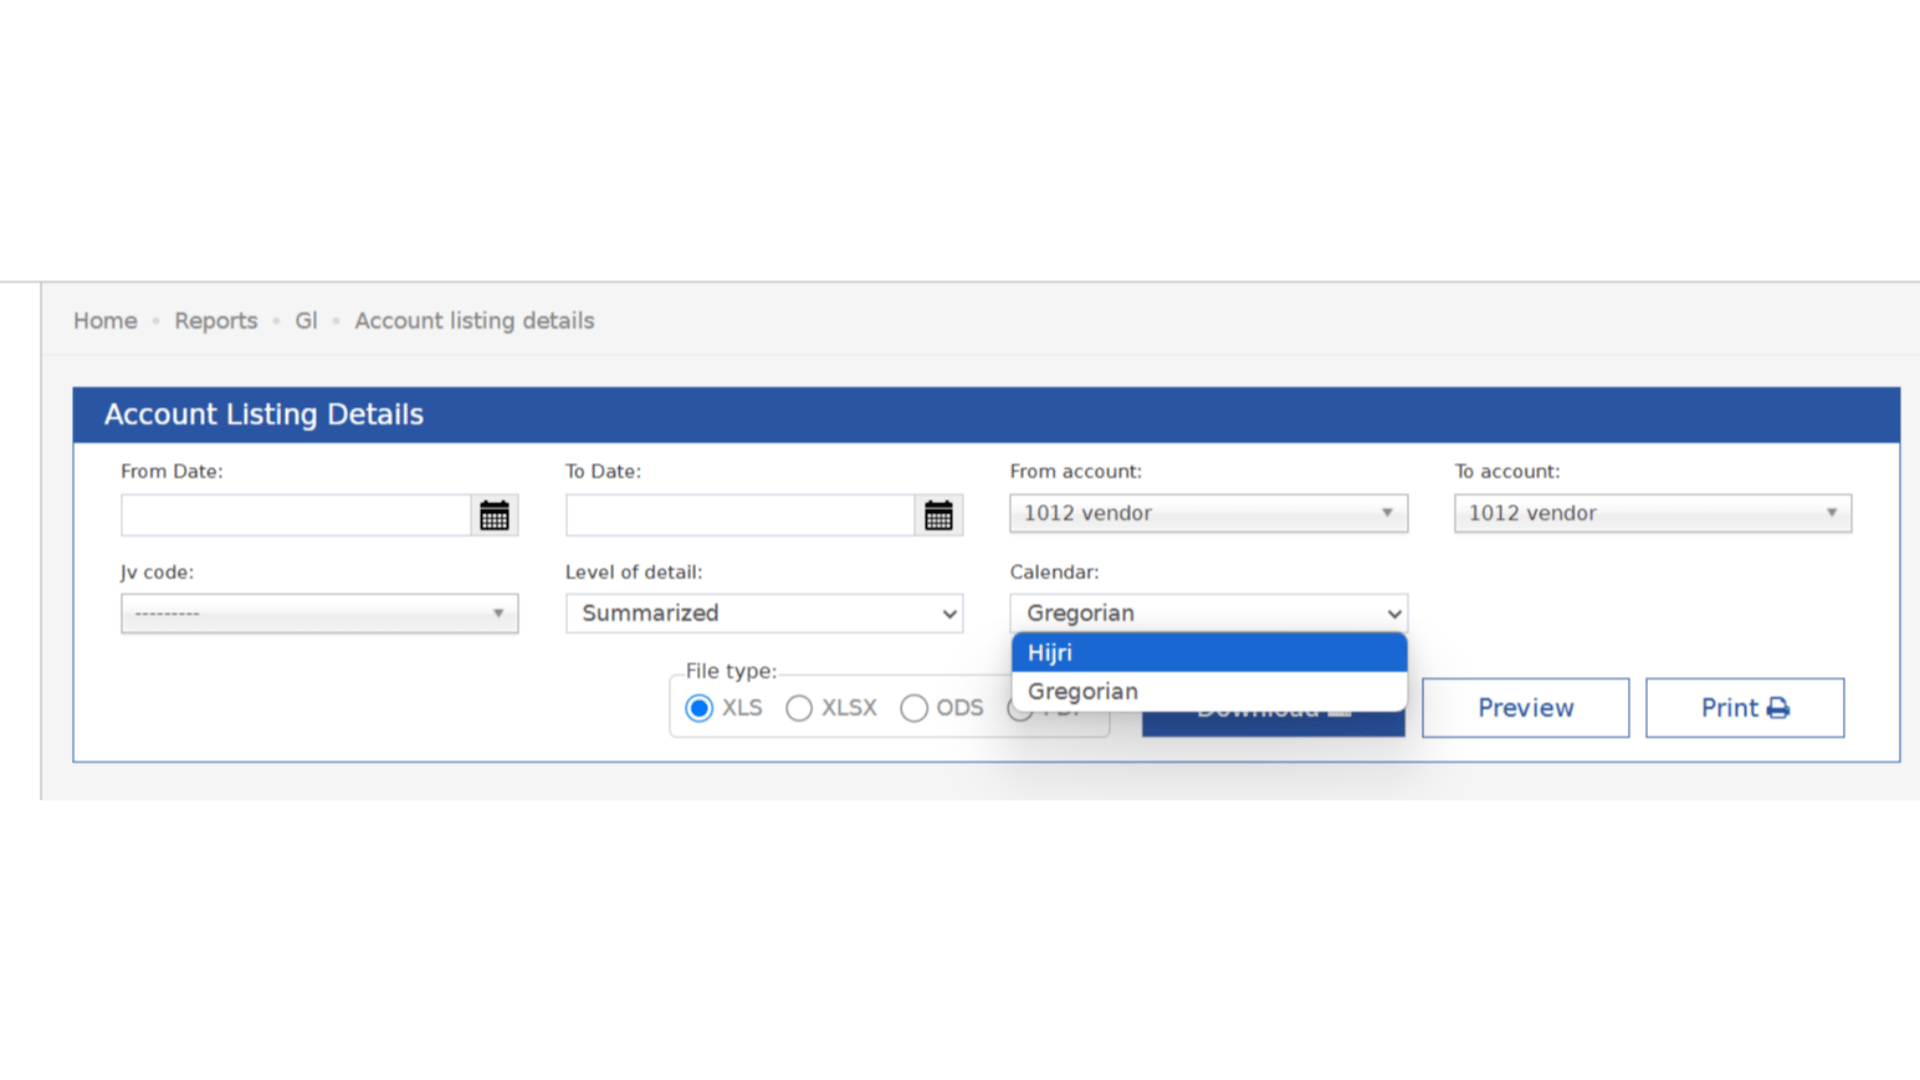 [Read more](/back-office/bo-reports/british-account-listing-hijri-calendar-support)
## How to Use the British Accounting System's Import JV Feature
#### Accessing the Import JV Feature
Where to Find It:
* Only in the British system is Enabled
* [BackOffice → GL → Import JV](https://manage.kwentra.com/gl/journalvoucher/importbritishvouchers/)
Steps to Use:
1. Access British Import JV: Navigate to the GL section in the BackOffice and select "British Import JV" if the British system is enabled.
#### Preparing Your Import File
To import JVs, you need to prepare a CSV file with the following structure:
Required Columns:
1. JV Code: Text field (Mandatory)
2. JV Description: Text field (Mandatory)
3. Date: Date field in the format YYYY-MM-DD (Mandatory)
4. Main Account Code: Saved main account code (Mandatory)
5. T0 Analysis Code: Saved analysis code (Optional)
6. T1 Analysis Code: Saved analysis code (Optional)
7. T2 Analysis Code: Saved analysis code (Optional)
8. T3 Analysis Code: Saved analysis code (Optional)
9. T4 Analysis Code: Saved analysis code (Optional)
10. Debit Amount: Number field (Mandatory)
11. Credit Amount: Number field (Mandatory)
12. Transaction Description: Text field (Optional)
| V Code | JV Description | Date | Main Account Code | T0 Analysis Code | T1 Analysis Code | T2 Analysis Code | T3 Analysis Code | T4 Analysis Code | Debit Amount | Credit Amount | Transaction Description |
| ------ | ------------------------ | ---------- | ----------------- | ---------------- | ---------------- | ---------------- | ---------------- | ---------------- | ------------ | ------------- | ----------------------- |
| 01 | January Expenses Updated | 2024-05-06 | | | | | | | | | |
| | | | 1234 | 2000 | 1000 | | | | 108526.37 | | |
| | | | 11123444 | 500 | | 600 | 700 | | | 108526.37 | |
| 02 | January Expenses Updated | 2024-05-06 | | | | | | | | | |
| | | | 11123444 | 500 | | 600 | 700 | | 108526.37 | | |
| | | | 1234 | 2000 | 1000 | | | | | 108526.37 | |
| | | | | | | | | | | | |
Steps to Import:
1. Select File: On the "British Import JV" page, use the file selection option to choose your prepared CSV file.
2. Review Help Section: Refer to the help section on the page to ensure all fields in your file meet the required validations.
3. Submit File: Once your file is selected and verified, click the import button to upload your data.
#### Validation Rules
* Main Account Code: The system must have a saved main account code.
* T0-T4 Analysis Codes: Optional fields but must be valid if entered.
* Combination Validation: The combination of the Main Account Code and any T Analysis Codes must exist in the system and point to an account number.
* Debit and Credit Amounts: These must be positive numbers. Debit Amount or Credit Amount must be provided, not both zero.
#### Help Text for Fields
* JV Code: Text field (Mandatory)
* JV Description: Text field (Mandatory)
* Date: Date field in the format YYYY-MM-DD (Mandatory)
* Main Account Code: Must be an existing main account code (Mandatory)
* T0-T4 Analysis Codes: Optional but must be valid codes if entered
* Debit Amount: Must be a positive number greater than zero (Mandatory)
* Credit Amount: Must be a positive number greater than zero (Mandatory)
* Transaction Description: Text field (Optional)
Important Note: Every transaction on the same JV should be placed on a separate row under the JV main row, which contains the above JV fields. The transaction information should start from the 4th column in the CSV file, leaving the first three columns empty.
## Importing vendors through Accounts Import update
[Read more](/back-office/bo-reports/british-account-listing-hijri-calendar-support)
## How to Use the British Accounting System's Import JV Feature
#### Accessing the Import JV Feature
Where to Find It:
* Only in the British system is Enabled
* [BackOffice → GL → Import JV](https://manage.kwentra.com/gl/journalvoucher/importbritishvouchers/)
Steps to Use:
1. Access British Import JV: Navigate to the GL section in the BackOffice and select "British Import JV" if the British system is enabled.
#### Preparing Your Import File
To import JVs, you need to prepare a CSV file with the following structure:
Required Columns:
1. JV Code: Text field (Mandatory)
2. JV Description: Text field (Mandatory)
3. Date: Date field in the format YYYY-MM-DD (Mandatory)
4. Main Account Code: Saved main account code (Mandatory)
5. T0 Analysis Code: Saved analysis code (Optional)
6. T1 Analysis Code: Saved analysis code (Optional)
7. T2 Analysis Code: Saved analysis code (Optional)
8. T3 Analysis Code: Saved analysis code (Optional)
9. T4 Analysis Code: Saved analysis code (Optional)
10. Debit Amount: Number field (Mandatory)
11. Credit Amount: Number field (Mandatory)
12. Transaction Description: Text field (Optional)
| V Code | JV Description | Date | Main Account Code | T0 Analysis Code | T1 Analysis Code | T2 Analysis Code | T3 Analysis Code | T4 Analysis Code | Debit Amount | Credit Amount | Transaction Description |
| ------ | ------------------------ | ---------- | ----------------- | ---------------- | ---------------- | ---------------- | ---------------- | ---------------- | ------------ | ------------- | ----------------------- |
| 01 | January Expenses Updated | 2024-05-06 | | | | | | | | | |
| | | | 1234 | 2000 | 1000 | | | | 108526.37 | | |
| | | | 11123444 | 500 | | 600 | 700 | | | 108526.37 | |
| 02 | January Expenses Updated | 2024-05-06 | | | | | | | | | |
| | | | 11123444 | 500 | | 600 | 700 | | 108526.37 | | |
| | | | 1234 | 2000 | 1000 | | | | | 108526.37 | |
| | | | | | | | | | | | |
Steps to Import:
1. Select File: On the "British Import JV" page, use the file selection option to choose your prepared CSV file.
2. Review Help Section: Refer to the help section on the page to ensure all fields in your file meet the required validations.
3. Submit File: Once your file is selected and verified, click the import button to upload your data.
#### Validation Rules
* Main Account Code: The system must have a saved main account code.
* T0-T4 Analysis Codes: Optional fields but must be valid if entered.
* Combination Validation: The combination of the Main Account Code and any T Analysis Codes must exist in the system and point to an account number.
* Debit and Credit Amounts: These must be positive numbers. Debit Amount or Credit Amount must be provided, not both zero.
#### Help Text for Fields
* JV Code: Text field (Mandatory)
* JV Description: Text field (Mandatory)
* Date: Date field in the format YYYY-MM-DD (Mandatory)
* Main Account Code: Must be an existing main account code (Mandatory)
* T0-T4 Analysis Codes: Optional but must be valid codes if entered
* Debit Amount: Must be a positive number greater than zero (Mandatory)
* Credit Amount: Must be a positive number greater than zero (Mandatory)
* Transaction Description: Text field (Optional)
Important Note: Every transaction on the same JV should be placed on a separate row under the JV main row, which contains the above JV fields. The transaction information should start from the 4th column in the CSV file, leaving the first three columns empty.
## Importing vendors through Accounts Import update
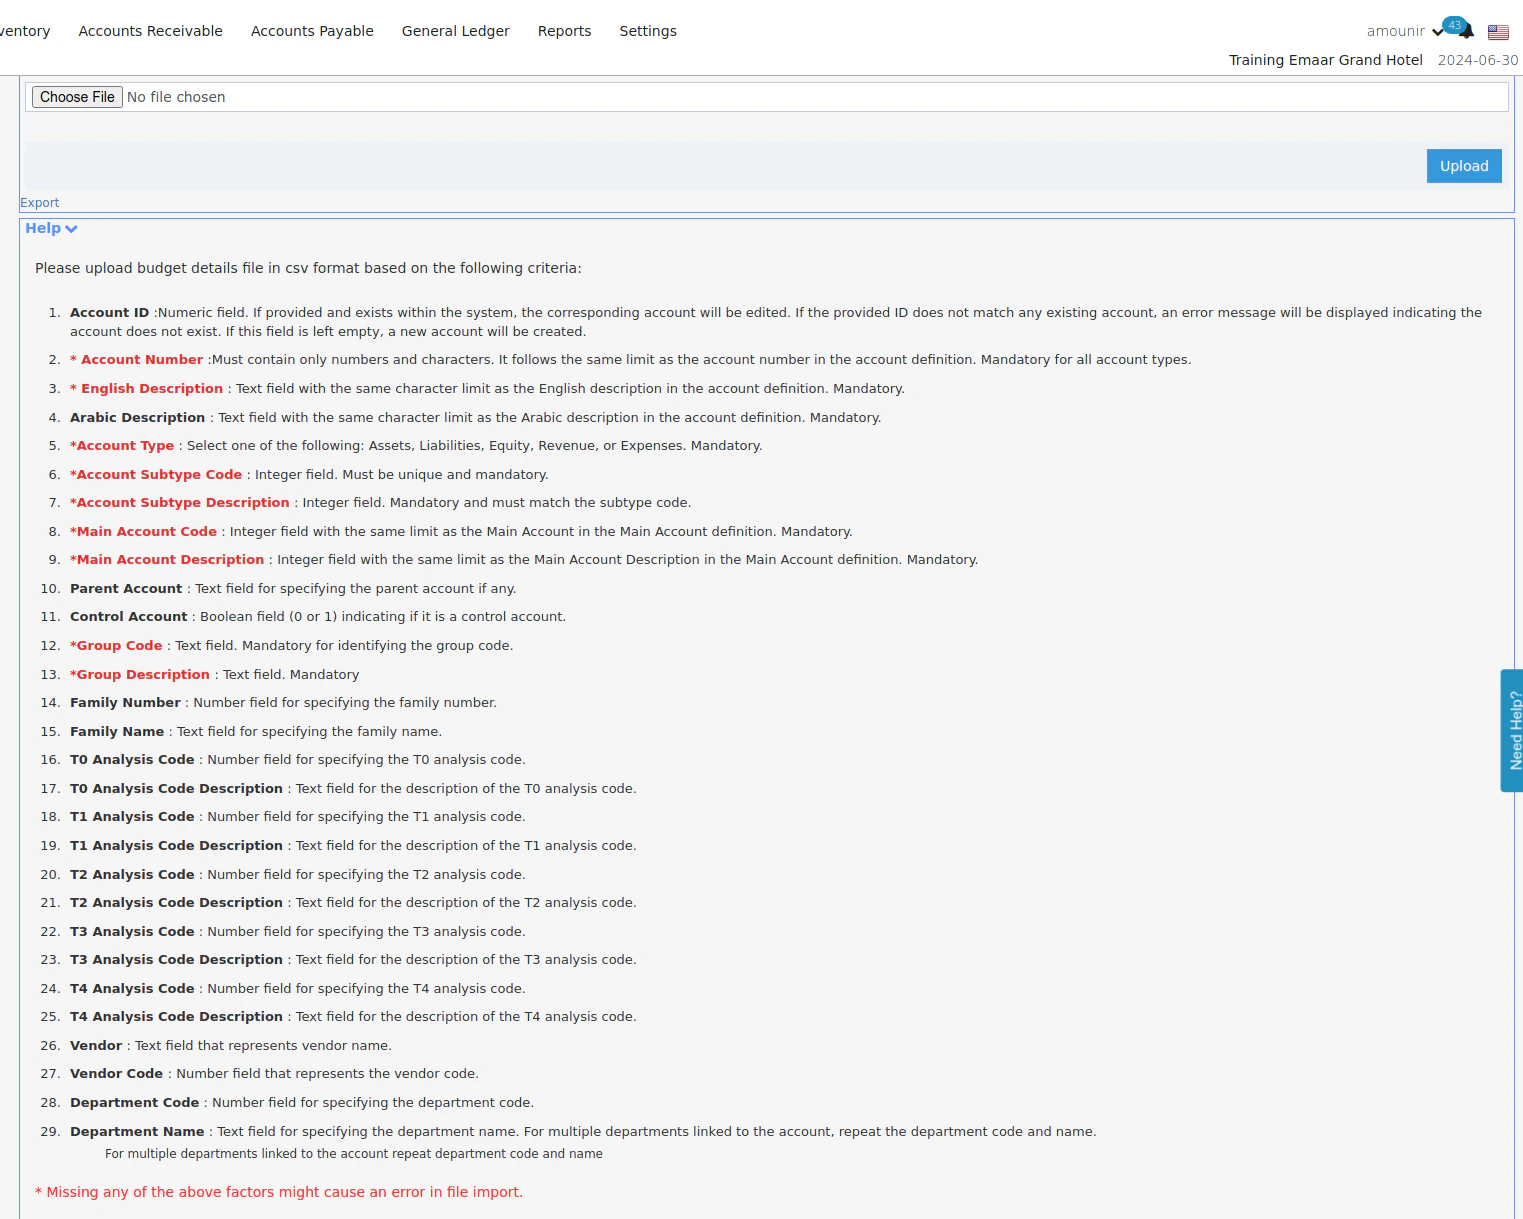 We have updated how we import vendors through the import chart of accounts feature.
New import can have multiple vendors in the same sheet but each one will have its account number or account number and combination in the British system (can be vendor code) and its line
The group should be empty for each vendor line so the account will be hidden.
If multiple vendors have the same parent, add the parent account number in the parent account column. this will work whether the parent is already created or you will add it in the sheet like the example attached
Important notes
1. When you export the system will not export vendor accounts for editing them. **so editing the vendors is not allowed**
2. Multiple vendors on the same parent account in various sheets
3. vendor account cannot be control account
## Journal Voucher (JV) Print Enhancements
Two improvements have been made to the Journal Voucher print format to improve clarity, localization, and readability for both international and local users.
These changes help users:
* Get better visibility into **TCode values** where needed (e.g., British reporting).
* Reduce clutter by **removing unused TCodes.**
* Improve the **readability** of long account descriptions.
* Standardize **decimal display** for easier financial reconciliation.
### **Click "Back Office"**
We have updated how we import vendors through the import chart of accounts feature.
New import can have multiple vendors in the same sheet but each one will have its account number or account number and combination in the British system (can be vendor code) and its line
The group should be empty for each vendor line so the account will be hidden.
If multiple vendors have the same parent, add the parent account number in the parent account column. this will work whether the parent is already created or you will add it in the sheet like the example attached
Important notes
1. When you export the system will not export vendor accounts for editing them. **so editing the vendors is not allowed**
2. Multiple vendors on the same parent account in various sheets
3. vendor account cannot be control account
## Journal Voucher (JV) Print Enhancements
Two improvements have been made to the Journal Voucher print format to improve clarity, localization, and readability for both international and local users.
These changes help users:
* Get better visibility into **TCode values** where needed (e.g., British reporting).
* Reduce clutter by **removing unused TCodes.**
* Improve the **readability** of long account descriptions.
* Standardize **decimal display** for easier financial reconciliation.
### **Click "Back Office"**
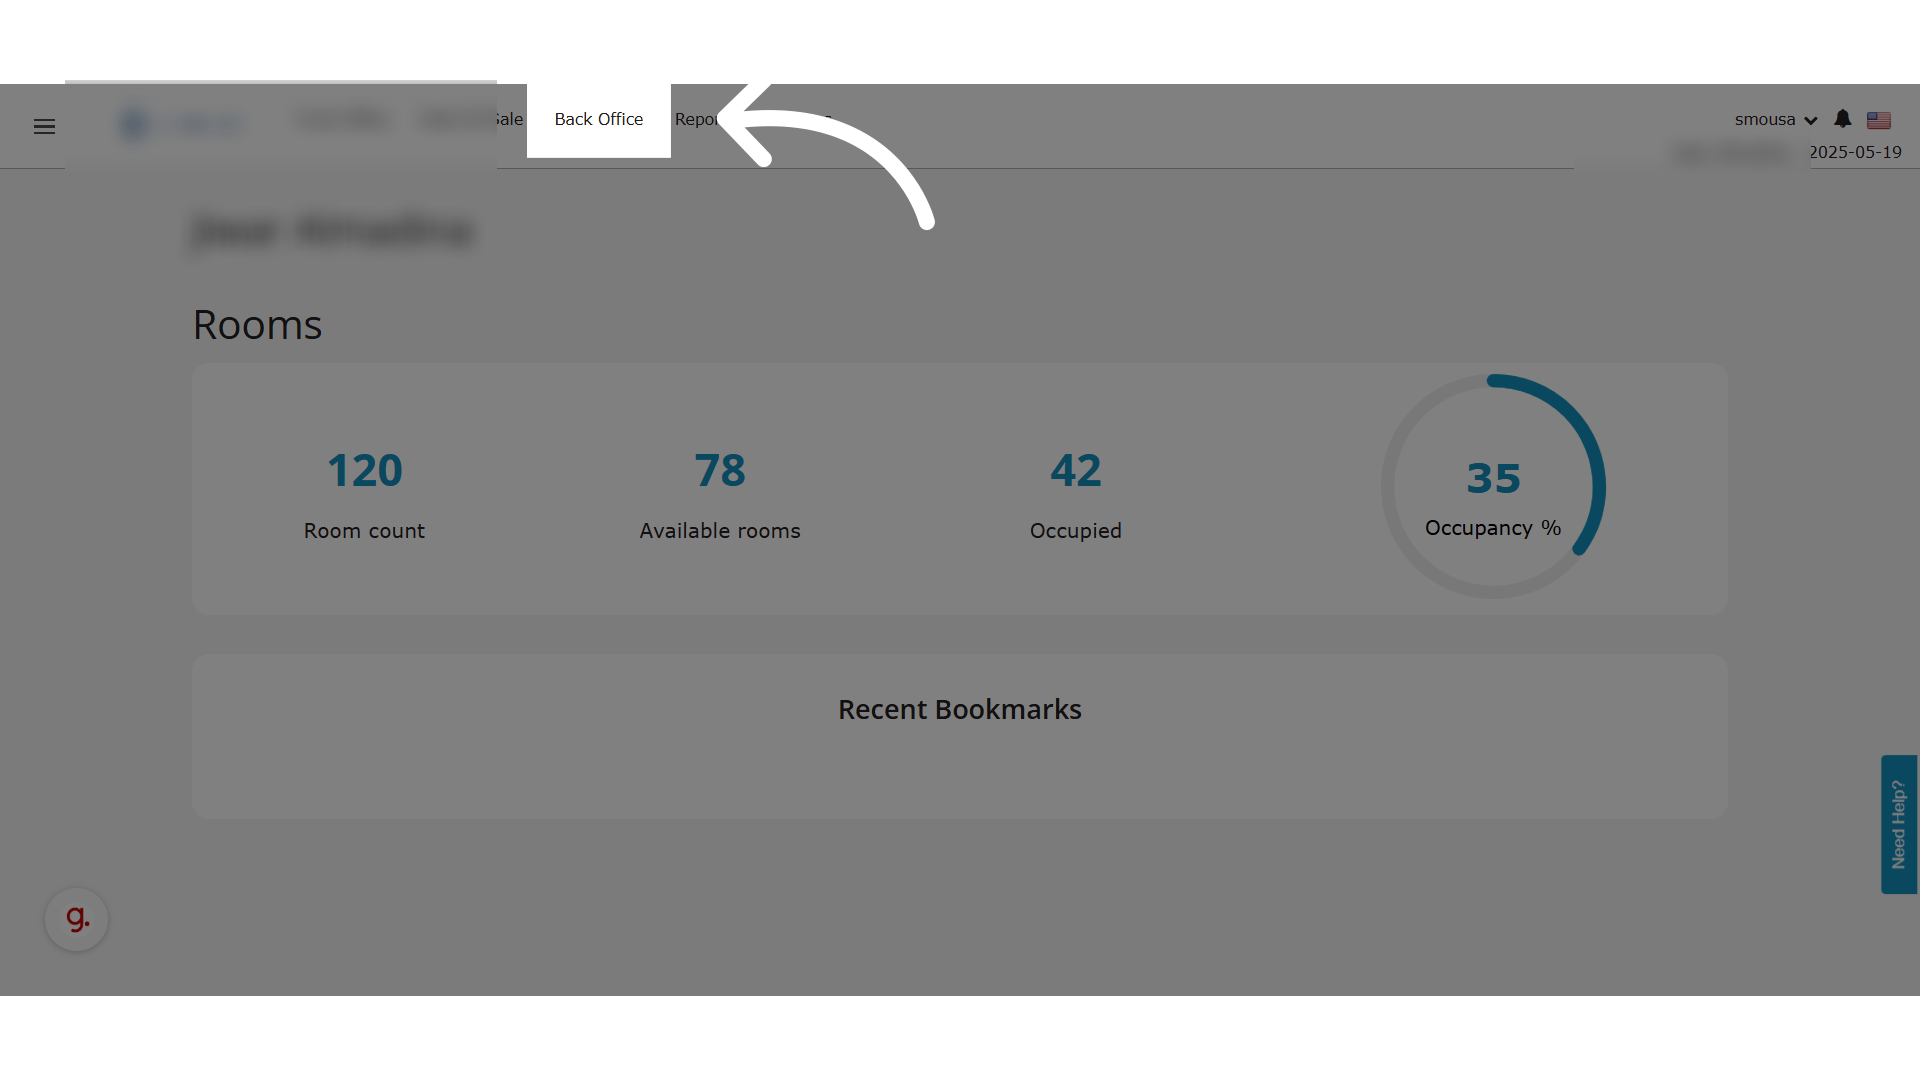 ### **Click "General Ledger"**
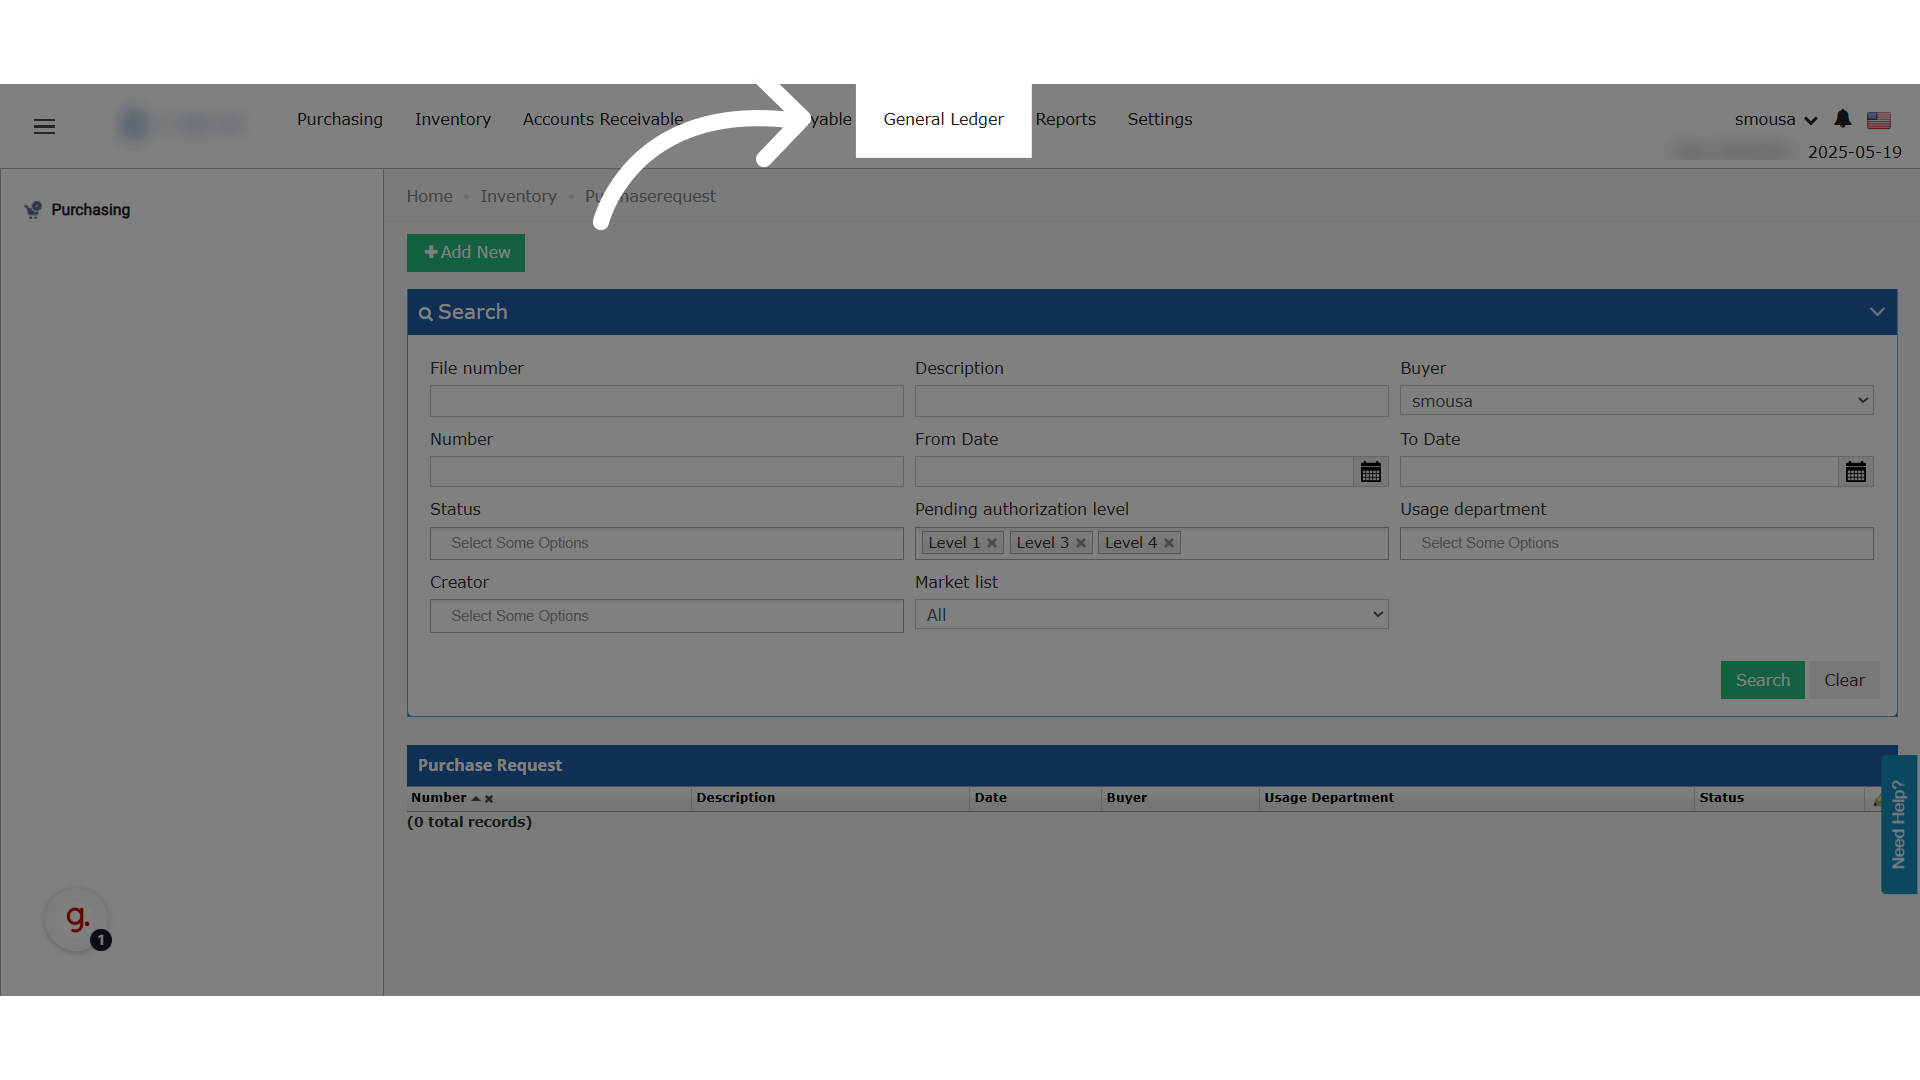 ### **Open any JV**
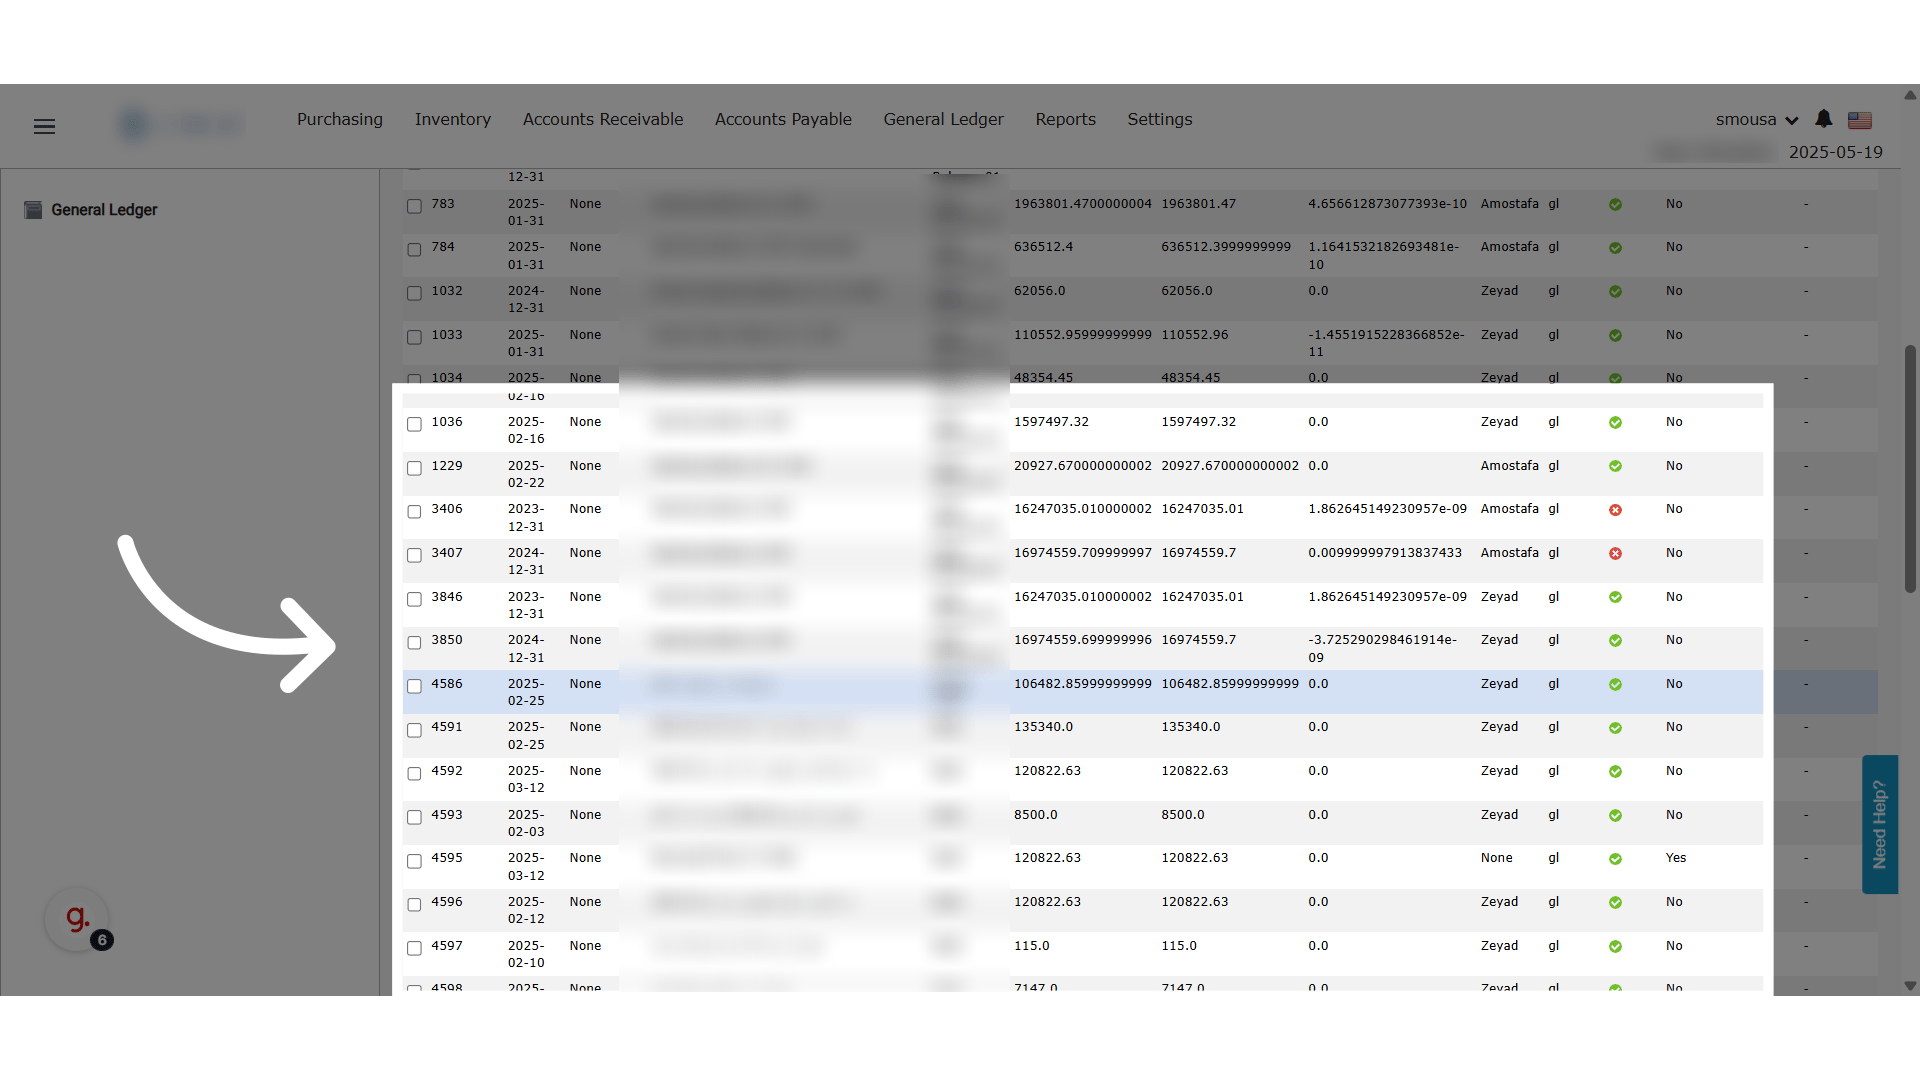 ### **Click "Print"**
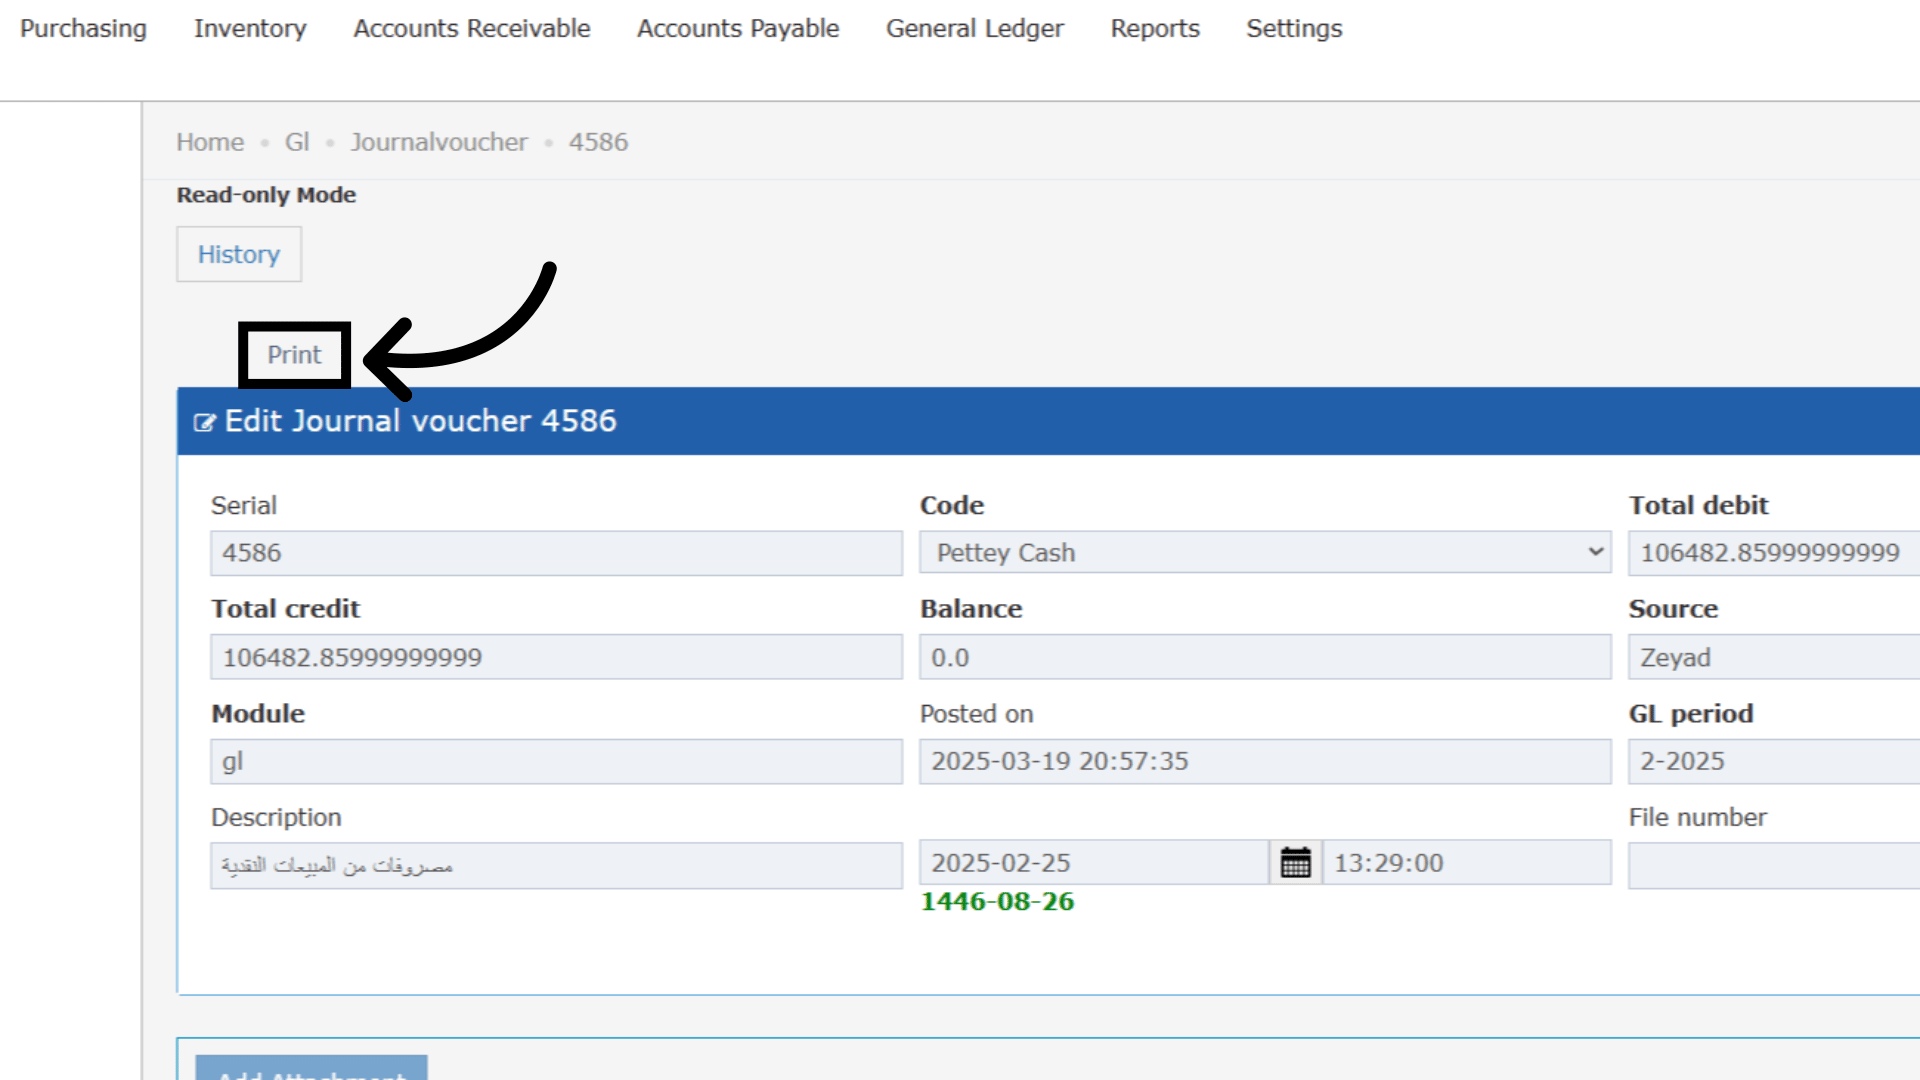 ### **JV Printout - British Accounting System**
✅ Changes Applied
1. **TCode3 and TCode4**
⛔ These two columns have been **removed** from the general JV print view (non-British format) to reduce clutter.
2. **Decimal Formatting**
✅ Numbers now display with **two decimal places only** (e.g., 35469.78 instead of 35469.77736), improving financial clarity and matching standard report rounding.
3. **Wider Account Description Field**
✅ The **Account Description** column has been **expanded** to show longer descriptions without a cutoff. This helps users see both English and Arabic descriptions.
### **JV Printout - British Accounting System**
✅ Changes Applied
1. **TCode3 and TCode4**
⛔ These two columns have been **removed** from the general JV print view (non-British format) to reduce clutter.
2. **Decimal Formatting**
✅ Numbers now display with **two decimal places only** (e.g., 35469.78 instead of 35469.77736), improving financial clarity and matching standard report rounding.
3. **Wider Account Description Field**
✅ The **Account Description** column has been **expanded** to show longer descriptions without a cutoff. This helps users see both English and Arabic descriptions.
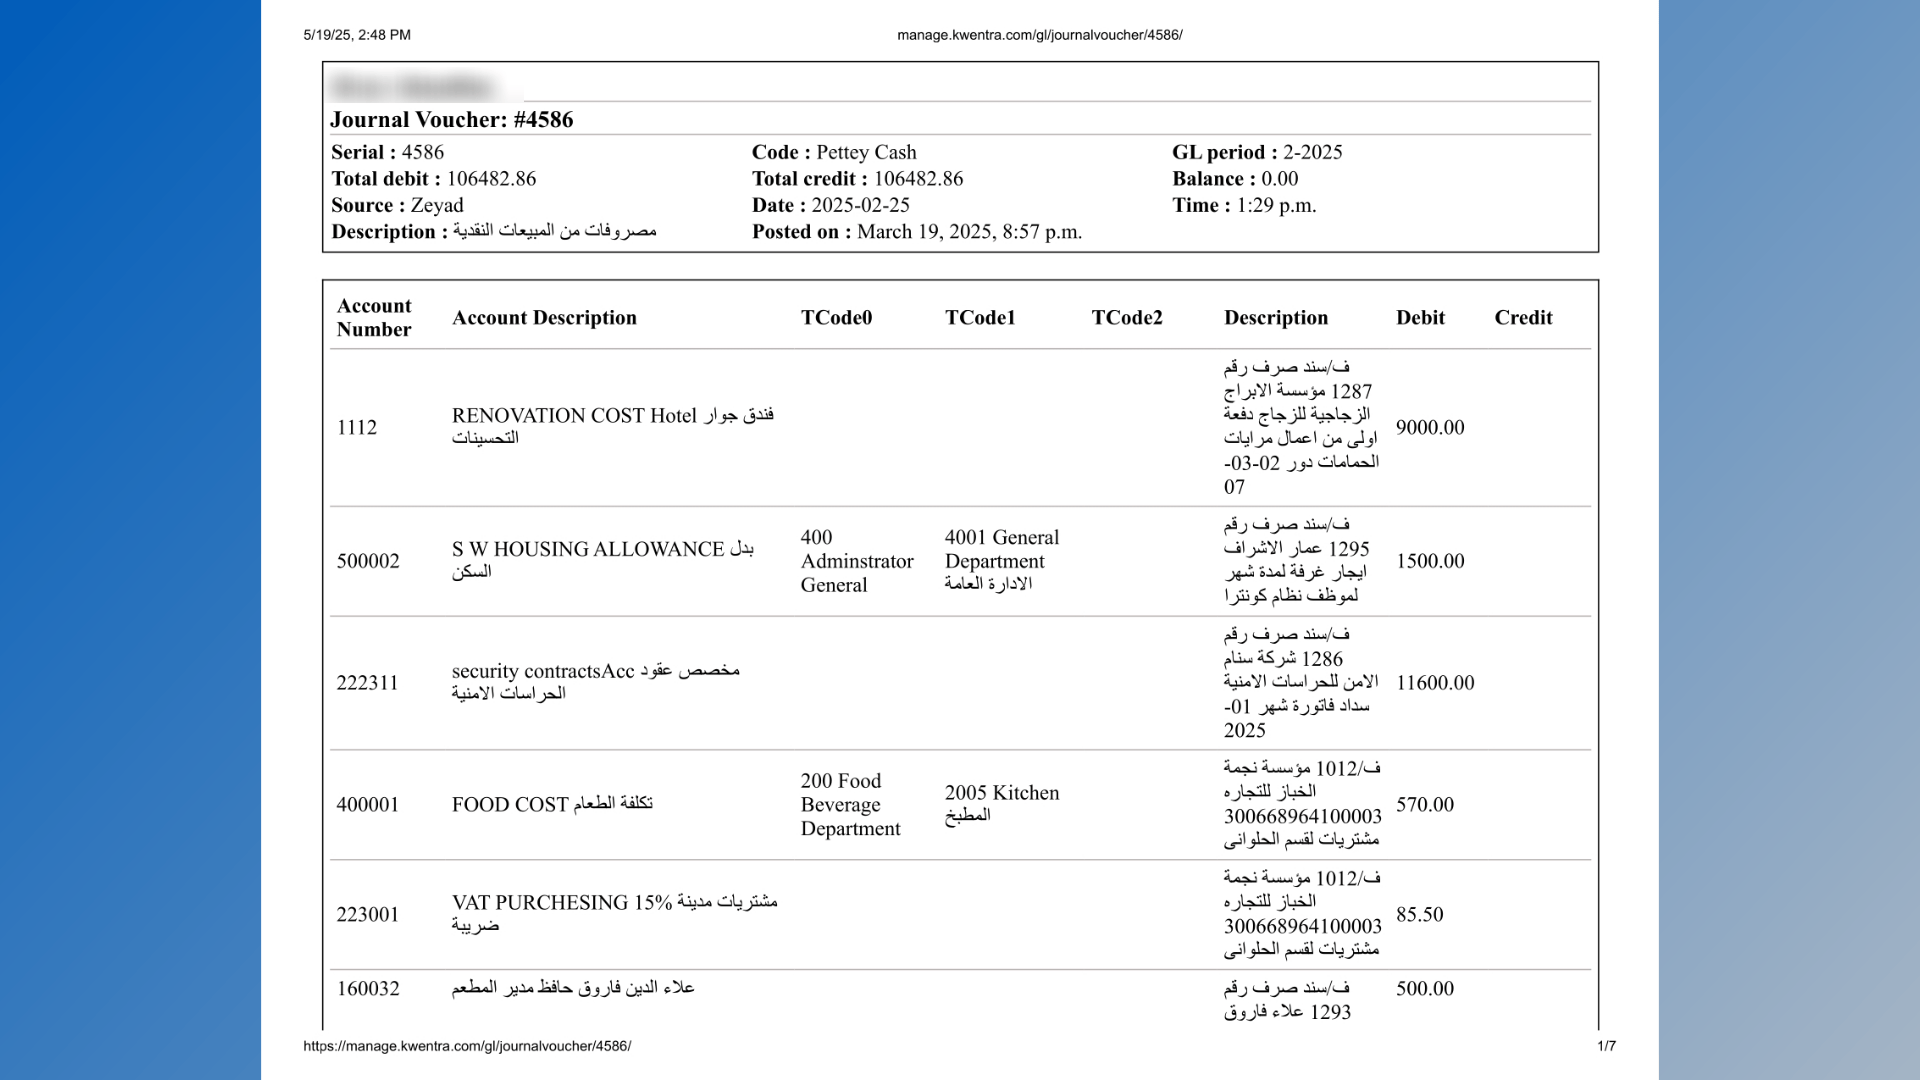 ## Last Receiving Order Details In Purchase Requests
### **💼 Business Value**
This enhancement enables users to access critical historical data at the point of decision. By showing information from the most recent receiving order for each item directly within the purchase request screen, users can:
* Make better-informed purchasing decisions
* Avoid over-ordering or duplication
* Identify the last vendor and ensure consistent sourcing
* Gain quick access to related Receiving Orders
###
**🧠 Use Cases**
* **Purchasing Managers** want to see what quantity was received last and from whom before confirming the new request.
* **Cost Control teams** need to compare current price estimates to the last received price to monitor supplier consistency.
* **New team members** benefit from easy access to context without switching screens.
**Go to [manage.kwentra.com](https://manage.kwentra.com/)**
**Click "Back Office"**
## Last Receiving Order Details In Purchase Requests
### **💼 Business Value**
This enhancement enables users to access critical historical data at the point of decision. By showing information from the most recent receiving order for each item directly within the purchase request screen, users can:
* Make better-informed purchasing decisions
* Avoid over-ordering or duplication
* Identify the last vendor and ensure consistent sourcing
* Gain quick access to related Receiving Orders
###
**🧠 Use Cases**
* **Purchasing Managers** want to see what quantity was received last and from whom before confirming the new request.
* **Cost Control teams** need to compare current price estimates to the last received price to monitor supplier consistency.
* **New team members** benefit from easy access to context without switching screens.
**Go to [manage.kwentra.com](https://manage.kwentra.com/)**
**Click "Back Office"**
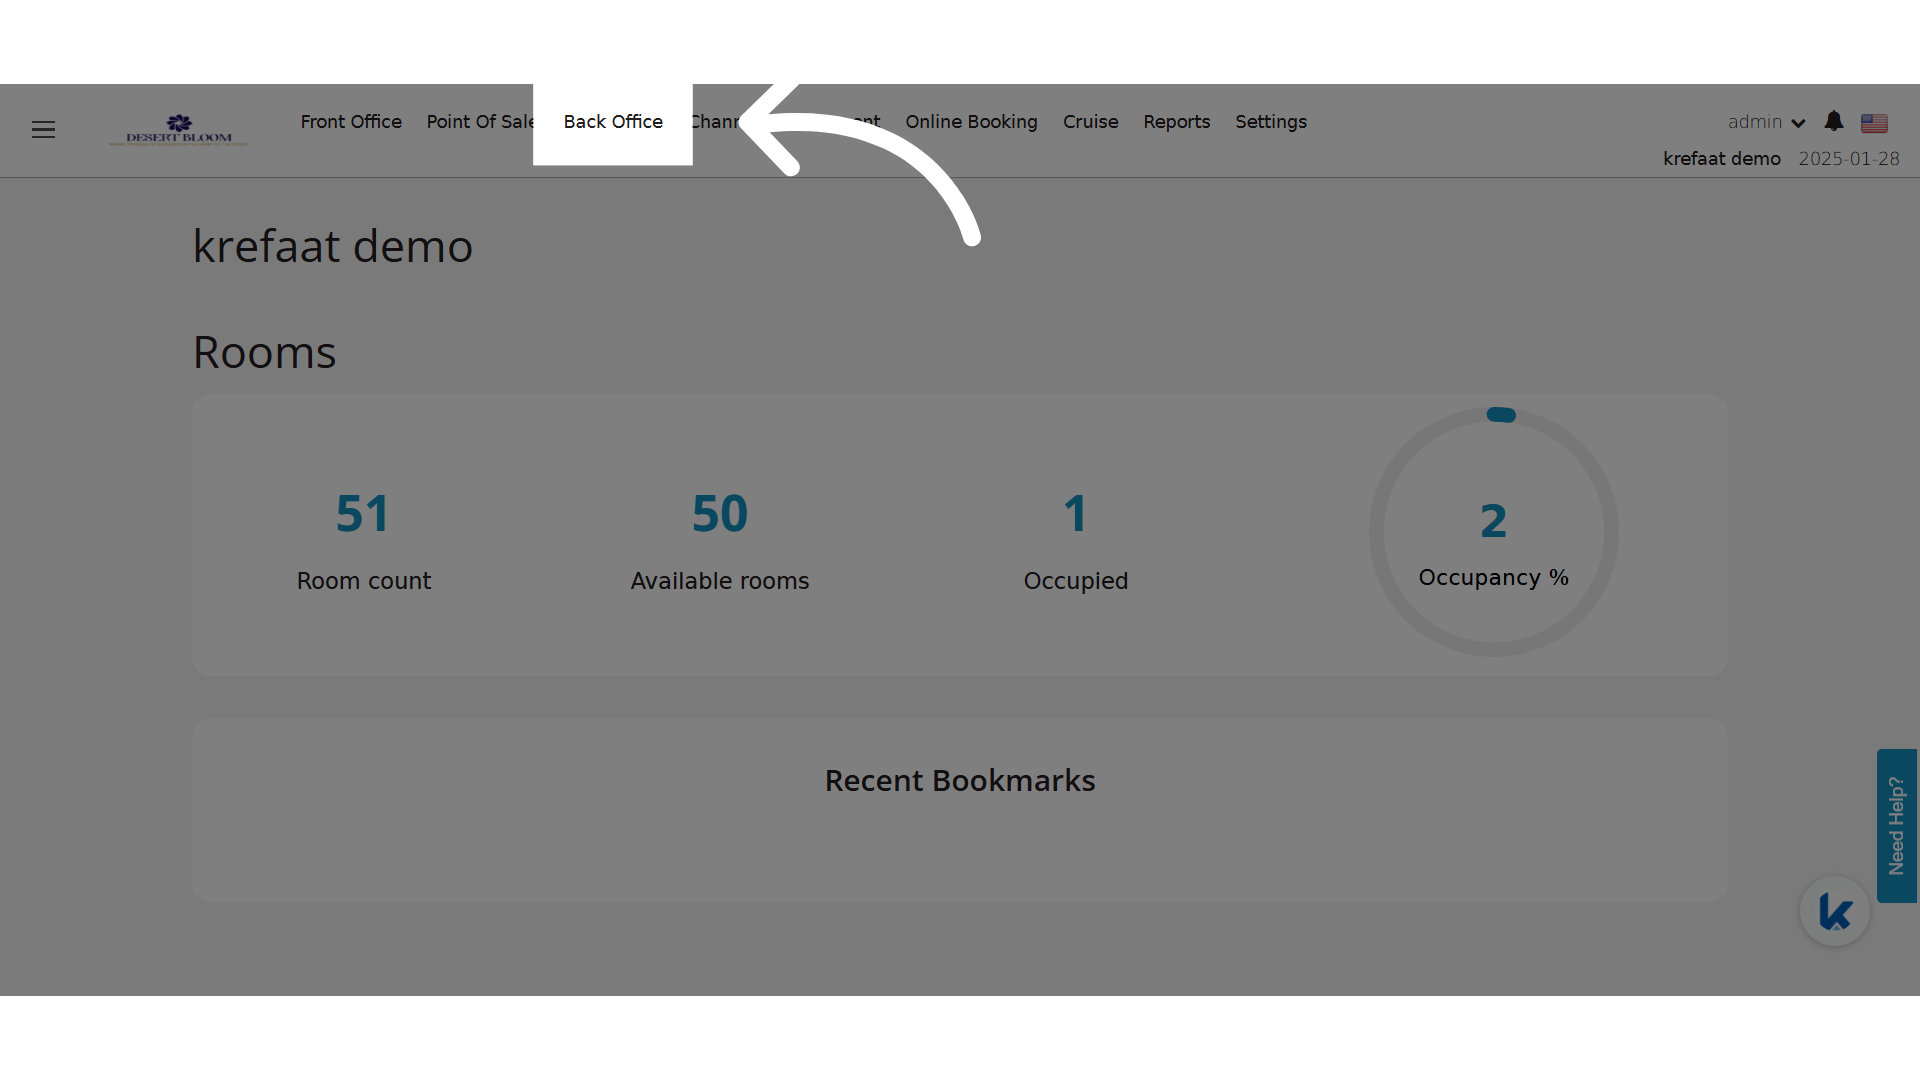 **Click "Purchasing"**
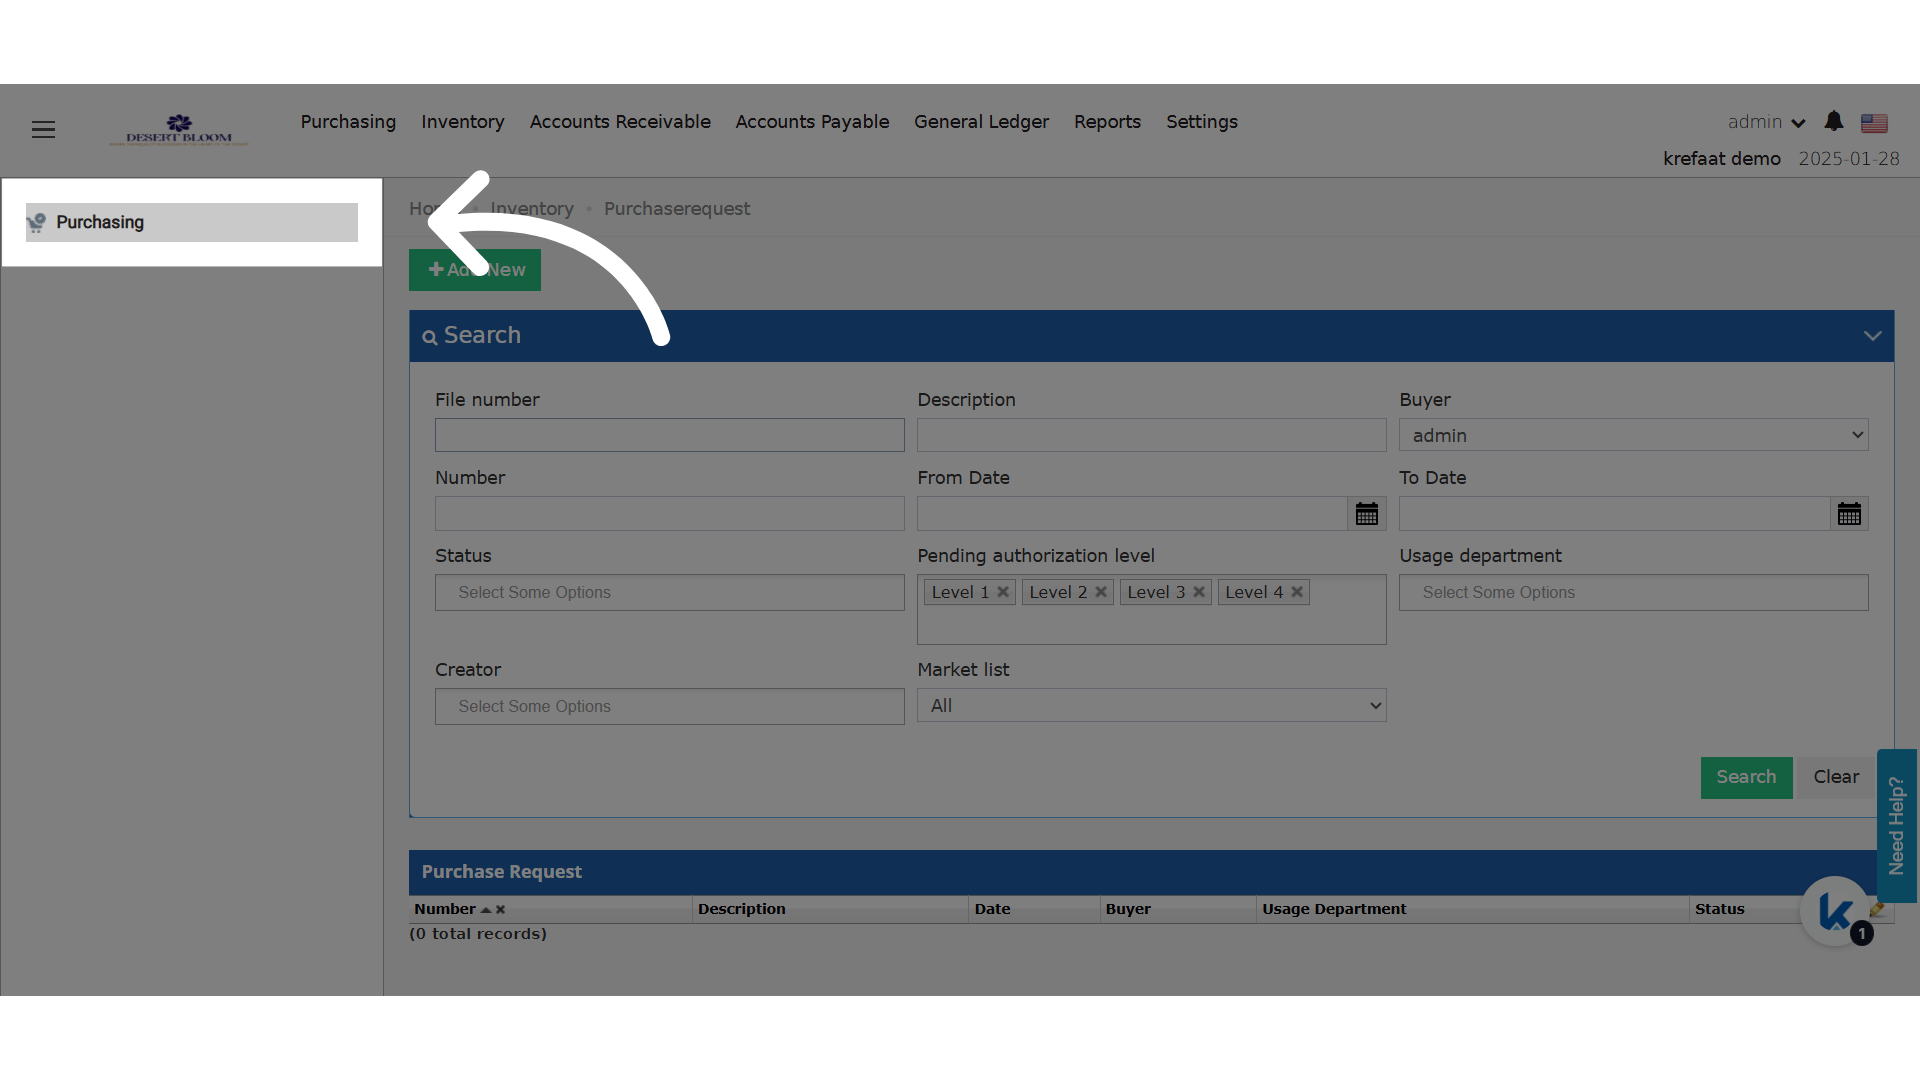 **Click "Add New"**
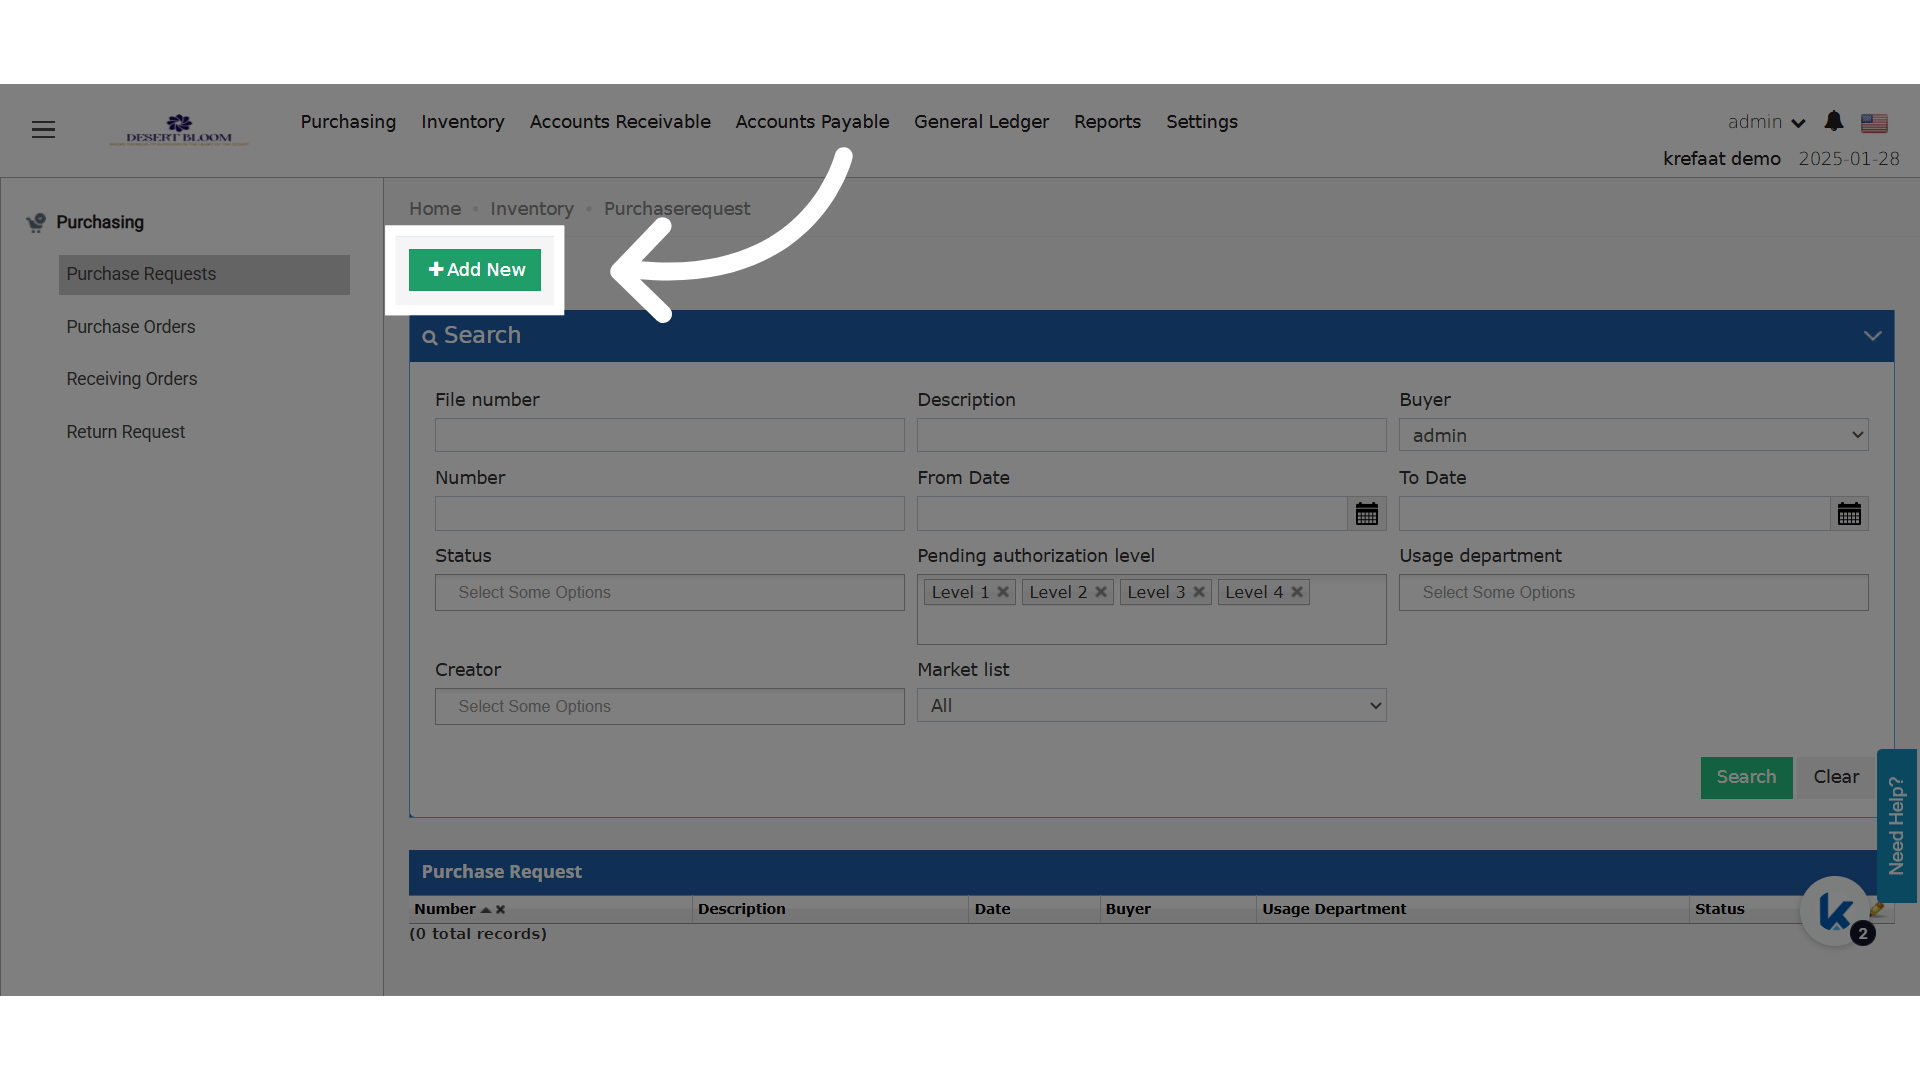 **Choose your item using autocomplete or the magnifying glass**
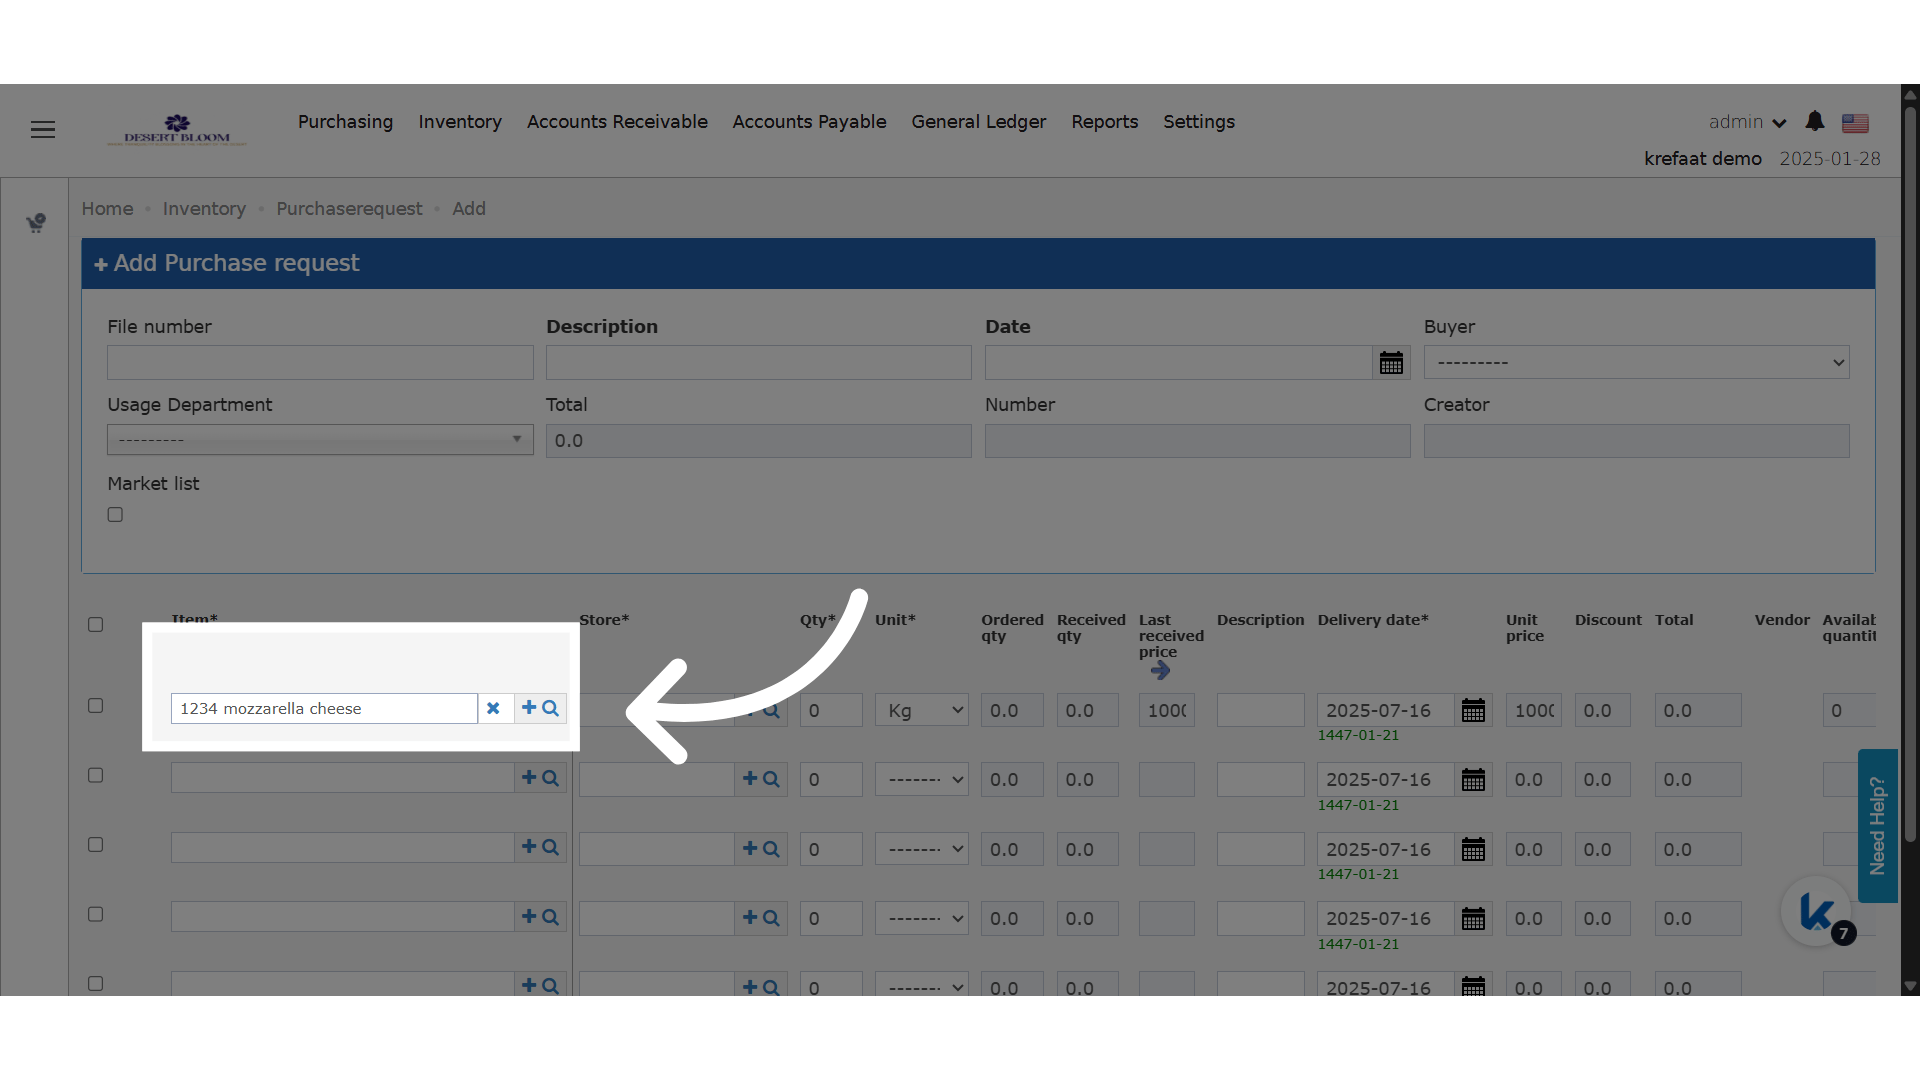 **Clicking this blue arrow expands the columns for more details**
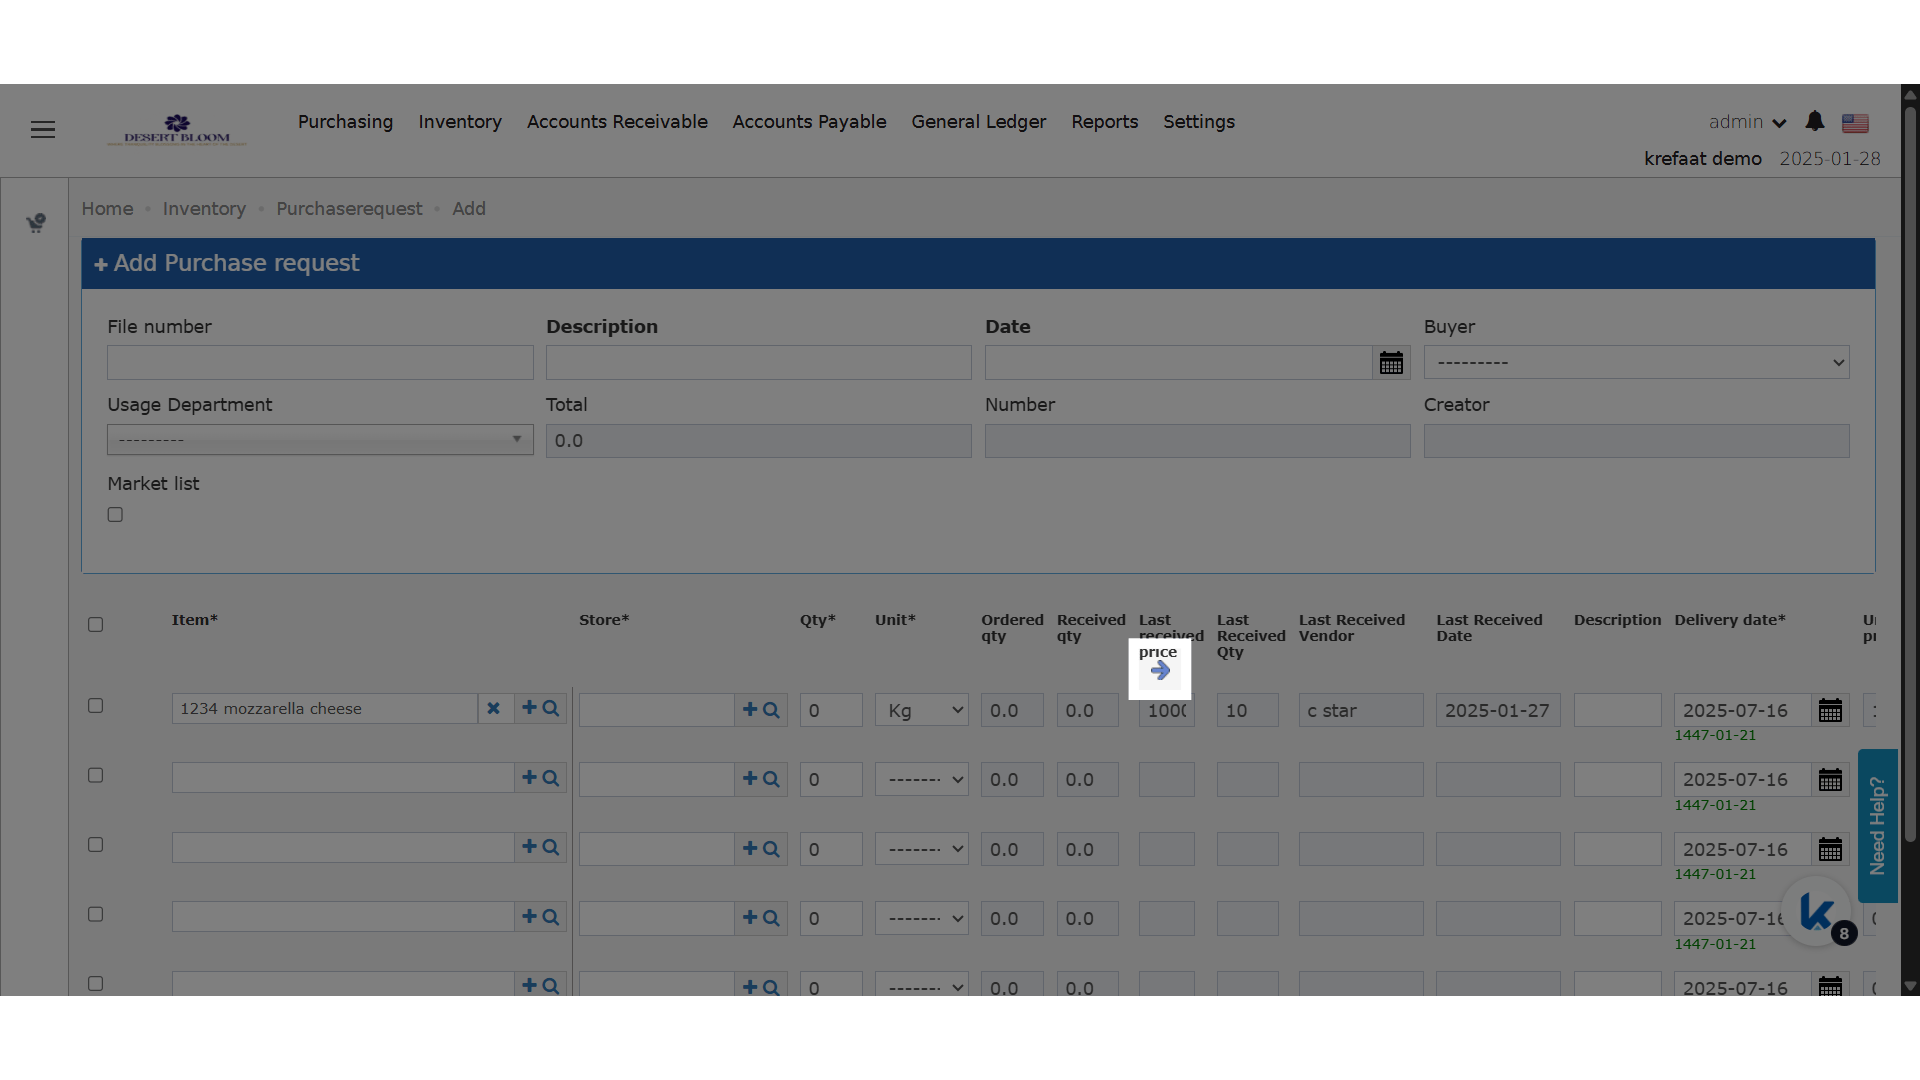 **All the needed details for better decision-making**
* **Last Received Total Price**
* **Last Received Quantity**
* **Last Received Vendor**
* **Last Received Date**
**All the needed details for better decision-making**
* **Last Received Total Price**
* **Last Received Quantity**
* **Last Received Vendor**
* **Last Received Date**
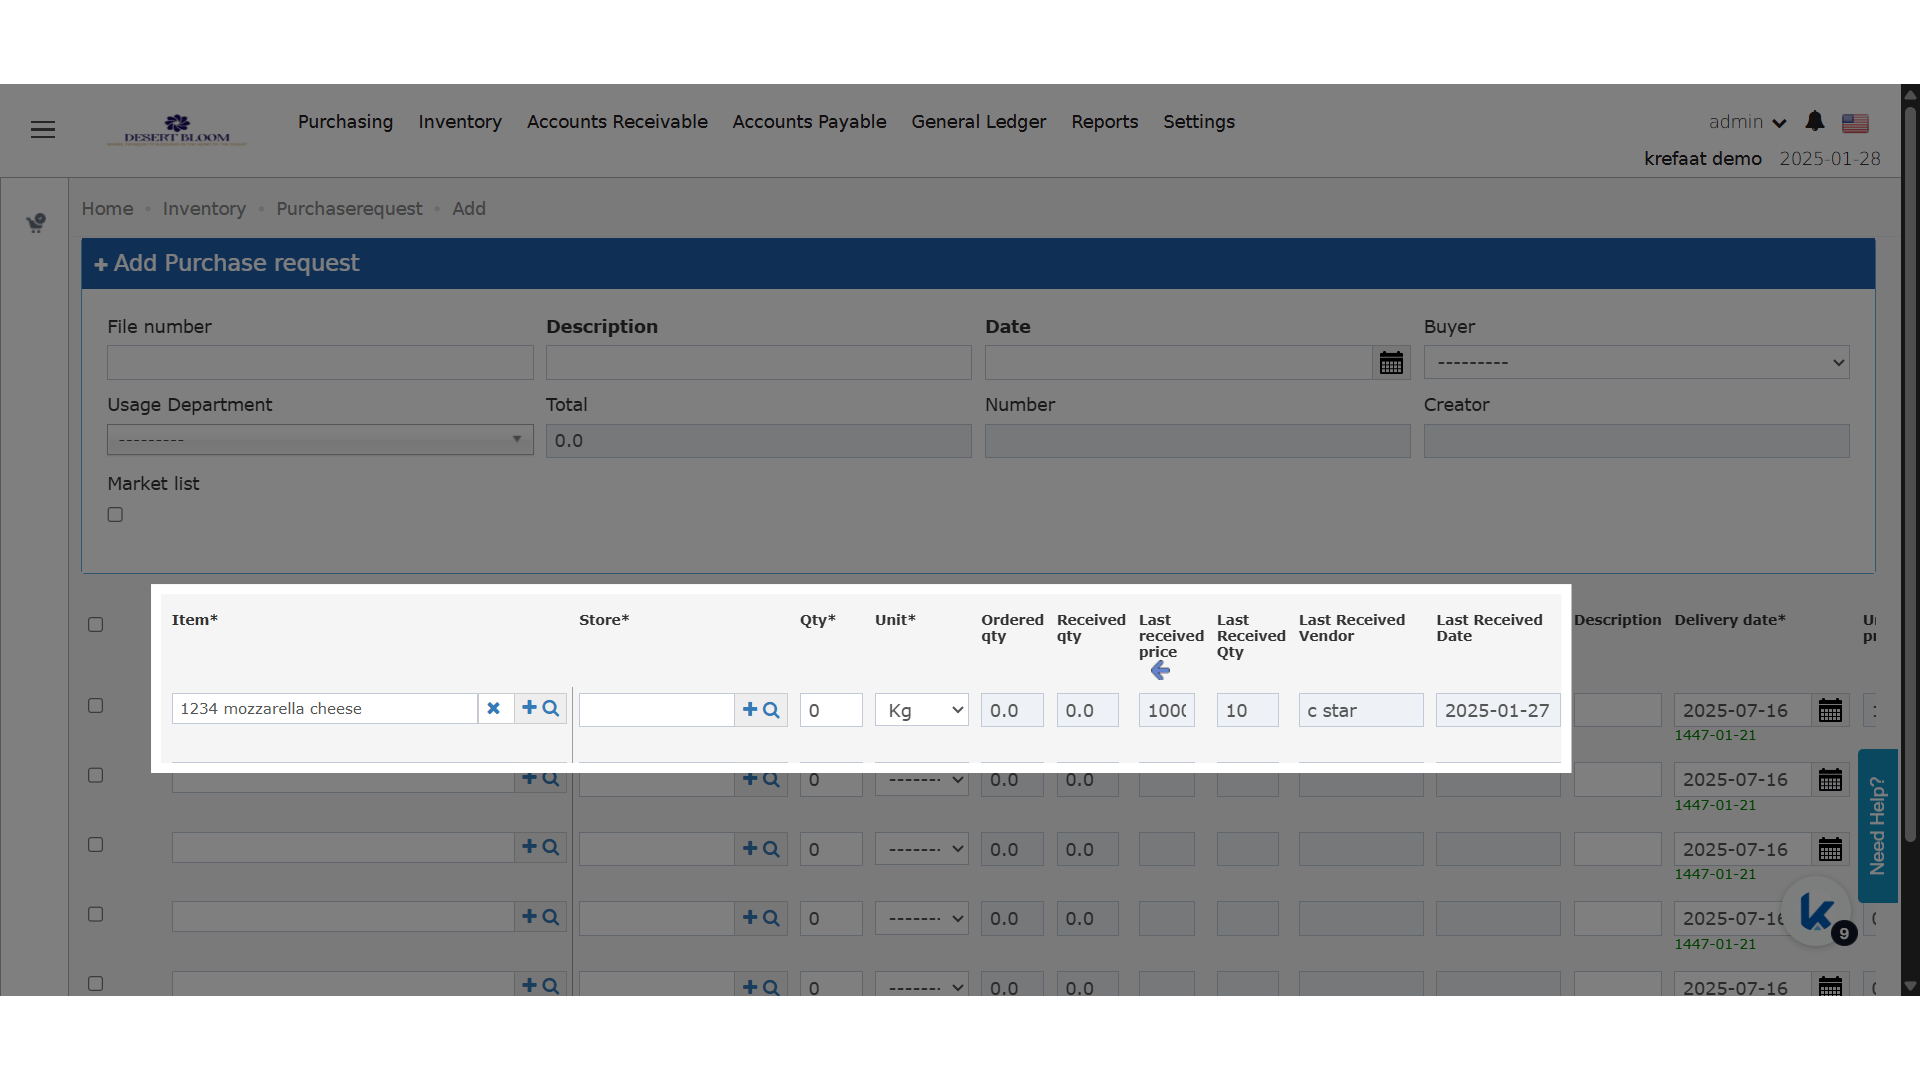 ## One-Way Integration for Rate Gain
### **💡 Business Value:**
Hotels often use Rate Gain as a rate shopper or third-party connector where they only need to receive data (e.g., rates and availability) and not push data from Kwentra. This enhancement supports flexibility in use cases where one-way integration is preferred.
**🧾 Use Cases:**
* Hotels using Rate Gain for rate intelligence only, without needing to push availability or rates from Kwentra.
* Scenarios where **multiple Rate Gain rooms** are mapped to a **single Kwentra room type**.
* Chains or clusters that want **read-only connectivity** between Kwentra and Rate Gain.
### 🔧 **How?**
A new checkbox called **"One-Way Integration"** is added under the **Rate Gain channel settings** in Channel Manager (CM).
🔄 When enabled:
* ✅ **Inventory mapping validation is disabled**
(Multiple Rate Gain rooms can be mapped to a single Kwentra room type.)
* 🚫 **Availability is NOT sent to Rate Gain**
* 🚫 **Rates are NOT sent to Rate Gain**
*⚠️ This logic is applied only when the **Rate Gain channel** is selected.*
## One-Way Integration for Rate Gain
### **💡 Business Value:**
Hotels often use Rate Gain as a rate shopper or third-party connector where they only need to receive data (e.g., rates and availability) and not push data from Kwentra. This enhancement supports flexibility in use cases where one-way integration is preferred.
**🧾 Use Cases:**
* Hotels using Rate Gain for rate intelligence only, without needing to push availability or rates from Kwentra.
* Scenarios where **multiple Rate Gain rooms** are mapped to a **single Kwentra room type**.
* Chains or clusters that want **read-only connectivity** between Kwentra and Rate Gain.
### 🔧 **How?**
A new checkbox called **"One-Way Integration"** is added under the **Rate Gain channel settings** in Channel Manager (CM).
🔄 When enabled:
* ✅ **Inventory mapping validation is disabled**
(Multiple Rate Gain rooms can be mapped to a single Kwentra room type.)
* 🚫 **Availability is NOT sent to Rate Gain**
* 🚫 **Rates are NOT sent to Rate Gain**
*⚠️ This logic is applied only when the **Rate Gain channel** is selected.*
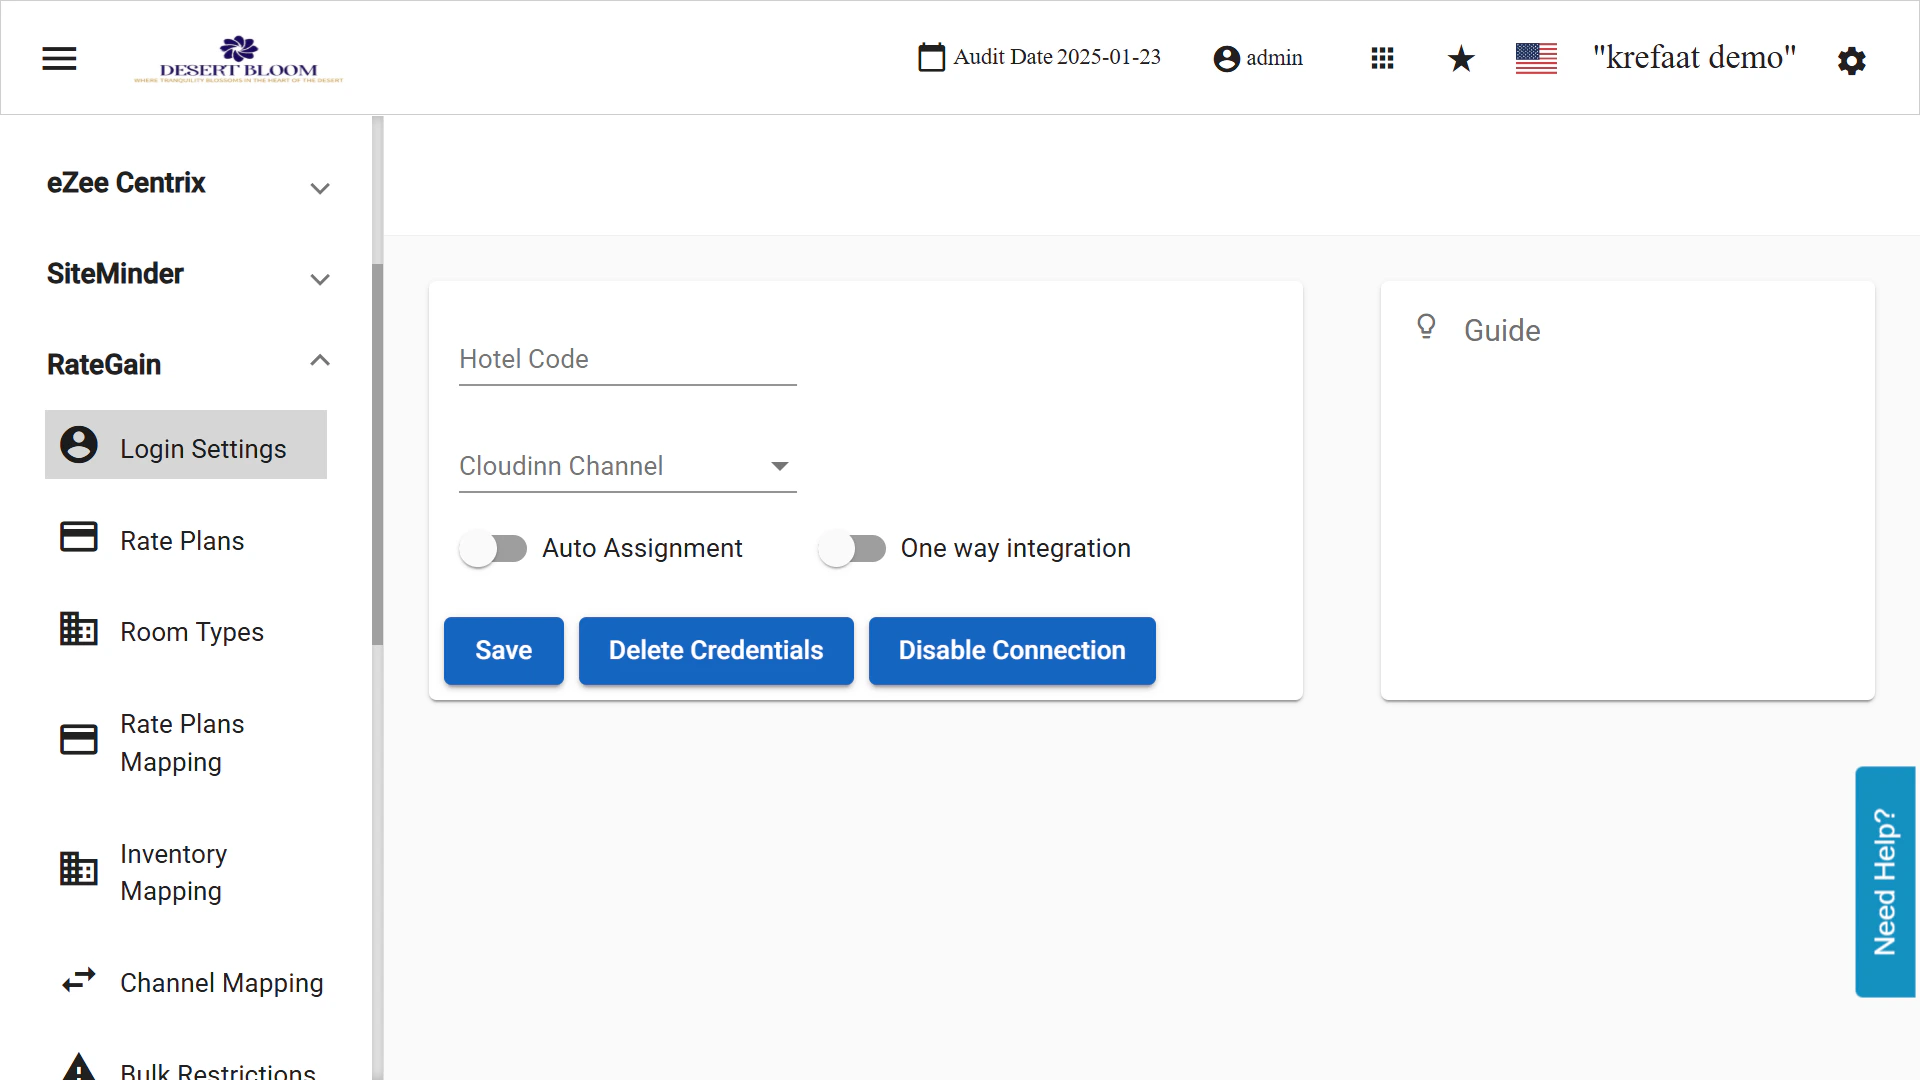 ## Guest Info Consolidated Report
**Report Business Value:**
We created a new consolidated report “Guest Info“ that returns the list of guests across one or more instance(s).
The report is the same as the existing “Guest Info“ report but allows company users to extract all the guests across multiple instances
**How does it work?**
Dashboard -> Reports -> Guest info
1. Select the filters you want to apply from the following
1. From Creation Date
2. To Creation Date
3. From Arrival Date
4. To Arrival Date
5. Nationality
6. From Loyalty Points
7. To Loyalty Points
8. From Date of Birth
9. To Date of Birth
10. Instance Name Multiselect
2. Select how the report should be grouped and you have the following options
1. Email Address
2. Telephone
3. Mobile Number
4. Passport ID
5. ID Number
3. Choose the **Export** option you desire i.e. Excel "XLS / XLSX / ODS" or PDF.
**Report Columns Output:**
* Grouping Result (example **“Email:**[ahmed@aa.com](mailto:ahmed@aa.com "mailto:ghisham@kwentra.com")**”** in case it was grouped by Email Address)
* List of profiles (row for each profile) that matches the grouping criteria with the following data:
* Instance Name
* Name of the instance that has the guest profile
* ID
* The unique identifier for the selected guest profile for the selected instance
* Guest name:
* first name + last name
* Email
* email address of the guest profile
* Country
* country of the guest profile
* Telephone
* telephone number of the guest profile
* Mobile
* mobile number of the guest profile
* No. of visits
* number of visits of this guest profile for the selected instance
* No. of nights
* total number of nights that the guest profile has stayed in the selected instance
* City
* city of the main address of the selected guest profile
* Address
* address line for the selected guest profile (main address)
* Nationality
* nationality of the guest profile
* ID Type
* ID Type of the selected guest profile
* ID Number
* ID Number of the selected guest profile
* Passport ID
* Passport ID of the selected guest profile
* Loyalty Points
* Loyalty points of the selected guest profile within the selected instance
## Guest Info Consolidated Report
**Report Business Value:**
We created a new consolidated report “Guest Info“ that returns the list of guests across one or more instance(s).
The report is the same as the existing “Guest Info“ report but allows company users to extract all the guests across multiple instances
**How does it work?**
Dashboard -> Reports -> Guest info
1. Select the filters you want to apply from the following
1. From Creation Date
2. To Creation Date
3. From Arrival Date
4. To Arrival Date
5. Nationality
6. From Loyalty Points
7. To Loyalty Points
8. From Date of Birth
9. To Date of Birth
10. Instance Name Multiselect
2. Select how the report should be grouped and you have the following options
1. Email Address
2. Telephone
3. Mobile Number
4. Passport ID
5. ID Number
3. Choose the **Export** option you desire i.e. Excel "XLS / XLSX / ODS" or PDF.
**Report Columns Output:**
* Grouping Result (example **“Email:**[ahmed@aa.com](mailto:ahmed@aa.com "mailto:ghisham@kwentra.com")**”** in case it was grouped by Email Address)
* List of profiles (row for each profile) that matches the grouping criteria with the following data:
* Instance Name
* Name of the instance that has the guest profile
* ID
* The unique identifier for the selected guest profile for the selected instance
* Guest name:
* first name + last name
* Email
* email address of the guest profile
* Country
* country of the guest profile
* Telephone
* telephone number of the guest profile
* Mobile
* mobile number of the guest profile
* No. of visits
* number of visits of this guest profile for the selected instance
* No. of nights
* total number of nights that the guest profile has stayed in the selected instance
* City
* city of the main address of the selected guest profile
* Address
* address line for the selected guest profile (main address)
* Nationality
* nationality of the guest profile
* ID Type
* ID Type of the selected guest profile
* ID Number
* ID Number of the selected guest profile
* Passport ID
* Passport ID of the selected guest profile
* Loyalty Points
* Loyalty points of the selected guest profile within the selected instance
 [Read more](/front-office/reports/reservation-reports/guest-info-report)
## Bulk Edit Individual Reservations
### **What's New?**
🔄 **Update (6th August 2025):**
Bulk edit *Checked-In* reservations enhancements. You can update the adult count, room type to charge, rate, and channel for unposted nights.
***
Introducing a new feature to streamline reservation management: **Bulk Edit Individual Reservations**! This innovative functionality enables you to modify specific details for multiple reservations simultaneously, saving valuable time and minimizing repetitive tasks.
**Accessing Bulk Edit:**
[Read more](/front-office/reports/reservation-reports/guest-info-report)
## Bulk Edit Individual Reservations
### **What's New?**
🔄 **Update (6th August 2025):**
Bulk edit *Checked-In* reservations enhancements. You can update the adult count, room type to charge, rate, and channel for unposted nights.
***
Introducing a new feature to streamline reservation management: **Bulk Edit Individual Reservations**! This innovative functionality enables you to modify specific details for multiple reservations simultaneously, saving valuable time and minimizing repetitive tasks.
**Accessing Bulk Edit:**
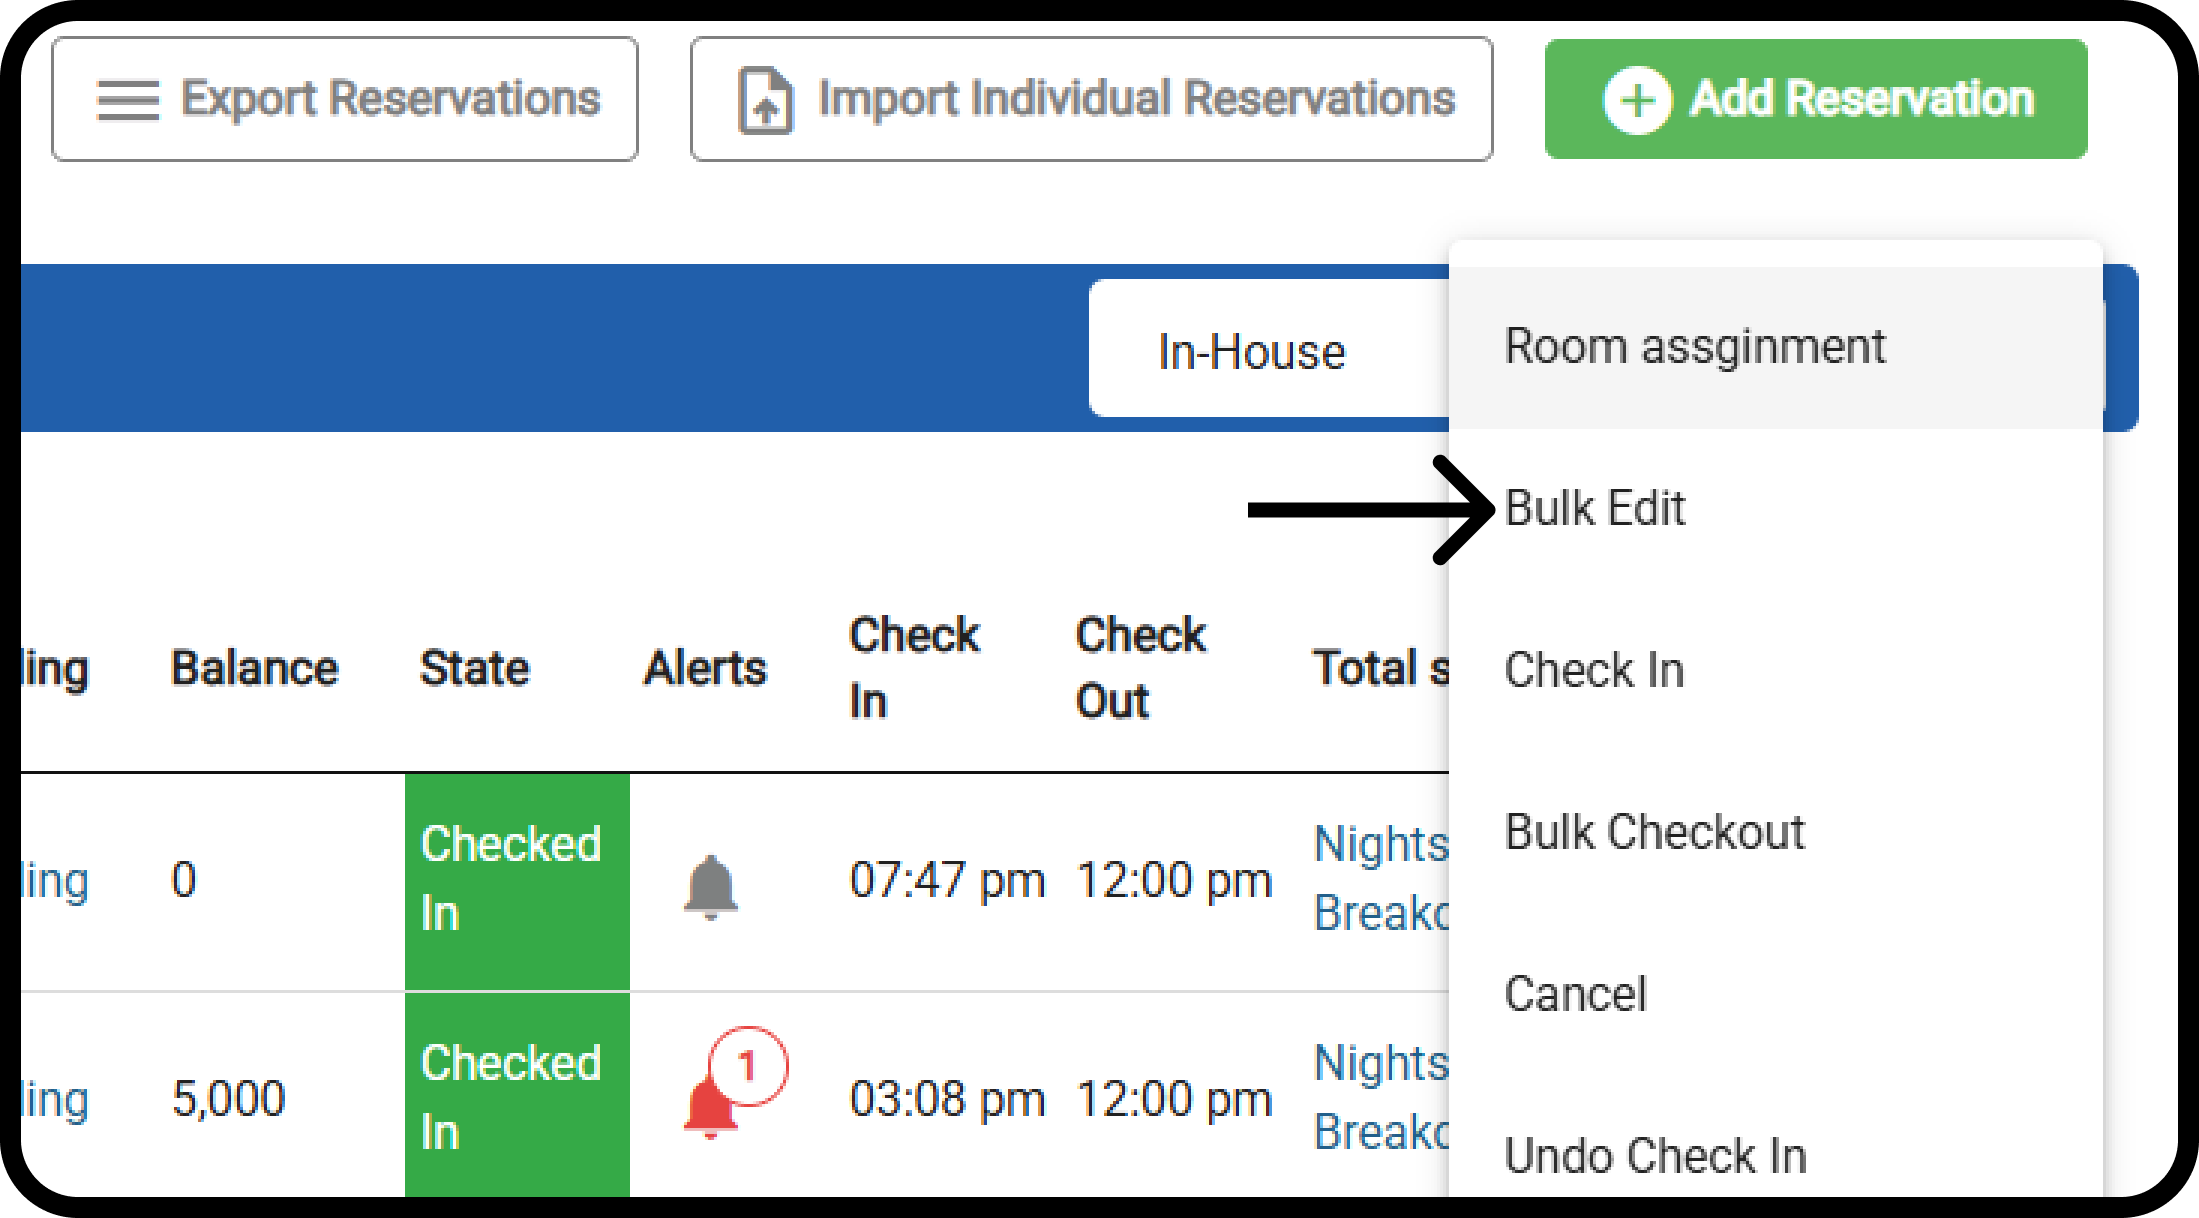 1. Head over to your reservation listing screen.
2. Select the checkboxes next to the reservations you want to edit. Remember, all chosen reservations must be in an "Expected or Checked-In" state.
3. You can only use **Bulk Edit** for reservations in the same state. **Expected and Checked-In Reservations** cannot be selected together for bulk edits.
4. With at least one reservation selected, go to the "Bulk Actions" menu. Click the new **"Bulk Edit"** button within this menu.
**Bulk Edit Screen:**
1. Head over to your reservation listing screen.
2. Select the checkboxes next to the reservations you want to edit. Remember, all chosen reservations must be in an "Expected or Checked-In" state.
3. You can only use **Bulk Edit** for reservations in the same state. **Expected and Checked-In Reservations** cannot be selected together for bulk edits.
4. With at least one reservation selected, go to the "Bulk Actions" menu. Click the new **"Bulk Edit"** button within this menu.
**Bulk Edit Screen:**
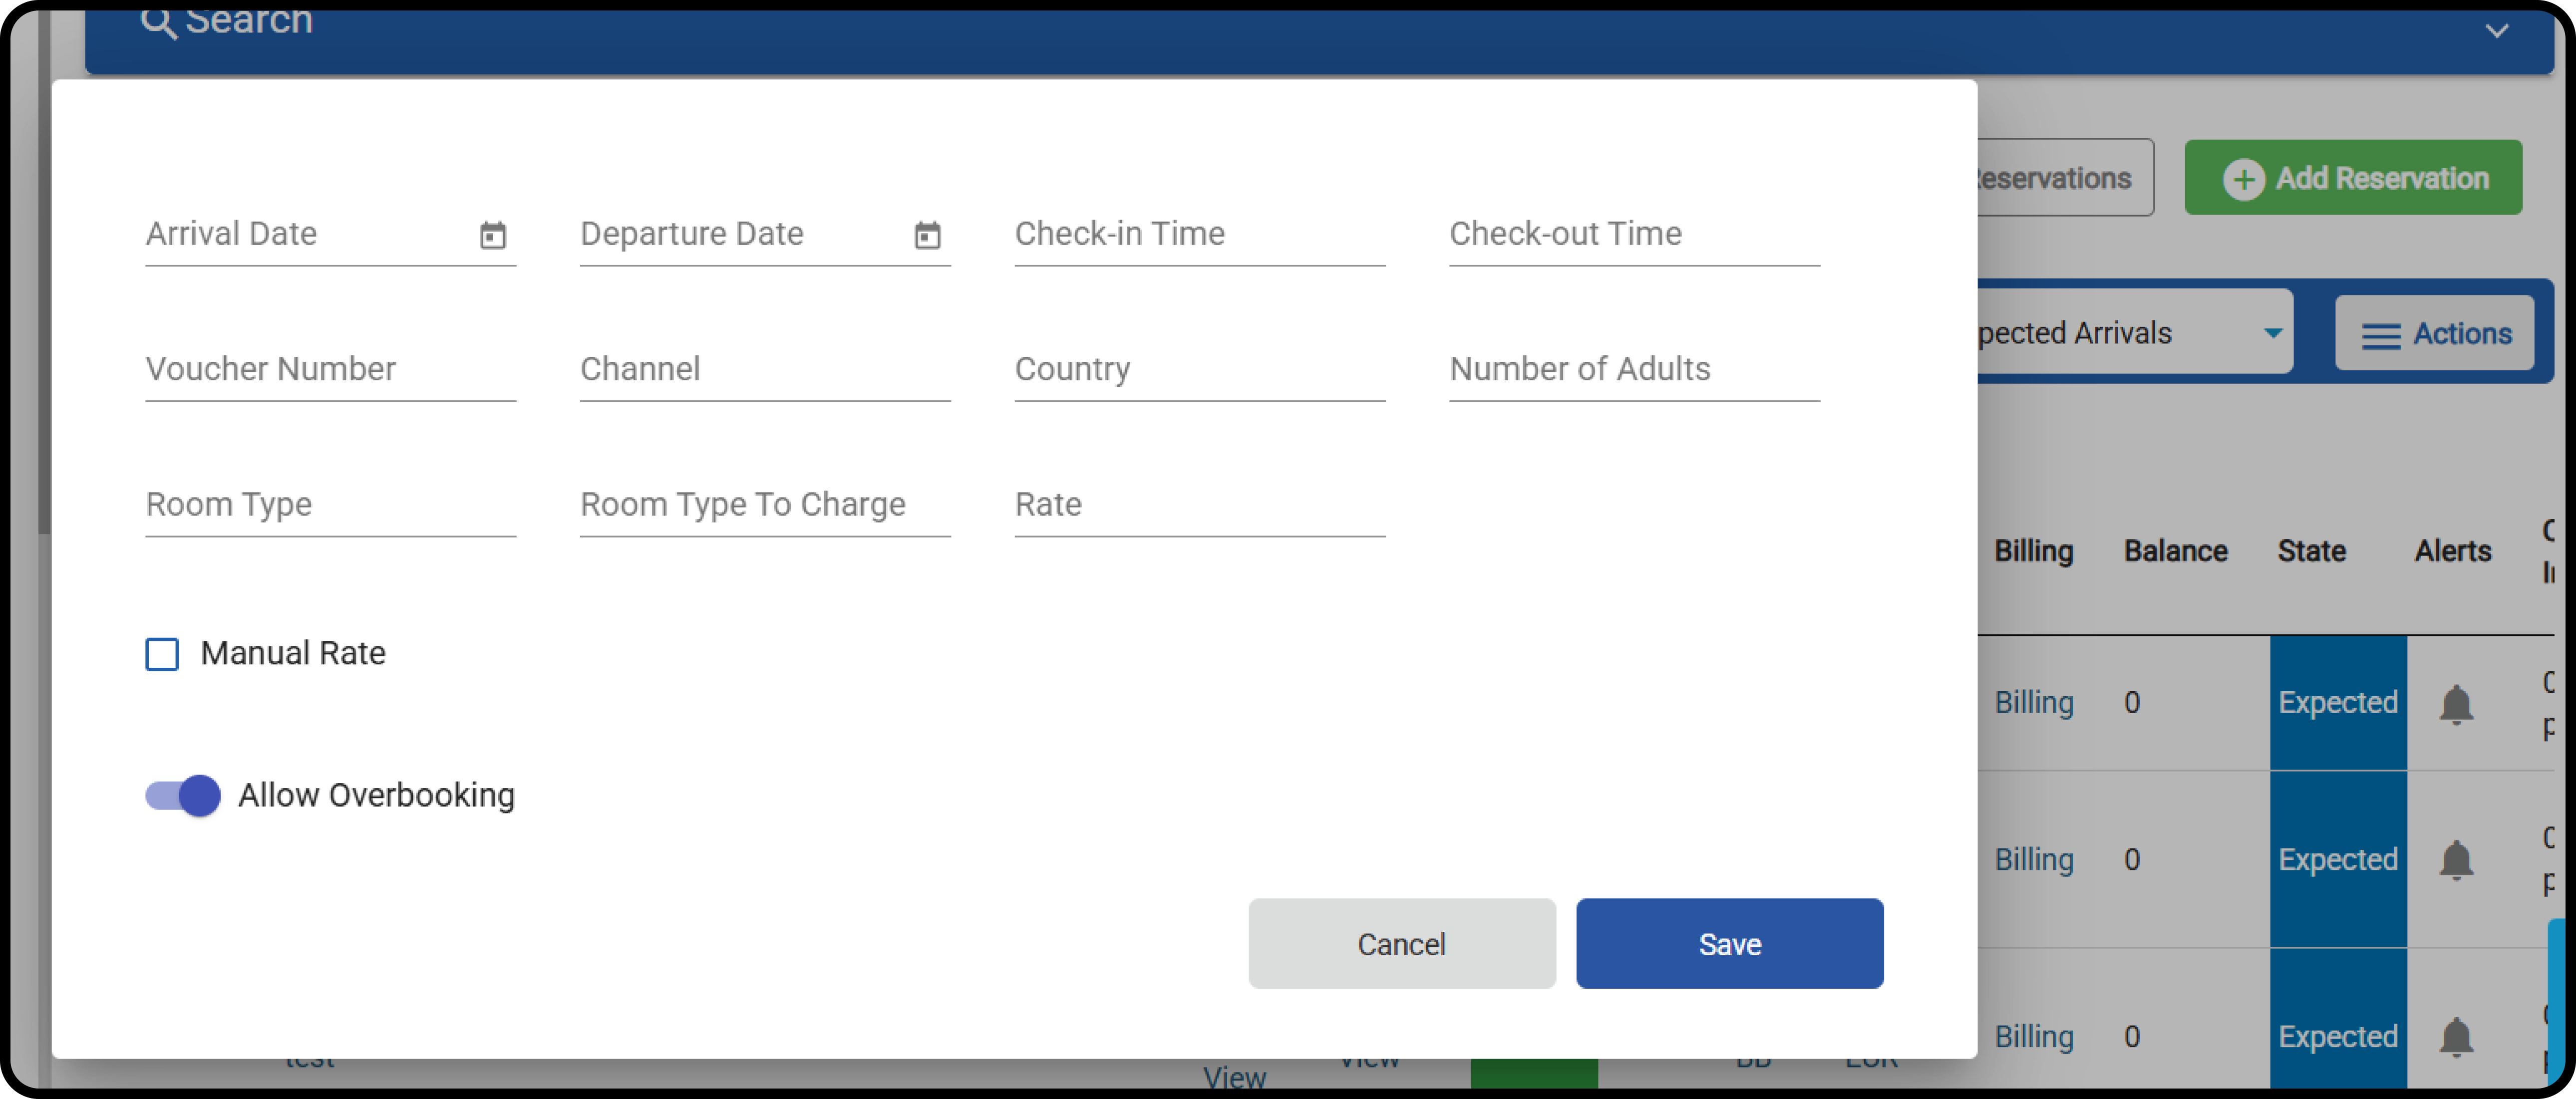 A pop-up window will appear, allowing you to modify various reservation details simultaneously. Here's a breakdown of the available fields:
**For Expected Reservations:**
* **Arrival Date:** Utilize the date selector to adjust the arrival date for all selected reservations. Remember that the new date cannot be before the audit date, after the original departure date, or conflict with the chosen rate code.
* **Departure Date:** Similar to the arrival date, you can modify the departure date for all chosen reservations. The new date cannot be earlier than the audit date, before the preferred arrival date, or incompatible with the selected rate code.
* **Channel:** This auto-complete field lets you assign a new channel to all selected reservations. Choose from any channel available in the system, ensuring it aligns with the chosen rate code.
* **Reservation Country:** Update the country of origin for all selected reservations with an auto-complete dropdown list featuring all available countries.
* **Room Type & Room Type To Charge:** Edit both room types simultaneously! Selecting a new room type will automatically update the "Room Type To Charge" field, potentially applying a free upgrade if applicable. This functionality mirrors the behavior within individual reservation editing.
* **Rate:** Choose a new rate code from the auto-complete list and ensure it aligns with the selected reservations' dates, channels, and room types.
* **Rate Amount & Currency:** These editable fields appear only if you select the "Manual Rate" checkbox. This allows you to apply a specific rate amount and currency to all chosen reservations.
* **Allow Overbooking:**
* Your user permissions will determine whether the **Overbooking** toggle will be dimmed.
* You will be able to allow overbooking in bulk when:
* Changing Arrival Date
* Changing Departure Date
* Changing Room Type
**For Checked-In Reservations:**
**Only the following fields will be editable:**
* Departure Date
* Check-out Time
* Voucher Number
* Country
* **Allow Overbooking** will allow bulk changes for the departure date only
**Saving Your Changes:**
A pop-up window will appear, allowing you to modify various reservation details simultaneously. Here's a breakdown of the available fields:
**For Expected Reservations:**
* **Arrival Date:** Utilize the date selector to adjust the arrival date for all selected reservations. Remember that the new date cannot be before the audit date, after the original departure date, or conflict with the chosen rate code.
* **Departure Date:** Similar to the arrival date, you can modify the departure date for all chosen reservations. The new date cannot be earlier than the audit date, before the preferred arrival date, or incompatible with the selected rate code.
* **Channel:** This auto-complete field lets you assign a new channel to all selected reservations. Choose from any channel available in the system, ensuring it aligns with the chosen rate code.
* **Reservation Country:** Update the country of origin for all selected reservations with an auto-complete dropdown list featuring all available countries.
* **Room Type & Room Type To Charge:** Edit both room types simultaneously! Selecting a new room type will automatically update the "Room Type To Charge" field, potentially applying a free upgrade if applicable. This functionality mirrors the behavior within individual reservation editing.
* **Rate:** Choose a new rate code from the auto-complete list and ensure it aligns with the selected reservations' dates, channels, and room types.
* **Rate Amount & Currency:** These editable fields appear only if you select the "Manual Rate" checkbox. This allows you to apply a specific rate amount and currency to all chosen reservations.
* **Allow Overbooking:**
* Your user permissions will determine whether the **Overbooking** toggle will be dimmed.
* You will be able to allow overbooking in bulk when:
* Changing Arrival Date
* Changing Departure Date
* Changing Room Type
**For Checked-In Reservations:**
**Only the following fields will be editable:**
* Departure Date
* Check-out Time
* Voucher Number
* Country
* **Allow Overbooking** will allow bulk changes for the departure date only
**Saving Your Changes:**
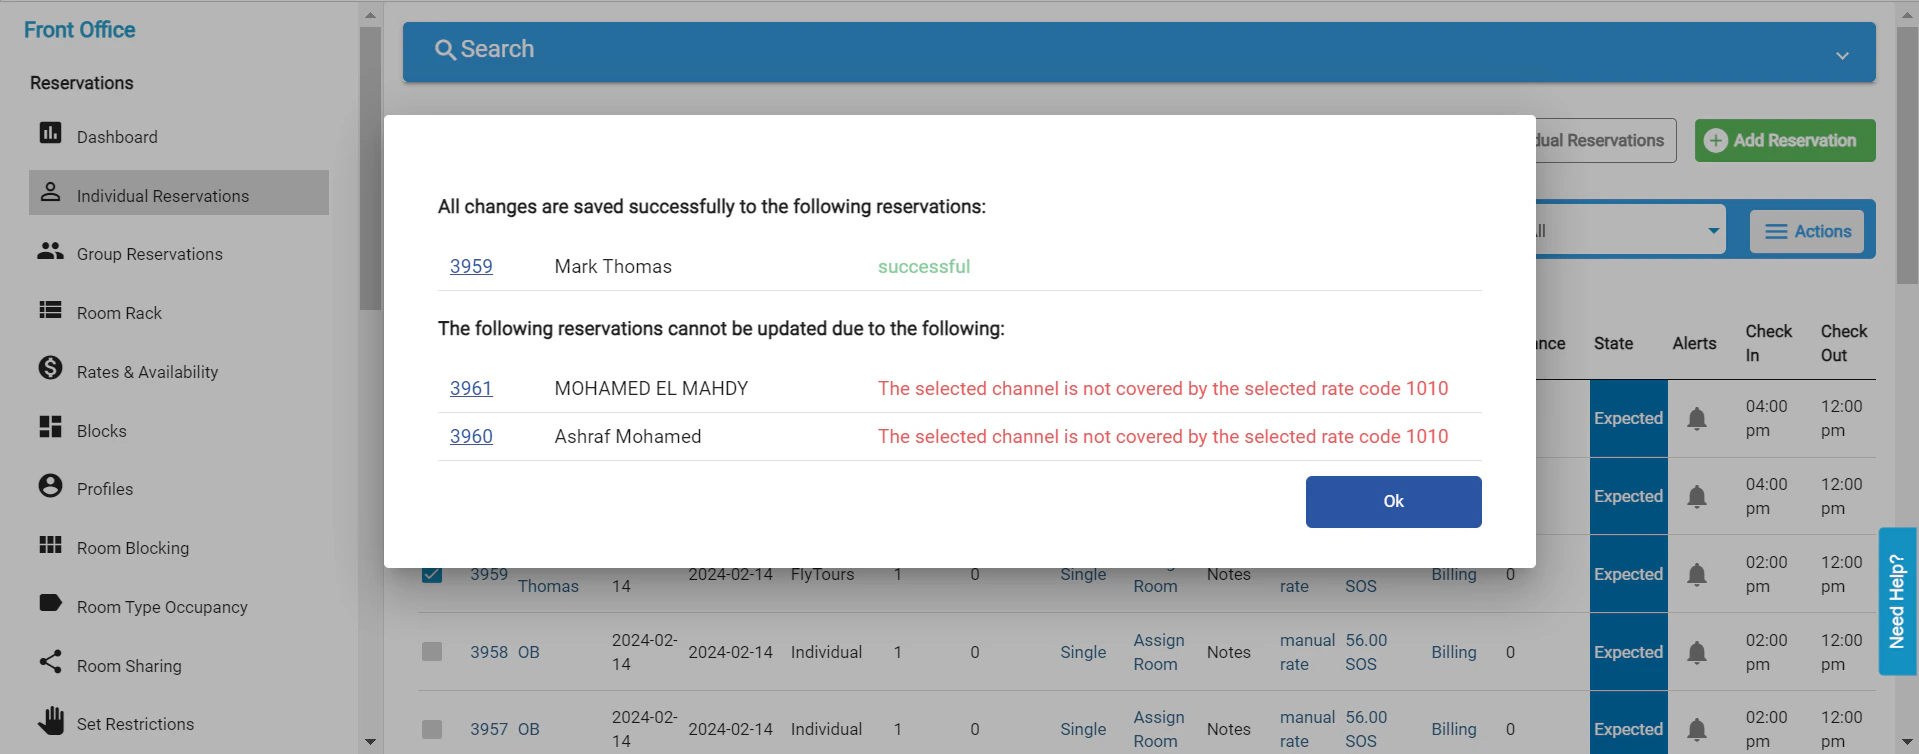 Click the **"Save"** button to apply the modifications. A pop-up will appear, providing details about the update process:
* **Success:** A list of successfully updated reservations will be displayed, including clickable "Reservation ID" to access the individual reservation and "Guest Name" for easy reference.
* **Errors:** If any reservations encountered issues during the update, they will be listed with clickable "Reservation ID," "Guest Name," and a specific validation message explaining the error.
**What Happens Next:**
* Clicking "OK" on the pop-up will dismiss the message and return you to the reservation listing screen, reflecting the implemented changes.
**Benefits of Bulk Edit:**
* **Effortless Efficiency:** Edit fields for multiple reservations simultaneously, freeing up valuable time for other tasks.
* **Enhanced Workflow:** Manage reservation details in bulk, streamlining your work processes.
* **Reduced Mistakes:** Minimize the risk of errors by applying changes to multiple reservations at once.
[Read more](/front-office/reservations/individual-reservations/bulk-add-notes-to-individual-reservations)
## Dashboard Room Count Update
The total room count displayed on the main dashboard has been updated to show **only valid, countable rooms**. Rooms marked as "non-count" will now be excluded from this number, giving you a more accurate and meaningful view of your property's available inventory.
### **Value & Application**
* ✅ **Updated**: Dashboard room count
* ❌ **Not Affected**: Room availability, reservation flows, occupancy %, or financial reporting
This is a display update only — it does **not** impact calculations elsewhere in the system.
Click the **"Save"** button to apply the modifications. A pop-up will appear, providing details about the update process:
* **Success:** A list of successfully updated reservations will be displayed, including clickable "Reservation ID" to access the individual reservation and "Guest Name" for easy reference.
* **Errors:** If any reservations encountered issues during the update, they will be listed with clickable "Reservation ID," "Guest Name," and a specific validation message explaining the error.
**What Happens Next:**
* Clicking "OK" on the pop-up will dismiss the message and return you to the reservation listing screen, reflecting the implemented changes.
**Benefits of Bulk Edit:**
* **Effortless Efficiency:** Edit fields for multiple reservations simultaneously, freeing up valuable time for other tasks.
* **Enhanced Workflow:** Manage reservation details in bulk, streamlining your work processes.
* **Reduced Mistakes:** Minimize the risk of errors by applying changes to multiple reservations at once.
[Read more](/front-office/reservations/individual-reservations/bulk-add-notes-to-individual-reservations)
## Dashboard Room Count Update
The total room count displayed on the main dashboard has been updated to show **only valid, countable rooms**. Rooms marked as "non-count" will now be excluded from this number, giving you a more accurate and meaningful view of your property's available inventory.
### **Value & Application**
* ✅ **Updated**: Dashboard room count
* ❌ **Not Affected**: Room availability, reservation flows, occupancy %, or financial reporting
This is a display update only — it does **not** impact calculations elsewhere in the system.
 ### **Click "FO settings"**
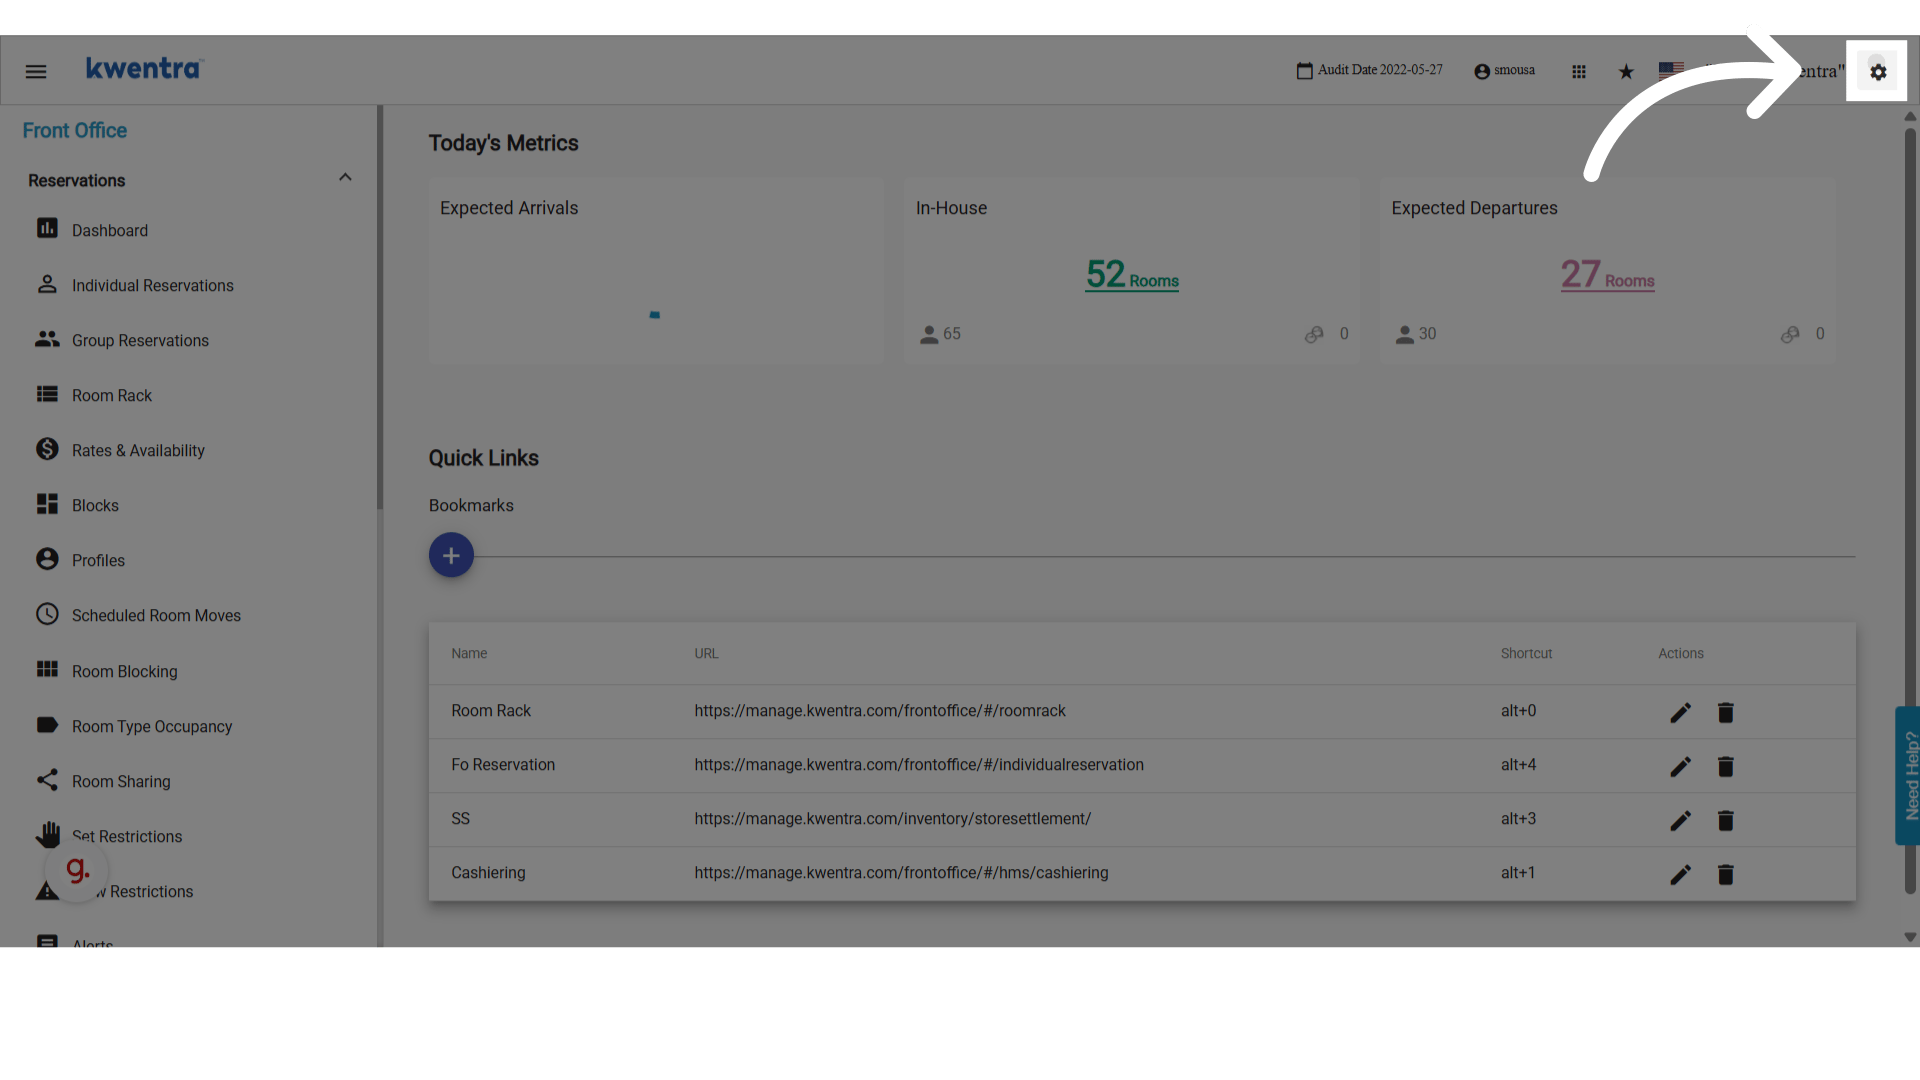 ### **Click "Front Office"**
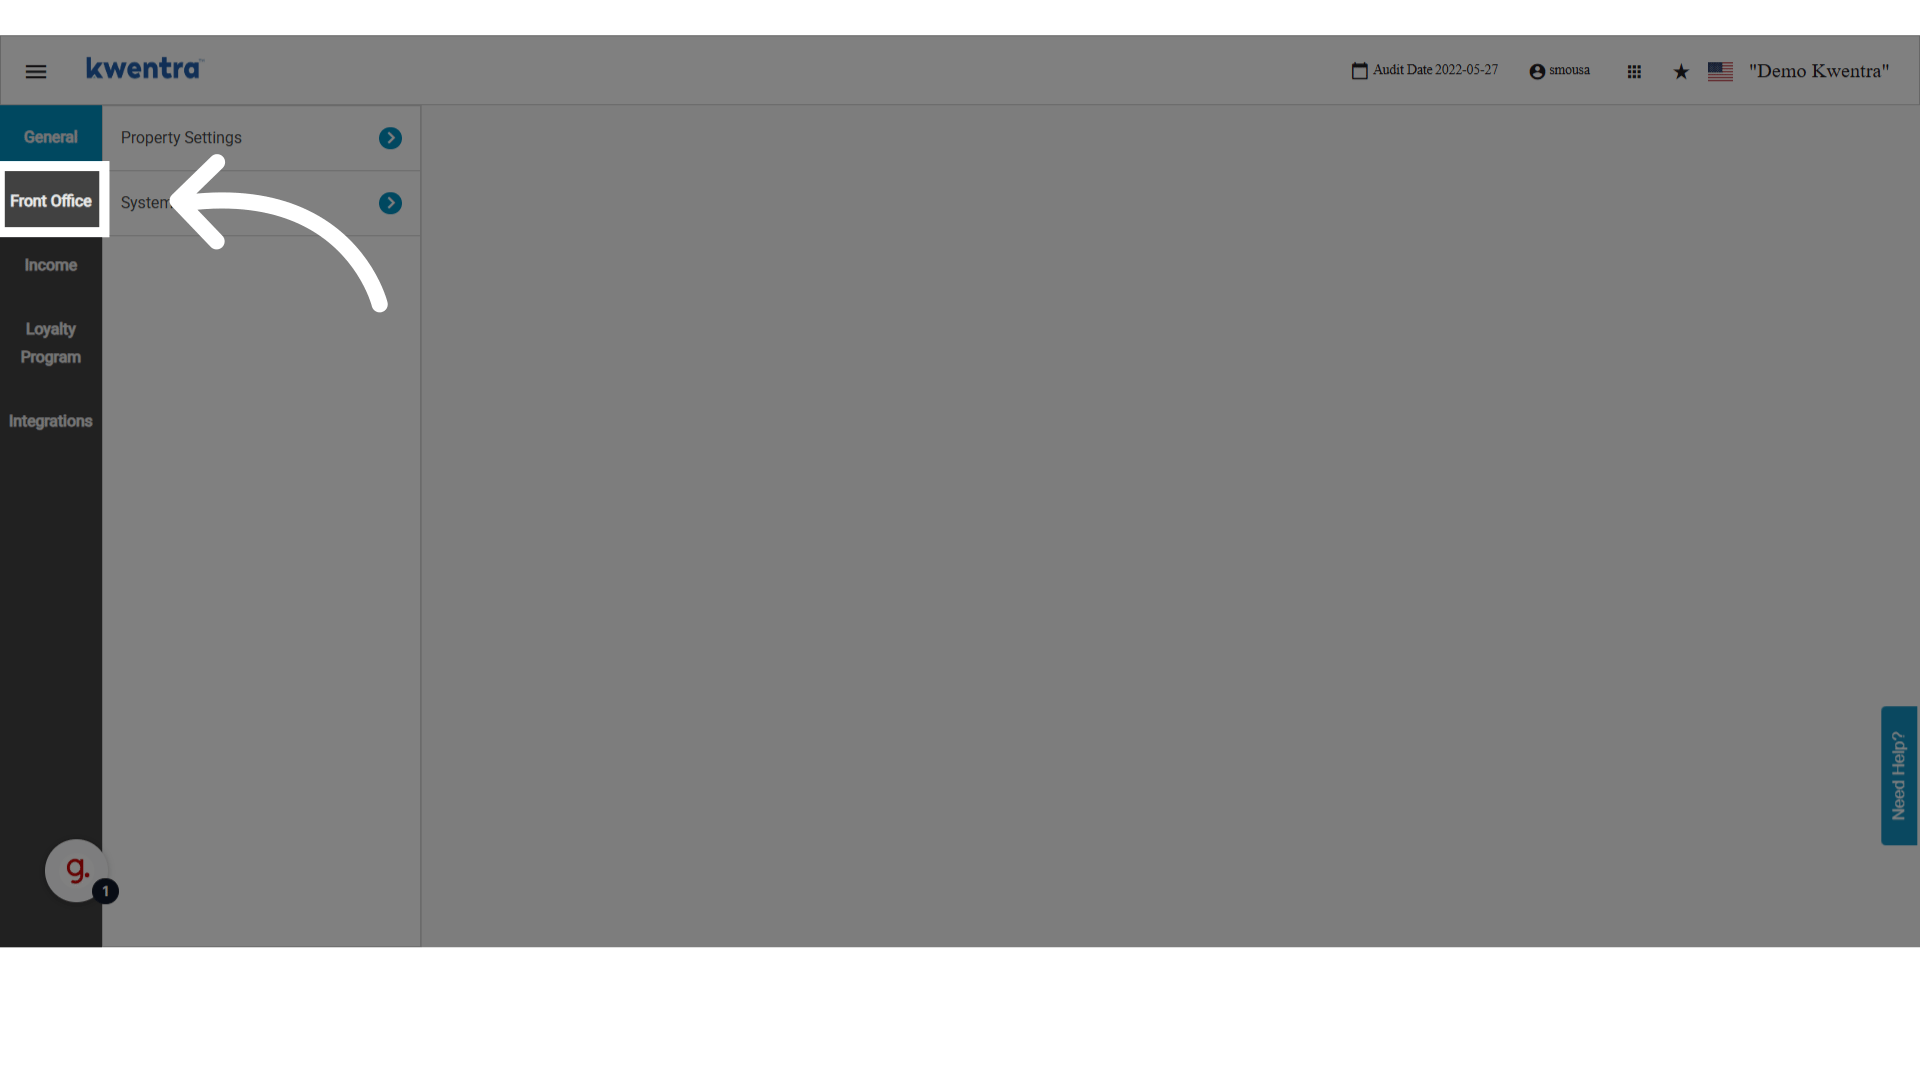 ### **Click "Rooms Settings"**
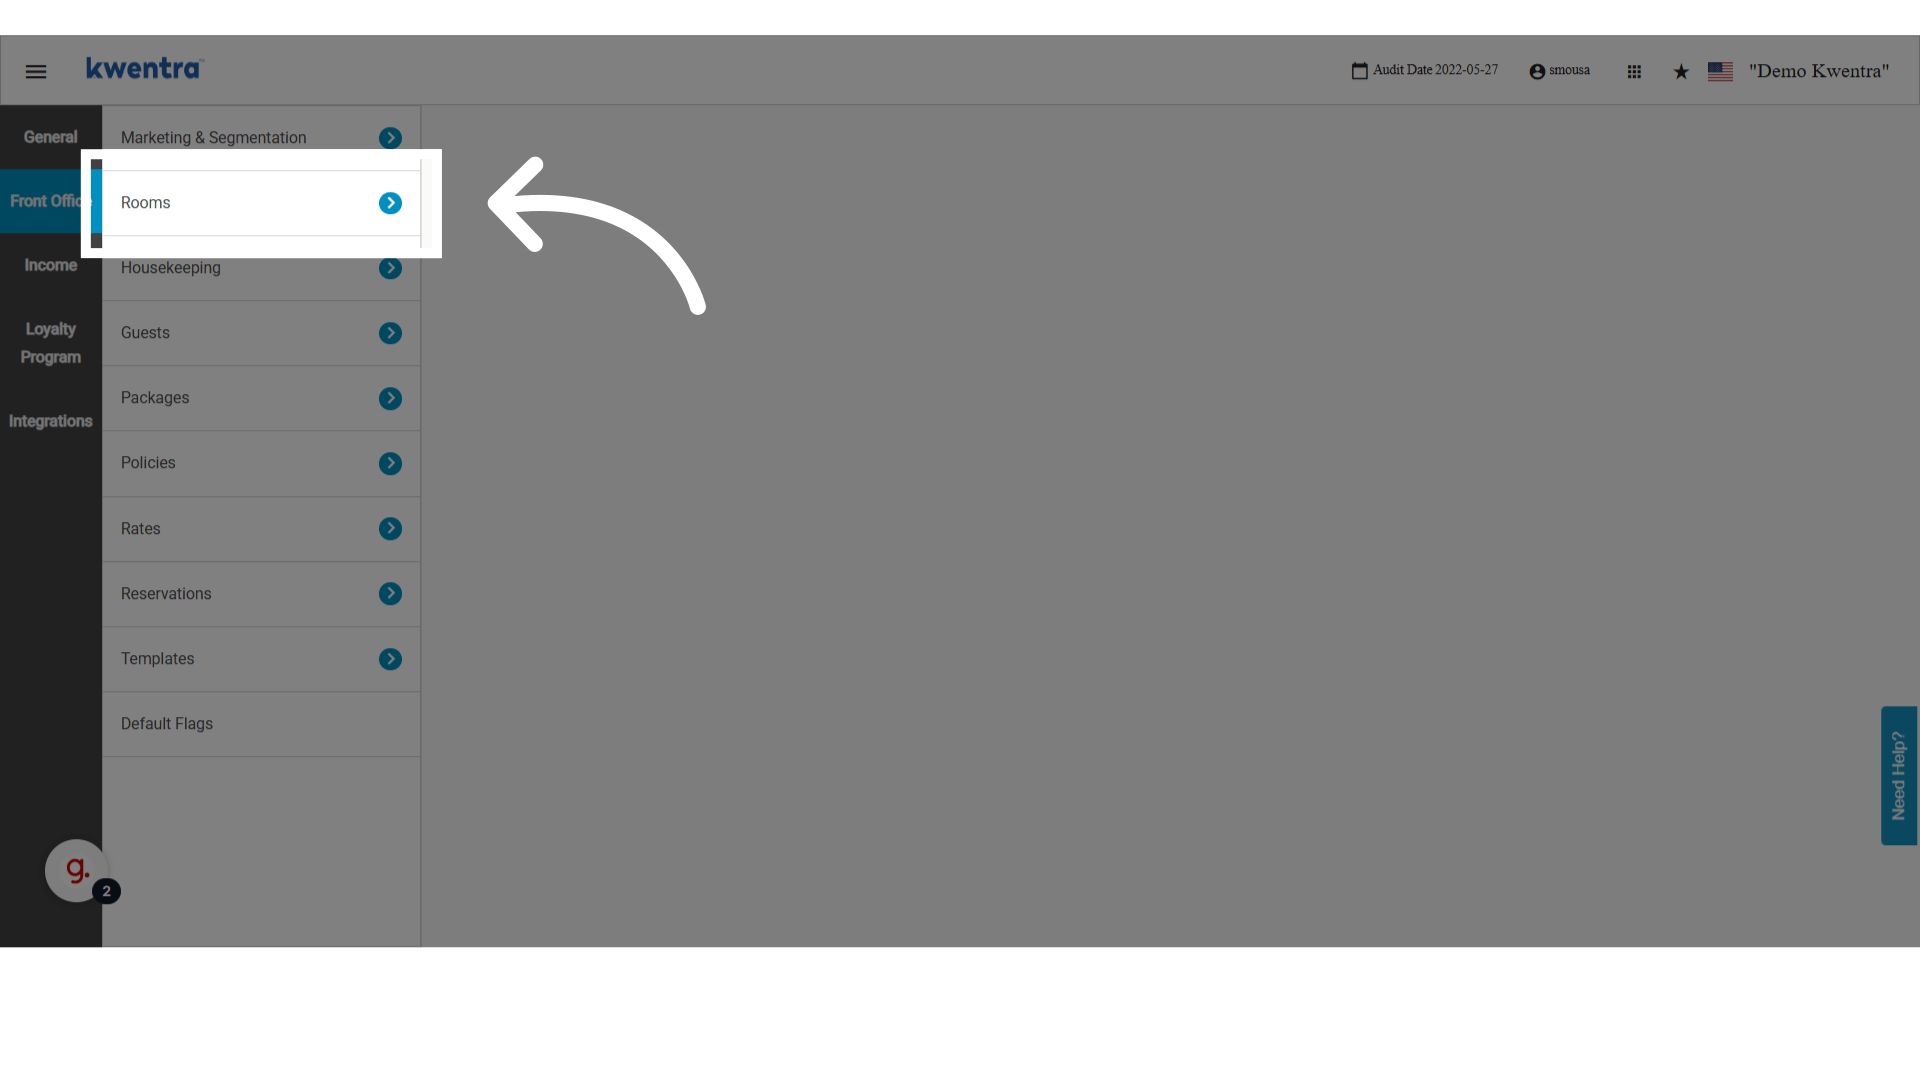 ### **Choose "Rooms"**
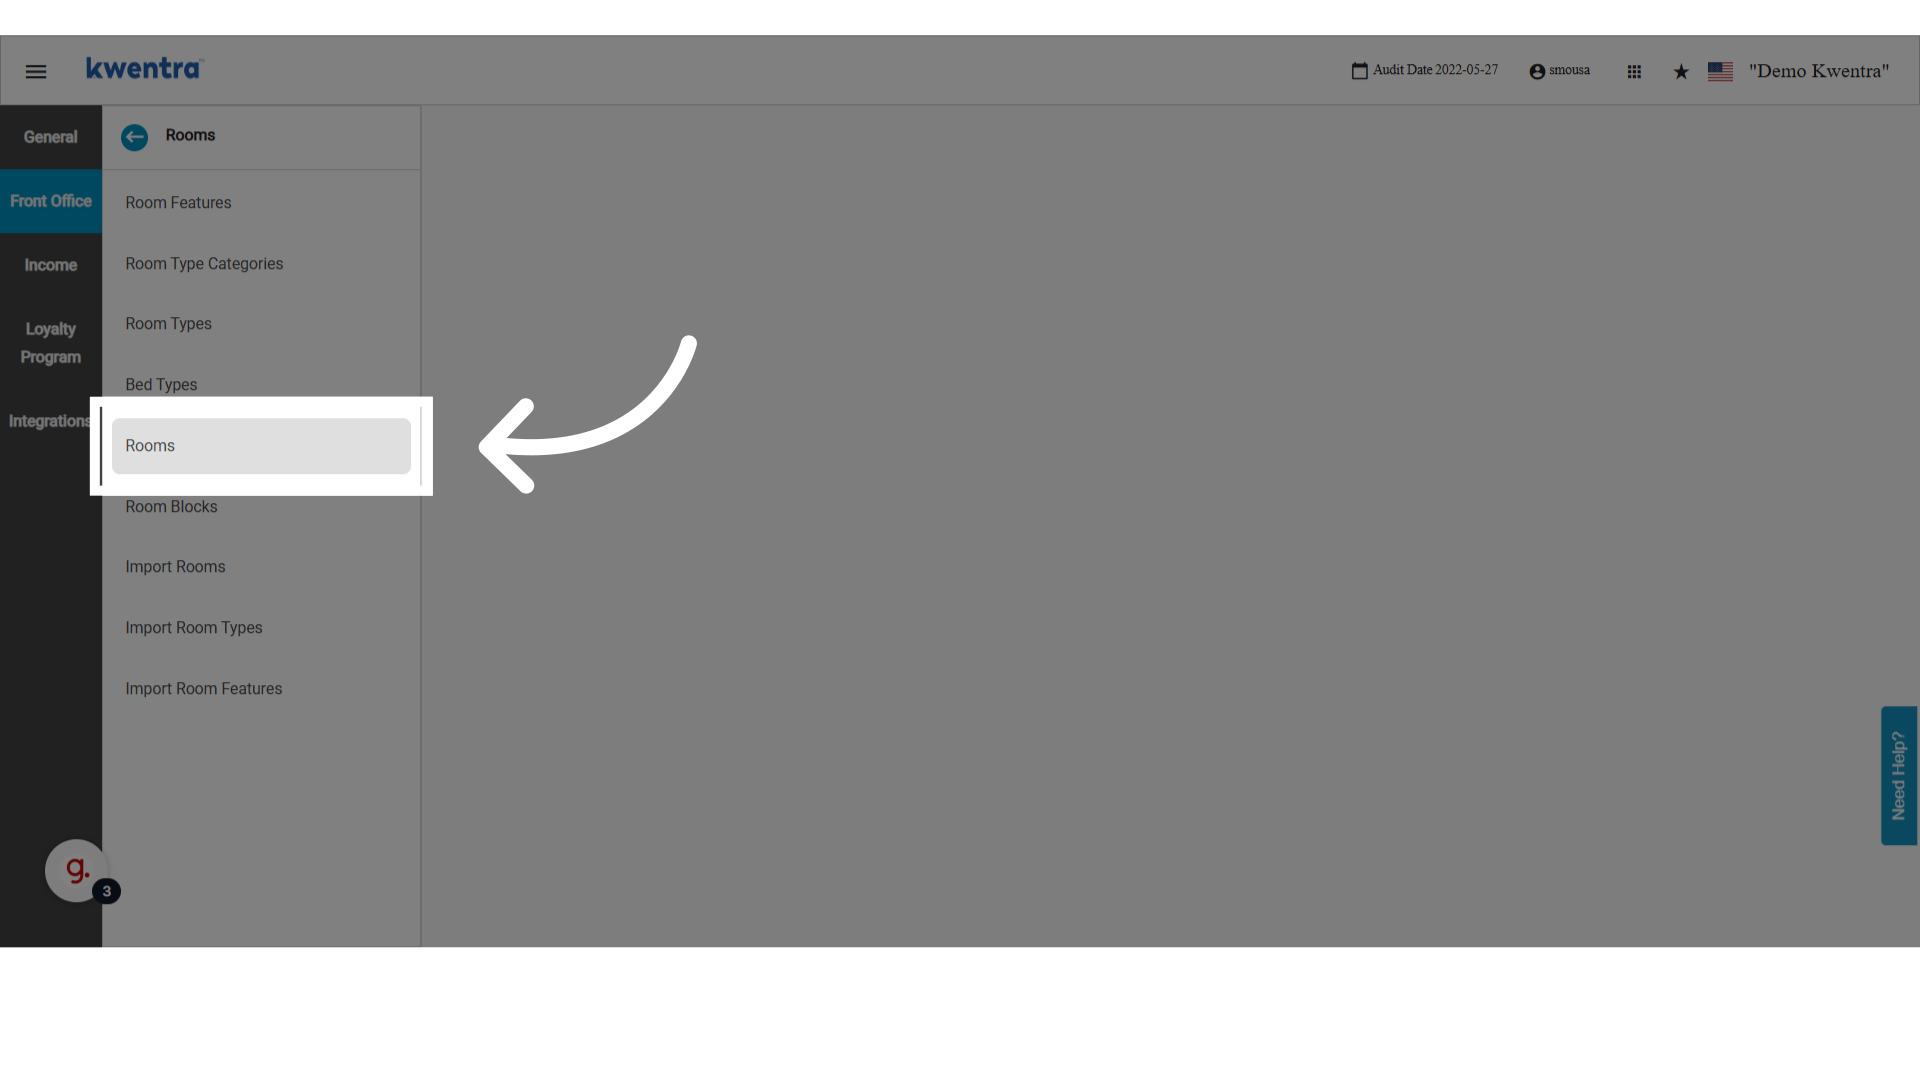 ### **Choose the room you want to exlude**
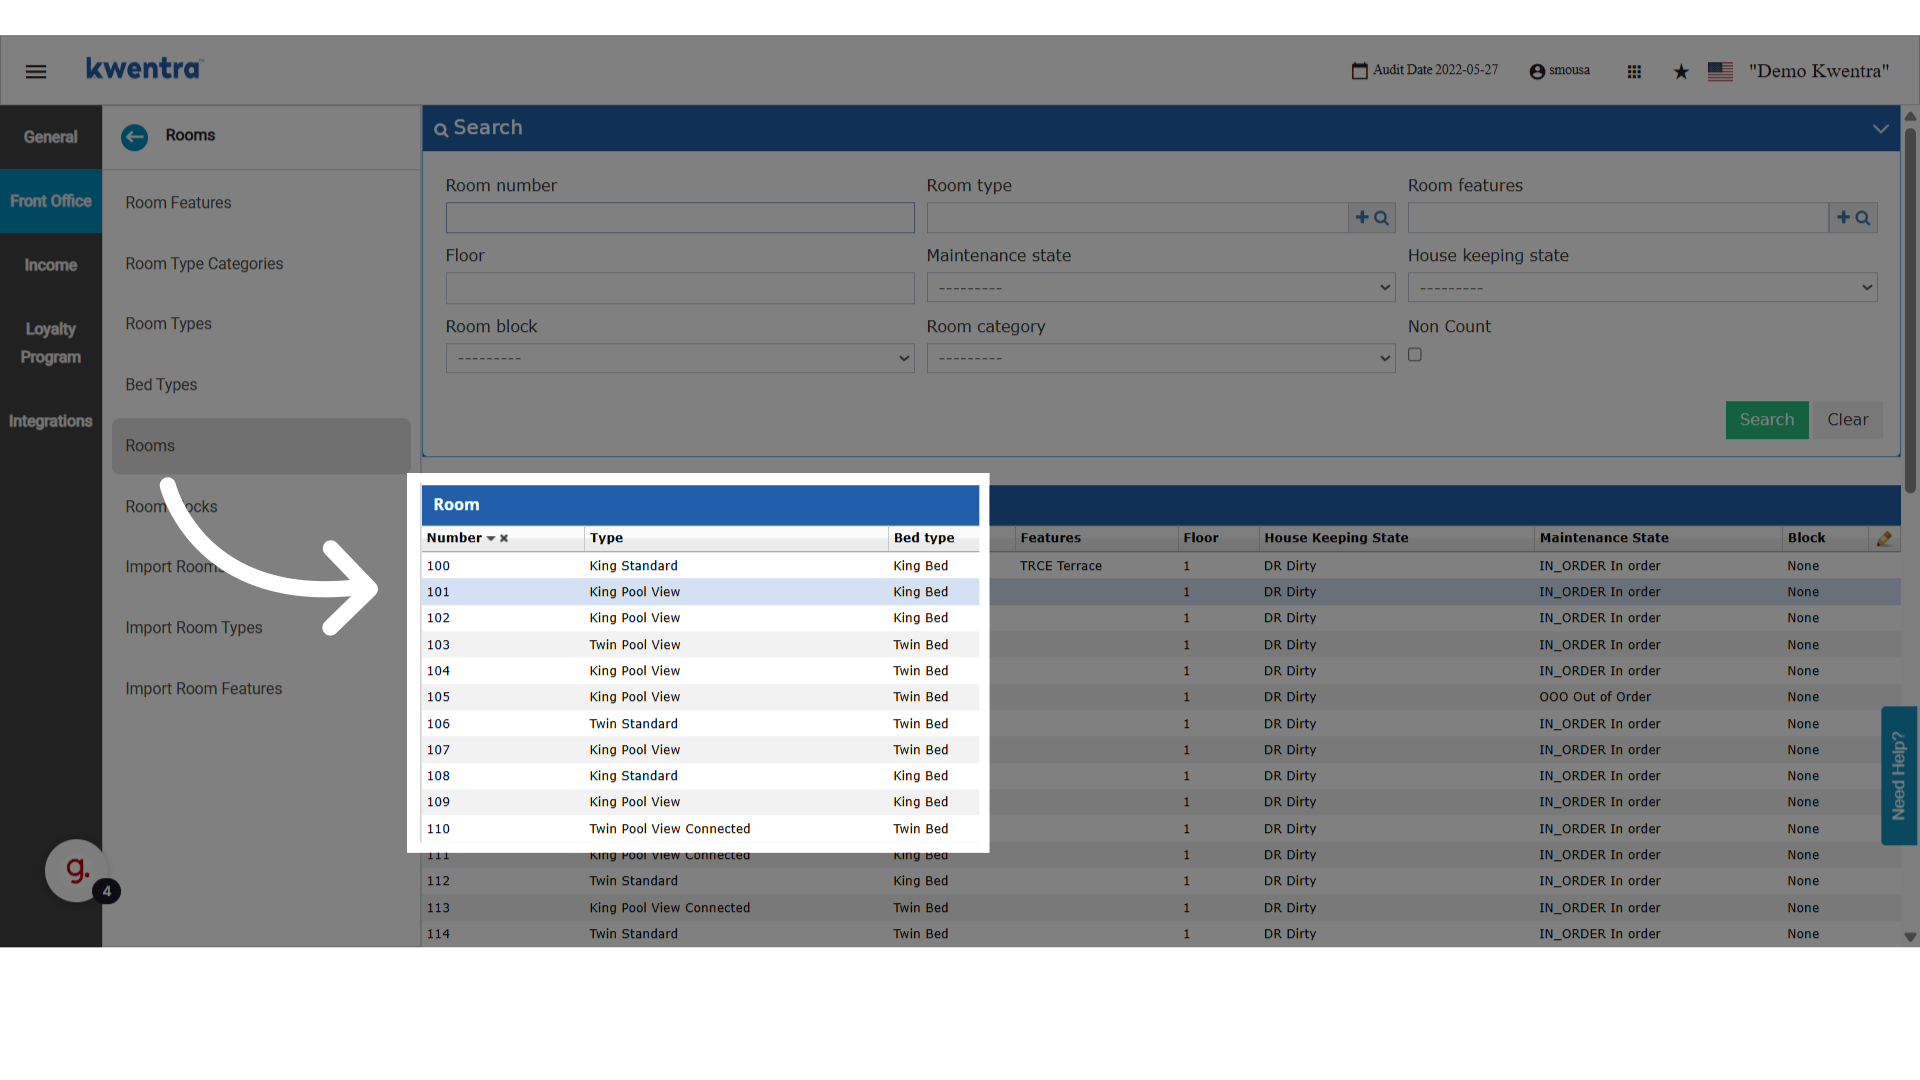 ### **Mark the Flag for Non-count**
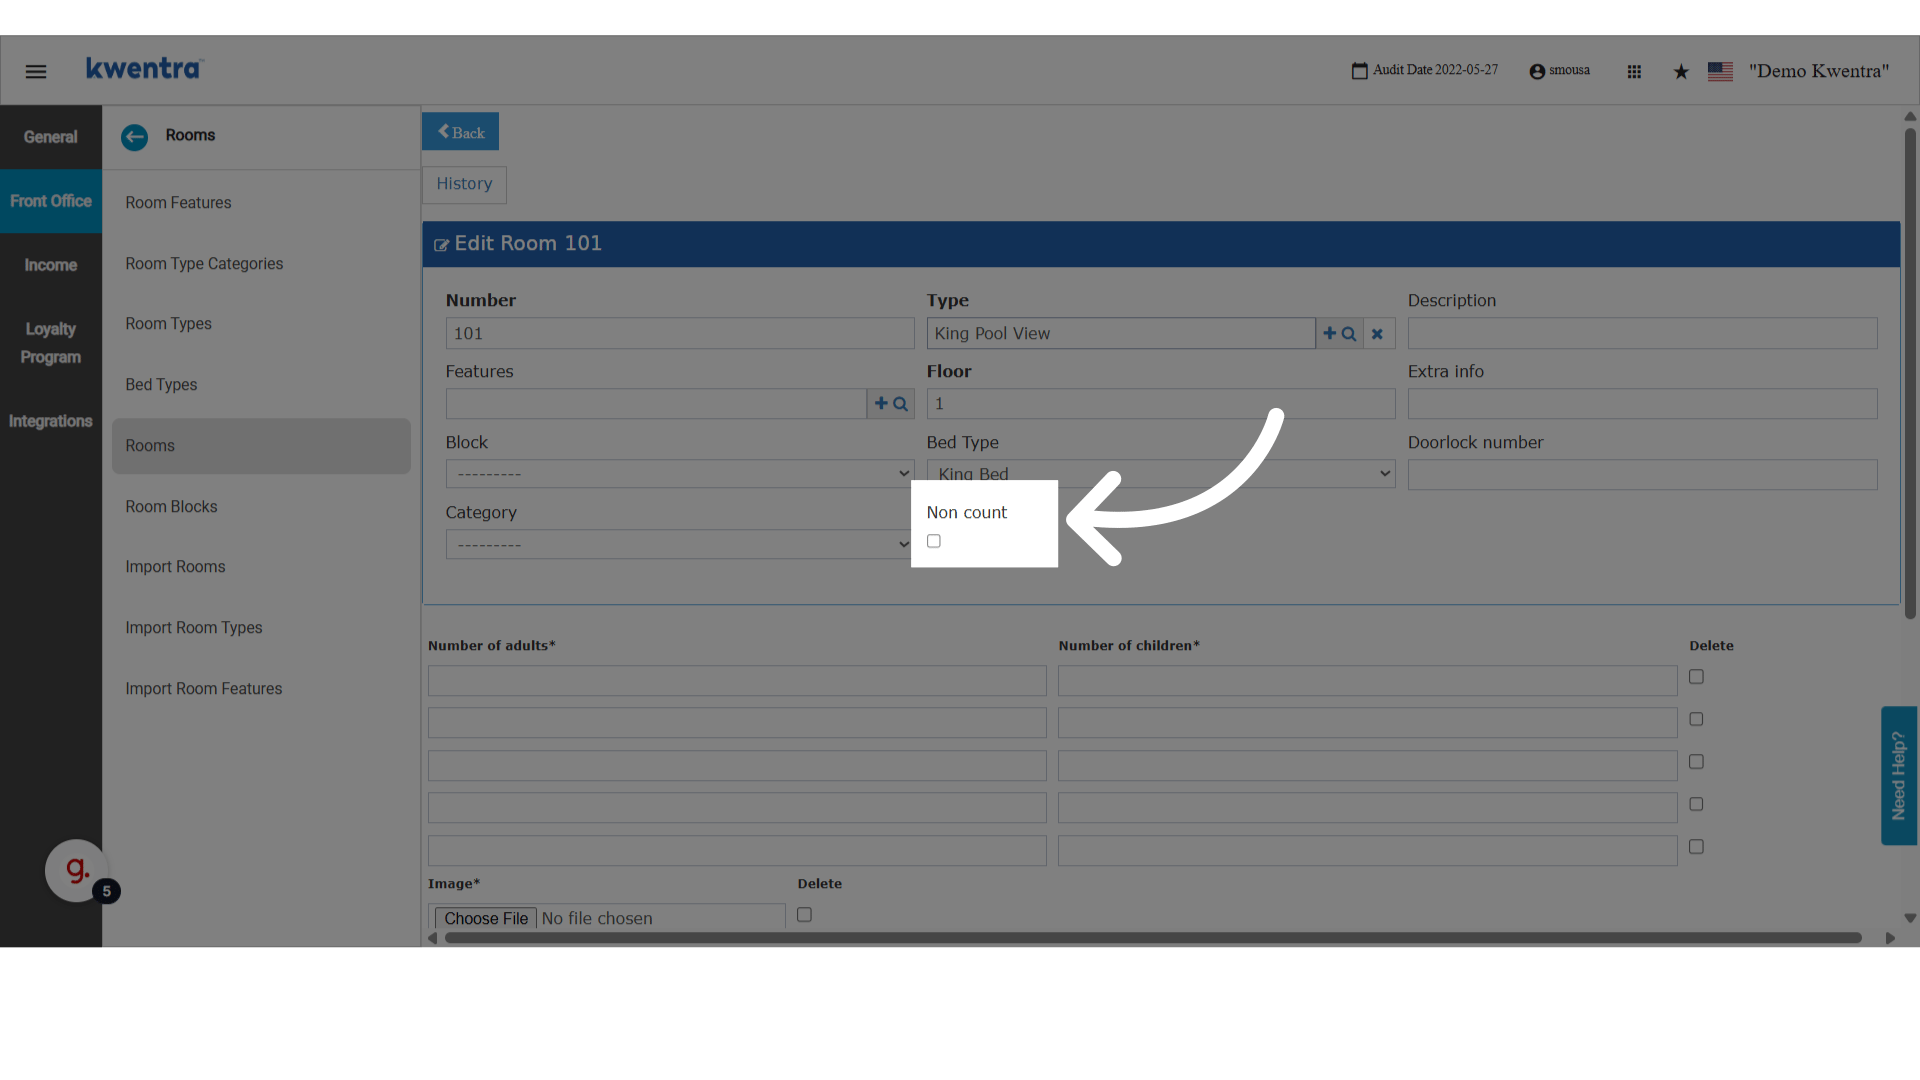 ### **Use any of the saving options**
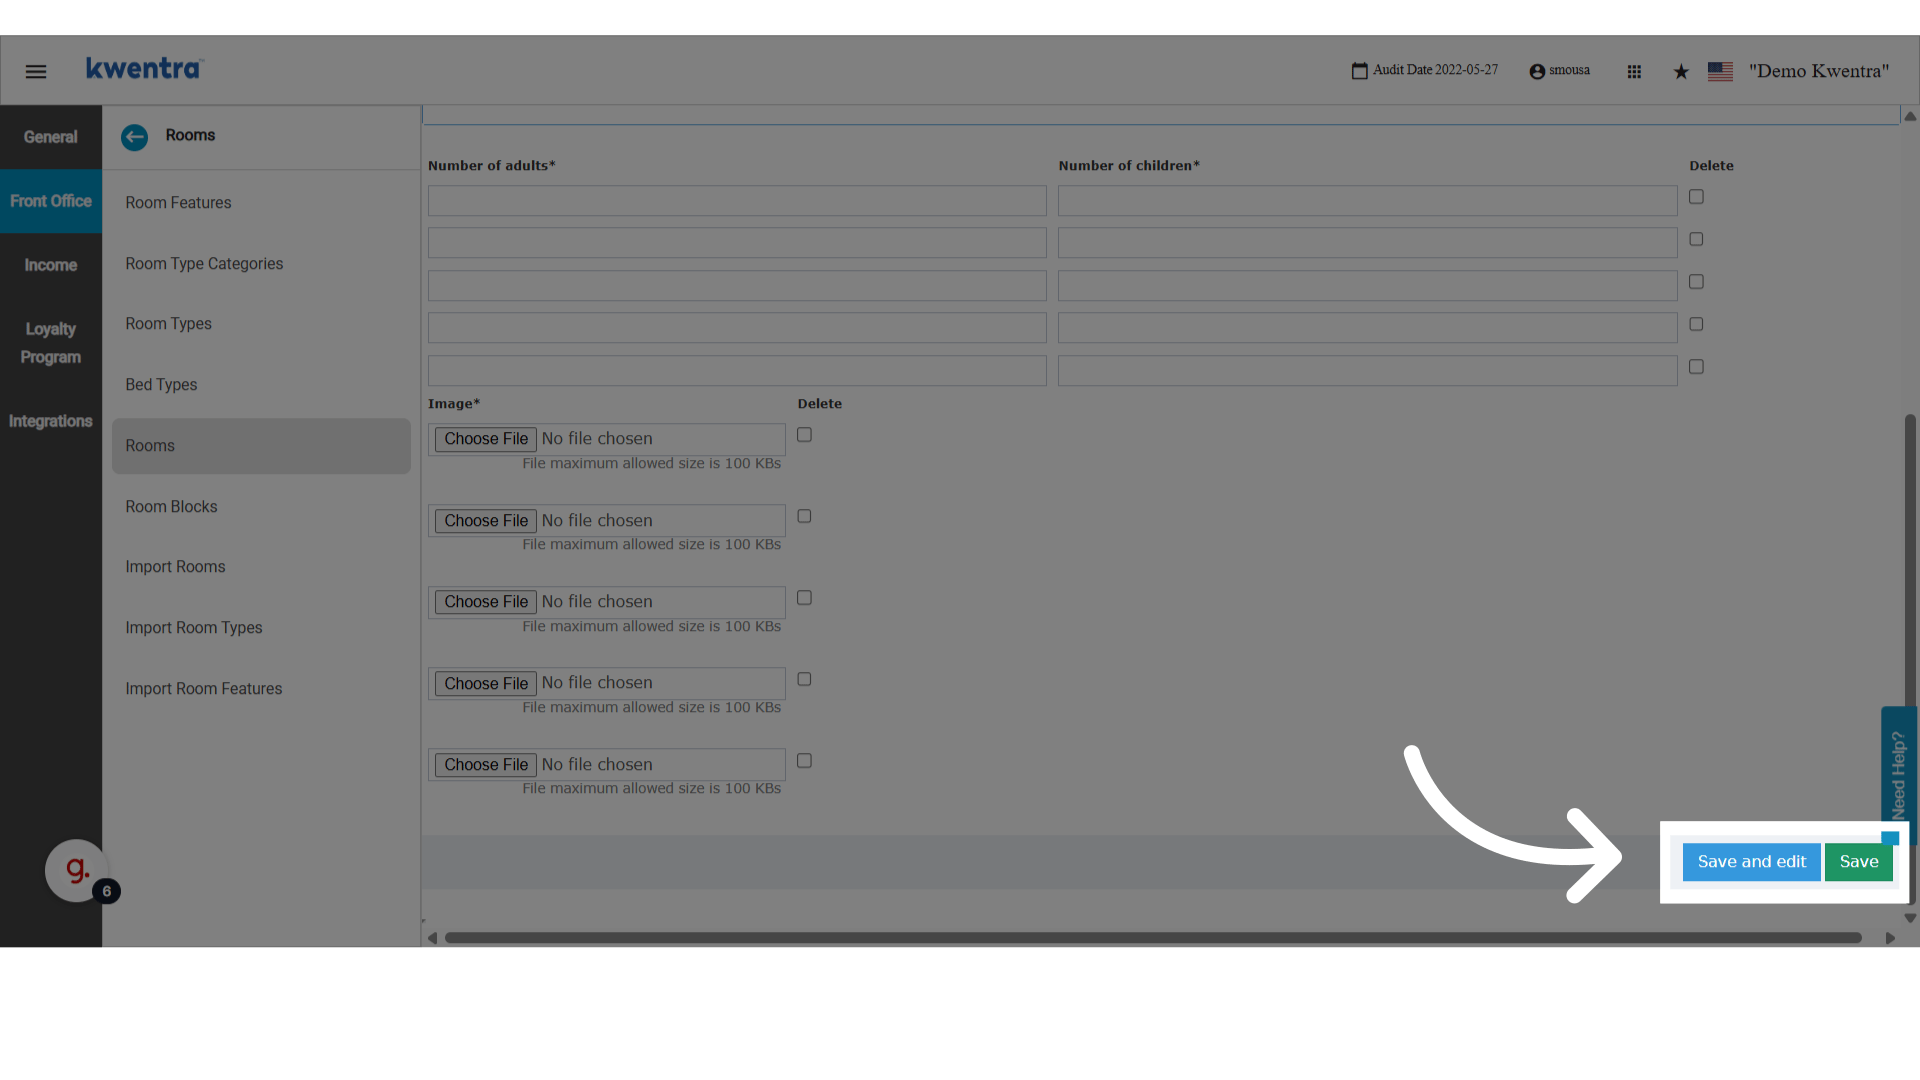 ### **Confirm the changes are saved**
 ### **Go back to Dashboard**
 ### **Non count disclaimer**
This will only appear when there are rooms flagged as non count.
### **Non count disclaimer**
This will only appear when there are rooms flagged as non count.
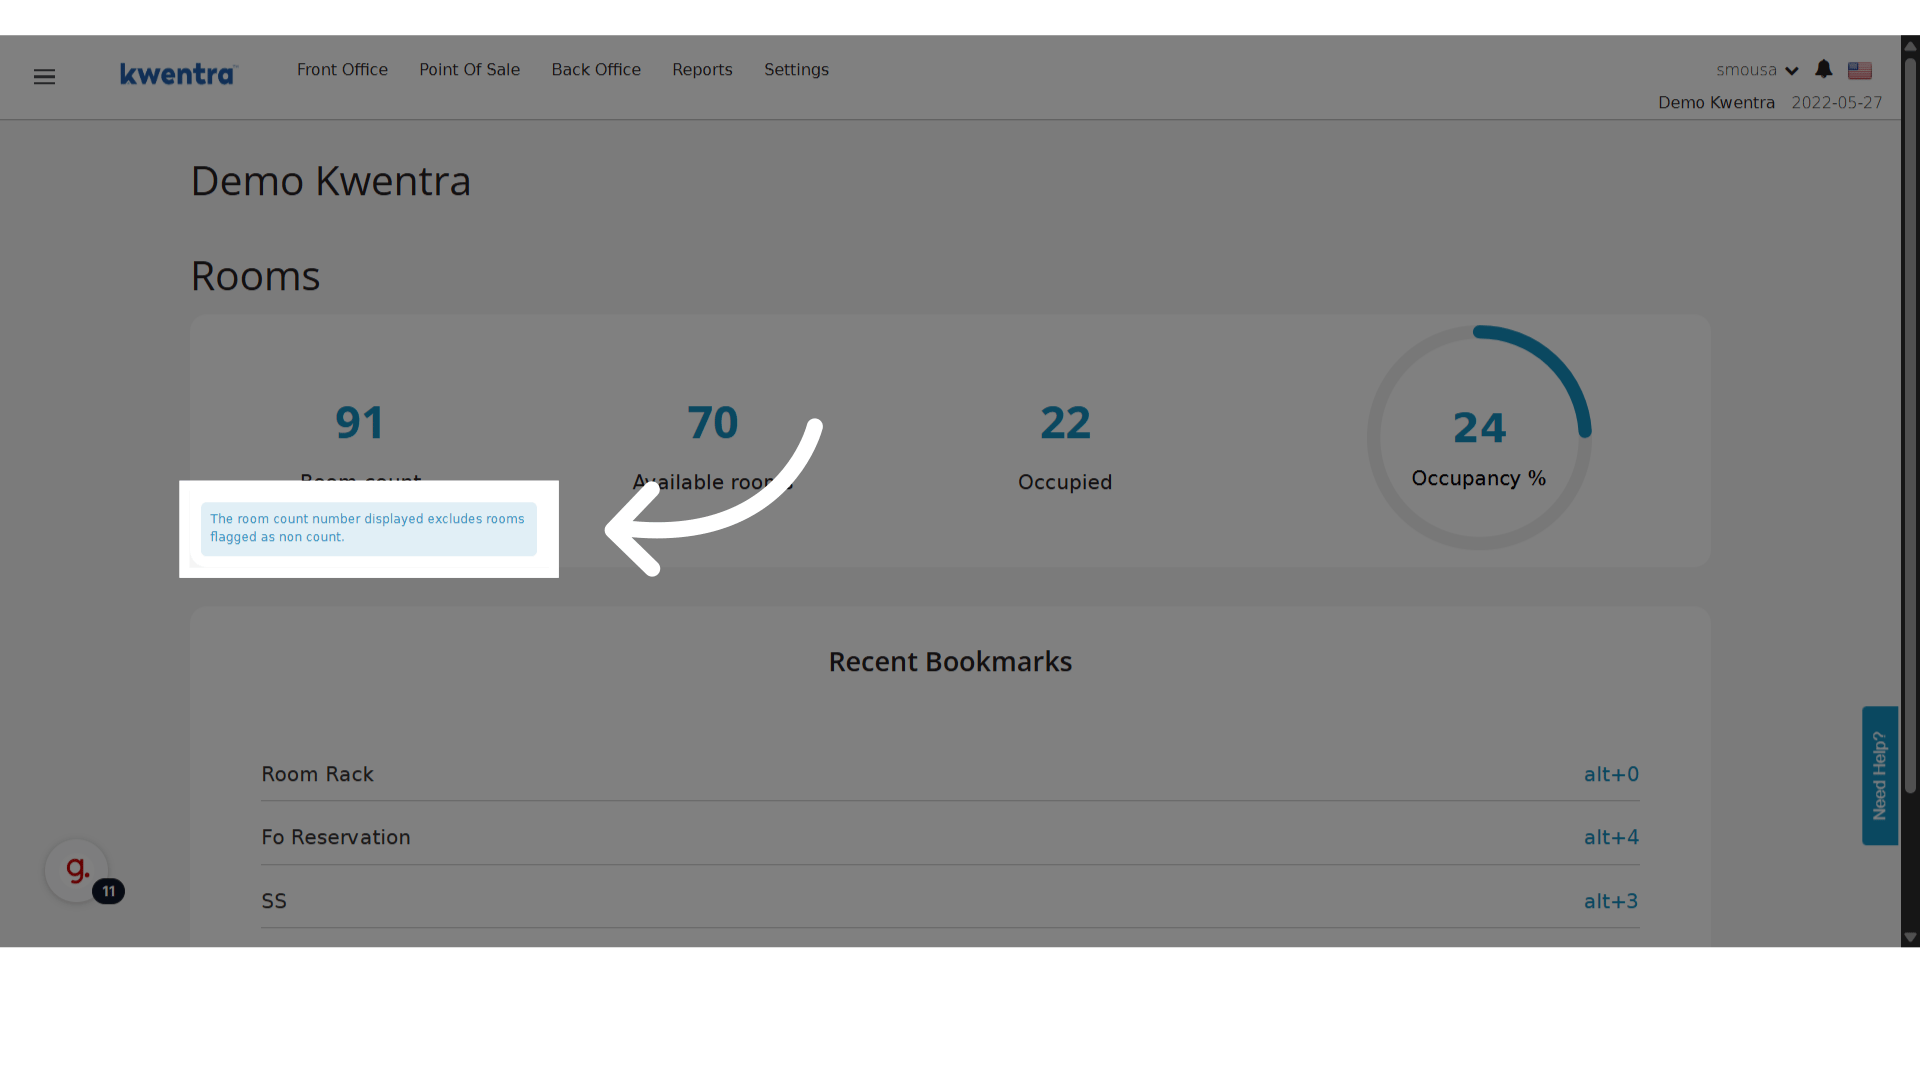 ## Front Office Budget
Introducing the new feature "Front Office Budget".
The feature allows you to add a Monthly Budget within the Front Office module for a selected year.
The feature is accessible from the path **[Front Office → Settings → Income → Budget](https://manage.kwentra.com/settings/#/hms/importbudget)**
Within this screen you will have the capabilities to Import a new budget for a selected year or Export an existing budget.
## Front Office Budget
Introducing the new feature "Front Office Budget".
The feature allows you to add a Monthly Budget within the Front Office module for a selected year.
The feature is accessible from the path **[Front Office → Settings → Income → Budget](https://manage.kwentra.com/settings/#/hms/importbudget)**
Within this screen you will have the capabilities to Import a new budget for a selected year or Export an existing budget.
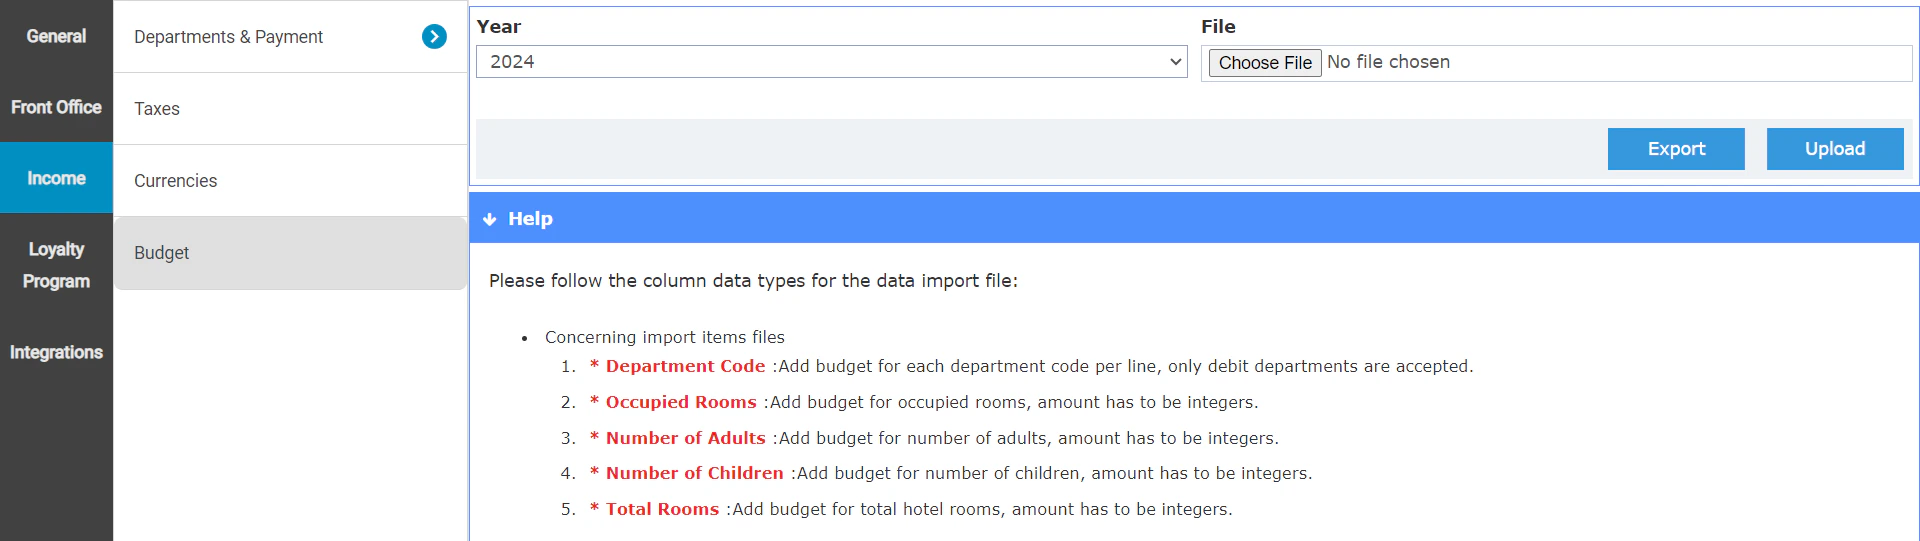 If you chose to export the budget for a year that does not have any budget saved within the system, the system will generate an empty budget file for the selected year. This serves as a template for you to fill the budget in for the selected year.
**Understanding the Budget File:**
* The header section of the file features each month of the selected year.
It is very important that you keep the headers matching the exported empty template and not to edit it in any way to avoid any errors during the upload function.
* The file allows you to upload the expected budget for each month of the year for the following data structures:
* **Total Rooms**
The metric represents the expected total number of rooms to be operational for each month.
This metric can only have whole numbers and does not accept any decimal value.
* **Occupied Rooms**
Represents the expected number of occupied rooms for each selected month.
This metric can only have whole numbers and does not accept any decimal value.
* **Number of Adults**
Represents the total number of adults expected to be in house across the whole month for each selected month.
This metric can only have whole numbers and does not accept any decimal value.
* **Number of Children**
Represents the total number of children expected to be in house across the whole month for each selected month.
This metric can only have whole numbers and does not accept any decimal value.
* **Revenue Departments**
* Each department is represented in a separate row.
* This can only include Revenue Departments (Debit Departments).
* Departments' budget can be represented in decimal value
* Each department is represented by its department code only.
If you chose to export the budget for a year that does not have any budget saved within the system, the system will generate an empty budget file for the selected year. This serves as a template for you to fill the budget in for the selected year.
**Understanding the Budget File:**
* The header section of the file features each month of the selected year.
It is very important that you keep the headers matching the exported empty template and not to edit it in any way to avoid any errors during the upload function.
* The file allows you to upload the expected budget for each month of the year for the following data structures:
* **Total Rooms**
The metric represents the expected total number of rooms to be operational for each month.
This metric can only have whole numbers and does not accept any decimal value.
* **Occupied Rooms**
Represents the expected number of occupied rooms for each selected month.
This metric can only have whole numbers and does not accept any decimal value.
* **Number of Adults**
Represents the total number of adults expected to be in house across the whole month for each selected month.
This metric can only have whole numbers and does not accept any decimal value.
* **Number of Children**
Represents the total number of children expected to be in house across the whole month for each selected month.
This metric can only have whole numbers and does not accept any decimal value.
* **Revenue Departments**
* Each department is represented in a separate row.
* This can only include Revenue Departments (Debit Departments).
* Departments' budget can be represented in decimal value
* Each department is represented by its department code only.
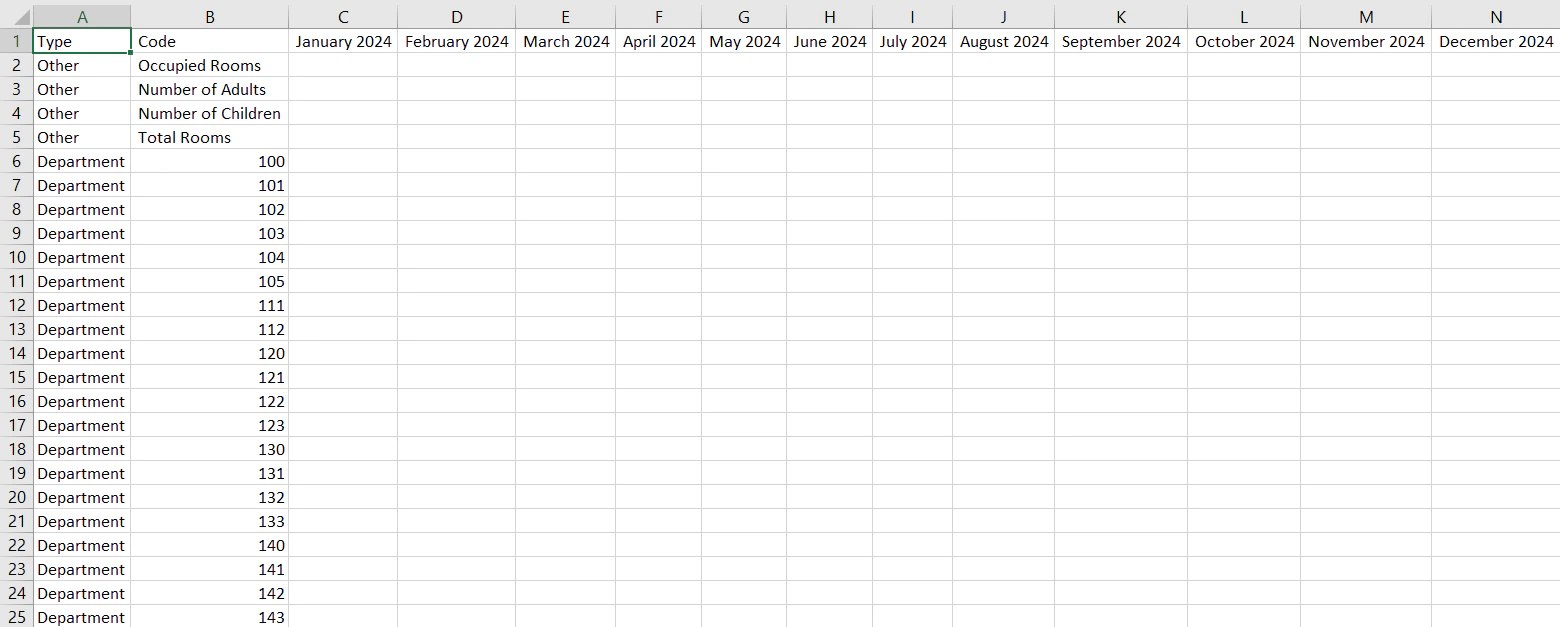 **Notes:**
* The system allows you to upload a budget for the current year, 3 year in the past and 3 years in the future.
* You have the ability to exclude any department that you do not want to upload any budget for
* You can remove the row for this department from the import sheet
* You can leave the values for each month for the department row empty
* In case you uploaded a budget for a specific month for a specific value, you have the option to overwrite it by re-uploading the budget for this specific metric/month
* You can delete a previously added value by re-uploading the budget for it as zero.
* There is a similar budget screen found in the path **[Front Office → Settings → Income → Hijri Budget](https://manage.kwentra.com/settings/#/hms/importhijribudget)** specifically for importing or exporting the budget based on the Hijri calendar.
[Read more](/front-office/reports/reservation-reports/revenue-report-front-office-budget)
## Manager Report - Front Office Budget Update
We are introducing the feature "Front Office Budget" within the Manager Report.
This feature allows you to track and compare the metrics of the Manager Report with the data as planned on the budget for the selected period. This is based on the feature .
Within the Manager Report you will find the new columns "Budget (day)", "Budget (month)" and "Budget (year)". Those columns represent values as calculated from the budget as follows:
* Calculation for Budget (day)
* The system divides the value of the budget for the selected month over total number of days within the selected month
* Example: In case of selecting the date "September 14th 2024" for running the Manager Report
* The system gets the budget value of the month of "September" for the year 2024
* The system divides this number over the total number of days for the this month (30 days)
* The result should represent the ***daily budget***
* Budget (month)
* This represents the budget from day 1 of the selected month until the selected day of the report
* In case of selecting the last day of the month, the ***monthly budget*** is equal to the uploaded budget
* In case of selecting a day in the middle of the month, The system calculates the ***daily budget*** and multiplies it with the number of days selected for the month
* Example: In case of selecting the date "October 20th 2024" for running the Manager Report
* The system calculates the ***daily budget**
In this case the daily budget is calculated by dividing the budget of October by (31 days)*
* The system multiplies the ***daily budget*** by the number of selected days (20)
* The result should represents the ***monthly budget***
* Budget (year)
* This represents the budget from day 1 of the selected year until the selected day of the report
* The system sums the budget of all previous months prior to the selected month with the current month's ***monthly budget***
* Example: In case of selecting the date "October 20th 2024" for running the Manager Report
* The system calculates the ***daily budget***
* The system multiplies the ***daily budget*** by the number of selected days (20)
* The result should represents the ***monthly budget***
* The system sums the budget of all the previous months with the ***monthly budget***
* This results for the ***yearly budget***
**Notes:**
* This report can also run based on the Hijri for the applicable instances. In this case you will find the field "Calendar" with the options (Gregorian & Hijri).
*Kindly consider that Hijri Budget is a different feature than the Gregorian Budget.
Each feature has its own screen and its own data; This means that the report will show completely different metrics when comparing the results of the 2 calendar systems.*
[Read more](/front-office/reports/reservation-reports/revenue-report-front-office-budget)
## Restricting Negative Charges and Payments in Billing
To improve financial control and prevent posting errors, Kwentra now restricts users from posting **negative charges or payments** unless they have special permissions.
These controls apply to both **reservation billing** and **paymaster billing** screens.
### **💡 Business Value**
This update protects your billing process by:
* Preventing **unauthorized adjustments** using negative amounts
* Ensuring only **Front Office Managers** can apply negative values when needed
* Helping hotels maintain **clean and auditable financial records**
### **✅ Use Cases**
* A front desk agent accidentally posts a charge as `-200` instead of `+200`
* A cashier attempts to adjust a payment using a negative value without permission
* The Front Office Manager needs to apply an approved manual reversal or correction
## **🔒 New System Validations**
### **🔹 1. Negative Manual Charges**
**Where:**
Reservation Billing → Manual Charge
Paymaster Billing → Manual Charge
**New Behavior:**
* Users **without the permission** will see this message:
*“Negative charges are not allowed for your user.”*
* The system will block the posting unless permission is granted.
### **🔹 2. Negative Payments**
**Where:**
Reservation Billing → Payment
Paymaster Billing → Payment
**New Behavior:**
* Users **without the permission** will see this message:
*“Negative payments are not allowed for your user.”*
* The system will block the posting unless permission is granted.
## **🔐 Permissions**
Two new permission keys were added:
| Permission Key | Description | Assigned To |
| -------------- | ------------------- | ----------------------------------- |
| \`income | posting information | Can create a negative manual charge |
| \`income | posting information | Can create a negative payment |
> ⚠️ These permissions are **not available** to receptionists, shift leaders, or auditors by default.
## Restriction on Changing Payments in Past POS Invoices
## Overview
Effective immediately, changes to payment details in POS invoices with a last payment date earlier than the audit date are no longer allowed. This policy aims to ensure accounting and reporting accuracy
## Workaround instead of Change Payments
If you need to address discrepancies in an old invoice, please follow these steps:
1. **Refund the Original Invoice**: Use the refund process to refund the old invoice.
2. **Create a New Invoice**: Once the refund is processed, create a new invoice with the correct payment details.
Using this method ensures that the revenue and cancellation records are accurately maintained.
## Validation Message
If a user attempts to change payment details in an old invoice, they will receive the following validation message:
> "You don't have permission to change payment in the past."
## Permission Restrictions
**This restriction is enforced through a new permission setting. This permission should only be granted in exceptional cases, as changing payments in old invoices can lead to inaccuracies in financial reports.**
**Notes:**
* The system allows you to upload a budget for the current year, 3 year in the past and 3 years in the future.
* You have the ability to exclude any department that you do not want to upload any budget for
* You can remove the row for this department from the import sheet
* You can leave the values for each month for the department row empty
* In case you uploaded a budget for a specific month for a specific value, you have the option to overwrite it by re-uploading the budget for this specific metric/month
* You can delete a previously added value by re-uploading the budget for it as zero.
* There is a similar budget screen found in the path **[Front Office → Settings → Income → Hijri Budget](https://manage.kwentra.com/settings/#/hms/importhijribudget)** specifically for importing or exporting the budget based on the Hijri calendar.
[Read more](/front-office/reports/reservation-reports/revenue-report-front-office-budget)
## Manager Report - Front Office Budget Update
We are introducing the feature "Front Office Budget" within the Manager Report.
This feature allows you to track and compare the metrics of the Manager Report with the data as planned on the budget for the selected period. This is based on the feature .
Within the Manager Report you will find the new columns "Budget (day)", "Budget (month)" and "Budget (year)". Those columns represent values as calculated from the budget as follows:
* Calculation for Budget (day)
* The system divides the value of the budget for the selected month over total number of days within the selected month
* Example: In case of selecting the date "September 14th 2024" for running the Manager Report
* The system gets the budget value of the month of "September" for the year 2024
* The system divides this number over the total number of days for the this month (30 days)
* The result should represent the ***daily budget***
* Budget (month)
* This represents the budget from day 1 of the selected month until the selected day of the report
* In case of selecting the last day of the month, the ***monthly budget*** is equal to the uploaded budget
* In case of selecting a day in the middle of the month, The system calculates the ***daily budget*** and multiplies it with the number of days selected for the month
* Example: In case of selecting the date "October 20th 2024" for running the Manager Report
* The system calculates the ***daily budget**
In this case the daily budget is calculated by dividing the budget of October by (31 days)*
* The system multiplies the ***daily budget*** by the number of selected days (20)
* The result should represents the ***monthly budget***
* Budget (year)
* This represents the budget from day 1 of the selected year until the selected day of the report
* The system sums the budget of all previous months prior to the selected month with the current month's ***monthly budget***
* Example: In case of selecting the date "October 20th 2024" for running the Manager Report
* The system calculates the ***daily budget***
* The system multiplies the ***daily budget*** by the number of selected days (20)
* The result should represents the ***monthly budget***
* The system sums the budget of all the previous months with the ***monthly budget***
* This results for the ***yearly budget***
**Notes:**
* This report can also run based on the Hijri for the applicable instances. In this case you will find the field "Calendar" with the options (Gregorian & Hijri).
*Kindly consider that Hijri Budget is a different feature than the Gregorian Budget.
Each feature has its own screen and its own data; This means that the report will show completely different metrics when comparing the results of the 2 calendar systems.*
[Read more](/front-office/reports/reservation-reports/revenue-report-front-office-budget)
## Restricting Negative Charges and Payments in Billing
To improve financial control and prevent posting errors, Kwentra now restricts users from posting **negative charges or payments** unless they have special permissions.
These controls apply to both **reservation billing** and **paymaster billing** screens.
### **💡 Business Value**
This update protects your billing process by:
* Preventing **unauthorized adjustments** using negative amounts
* Ensuring only **Front Office Managers** can apply negative values when needed
* Helping hotels maintain **clean and auditable financial records**
### **✅ Use Cases**
* A front desk agent accidentally posts a charge as `-200` instead of `+200`
* A cashier attempts to adjust a payment using a negative value without permission
* The Front Office Manager needs to apply an approved manual reversal or correction
## **🔒 New System Validations**
### **🔹 1. Negative Manual Charges**
**Where:**
Reservation Billing → Manual Charge
Paymaster Billing → Manual Charge
**New Behavior:**
* Users **without the permission** will see this message:
*“Negative charges are not allowed for your user.”*
* The system will block the posting unless permission is granted.
### **🔹 2. Negative Payments**
**Where:**
Reservation Billing → Payment
Paymaster Billing → Payment
**New Behavior:**
* Users **without the permission** will see this message:
*“Negative payments are not allowed for your user.”*
* The system will block the posting unless permission is granted.
## **🔐 Permissions**
Two new permission keys were added:
| Permission Key | Description | Assigned To |
| -------------- | ------------------- | ----------------------------------- |
| \`income | posting information | Can create a negative manual charge |
| \`income | posting information | Can create a negative payment |
> ⚠️ These permissions are **not available** to receptionists, shift leaders, or auditors by default.
## Restriction on Changing Payments in Past POS Invoices
## Overview
Effective immediately, changes to payment details in POS invoices with a last payment date earlier than the audit date are no longer allowed. This policy aims to ensure accounting and reporting accuracy
## Workaround instead of Change Payments
If you need to address discrepancies in an old invoice, please follow these steps:
1. **Refund the Original Invoice**: Use the refund process to refund the old invoice.
2. **Create a New Invoice**: Once the refund is processed, create a new invoice with the correct payment details.
Using this method ensures that the revenue and cancellation records are accurately maintained.
## Validation Message
If a user attempts to change payment details in an old invoice, they will receive the following validation message:
> "You don't have permission to change payment in the past."
## Permission Restrictions
**This restriction is enforced through a new permission setting. This permission should only be granted in exceptional cases, as changing payments in old invoices can lead to inaccuracies in financial reports.**