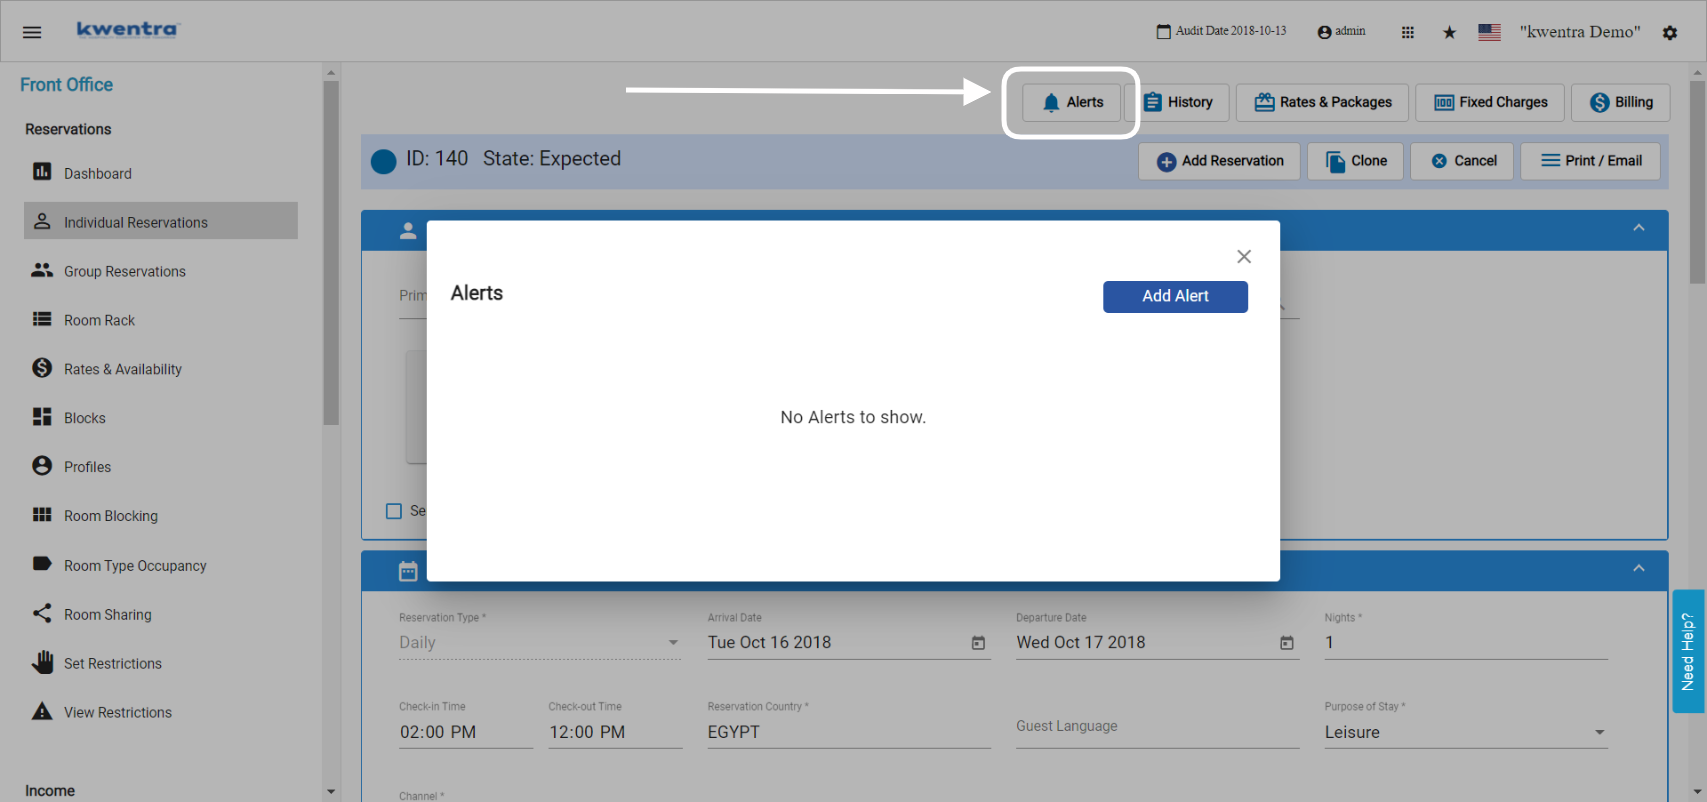
It is very important for staff members to communicate vital information about a guest or a billing related matter on a certain reservation with each other, rather than doing this verbally you can use the new Alerts Feature from kwentra. Alerts are added on the reservation level, these alerts pop up to any user that opens the reservation. Front Office → Individual Reservations → Select A Reservation → AlertsDocumentation Index
Fetch the complete documentation index at: https://help.kwentra.com/llms.txt
Use this file to discover all available pages before exploring further.
 How do I add an alert?
- Click on Alerts from the top of the reservation’s screen.
- Click Add Alert.
- Type in the content of this alert.
- Choose whether you want this alert to Pop Up to anyone who opens this reservation or not.
- Click Save.
- After you save you get the option to edit or delete the alert.
 How do I see the alerts on a reservation?
The Alerts pop up appear in the below scenarios:
How do I see the alerts on a reservation?
The Alerts pop up appear in the below scenarios:
- When you open the reservation itself.
- When you open the billing screen of the reservation.
- When you open the reservation as a pop up,
 Update: 29th of May, 2022
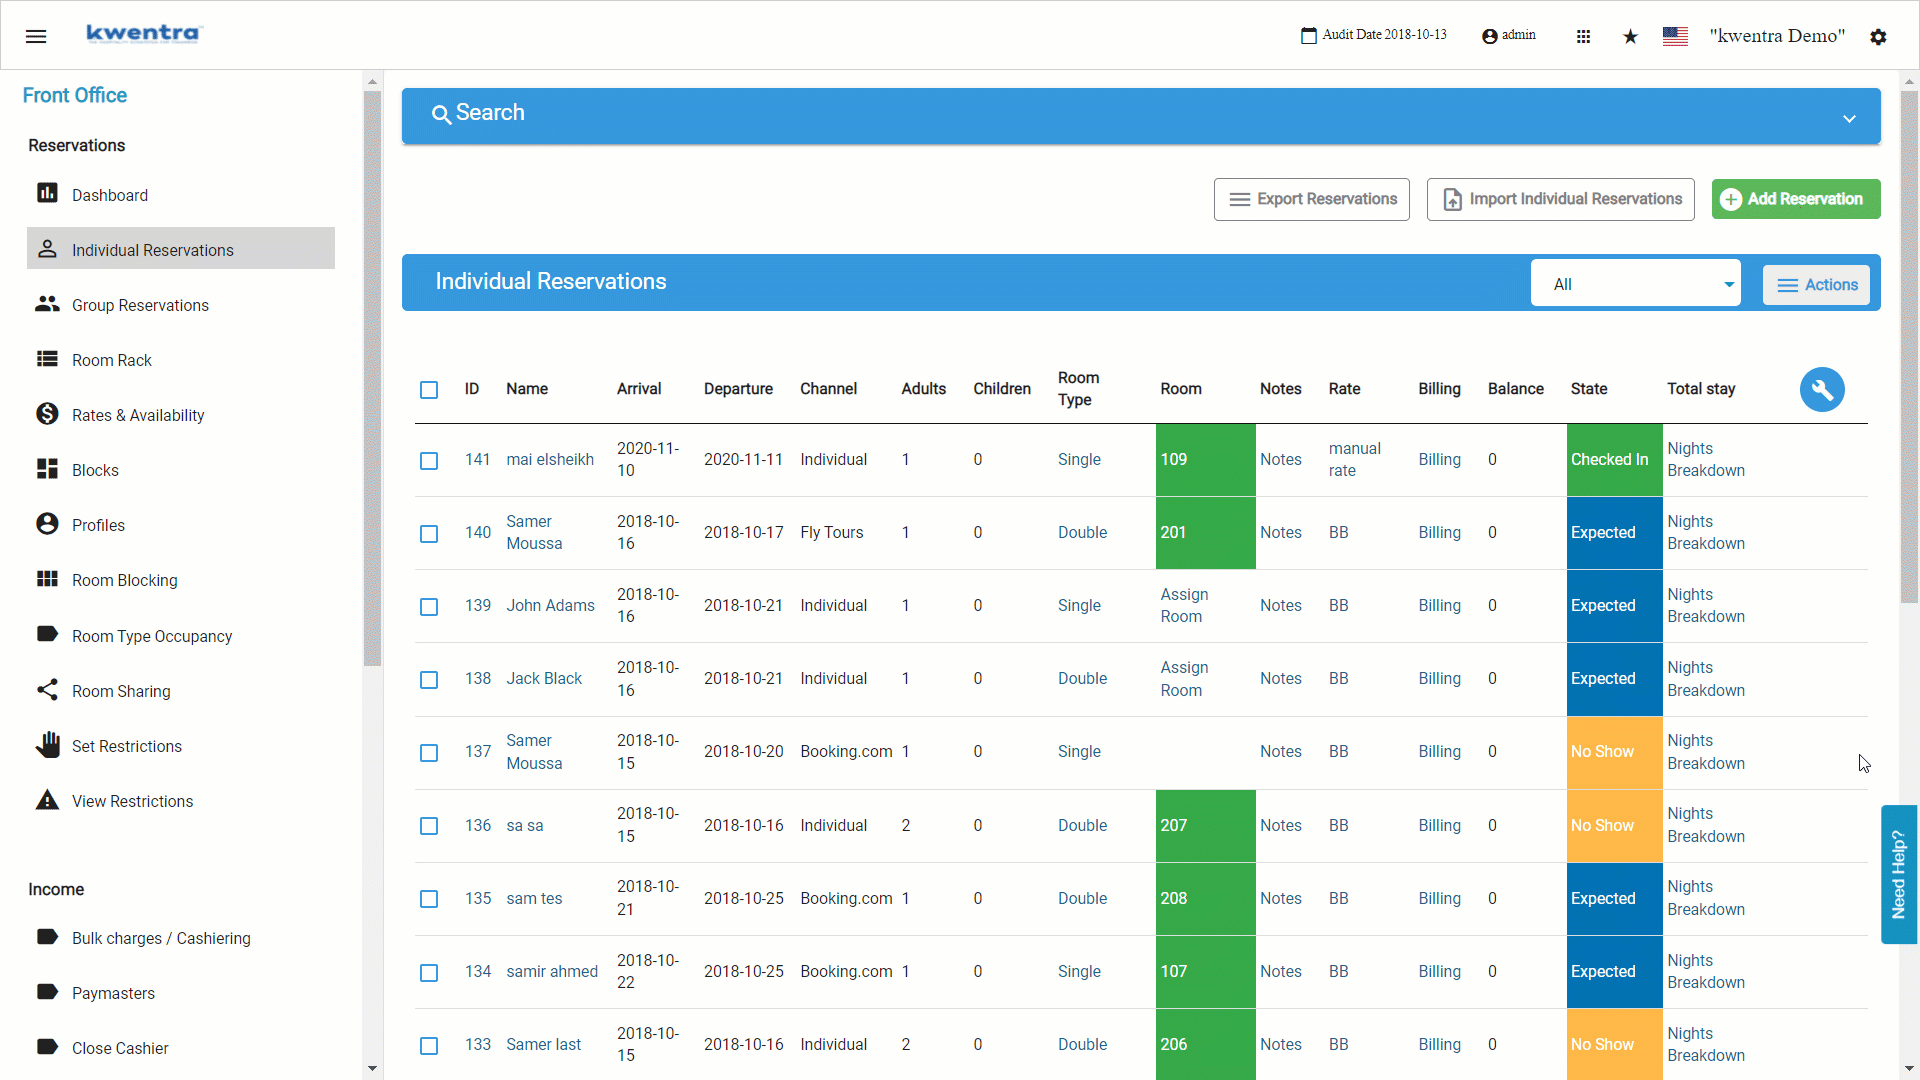
- Now you can view and add alerts to a reservation without the need of opening the reservation instead, you can click on the New Alerts Button from the Individual Reservations List.
- New fields and behaviors for the alerts:
- Add start and end dates for the alert.
- Mark a specific alert to be done, otherwise it will remain as pending.
- Alerts counter would only show the count of pending alerts excluding all finalized and ended alerts.
- Click on the Alerts Button.
- Click Add Alert.
- Choose the start date of the alert, the start date can be added before the current system date.
- Choose the end date of the alert, the end date can never be earlier than the current system date.
- Choose whether this alert to pop up to any user who opens the reservation or not.
- Click Save.
- you can edit or delete the alert after saving.
- You cannot edit an ended alert or change it dates.
 Update: 30th of October, 2022
You can now add alerts and assign them to a specific department “division”.
Only the users under this division would get to see the alert popup, if a user outside of the division that the alert is assigned to opens the reservation; the alert won’t pop up.
Update: 30th of October, 2022
You can now add alerts and assign them to a specific department “division”.
Only the users under this division would get to see the alert popup, if a user outside of the division that the alert is assigned to opens the reservation; the alert won’t pop up.
 Update: 20th of November, 2022
The alerts history is now available on the alerts tab, every interaction with any alert is now documented for audit purposes.
The below points are expected to appear in the new history tab:
Update: 20th of November, 2022
The alerts history is now available on the alerts tab, every interaction with any alert is now documented for audit purposes.
The below points are expected to appear in the new history tab:
- The log of creation.
- The log of every change and the change that took place.
- Any changes to the content of the alert, its dates and the assigned division.
- The log of marking the alert as done.
- The log of alert deletion.
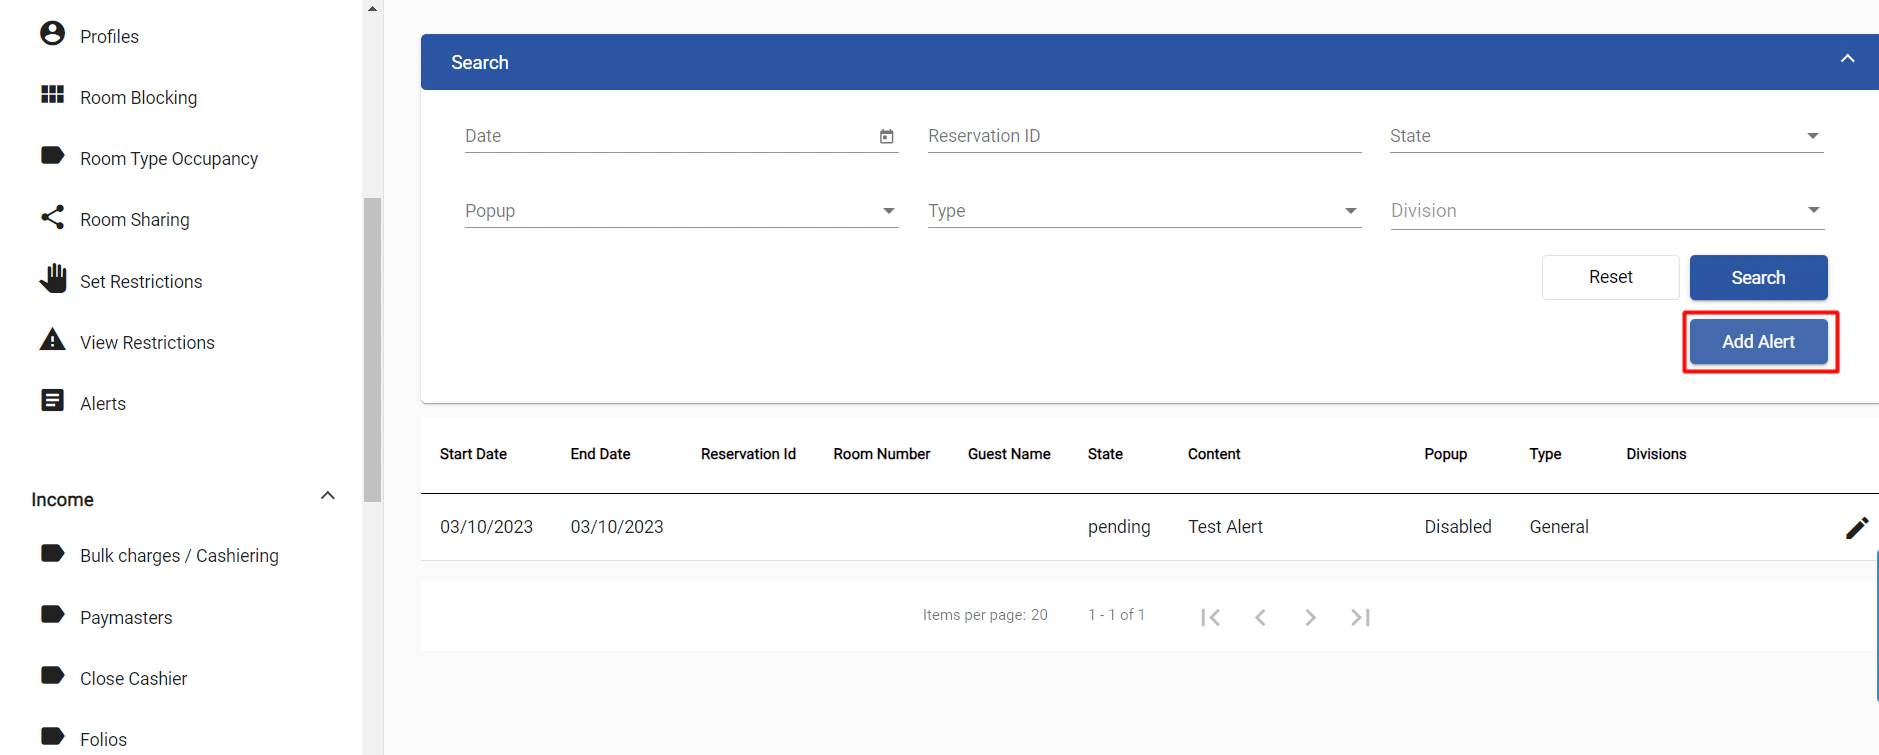
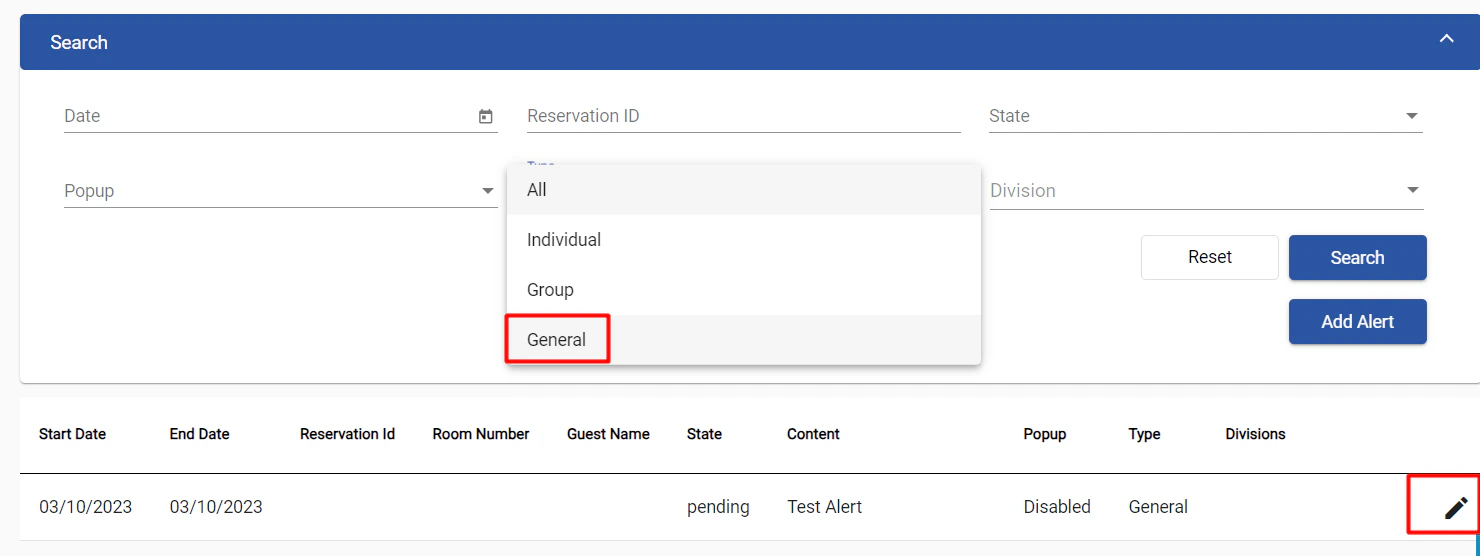
 Update: 16th of October, 2023
General Alerts (Traces) can now be created directly from the Alerts listing screen in Front Office.
These alerts will not be linked or related to any reservations (individuals or groups) and can be assigned to the desired division.
To create a new general alert, go to Front Office - Alerts, then click on Add Alert
Update: 16th of October, 2023
General Alerts (Traces) can now be created directly from the Alerts listing screen in Front Office.
These alerts will not be linked or related to any reservations (individuals or groups) and can be assigned to the desired division.
To create a new general alert, go to Front Office - Alerts, then click on Add Alert