Pay to Vendor is the process of finalizing the invoices created that increased your Liability towards a certain vendor from the below inputs:Documentation Index
Fetch the complete documentation index at: https://help.kwentra.com/llms.txt
Use this file to discover all available pages before exploring further.
- Invoices created from
- Invoices created from
- Use the Vendor Filter to only get the invoices for a specific vendor.
- In the receiving orders box you will only get the invoices of this vendor to pay.
- Optional: select 1 or more invoices to pay at a time using the checkboxes next to each invoice.
- Click on Payment.
- Optional: if the payment will be finalized by a bank cheque, add the cheque number.
- Select the date of payment.
- In the Bank field, select the Asset Account that you will pay these invoices from i.e. General Cashier, Bank Account, House funds etc.
- Insert a description for the payment to automatically have it available on the generated Journal Voucher.
- Click Save and edit.
- Click on JV from the top right corner.
- Select the appropriate JV Code for the transaction.
- Click Save and edit from the bottom of the page.
- Click Post from the top right corner of the screen.
 Update: 30th of October, 2022
New changes to the payment screen after you select to pay to a specific vendor are listed below.
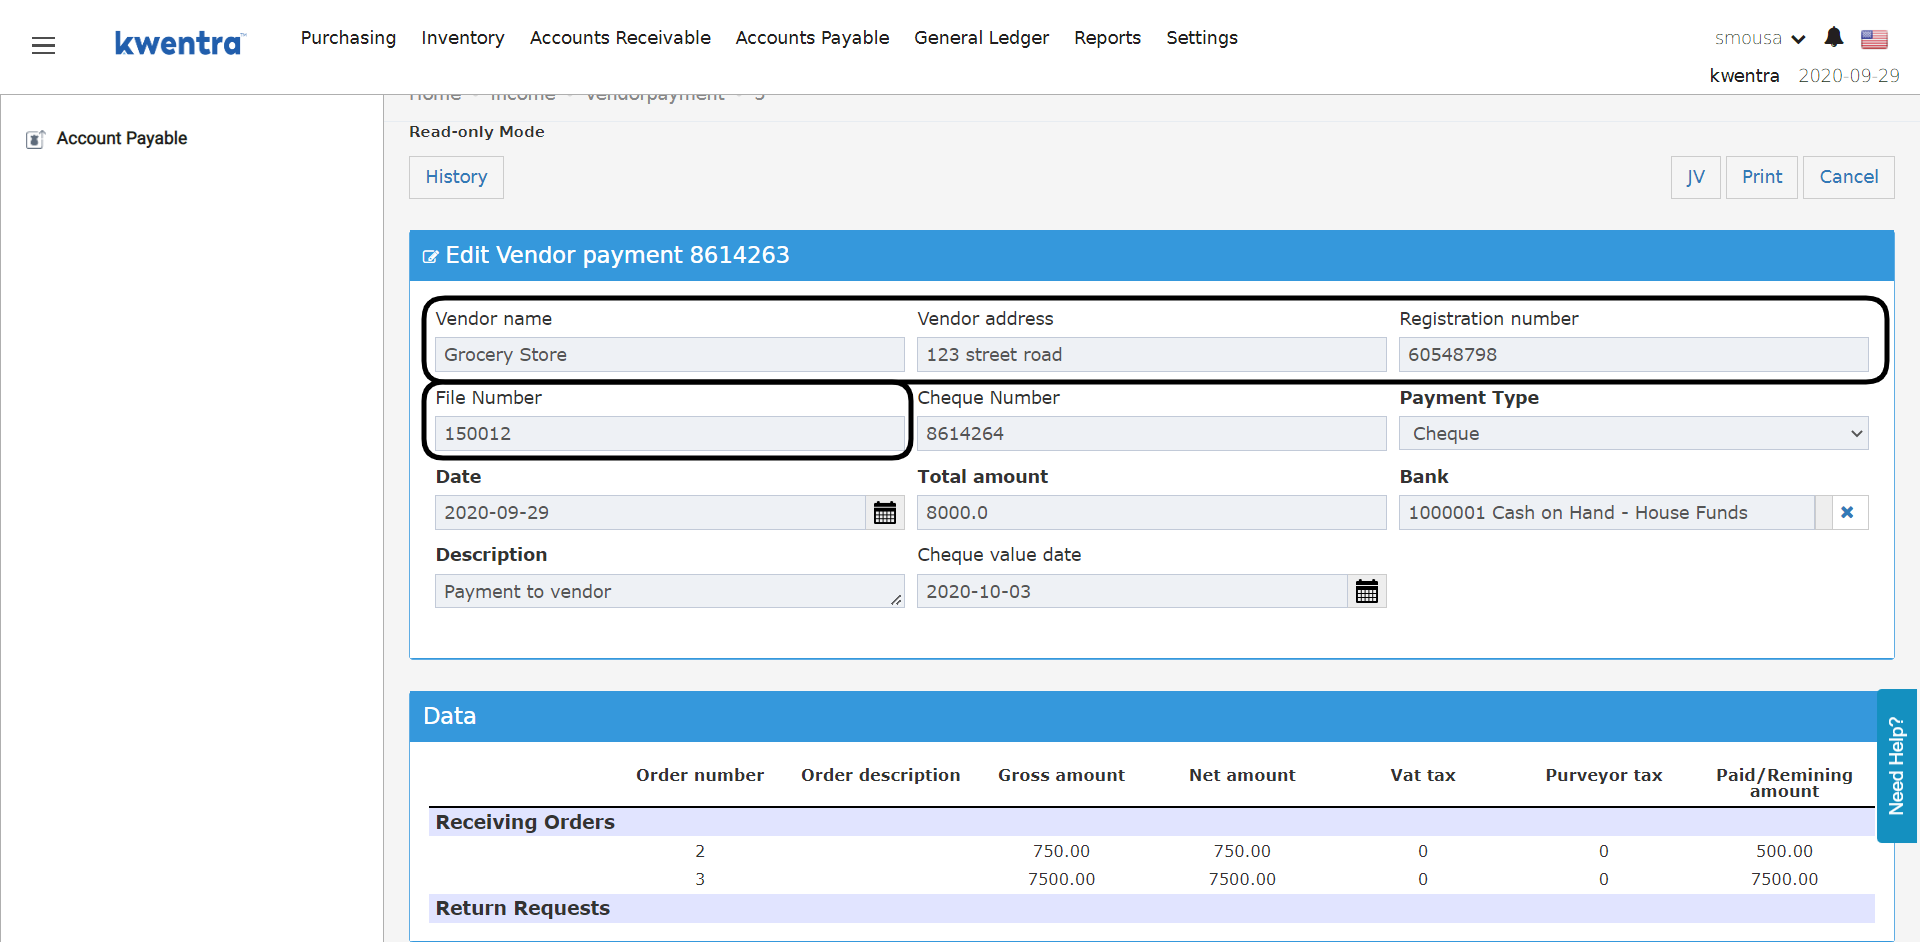
1. Vendor Profile details from vendor settings appear when you are making a payment.
Update: 30th of October, 2022
New changes to the payment screen after you select to pay to a specific vendor are listed below.
1. Vendor Profile details from vendor settings appear when you are making a payment.
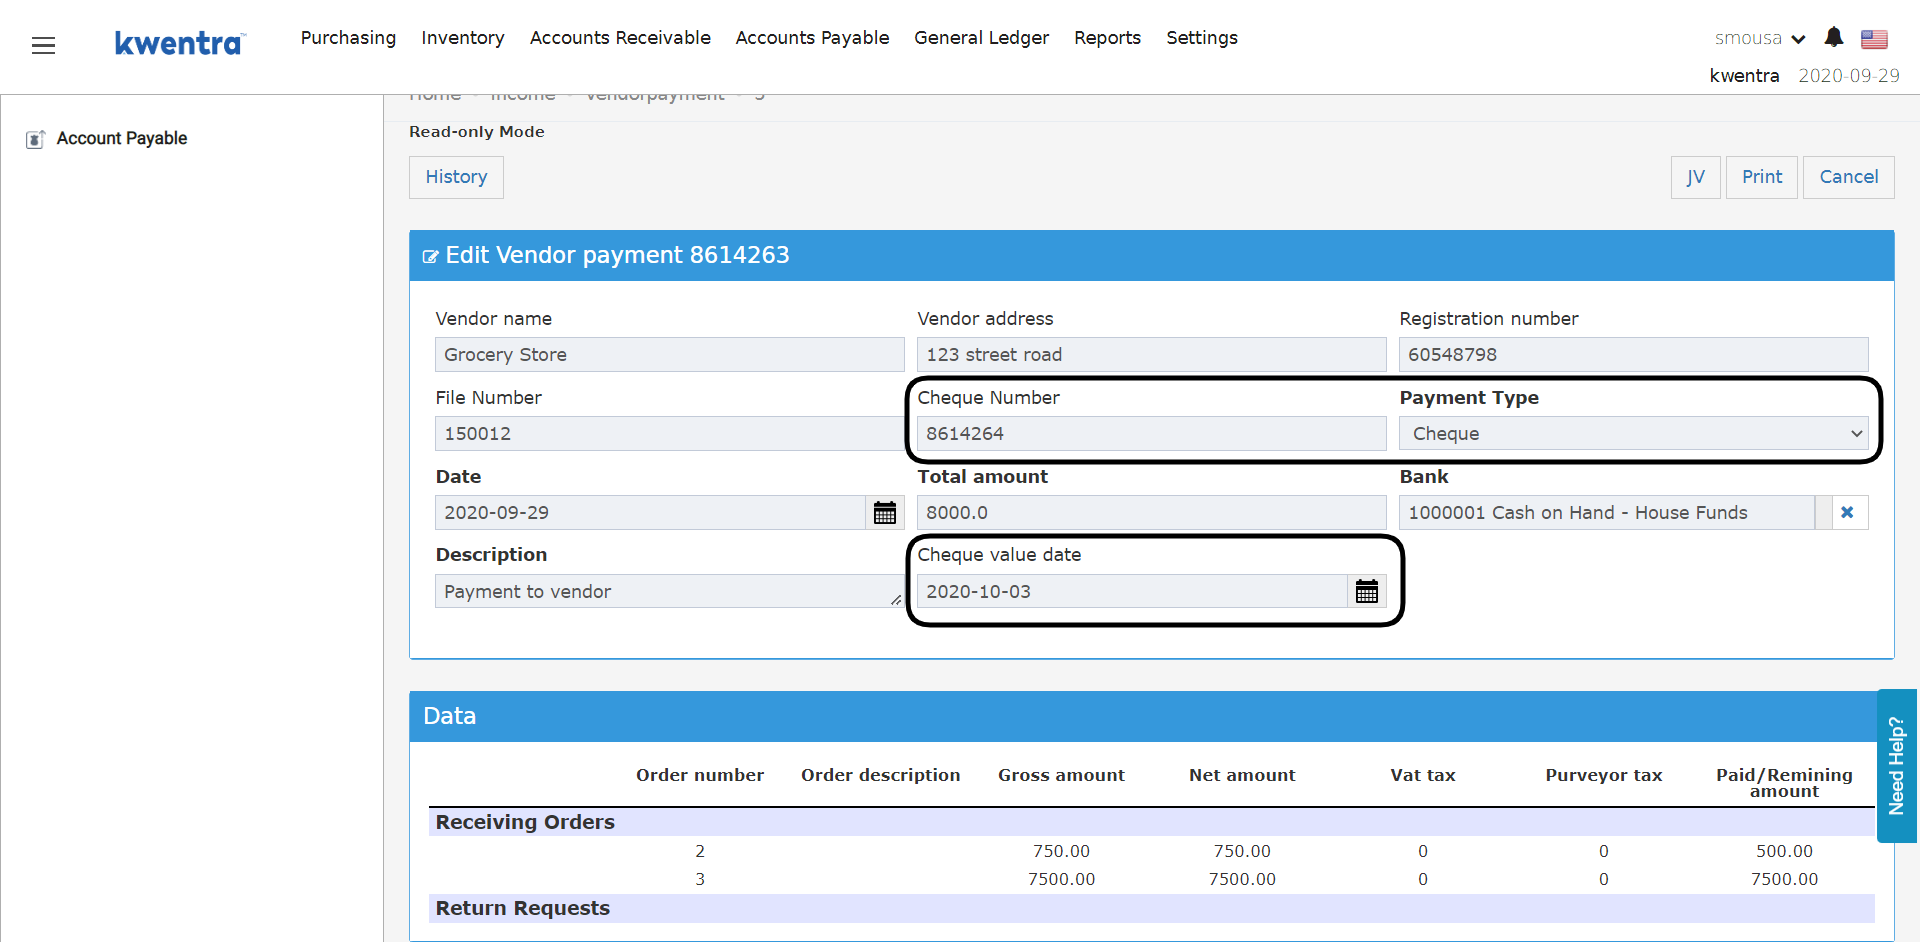
 2. Selecting the payment type Cheque or Cash the serial number field changes automatically
3. Cheque and Serial numbers will follow the serialization from the previous payment made, with the option to manually edit it.
4. New Field: Cheque value date which is only available in cheque payments to record the cheque’s actual date.
2. Selecting the payment type Cheque or Cash the serial number field changes automatically
3. Cheque and Serial numbers will follow the serialization from the previous payment made, with the option to manually edit it.
4. New Field: Cheque value date which is only available in cheque payments to record the cheque’s actual date.
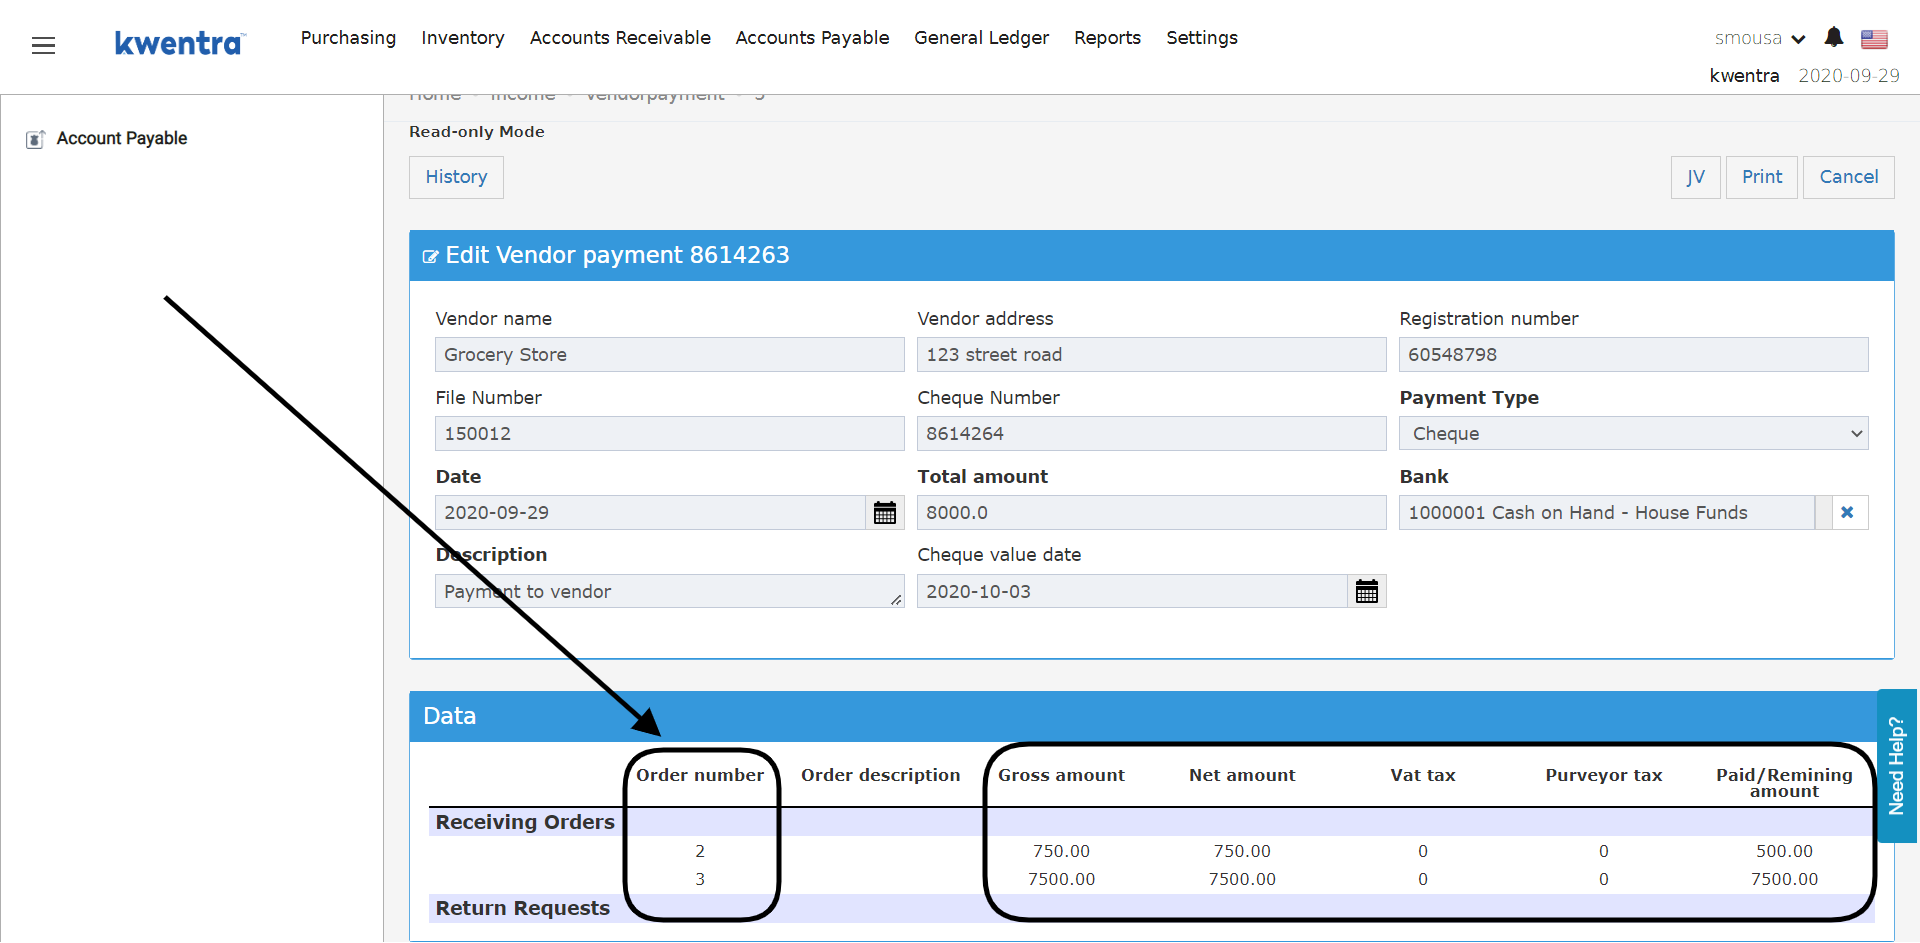
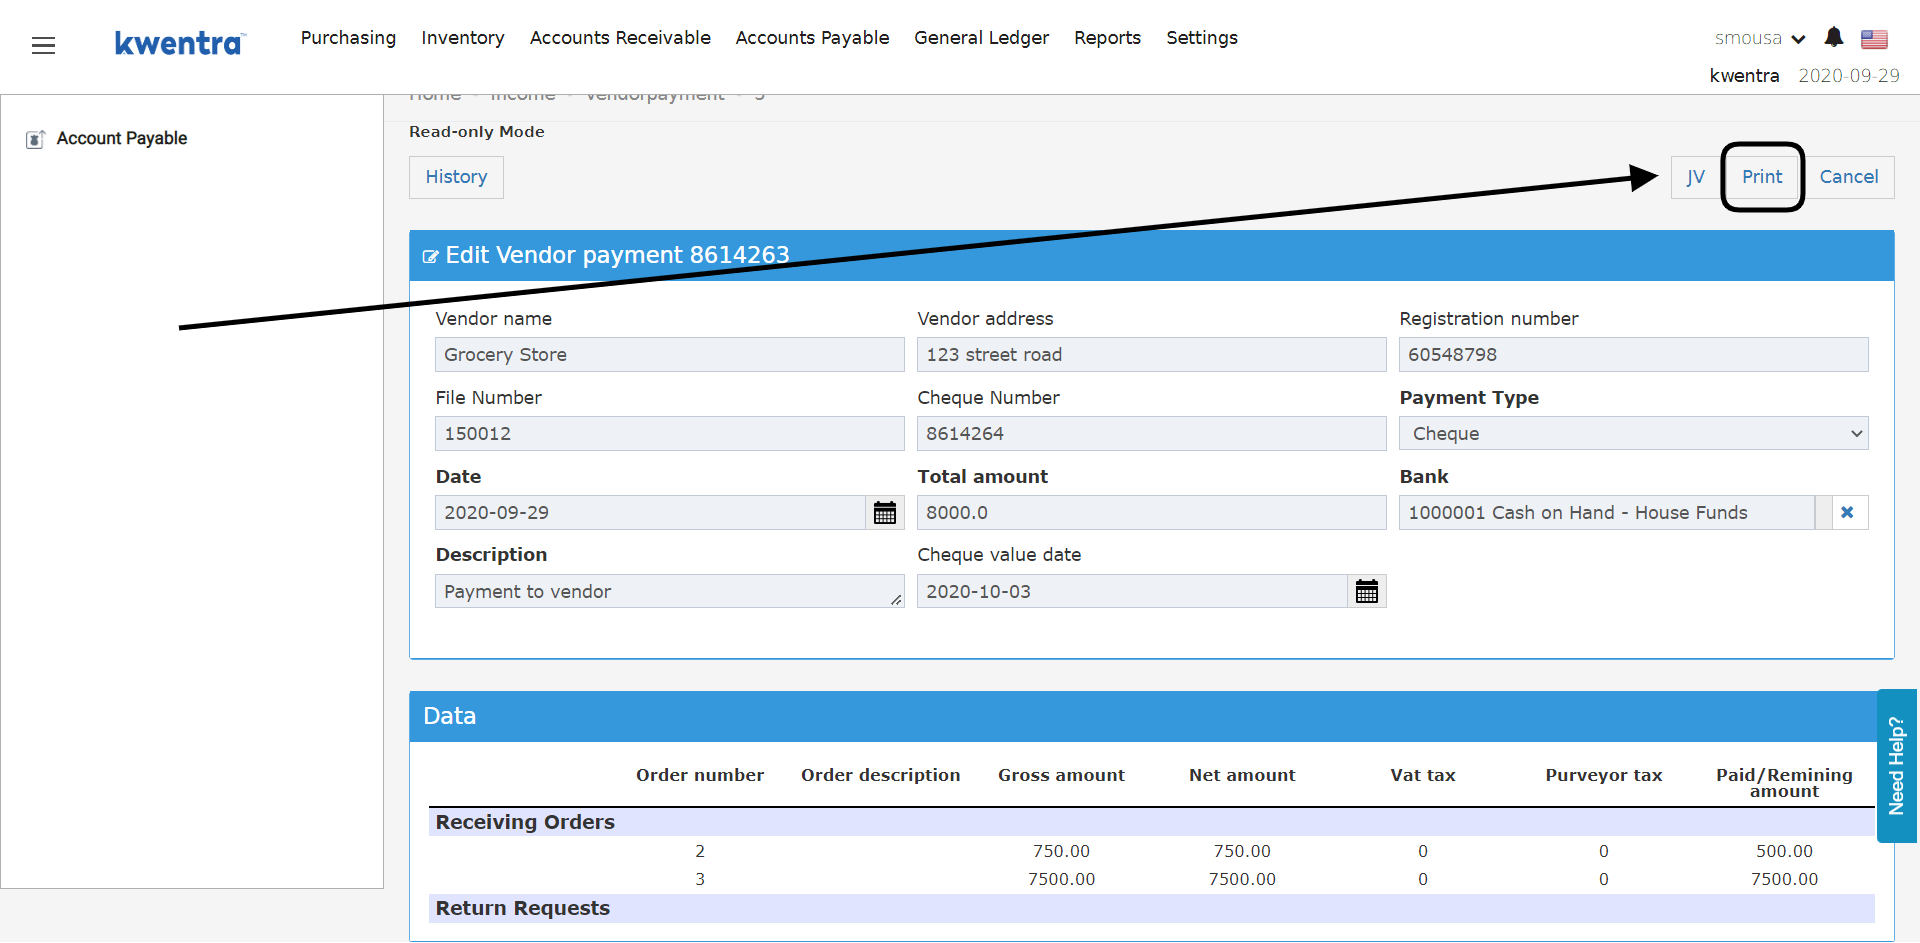
 5. Receiving Orders & Return Requests Data:
When making a payment to a vendor the system would bring the data from the selected receiving orders and return requests to show you exactly which orders are covered by this payment.
The system would bring up the vendor’s invoice breakdown of VAT purchasing and also the Purveyor Tax “Trade Tax Deductions”.
After the payment is submitted the amount per receiving order will be listed under the Paid amount column to show you the amount covered per order.
5. Receiving Orders & Return Requests Data:
When making a payment to a vendor the system would bring the data from the selected receiving orders and return requests to show you exactly which orders are covered by this payment.
The system would bring up the vendor’s invoice breakdown of VAT purchasing and also the Purveyor Tax “Trade Tax Deductions”.
After the payment is submitted the amount per receiving order will be listed under the Paid amount column to show you the amount covered per order.
 6. Print Vendor Payment Invoice:
You get the option to print out the payment you made to the vendor, which would include all the vendor details along with the receiving orders’ data.
6. Print Vendor Payment Invoice:
You get the option to print out the payment you made to the vendor, which would include all the vendor details along with the receiving orders’ data.
 Below is an end-to-end video to show how vendor payments are recorded after the new update:
 Update: 20th of November, 2022
The Cheque Value Date is now recorded on the Journal Voucher created from the pay to vendor option.
The Cheque Value Date is also available in the Vendor Payment Report.
Update: 20th of November, 2022
The Cheque Value Date is now recorded on the Journal Voucher created from the pay to vendor option.
The Cheque Value Date is also available in the Vendor Payment Report.