Quickly upload and link guest visas to group reservations, ensuring all profiles are accurate and compliant.Documentation Index
Fetch the complete documentation index at: https://help.kwentra.com/llms.txt
Use this file to discover all available pages before exploring further.
Business Value
- Bulk visa upload streamlines guest check-in for large groups.
- File validation reduces upload errors and ensures compliance.
- Profile fields (nationality, address, identity type) are auto-filled for accuracy and consistency.
- Automation minimizes manual entry, improving operational efficiency and guest experience.
How to Use Capture Visas
Where to find it: Go to: Group Reservations → Rooming List → Capture Visas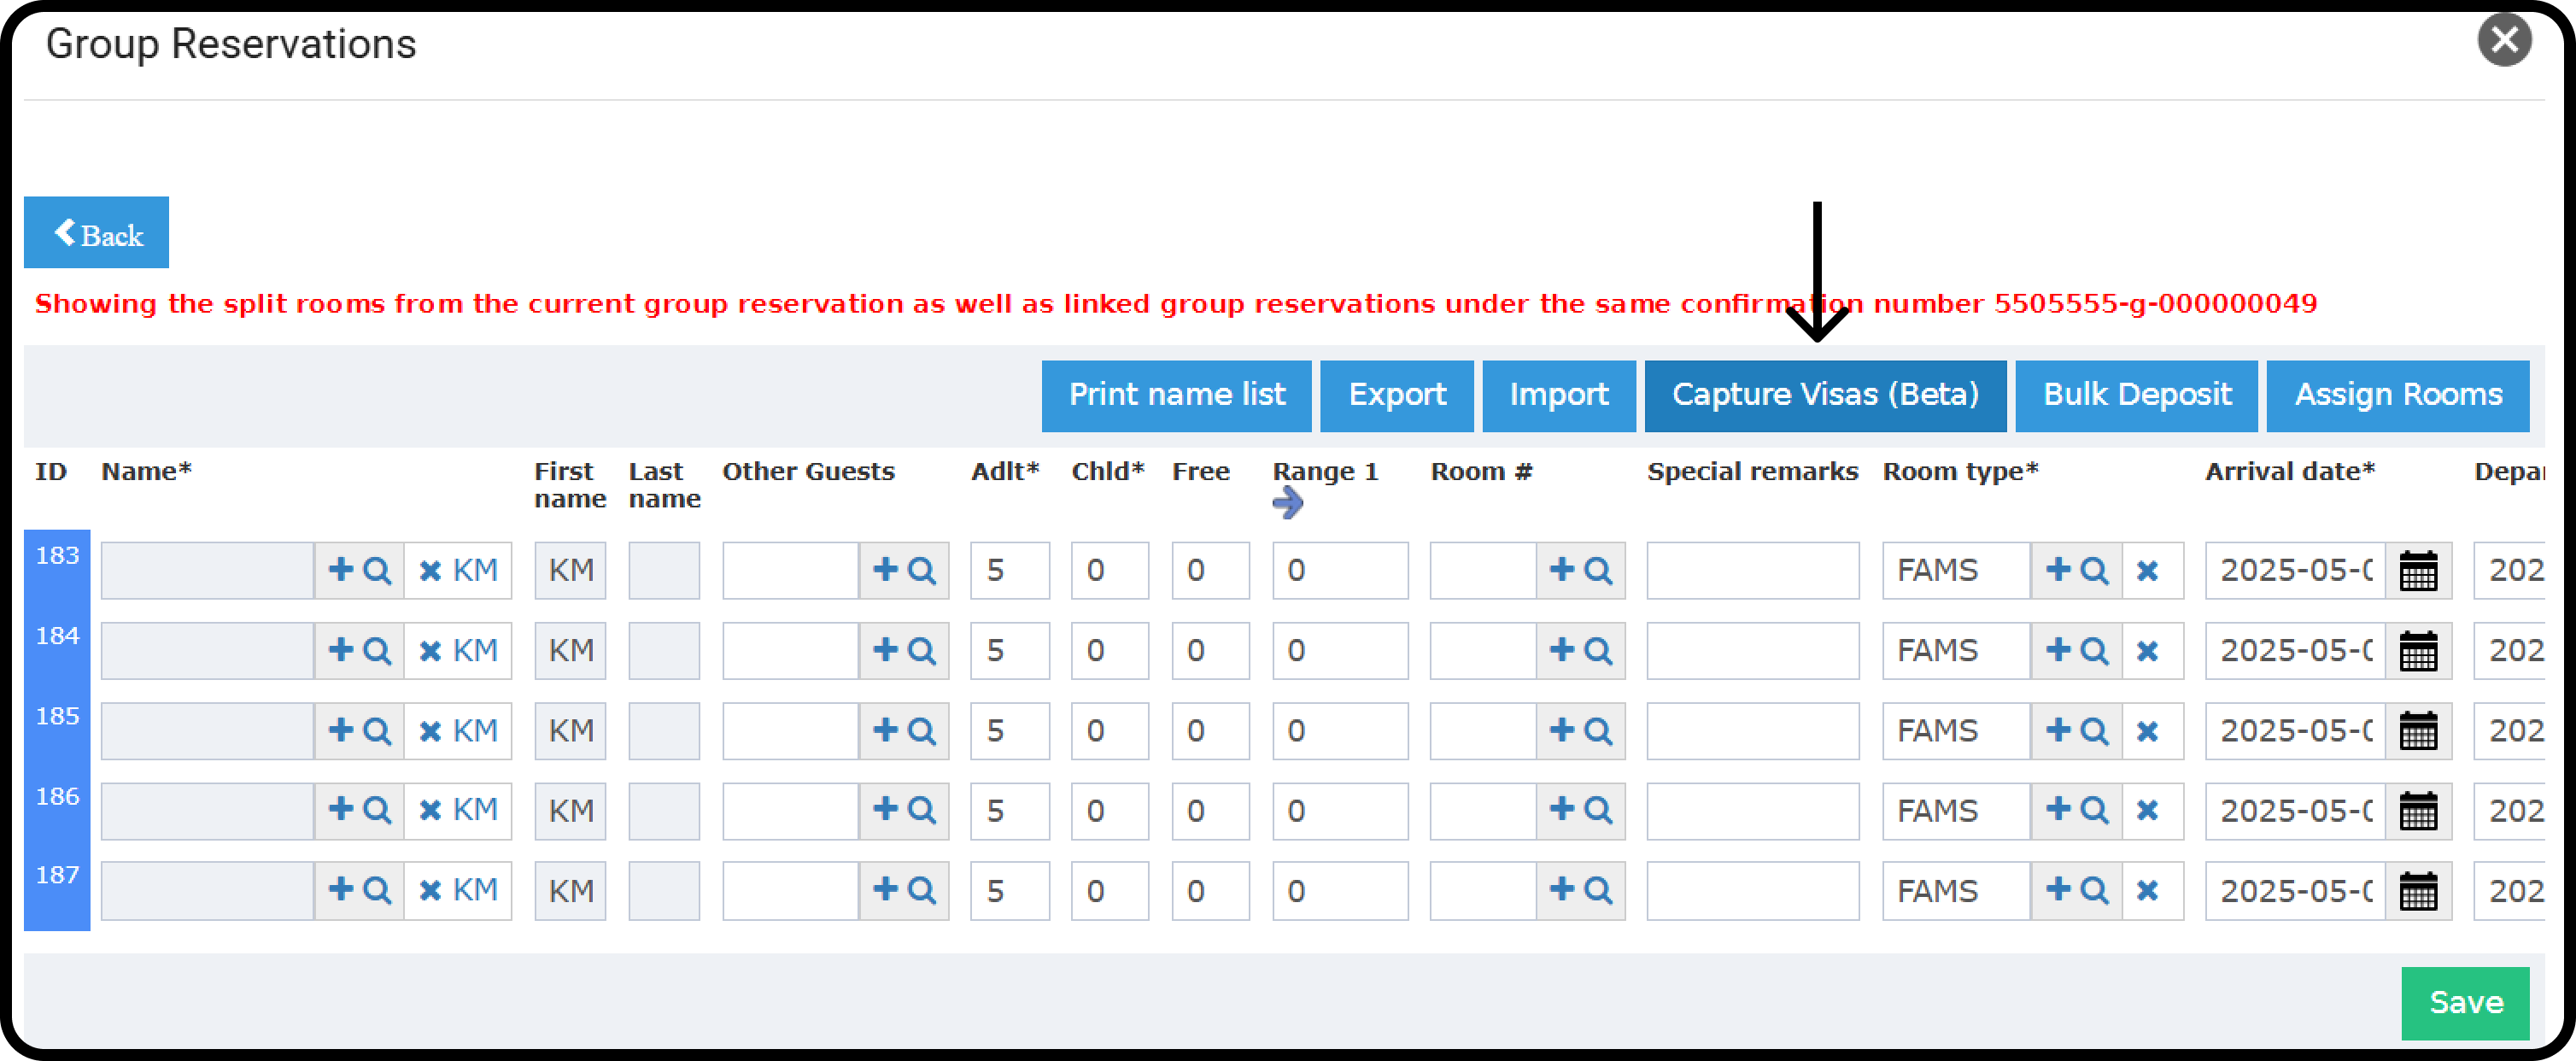 Steps:
- Click Capture Visas for your group.
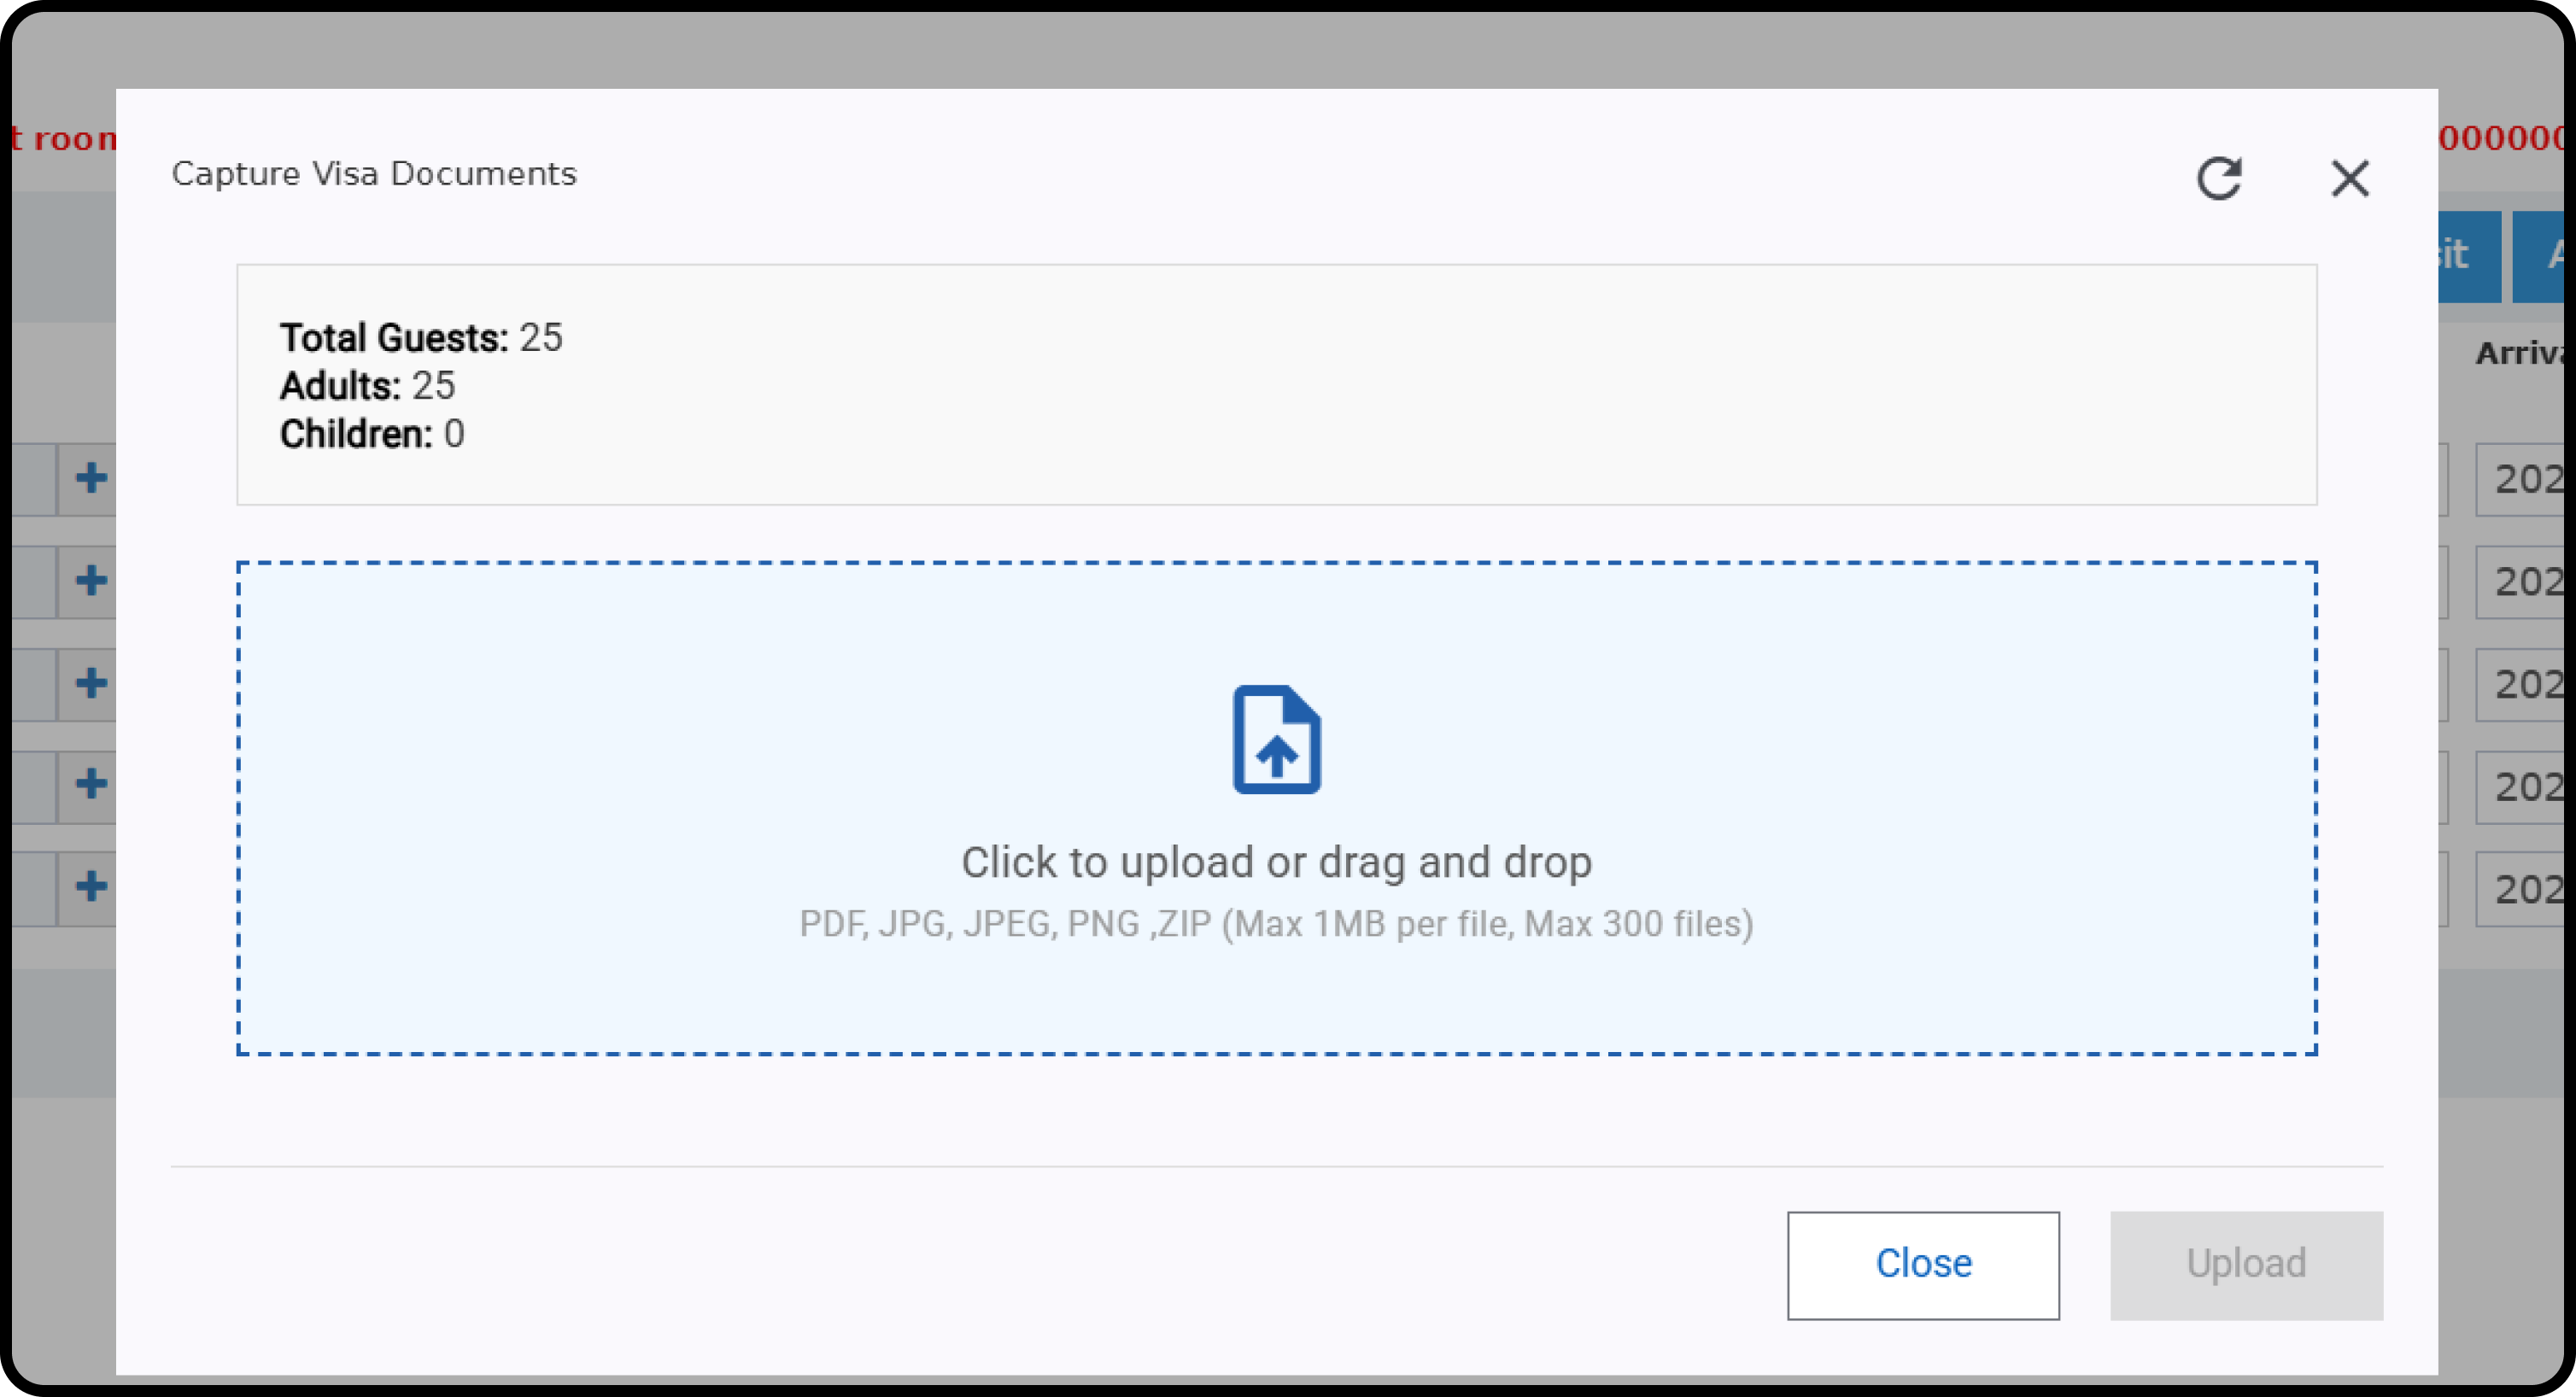
- Upload your visa files (PDF, JPG, JPEG, ZIP).
- Limit: Up to 300 files, each file max 1 MB.
- Click Upload.
- Each file must be 1 MB or less.
- Only checks size per file (not total).
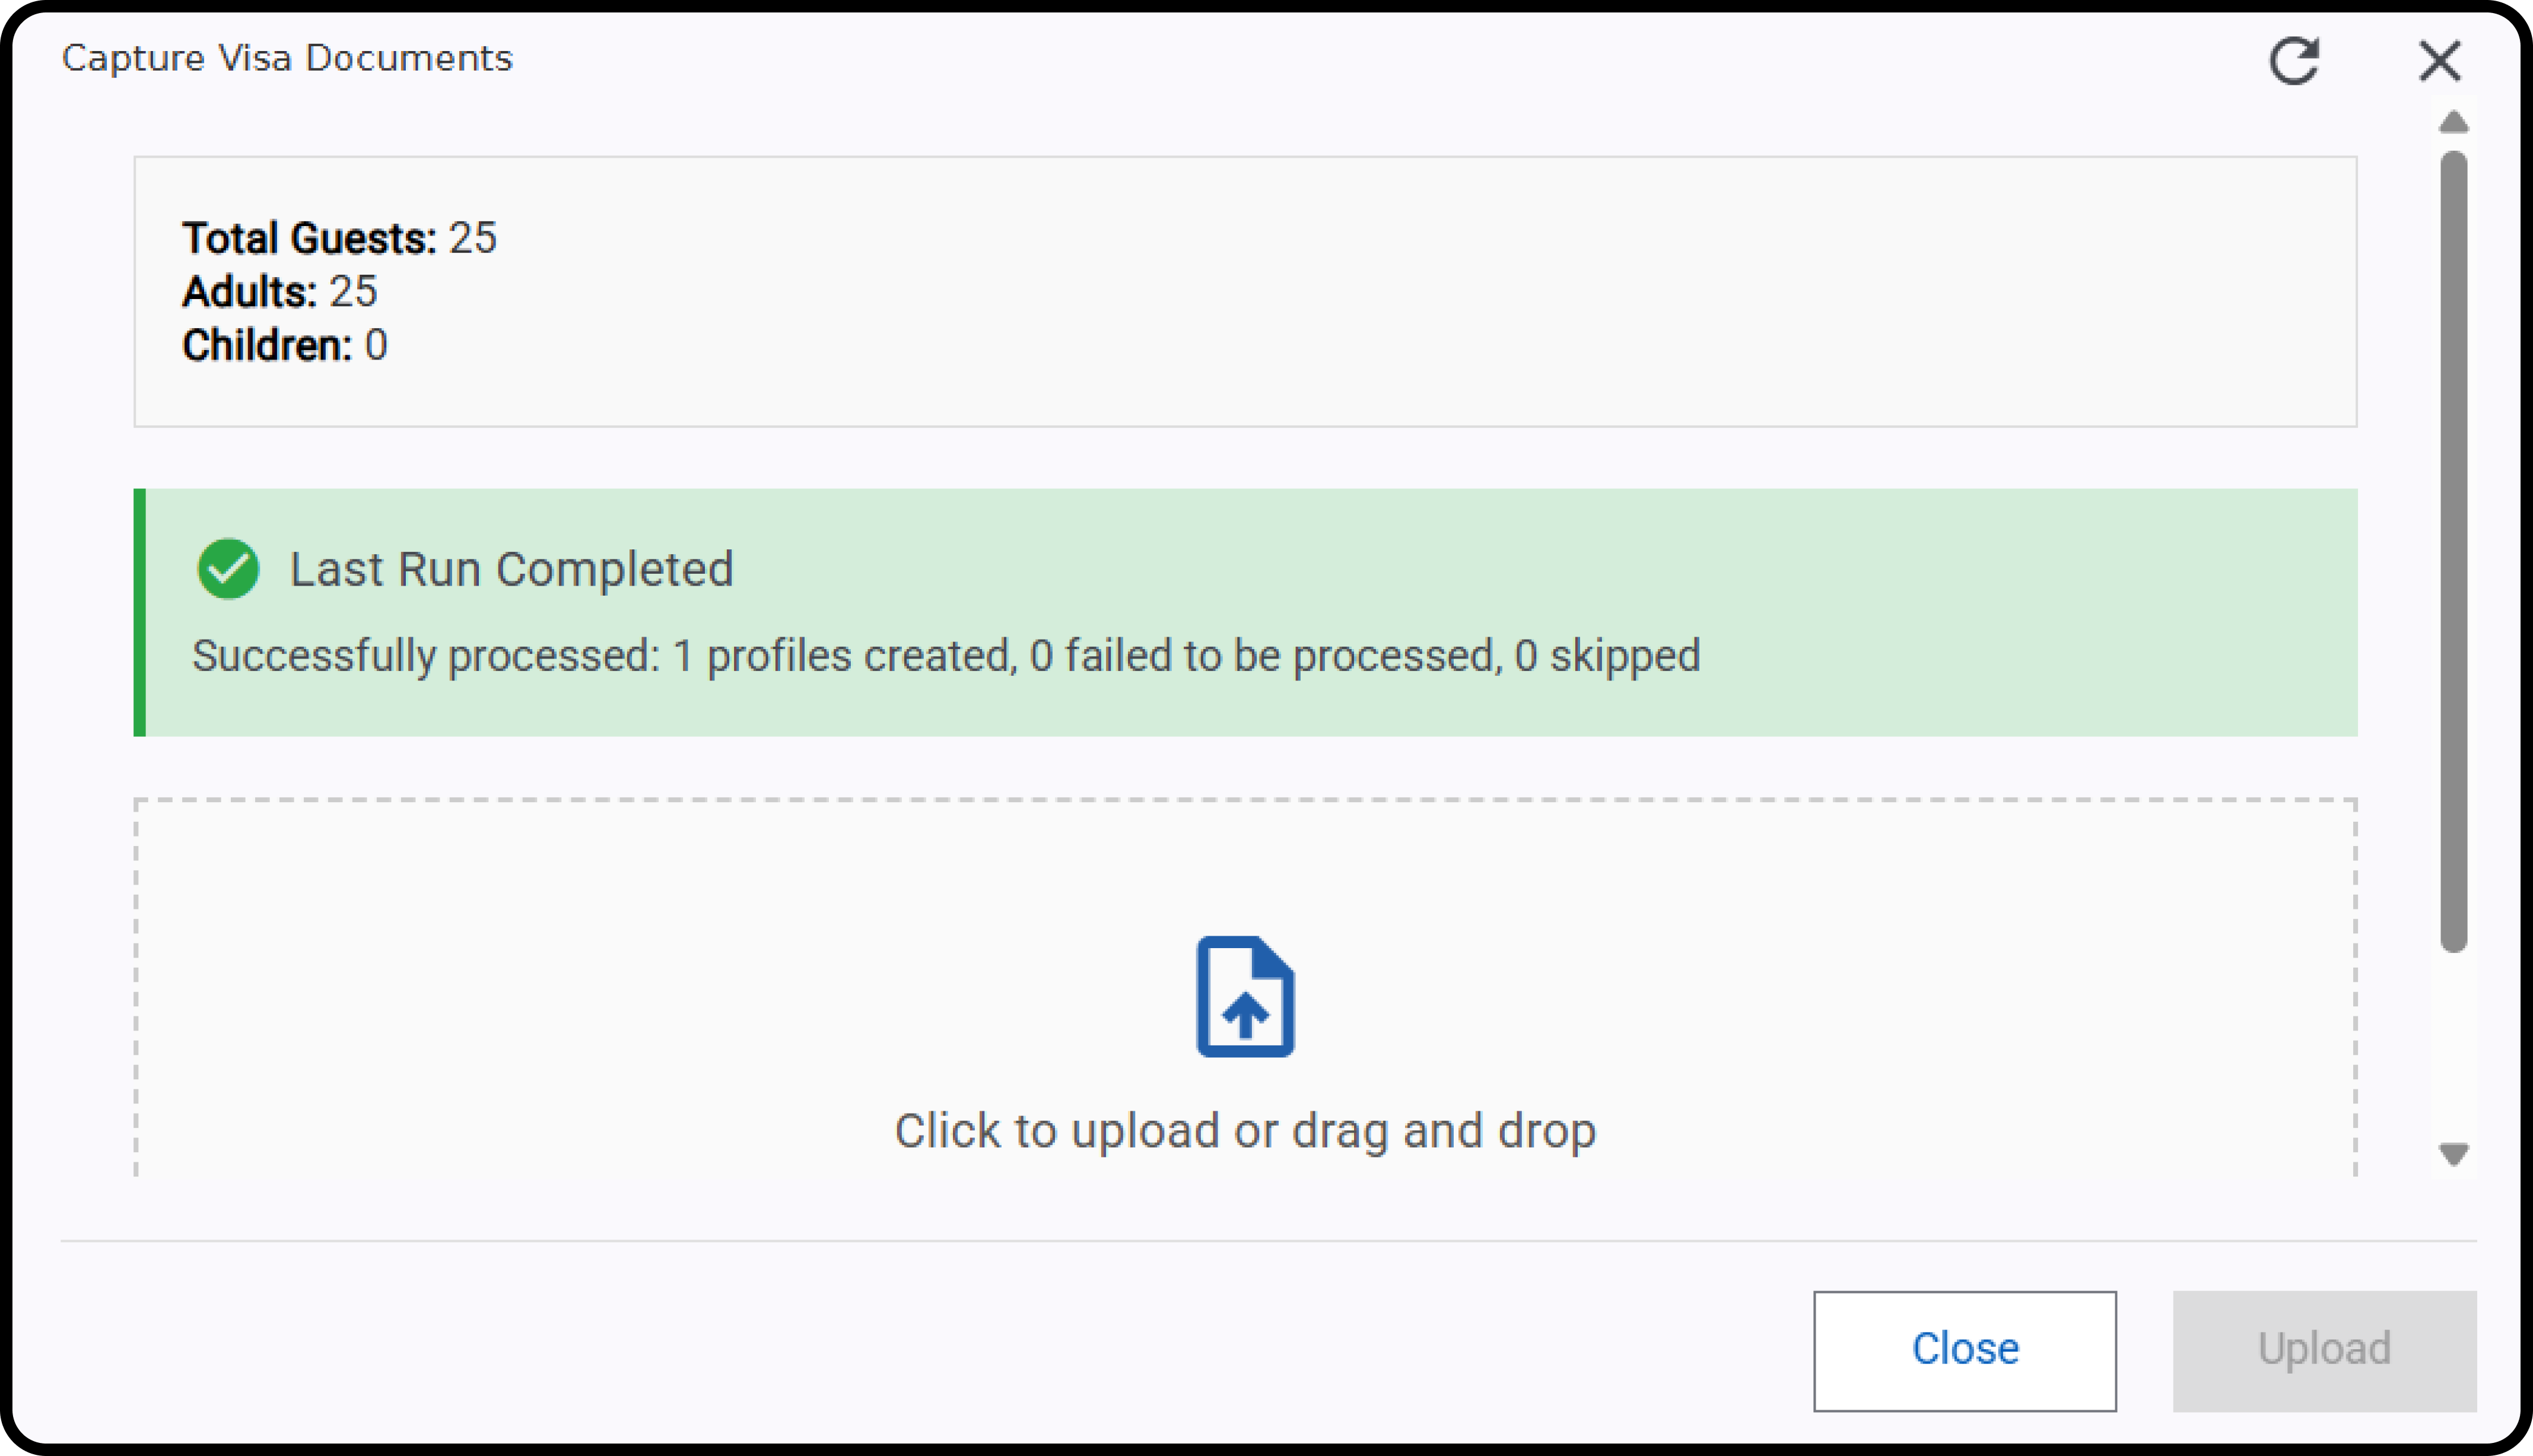
 What happens next:
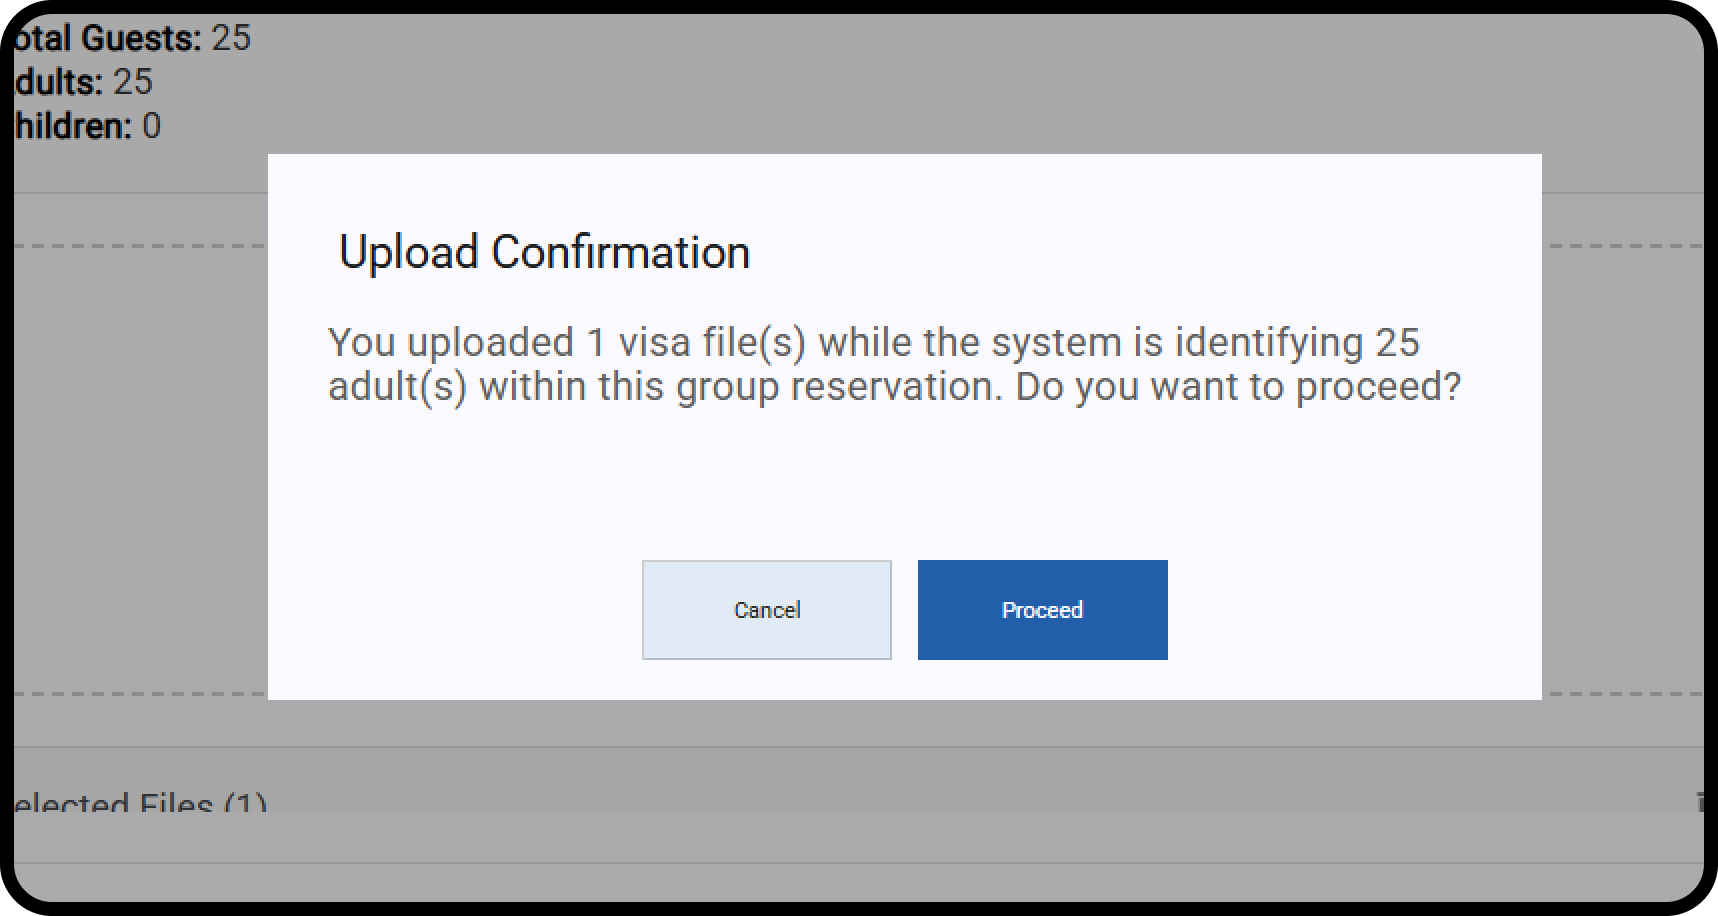
- The system compares how many visas you uploaded to the number of adults and children in the reservation.
- If you uploaded enough files: It matches visas to guest profiles.
- If not enough: You get a warning and can choose to continue or cancel.
 How Profiles are created:
- It automatically fills in nationality and address (if needed) in the profile.
- Identity type is always set as Passport.
- The system creates a new profile and links the visa.
- Each visa gets attached to the right profile.
- Created profiles are added randomly to the split individual reservations.
- Make sure to upload all the group’s visas, matching the number of adults and children.
- Don’t do partial uploads, as it will override previously created profiles.