There are 2 methods to add a vendor to your chart of accounts with each method comes it’s own benefit.Documentation Index
Fetch the complete documentation index at: https://help.kwentra.com/llms.txt
Use this file to discover all available pages before exploring further.
Link Vendor to a single Account with type “Liabilities”:
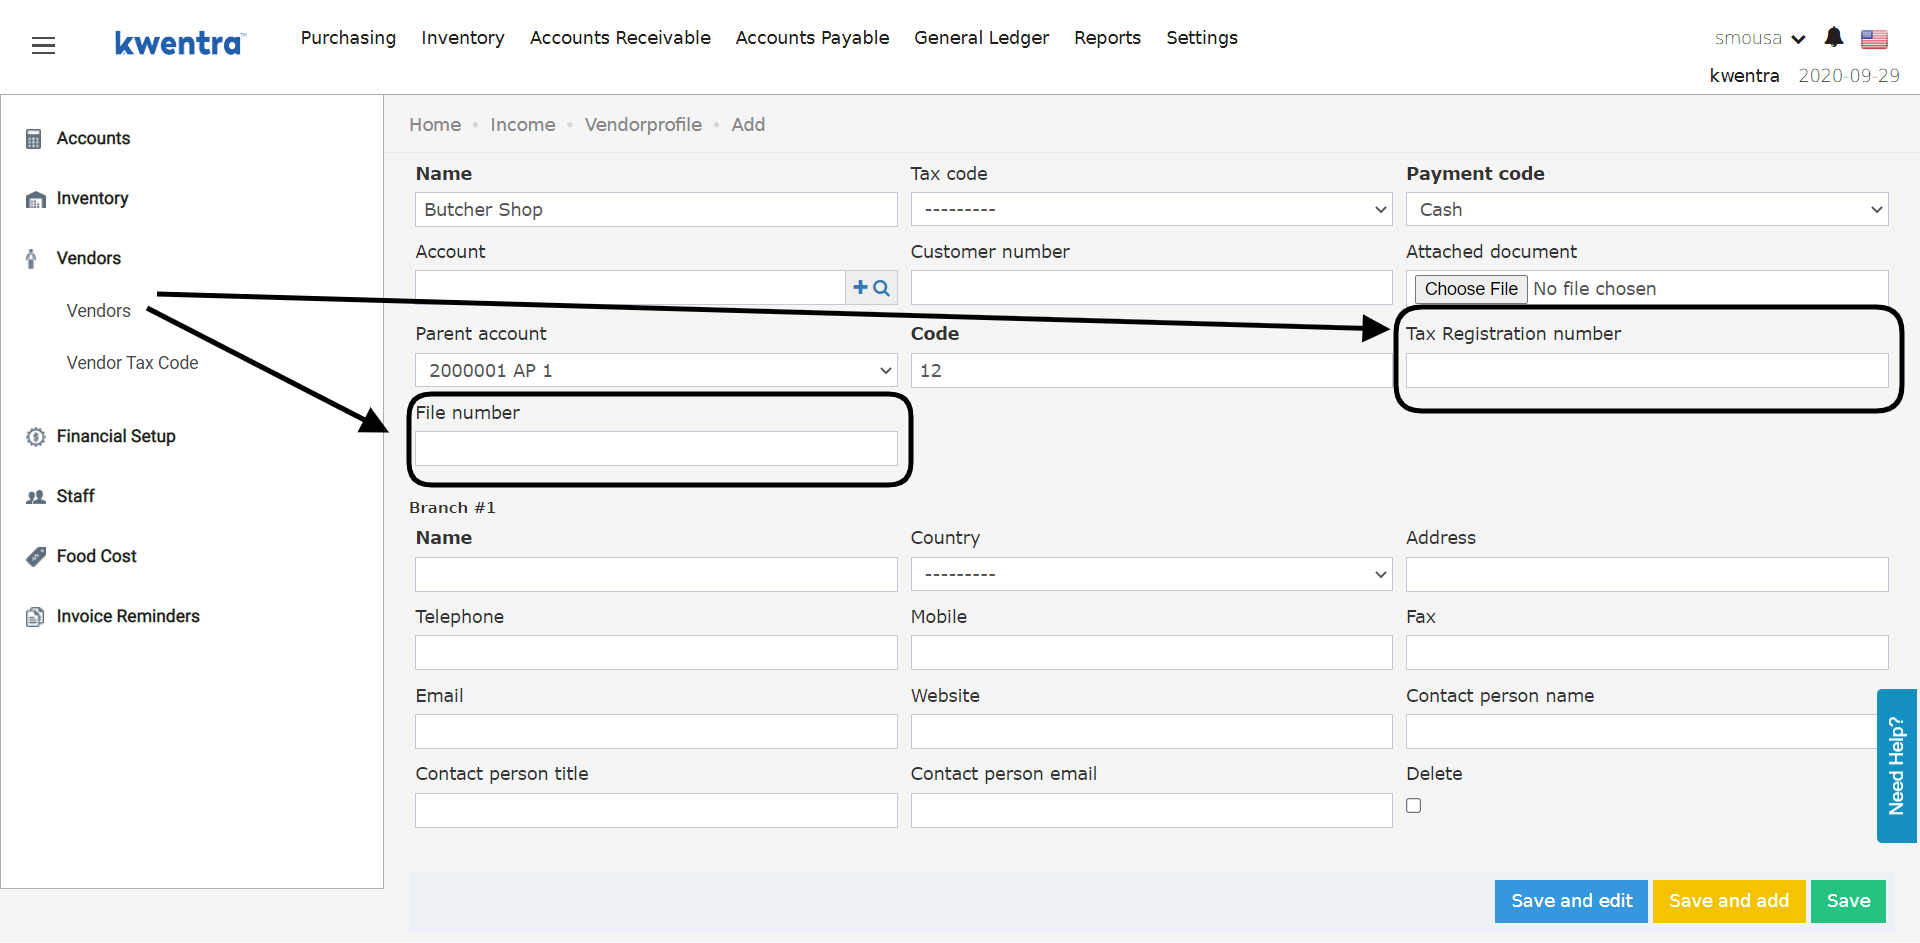
This is the easier method wherein each vendor has his own Liabilities Account in your chart. Back Office → Settings → Vendors → Add New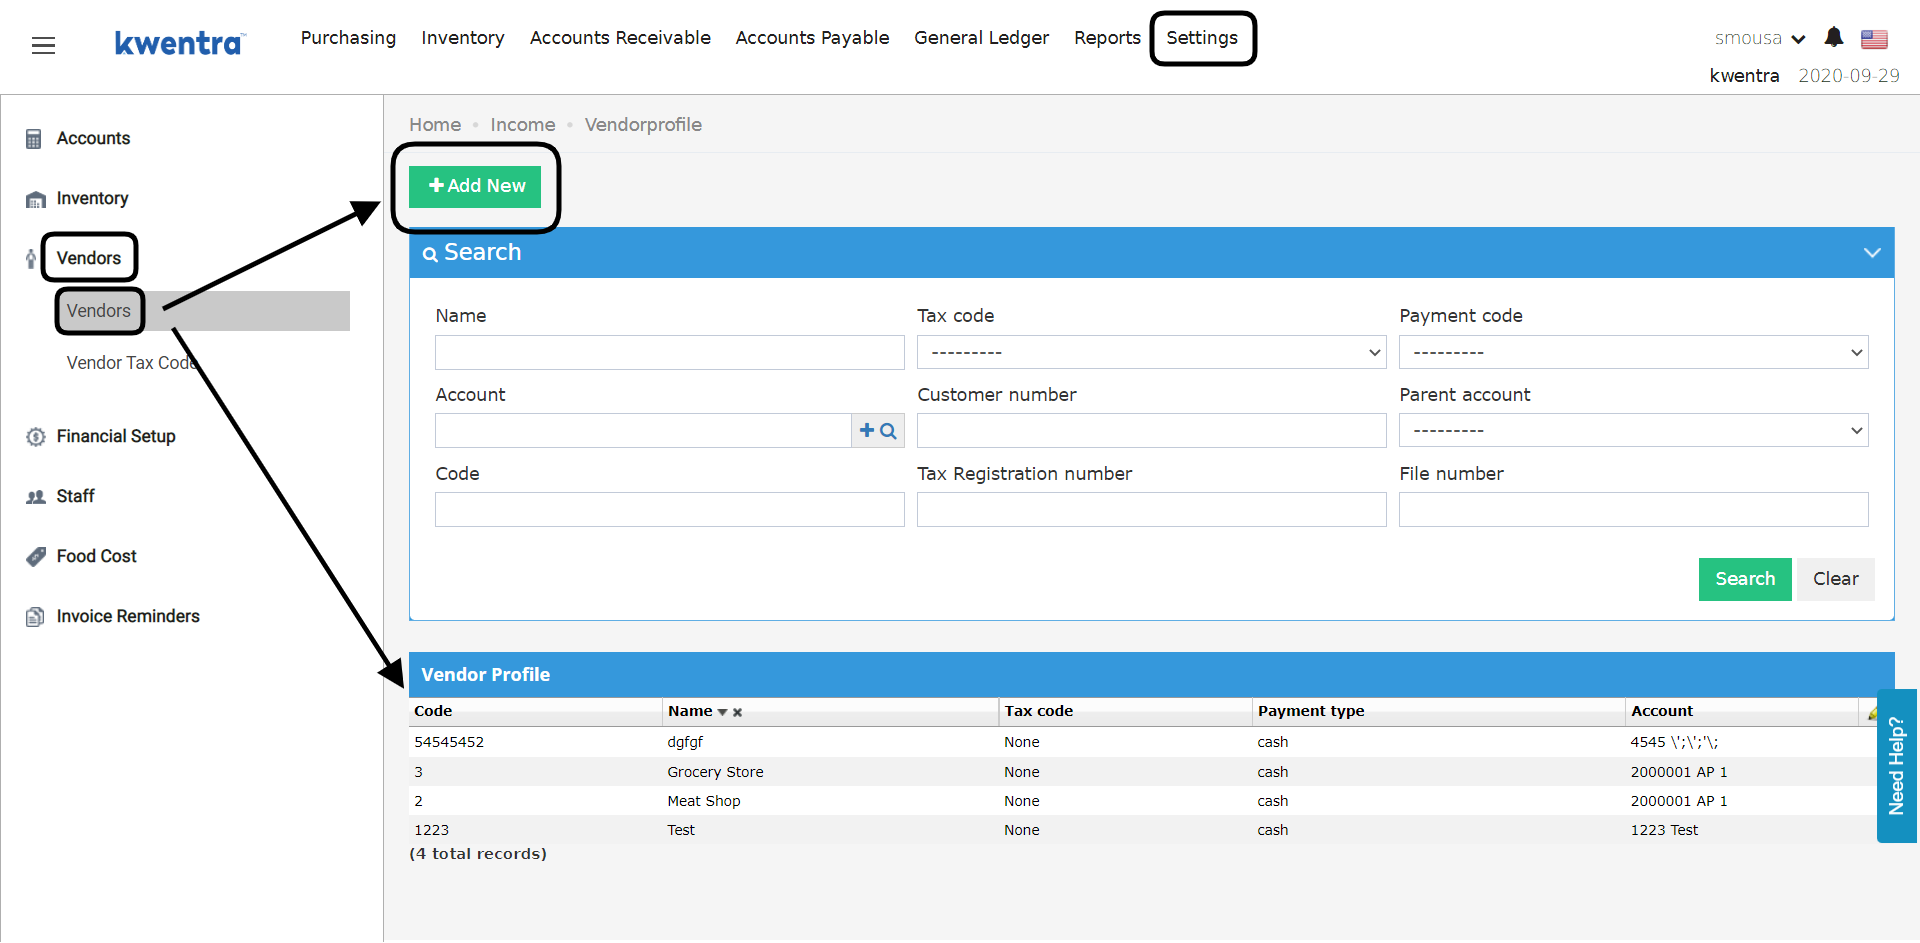 With the above step you will be able to complete the fields and add the vendor.
The mandatory info are highlighted in bold, however it’s essential to select one of the Liabilities Accounts to link it to this vendor to reflect properly on the balance sheet report.
You can add more vendors to the same Liability Account and all their data will be under one row belonging to the same Liability Account.
With the above step you will be able to complete the fields and add the vendor.
The mandatory info are highlighted in bold, however it’s essential to select one of the Liabilities Accounts to link it to this vendor to reflect properly on the balance sheet report.
You can add more vendors to the same Liability Account and all their data will be under one row belonging to the same Liability Account.

Link Multiple Vendors to a Parent Account with type “Liabilities”:
In order for us to have 1 parent account for all vendors, we need to have the designated account appear in the drop-down for parent accounts when adding a vendor. Back Office → Settings → Accounts → Account → Search for Account with type Liabilities → Click on the account you desire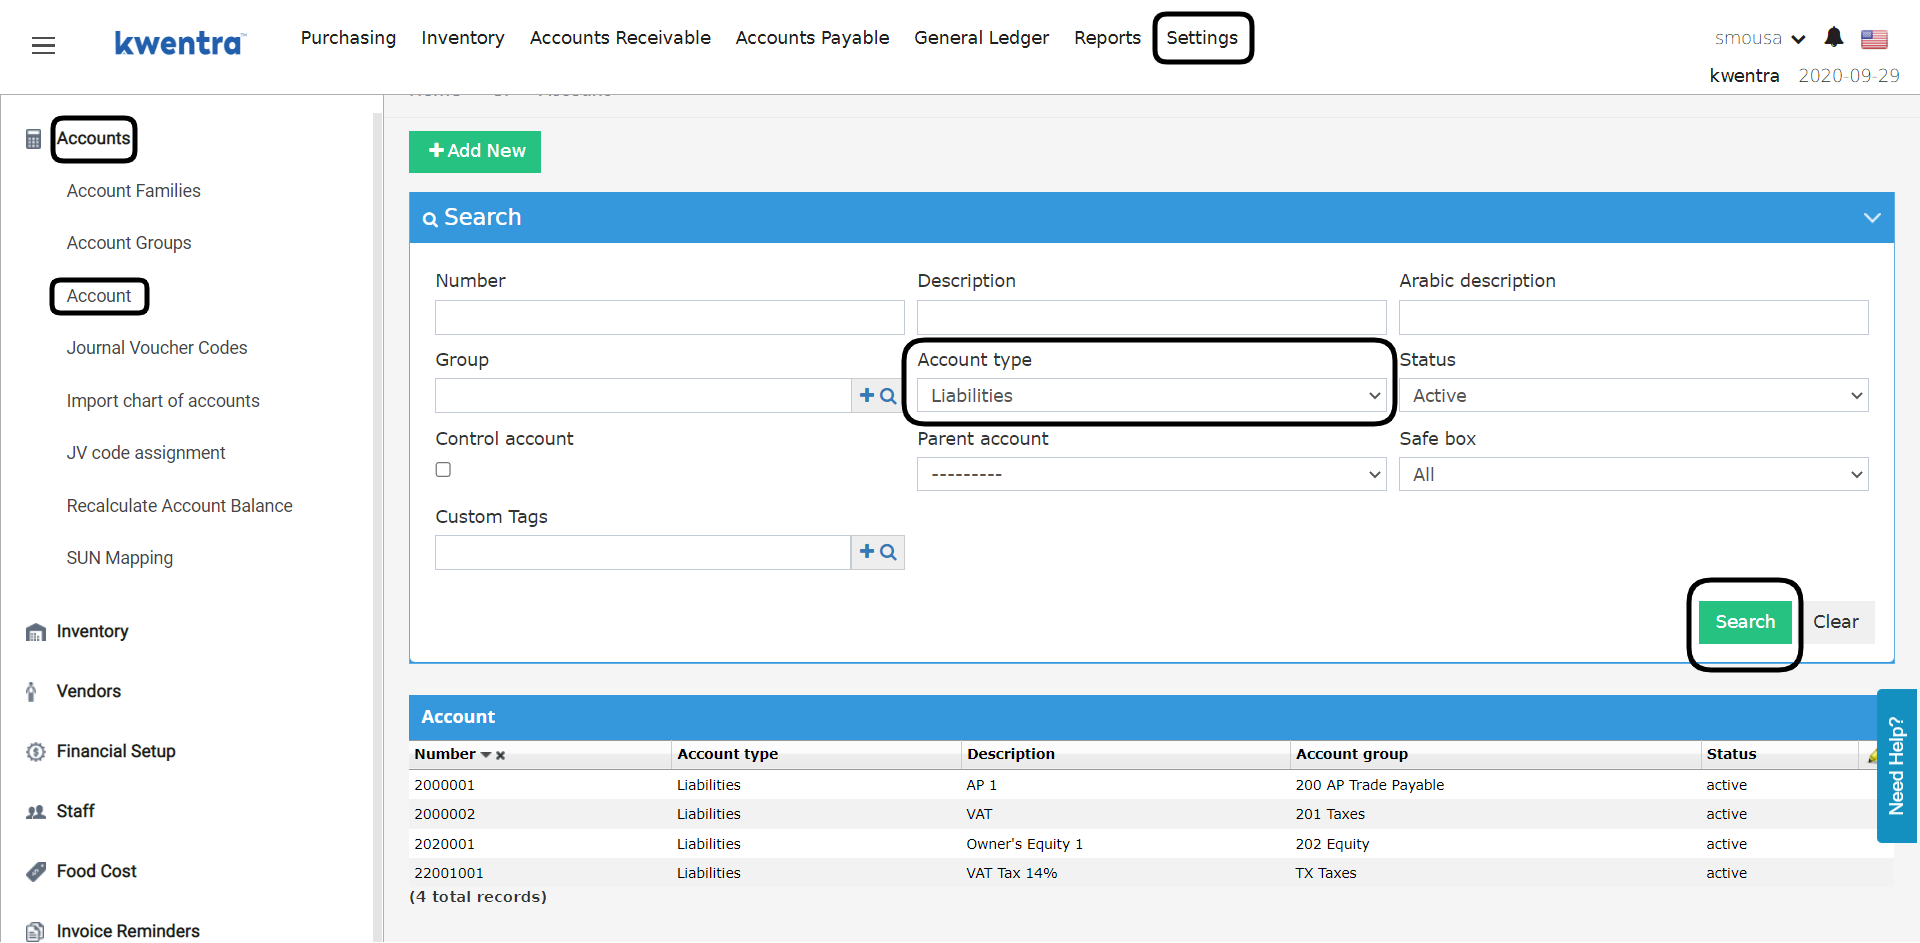 You have to mark this account as a Control Account in order for it to reflect in the drop-down for parent accounts when adding a vendor.
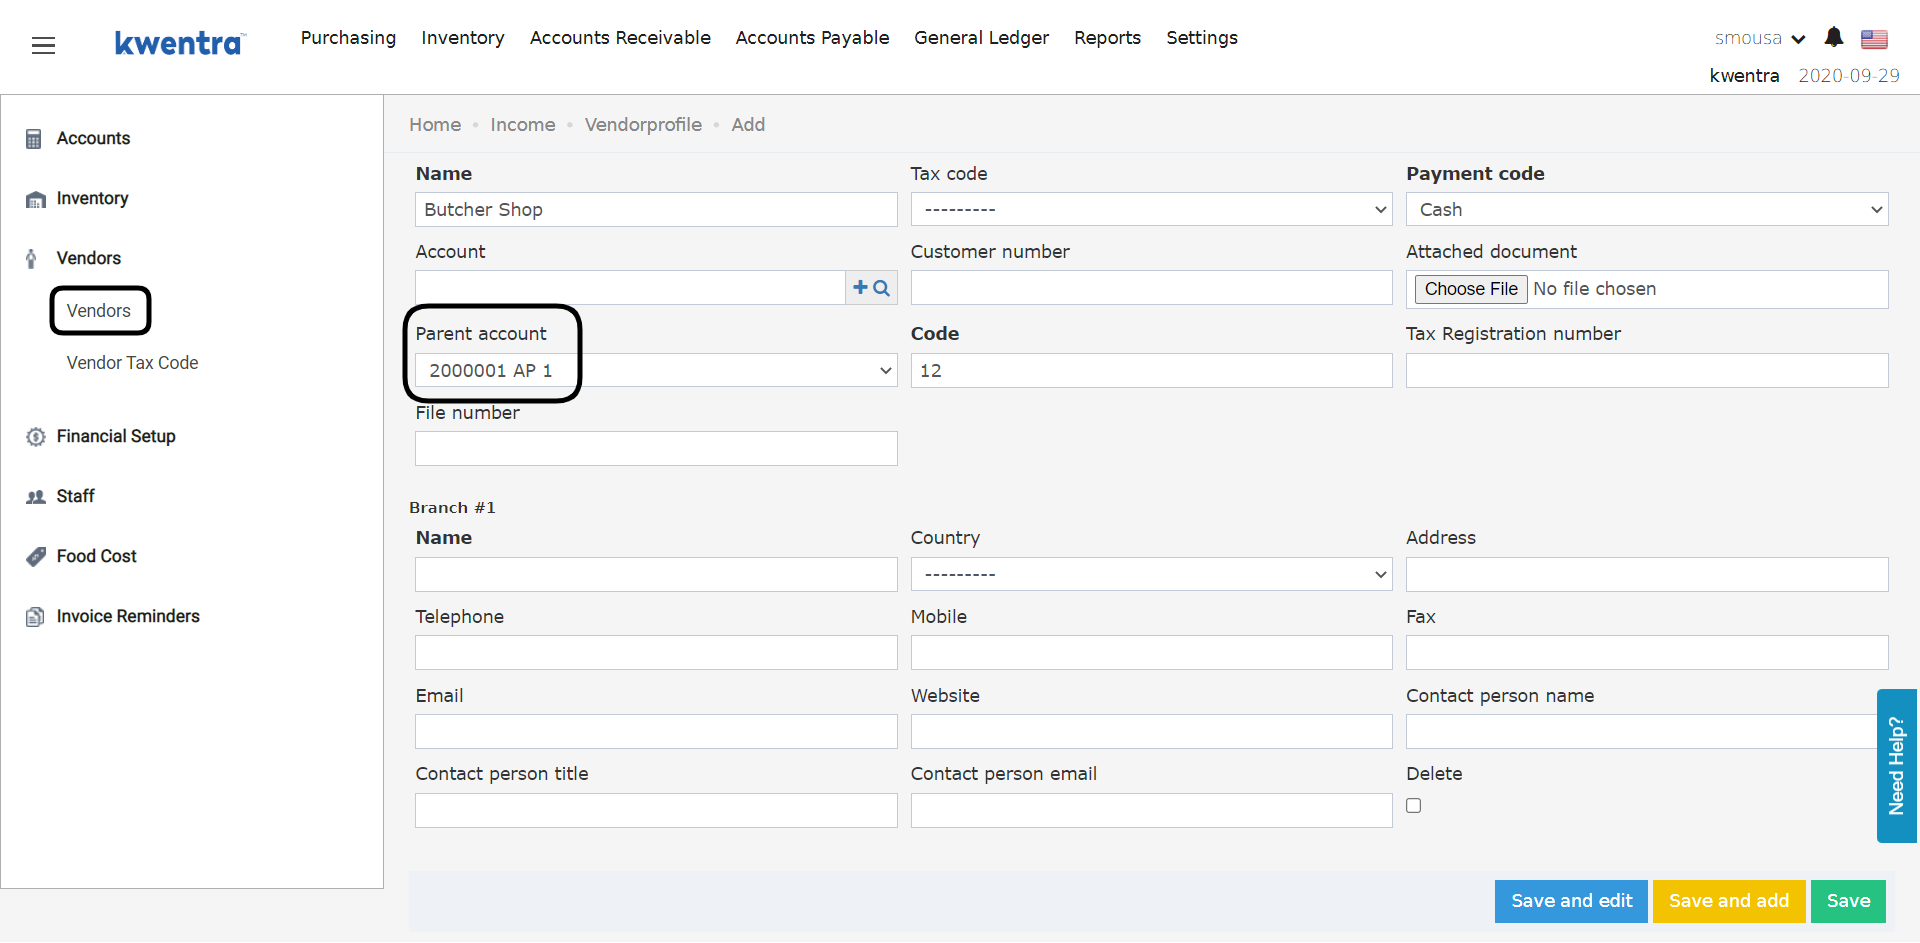
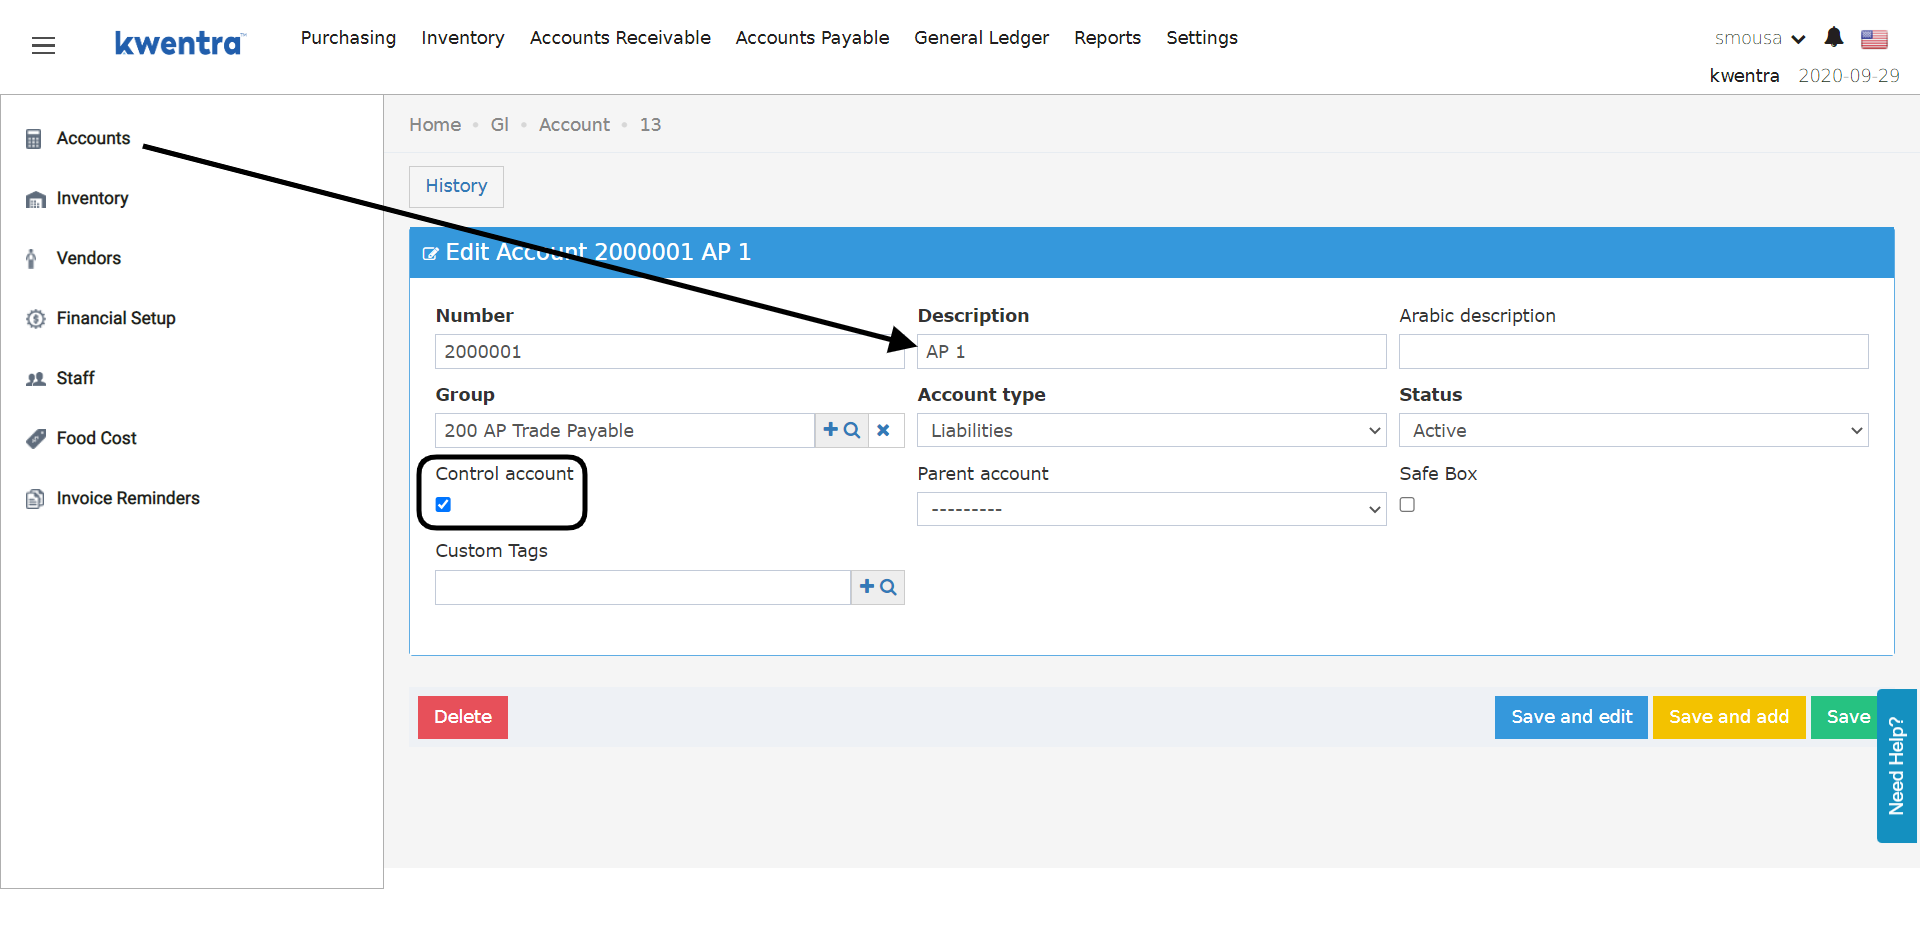 Now when you go to add a vendor you would find this account under the parent account drop-down menu.
This would trigger having all the Vendor Payments under a single parent account in the balance sheet report.
Back Office → Settings → Vendors → Add New
Now when you go to add a vendor you would find this account under the parent account drop-down menu.
This would trigger having all the Vendor Payments under a single parent account in the balance sheet report.
Back Office → Settings → Vendors → Add New
 Update: 30th of October, 2022
We added new fields to the vendor profile to appear on payments and printouts:
Update: 30th of October, 2022
We added new fields to the vendor profile to appear on payments and printouts:
- Vendor Tax Registration number
- File number