

Business Value
- Tell vendors how many days a PO is valid.
- See stock and what is still to receive on every line.
- See at a glance which POs still miss items.
- Find POs that still wait for approval with one filter.
- Email a PO to the vendor from the print preview.
Use Cases
- Purchasing manager sets a 30-day validity and emails the PO to the vendor.
- Store manager filters Partially Received POs to follow up on missing deliveries.
- Financial controller picks Fully Authorized POs for payment and audit.
How It Works
This article covers a PO after you create it. To create one, see Create a Purchase Order.
PO Fields
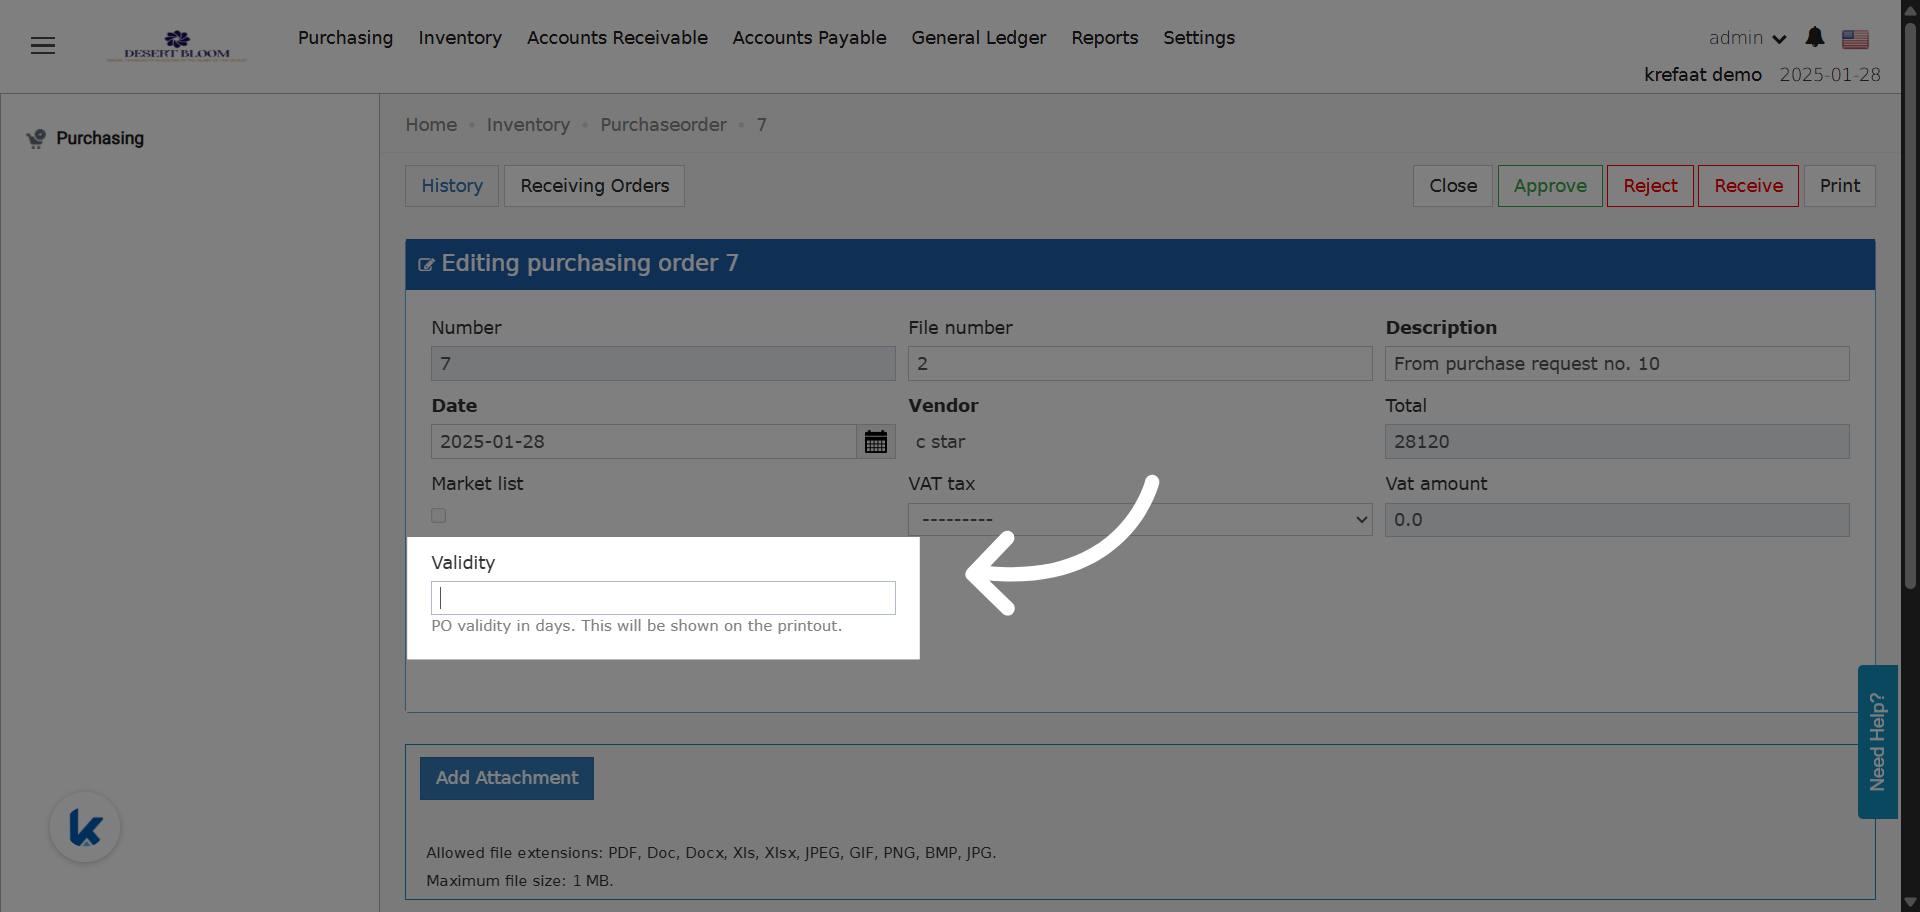
Validity
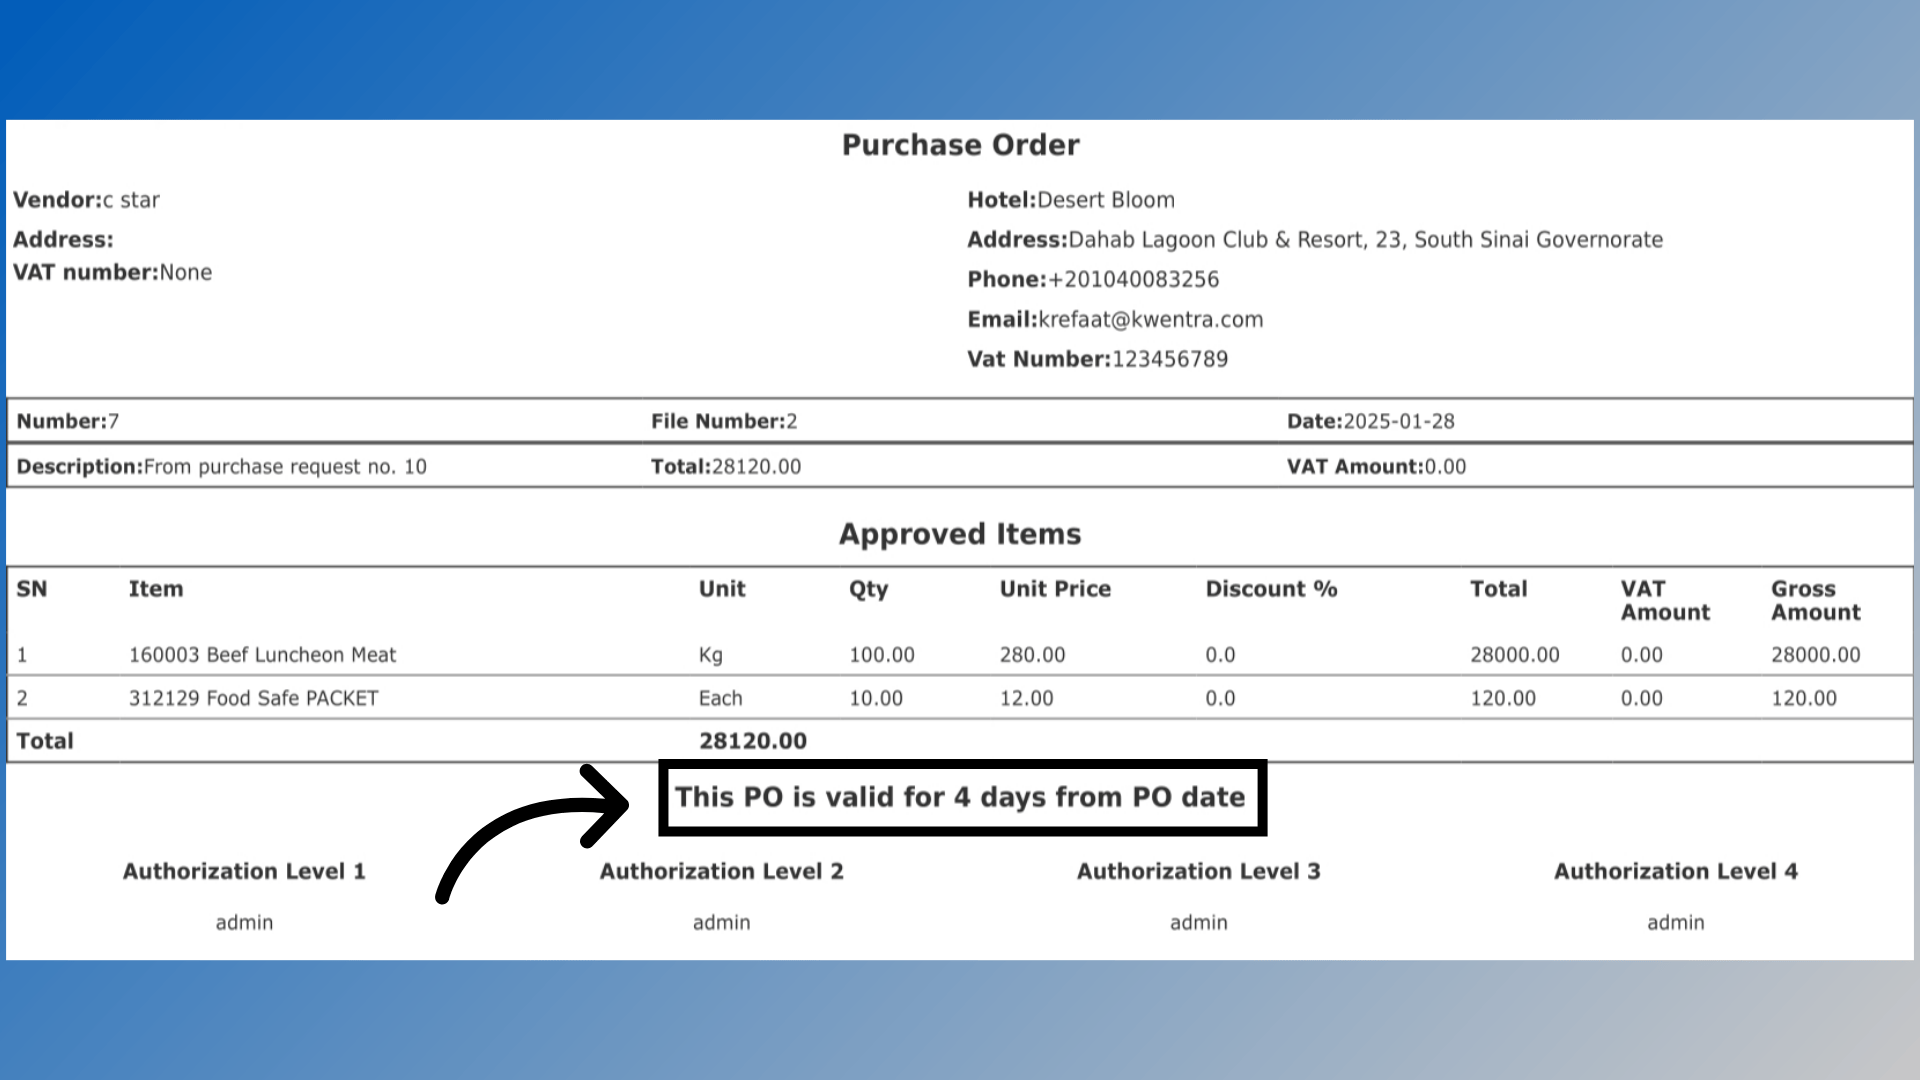
Validity is how many days the PO is valid from the PO date.- Enter a whole number above zero.
- Leave it empty for no validity period.
-
With a value, the printout shows this line under the items, before the signatures:
This PO is valid for X days from PO date.
- When it is empty, the line does not print.
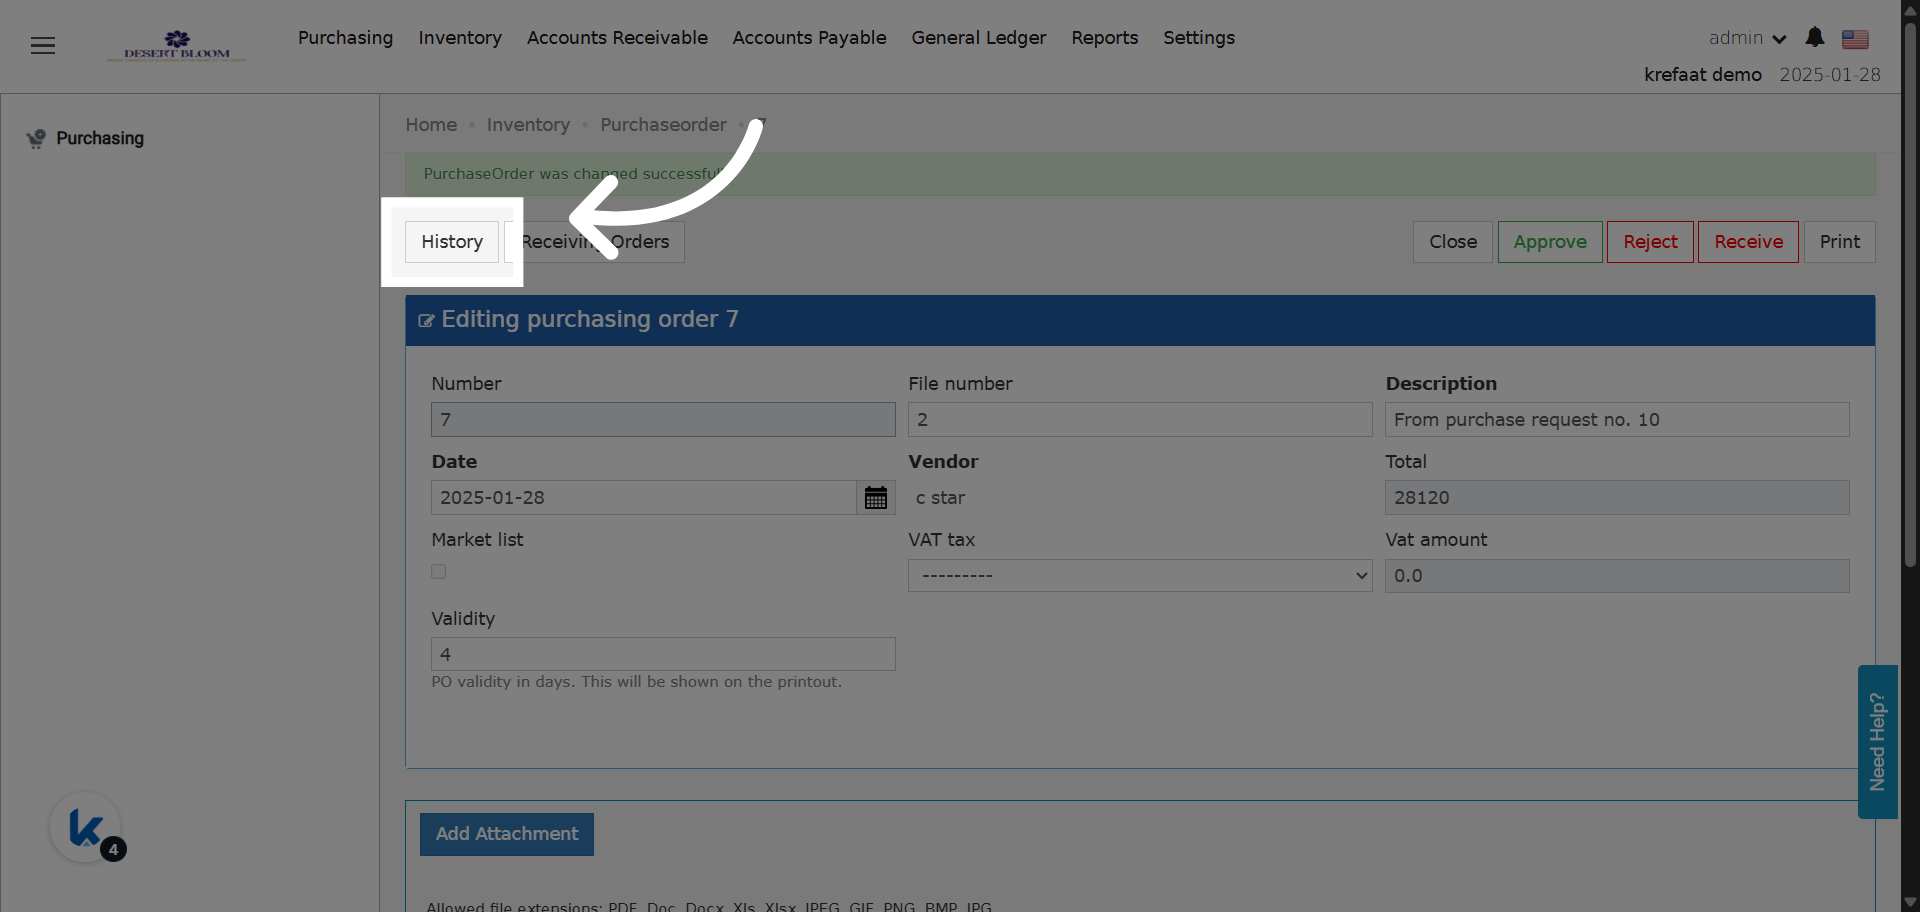
- Every change is saved in the PO history, with the time and user.
Usage Department
- Usage Department is read-only.
- It is copied from the linked purchase request, if there is one.
- It shows on the PO print and export.
Line Columns
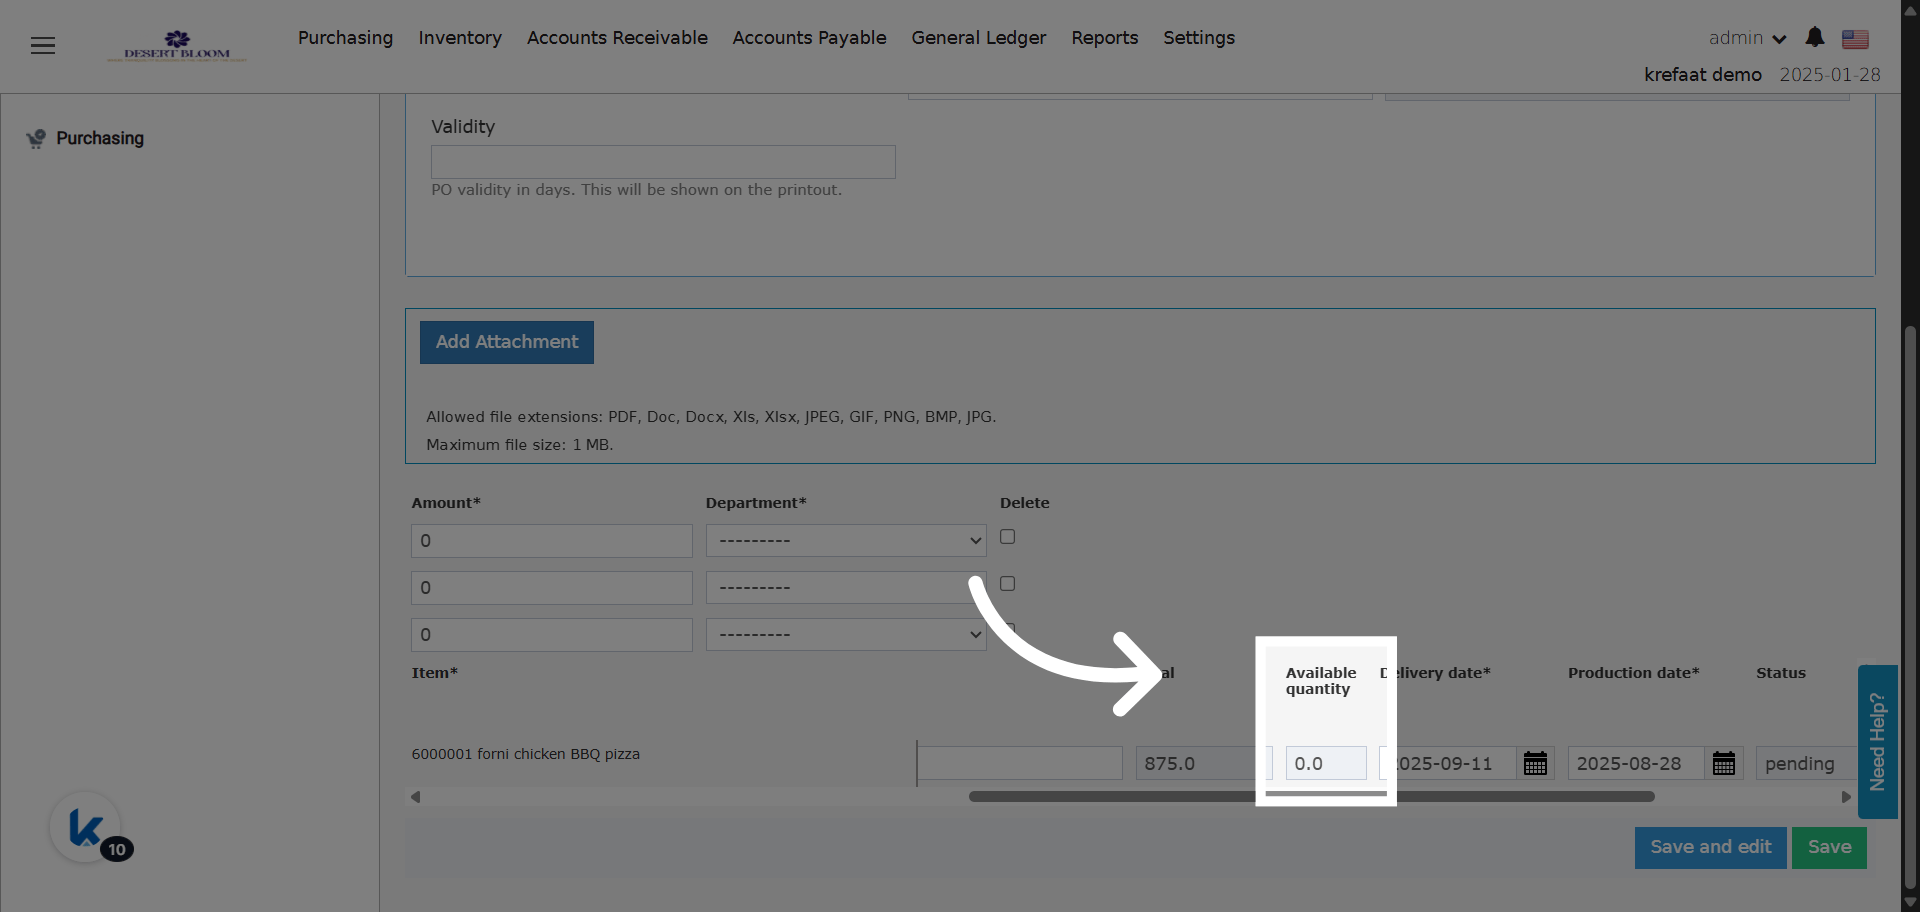
- Both columns are read-only.
- Available Quantity is the same as Available on purchase requests.
- Remaining Qty is never negative. If Received Qty is more than Qty, it shows 0.
- Receiving more than you ordered is allowed only for market list items.
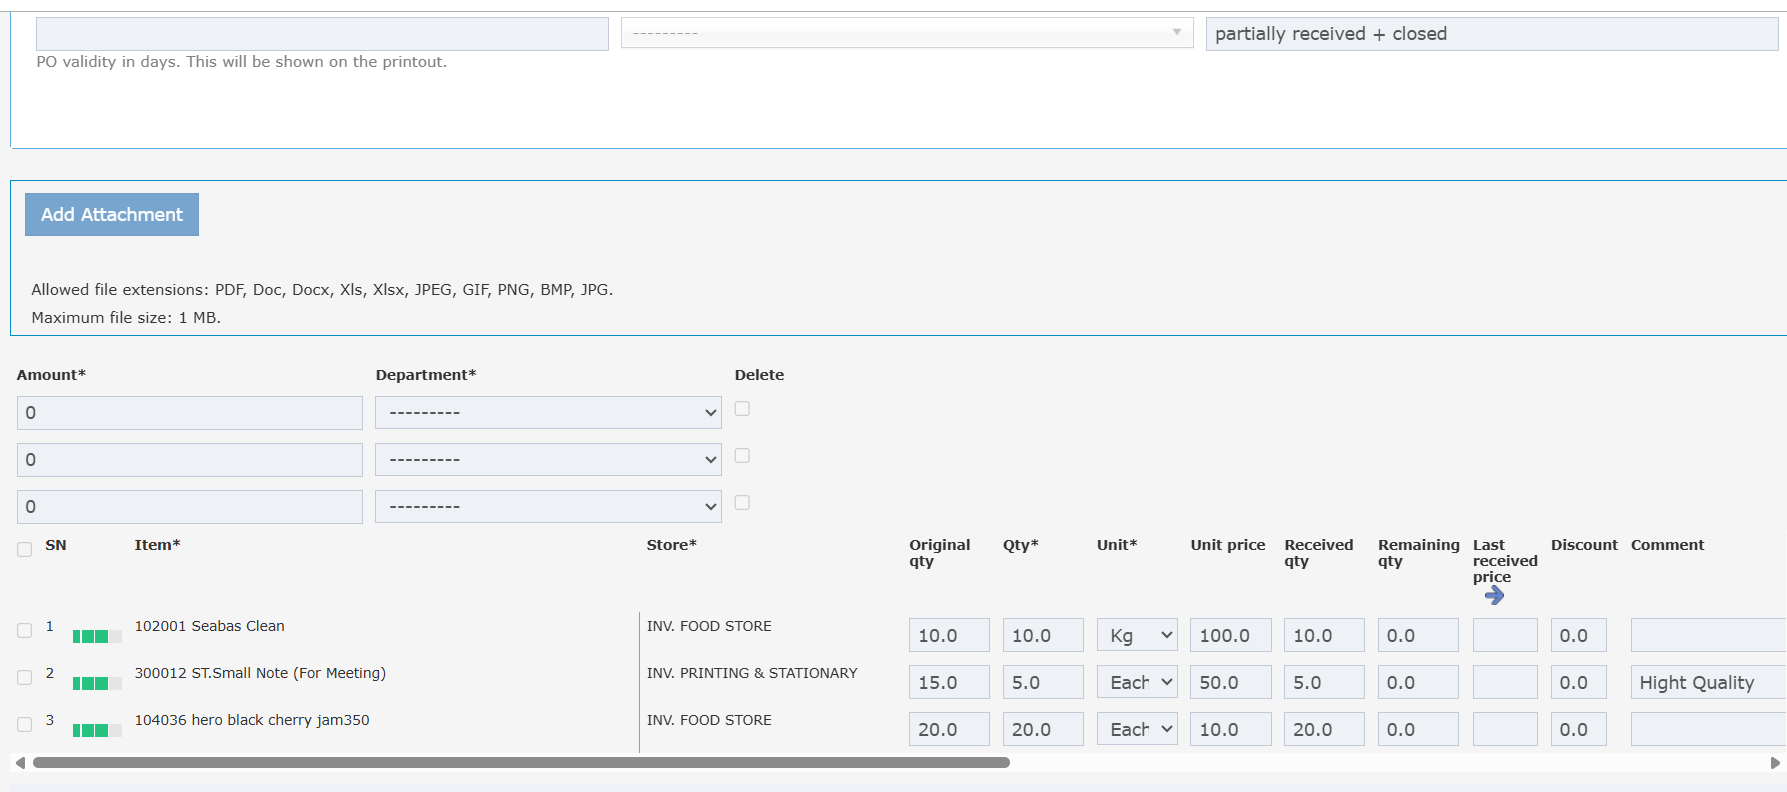
PO Statuses
You see the status in the PO list and inside each PO.
Example: You order 8 kitchen items. 5 arrive and 3 are still pending. The PO shows Partially Received.
Status in the Linked POs Popup
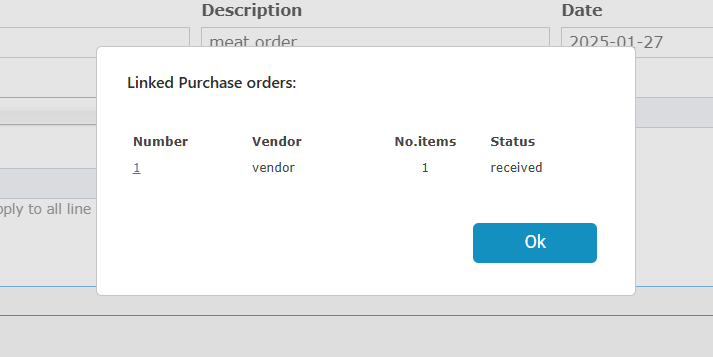
The Linked POs popup has a Status column. It shows the current status of each PO linked to the request. You do not need to open each PO.
Find POs on the List
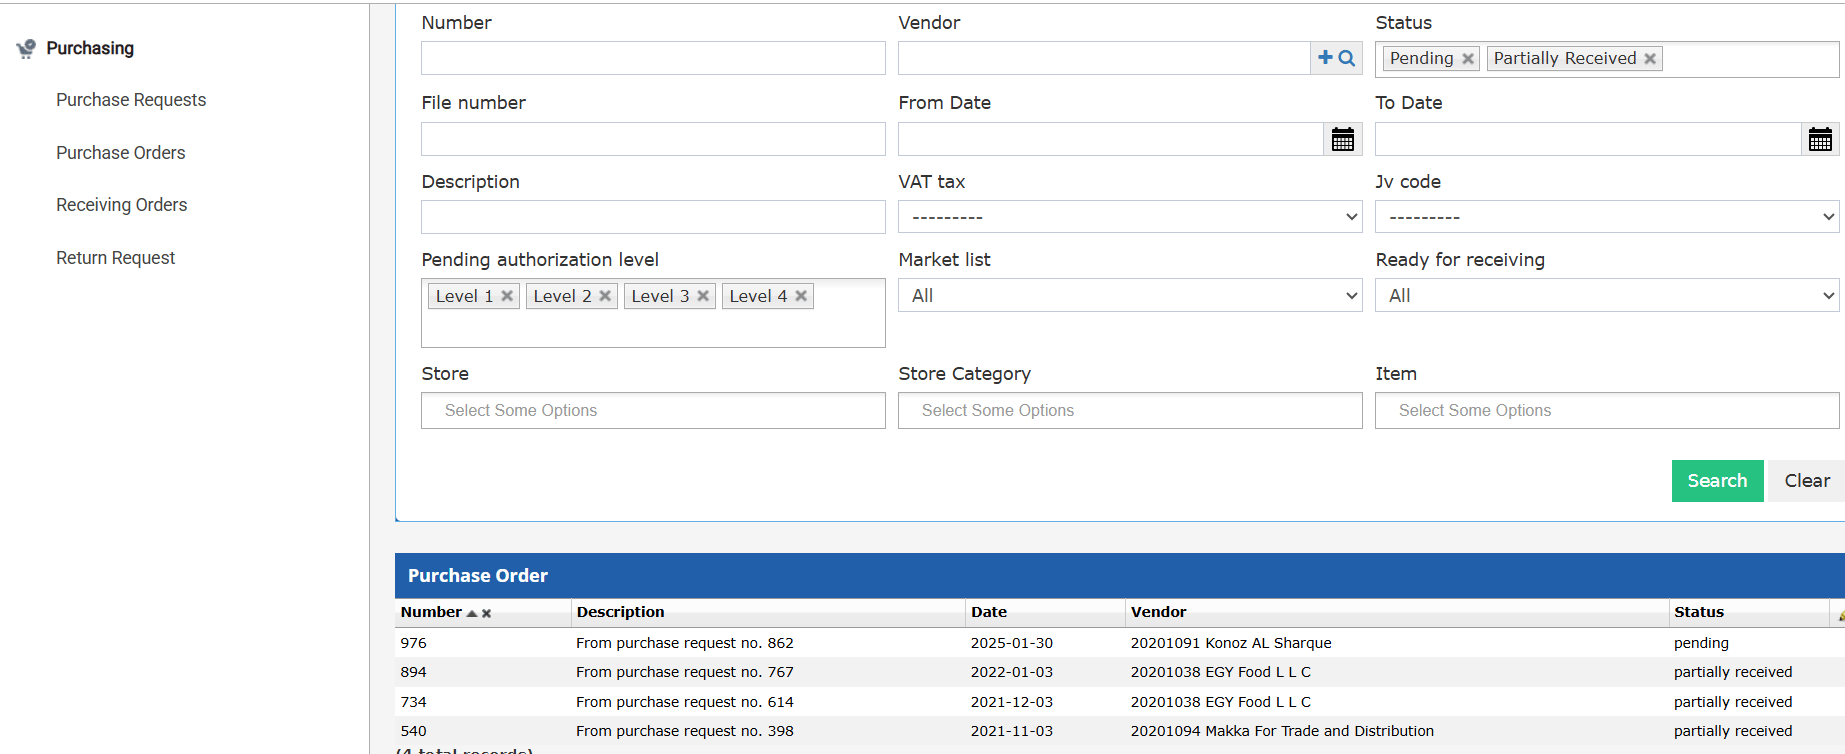
Status Filters
Filter the list by Pending or Partially Received to see orders that still miss items.Authorization Status
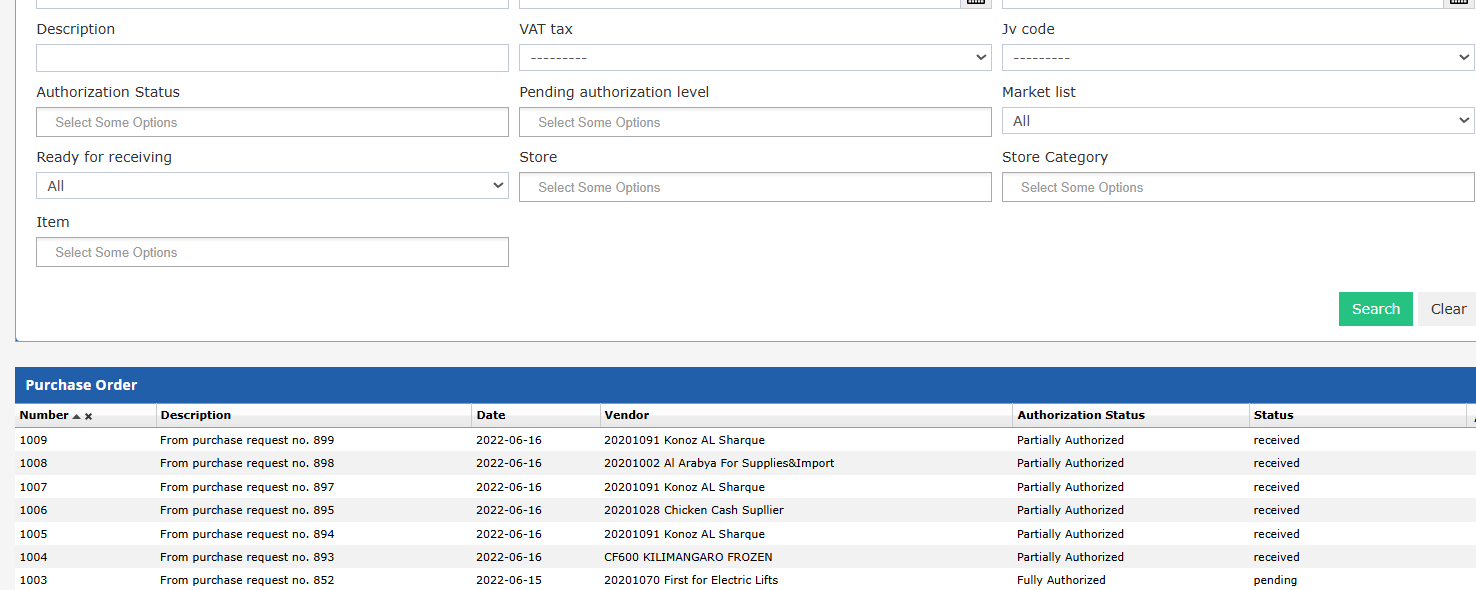
The PO list has an Authorization Status filter and column. You can pick more than one value.- A line is fully authorized when it is approved or rejected.
- Items with no approval workflow count as Fully Authorized.
- Closed lines are ignored. They do not change the status.
- A Closed PO always counts as Fully Authorized.
Usage Department Filter
- The list has a Usage Department filter and column.
- The filter fills in with the usage departments you can access.
- You see only the POs of your own departments.
- Clearing the filter shows all POs you can access. Other departments’ POs stay hidden.
Print and Email
Print a PO
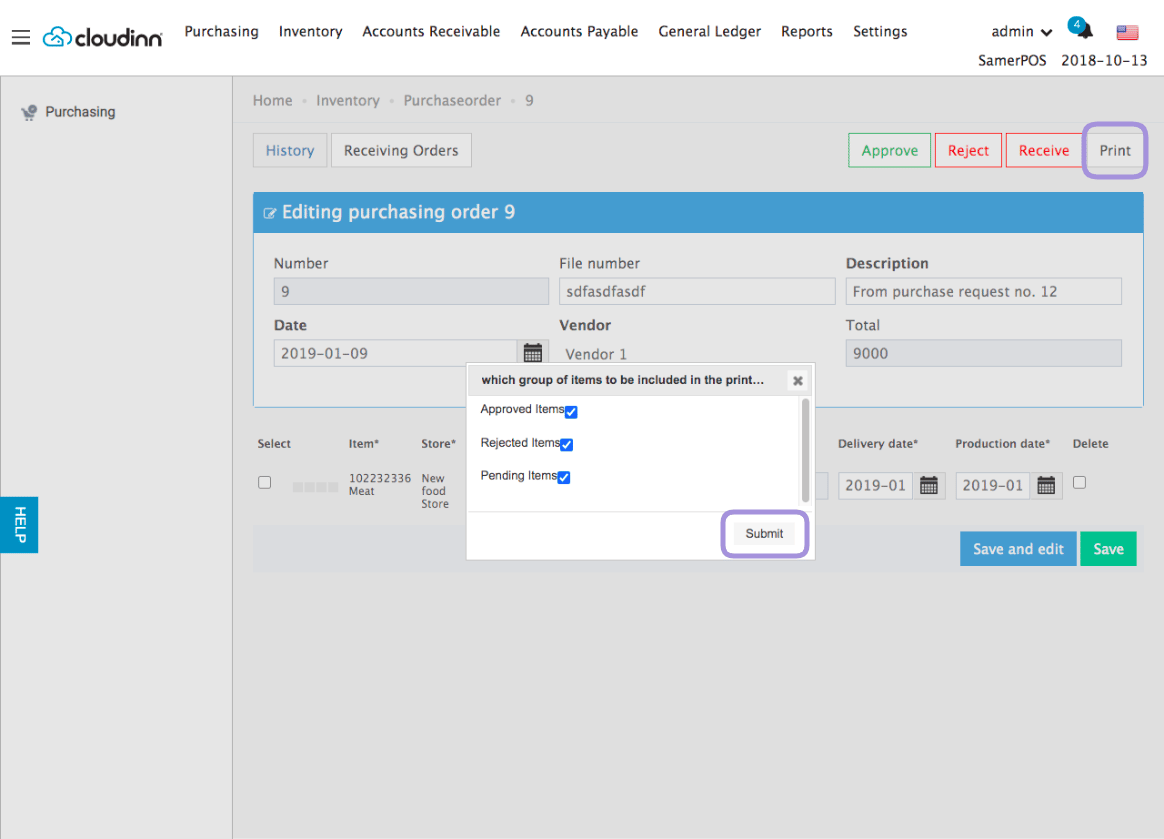
- Open the PO and click Print (top right).
- Choose which items to show: approved, pending, or rejected.
- Click Submit.
Send a PO by Email
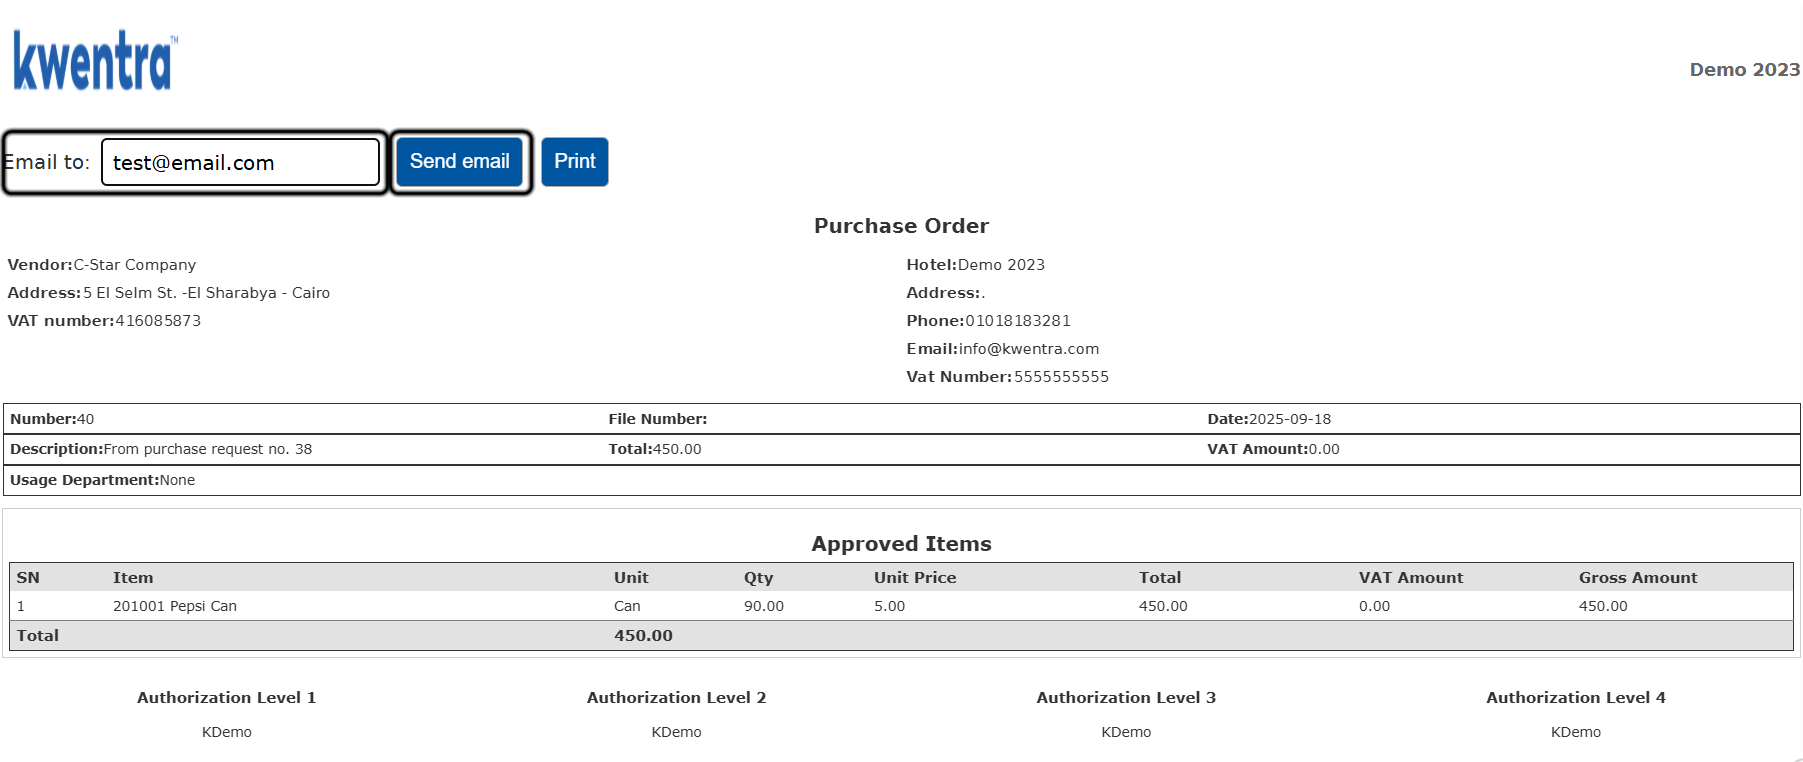
- Open the PO and click Print. The print preview has an Email to field and a Send email button, next to Print.
- Email to fills in with the email on the vendor profile. If the profile has none, the field stays empty.
- You can always change Email to.
- Click Send email.
- The email goes out in your account’s default language.
- The PO is attached as a PDF. It also shows in the email body.
- The subject and body use a fixed template. You cannot edit them.
Purchase Order #{po_number} - {property_name}
Body:
Dear{vendor_name}, Please find attached our Purchase Order #{po_number}dated{po_date}.{Embedded HTML Purchase Order}Best regards,{property_name}