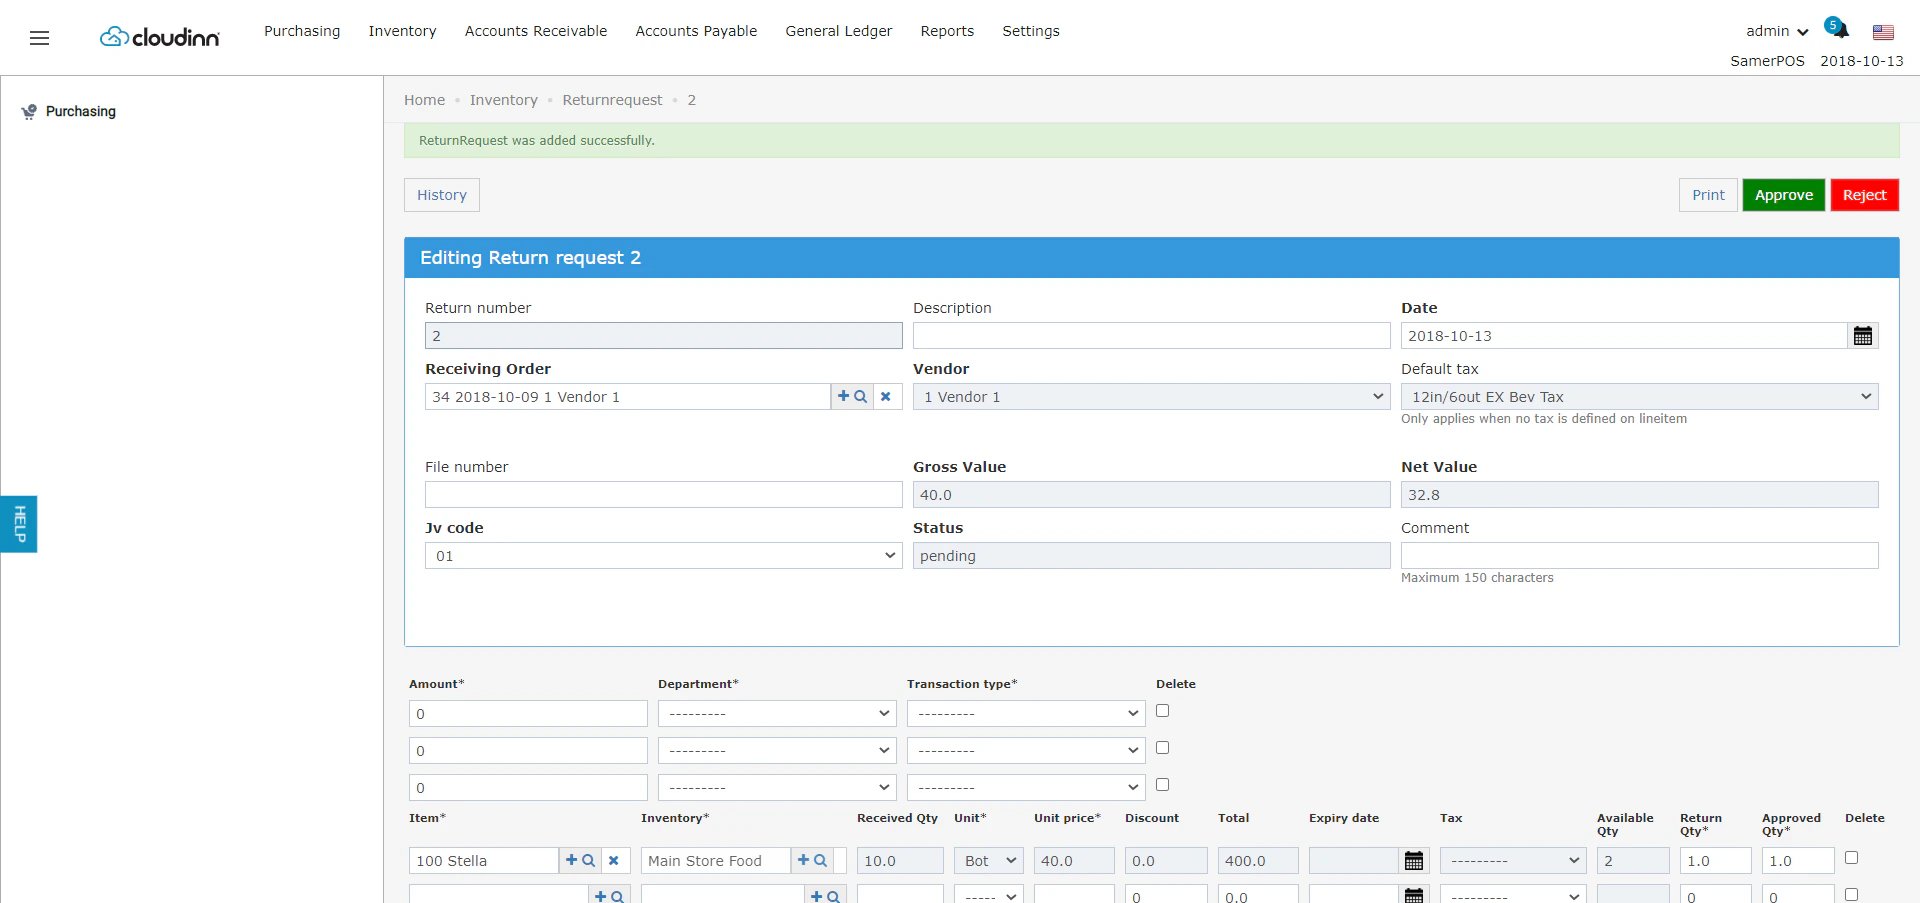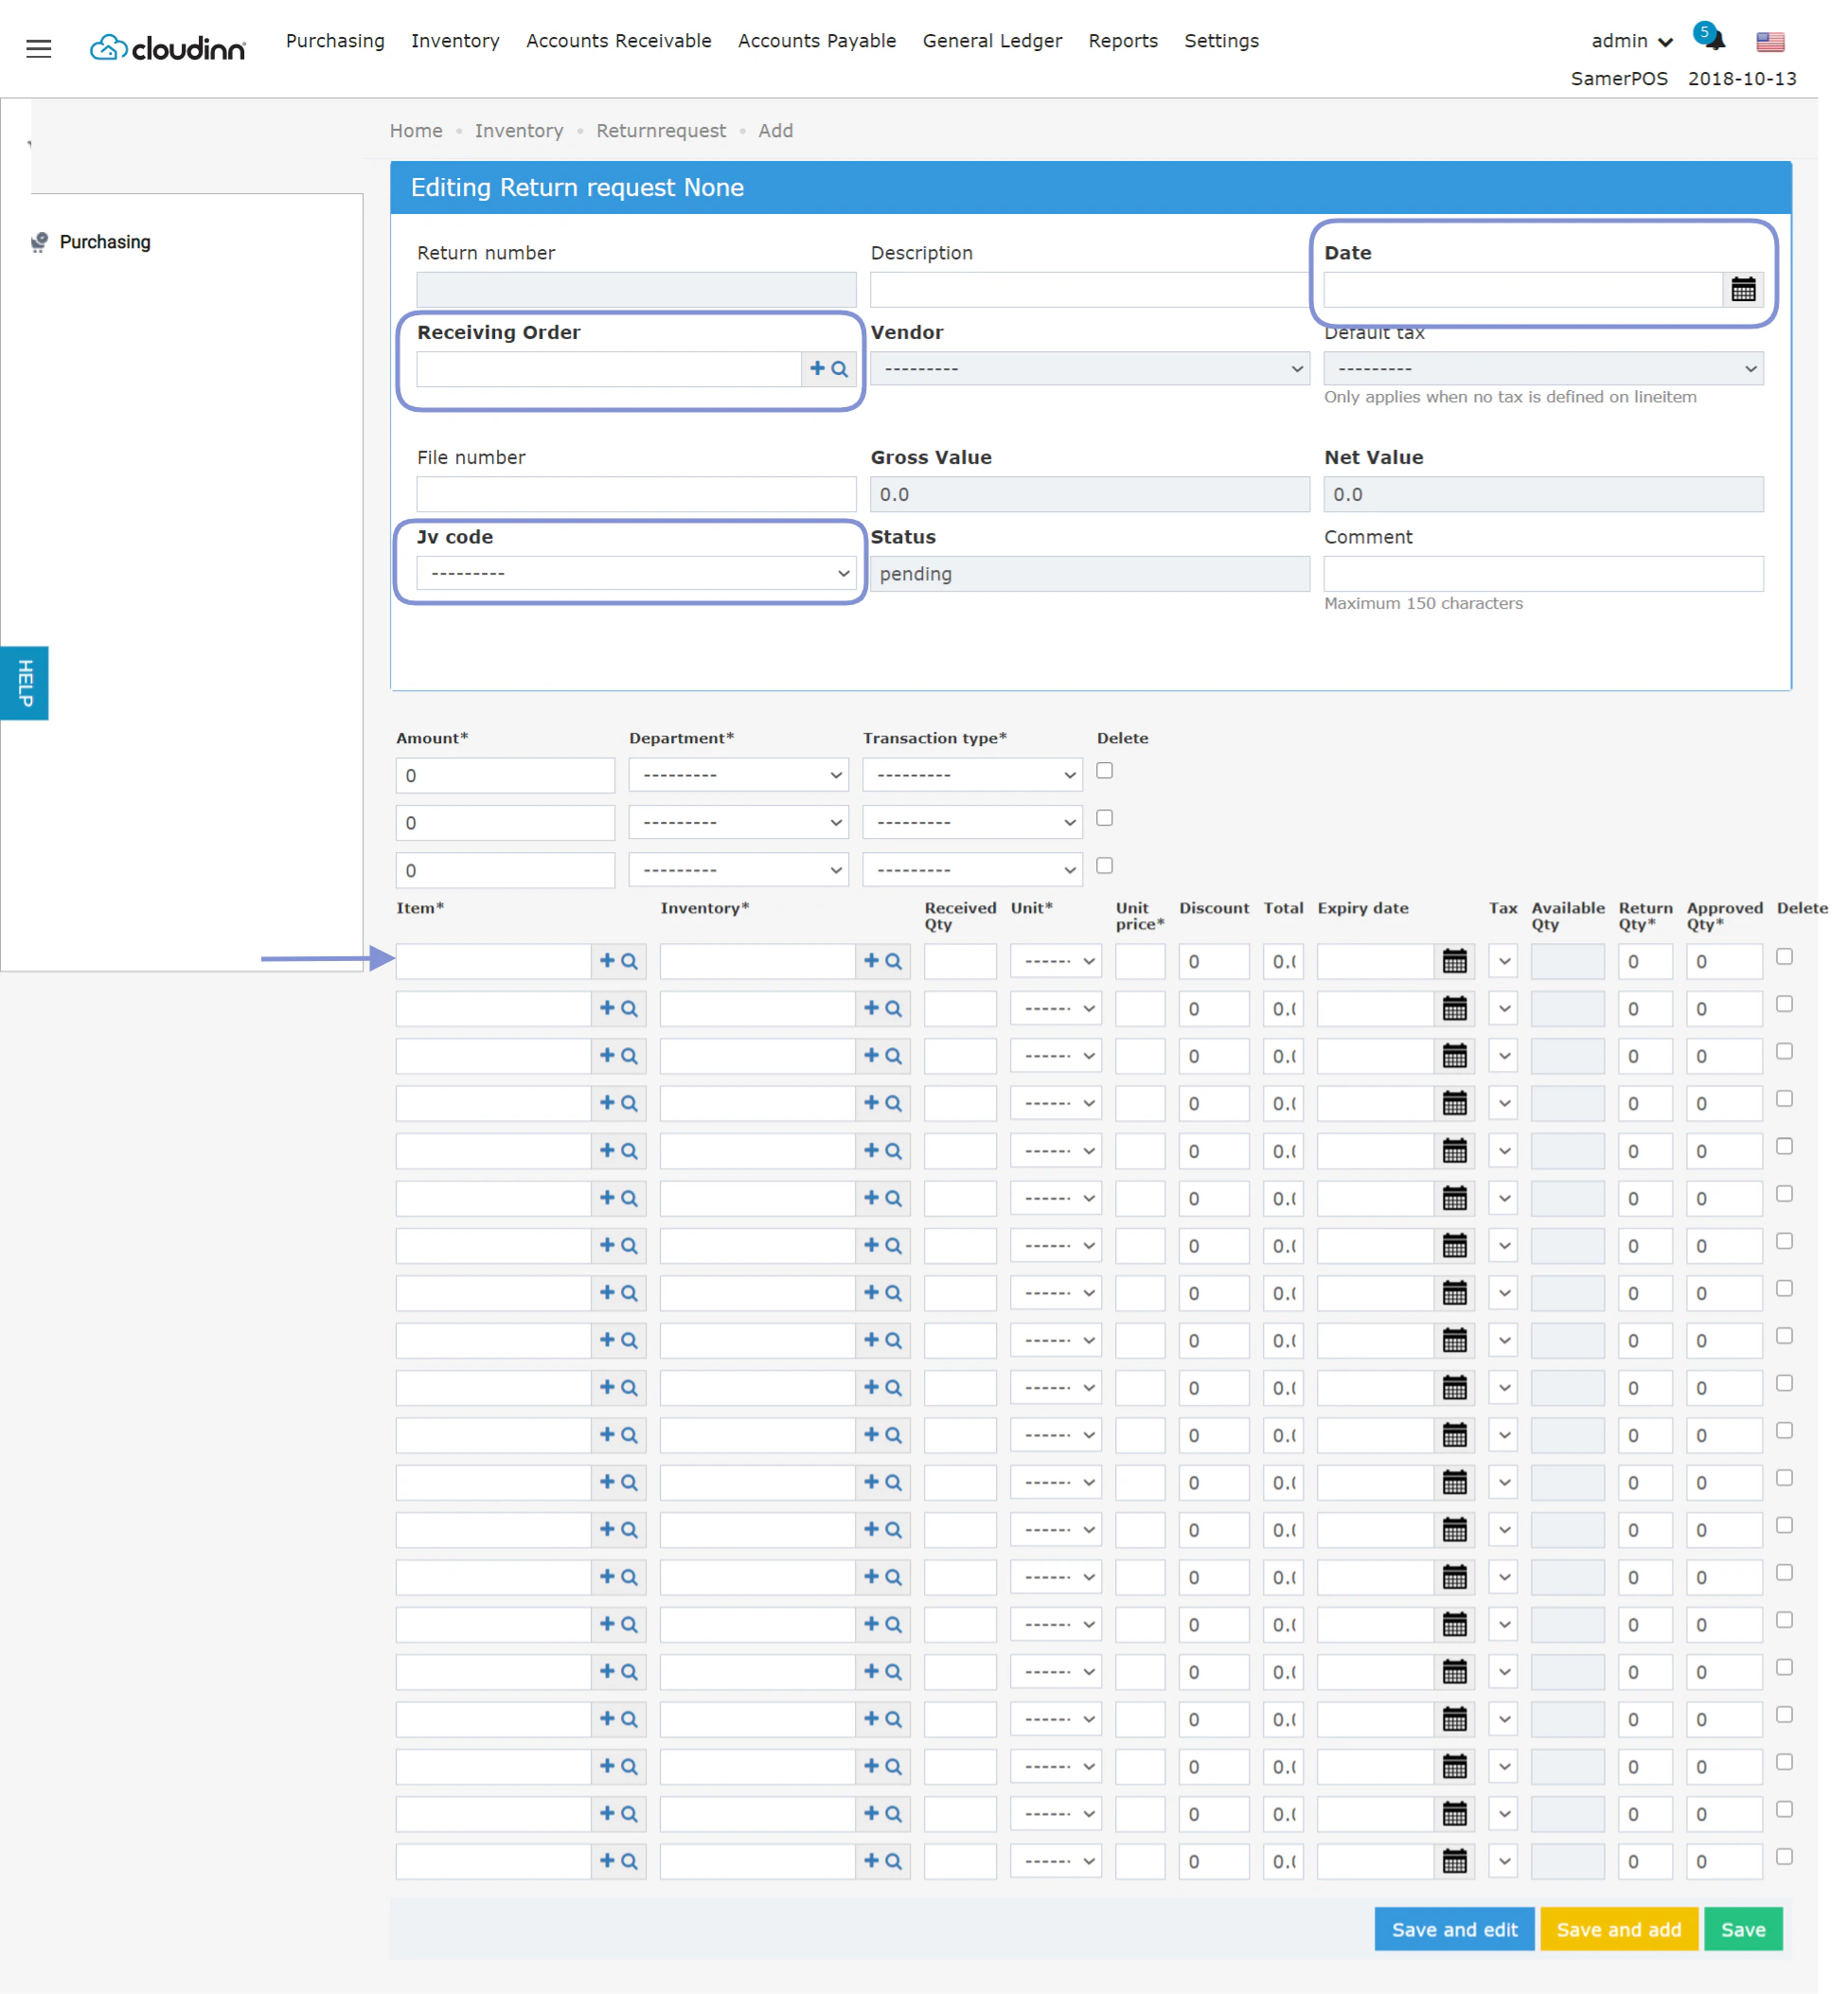
To return items to a vendor and record it in your accounts, use Return Request in Back Office Purchasing. Back office → Purchasing → Return Request → Add New New return request To add a return request, fill in:
  • Date of Return
  • The Receiving Order you are returning from
  • The Journal Voucher Code for returns
  • The items you are returning.
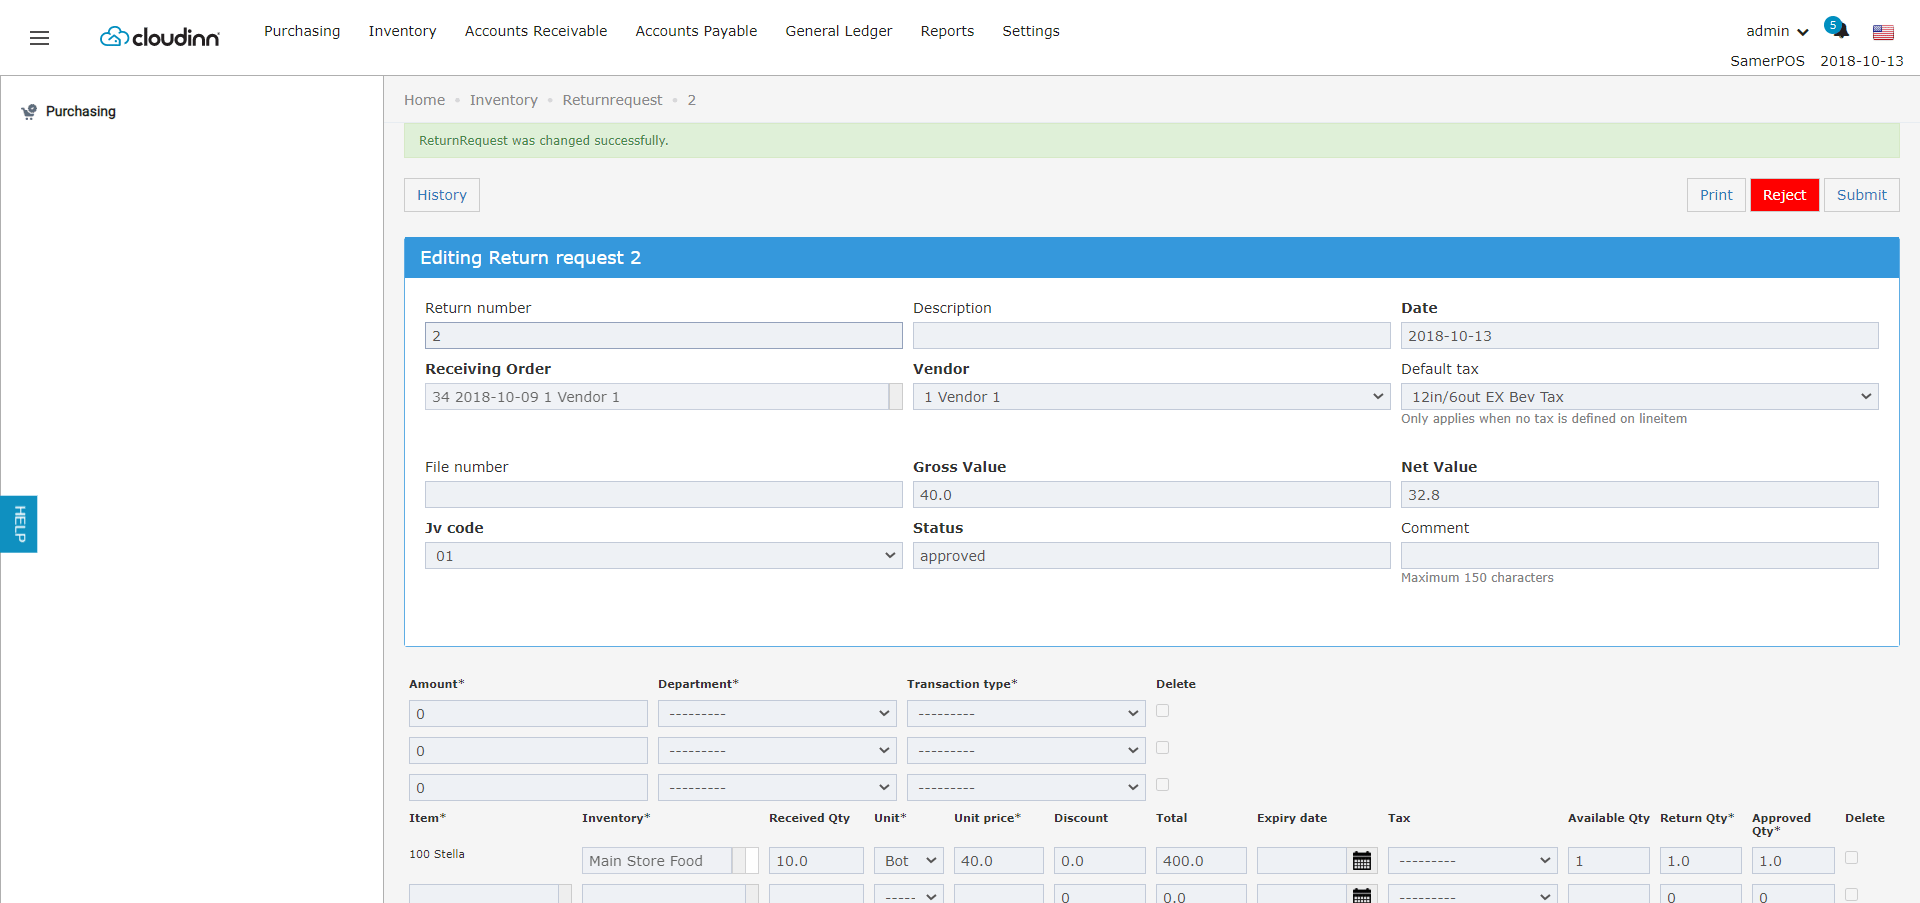
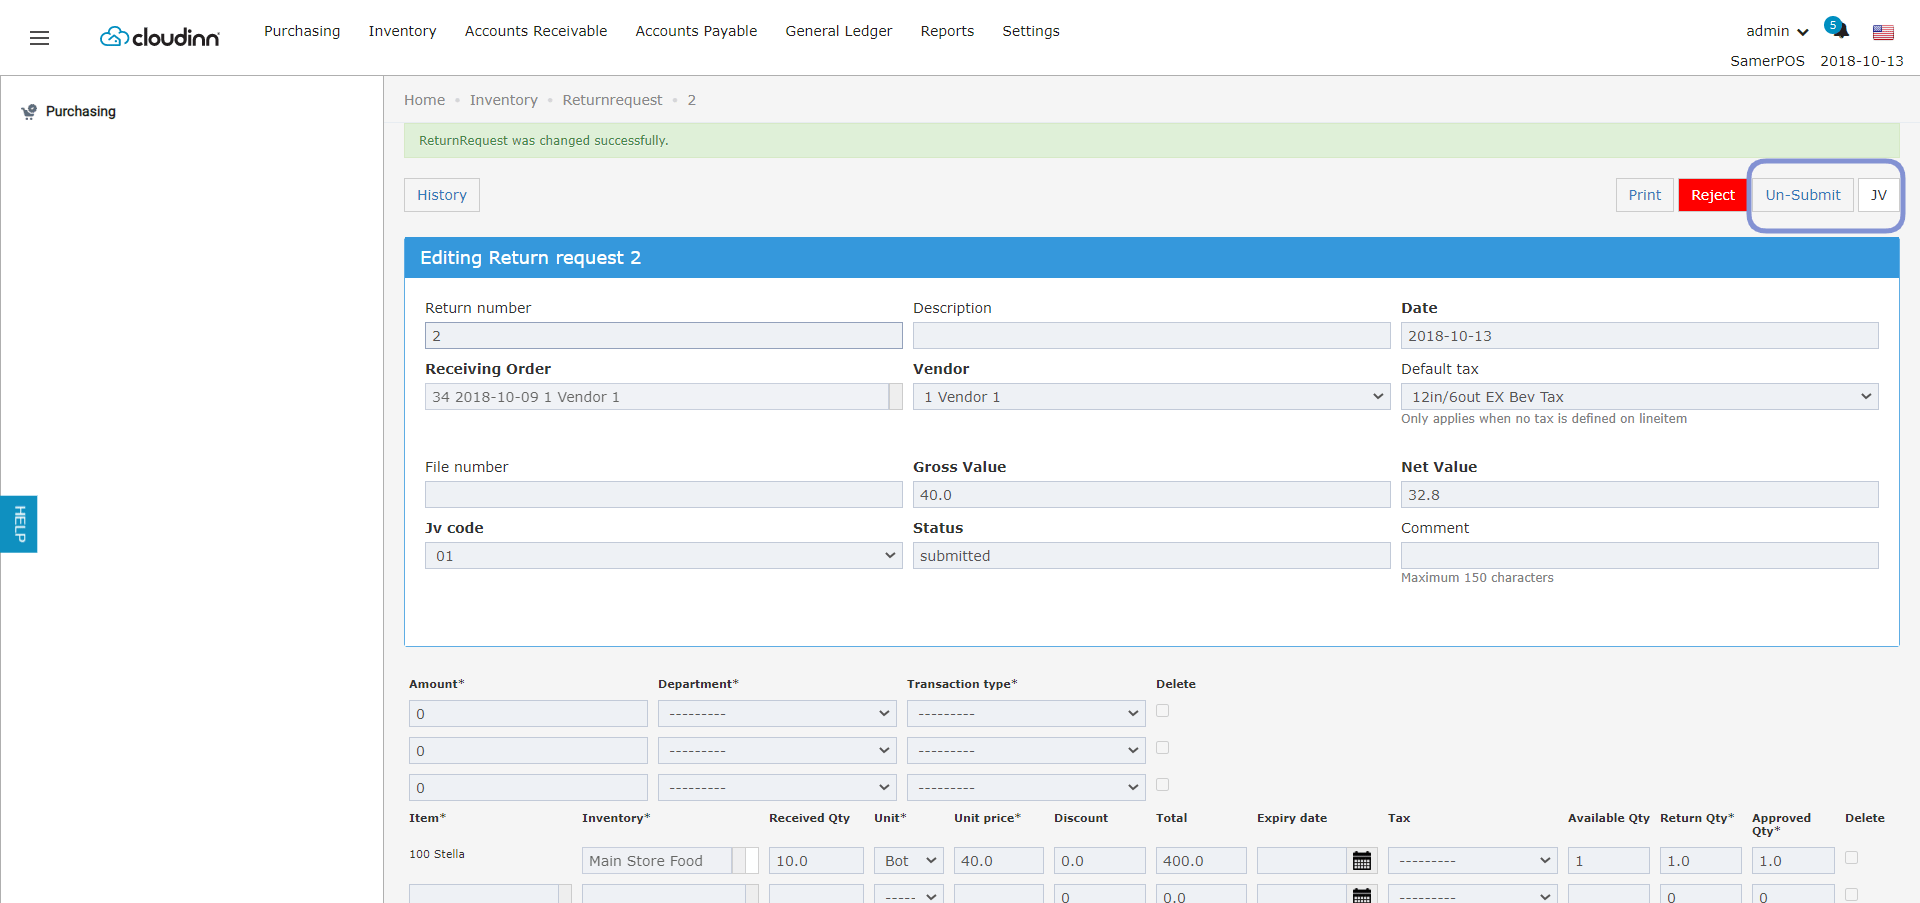
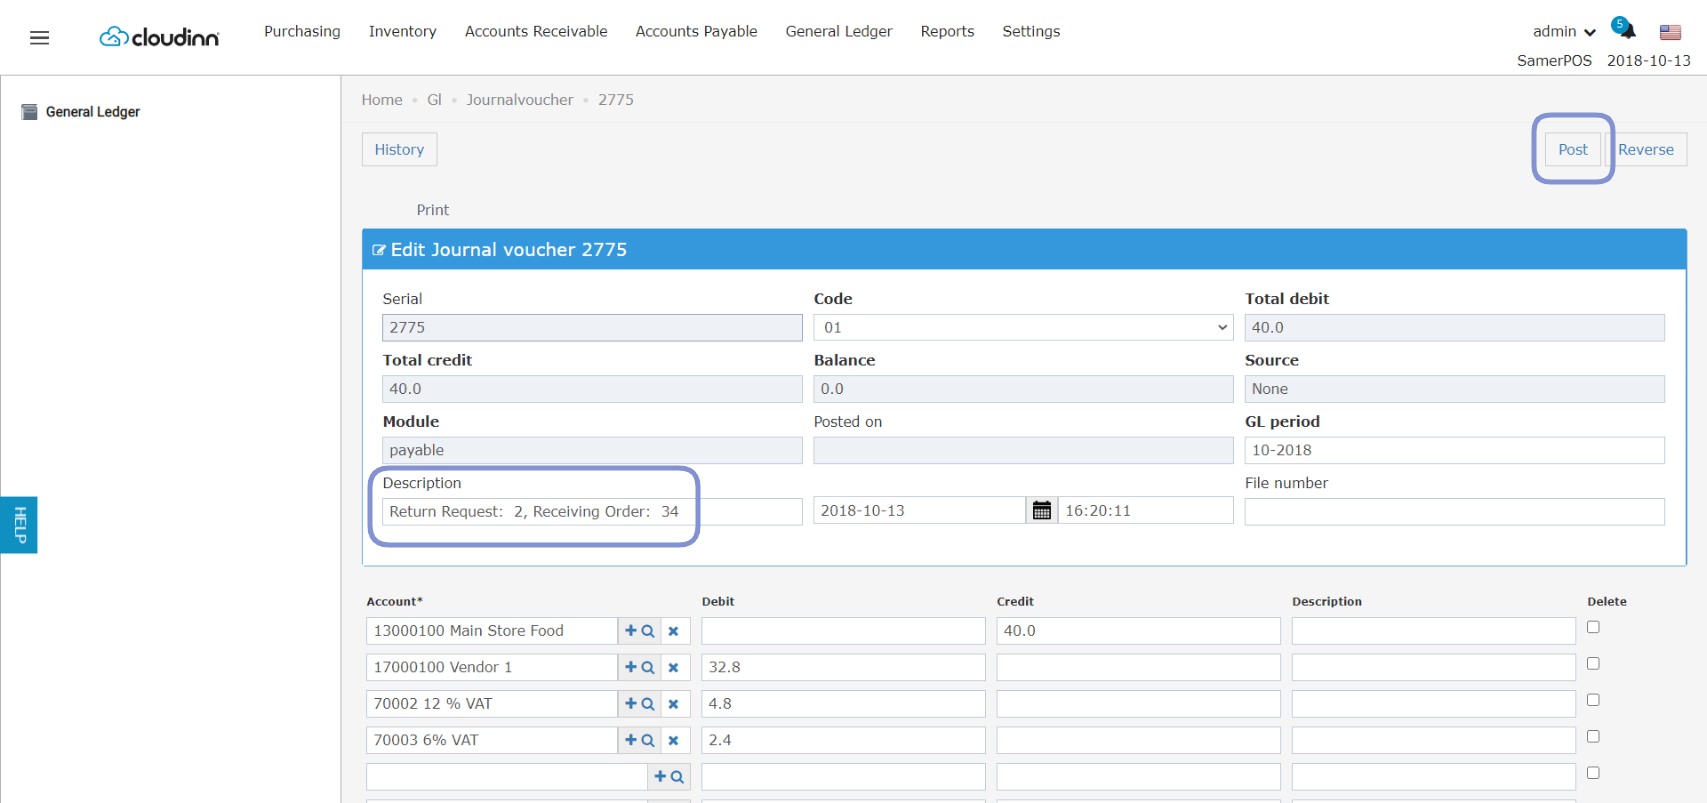
When you select the receiving order, the vendor fills in automatically. Click Save and Edit to take more actions on the request. In this example, we return 1 bottle to Vendor 1. It was received on Receiving Order #34. Return request for 1 bottle Like any purchasing action in Back Office, the request can be approved or rejected. An approved return request looks like the image below. If it is rejected, its status is Rejected and the available quantity does not go down. Approved return request The last step is to submit the return request and post the Journal Voucher in General Ledger. Click Submit. After you click Submit, the JV button shows. Check the voucher, then post it. JV button on a submitted return request Journal Voucher Posting: Journal voucher posting To reverse a return request that is already posted to the JV:
  1. Unpost the related JV to reverse it financially.
  2. Open the return request and Unsubmit it.
  3. Reject Return Request.
The return request is now reversed. Return Requests Report: Track past return requests with this report: Reports → BO → Inventory → Return Requests
  1. Enter the date range.
  2. Optional: choose a vendor. If you leave it empty, all vendors show.
  3. Optional: select the return request status.