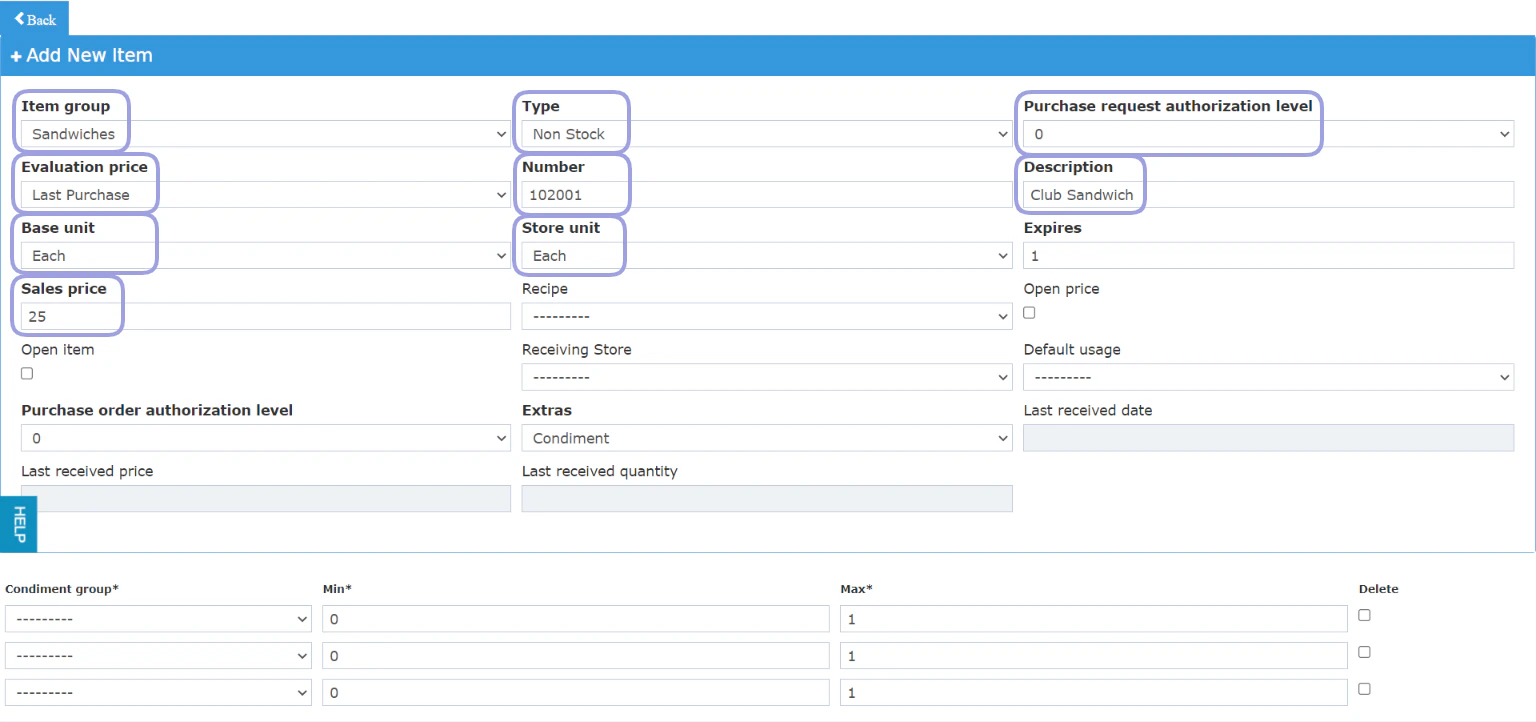
To add an item to POS in order to include it in your menus, you should follow the below steps: Point of Sale → Settings → Item → Add New In order to fill the mandatory fields to add an item, please read the below carefully.Documentation Index
Fetch the complete documentation index at: https://help.kwentra.com/llms.txt
Use this file to discover all available pages before exploring further.
- Item group: this is the group that the new item will appear under in the cashiering screen for ordering.
- Type: all POS items are Non Stock items.
- Purchase request authorization level: should be left as 0 as this field only affects back office items.
- Evaluation Price: any choice you make will not affect your POS items as it only affects back office items.
- Number: a serial number for each item is a must, please make sure to follow the serialization of your items inside each item group.
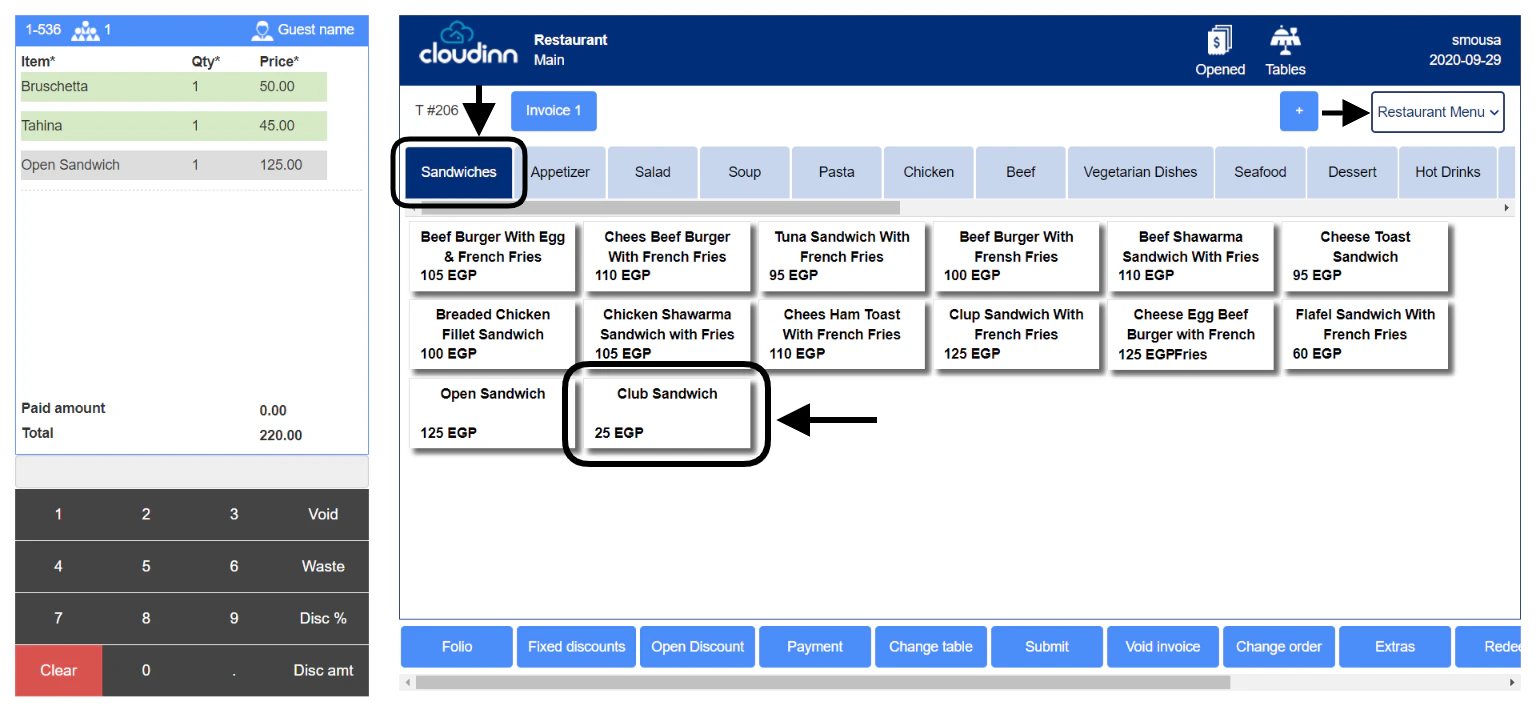
- Description: the name of the item that will appear to the cashiers on the POS menu.
- Base unit & store unit: all POS items should be added with the unit Each.
- Sales Price: this is the amount you will sell the item with on the menu, sales price will follow the base currency of your system.
- Item group
- Item category
- Item family
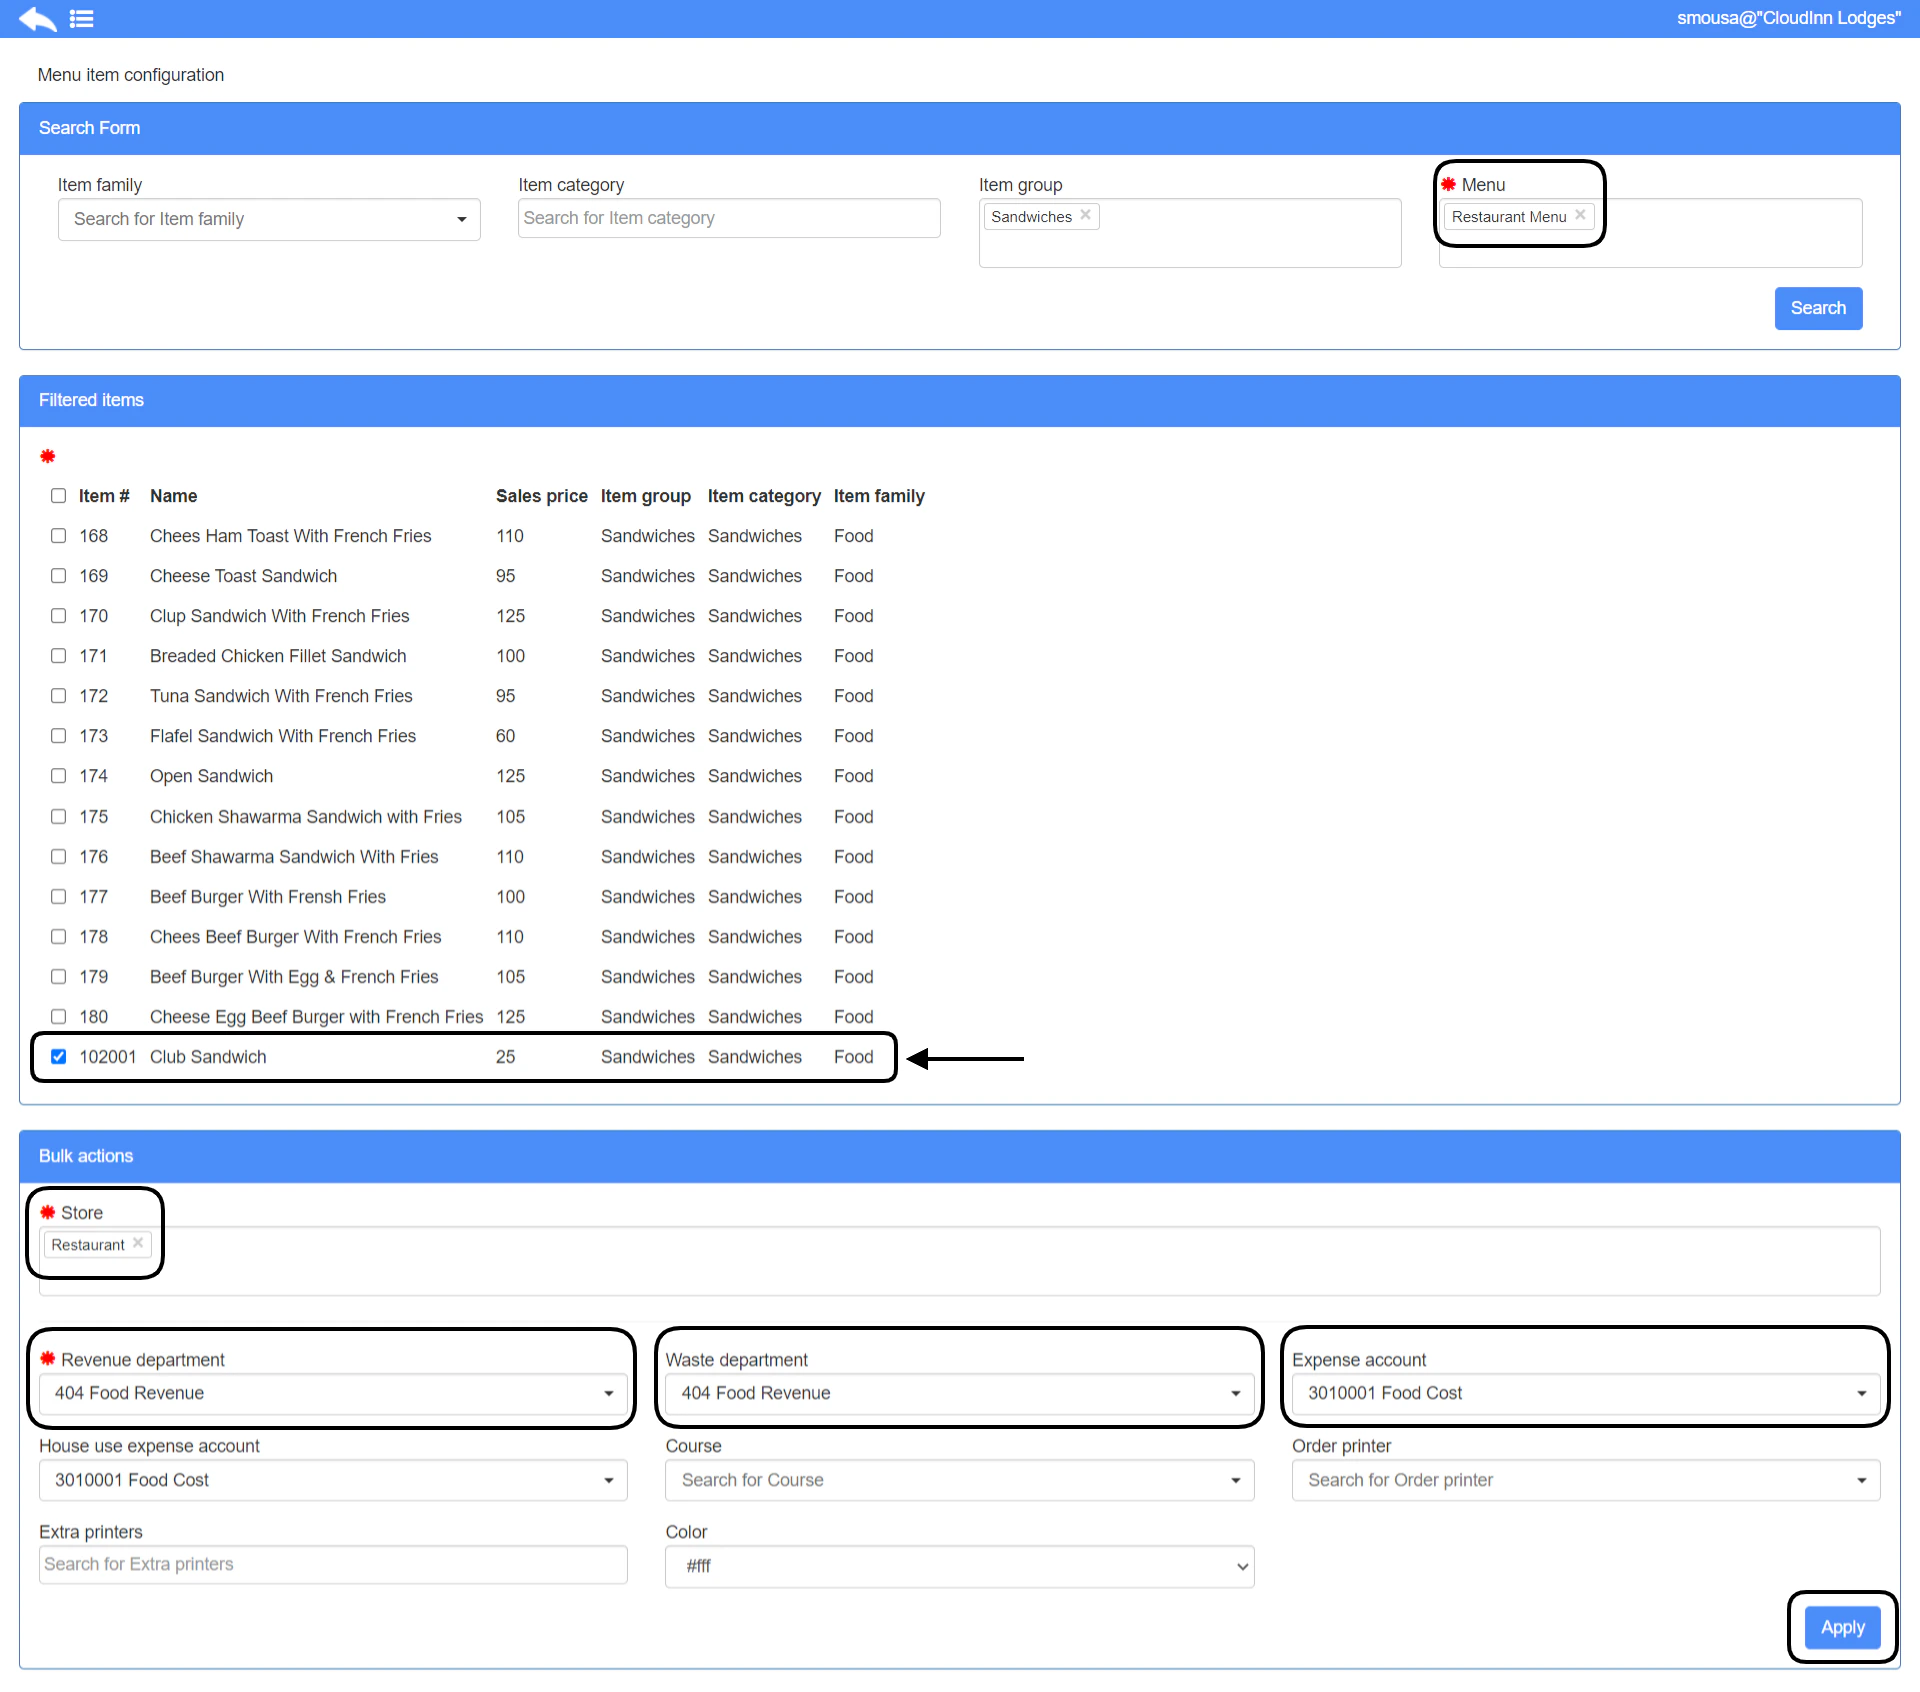
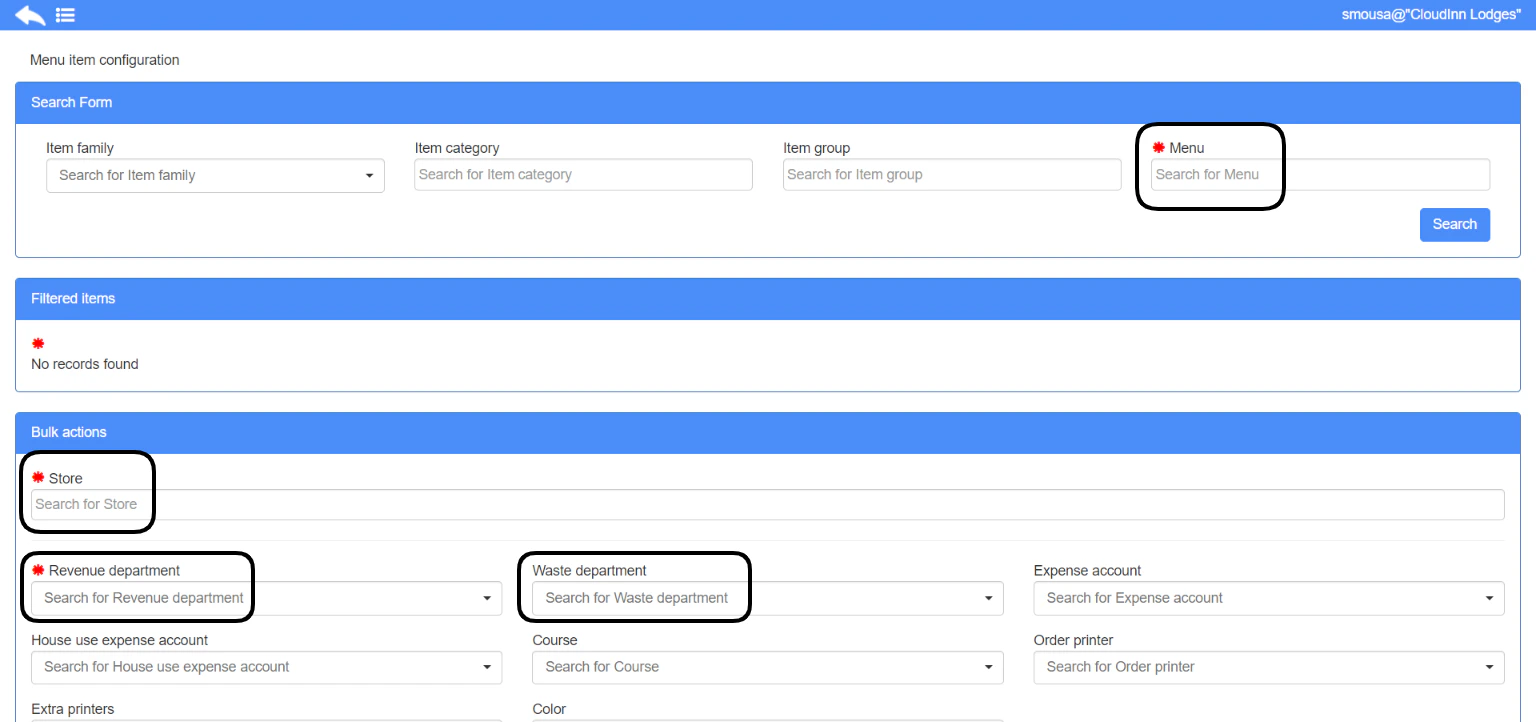
Menu item configuration
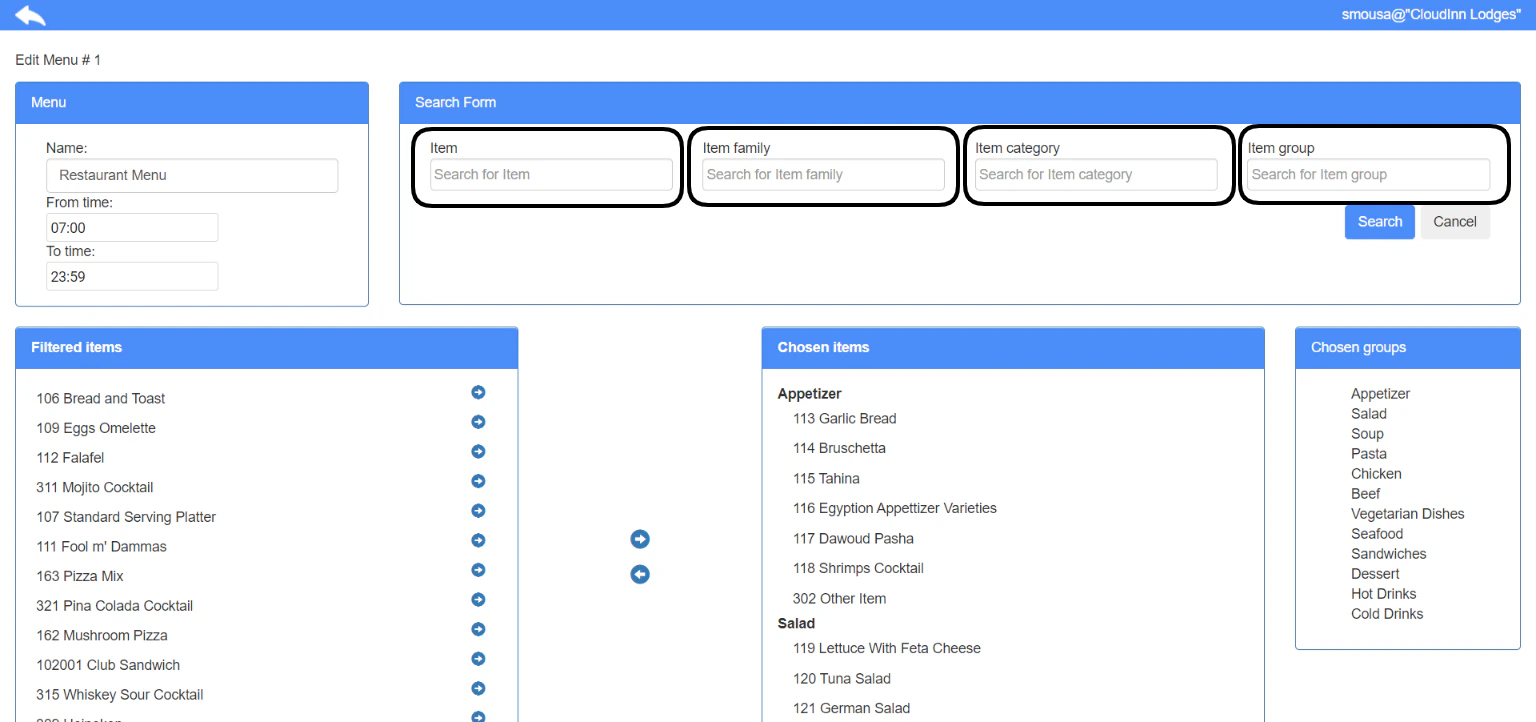
This is a very important step to make sure the item reflects properly on your outlet and shows up when you select the menu. Point of Sale → Settings → Menu Items Menu item configuration is essential as it links all the below aspects together:- Links the Menu to your outlet
- Links your items to the correct Revenue Departments “food or beverage”
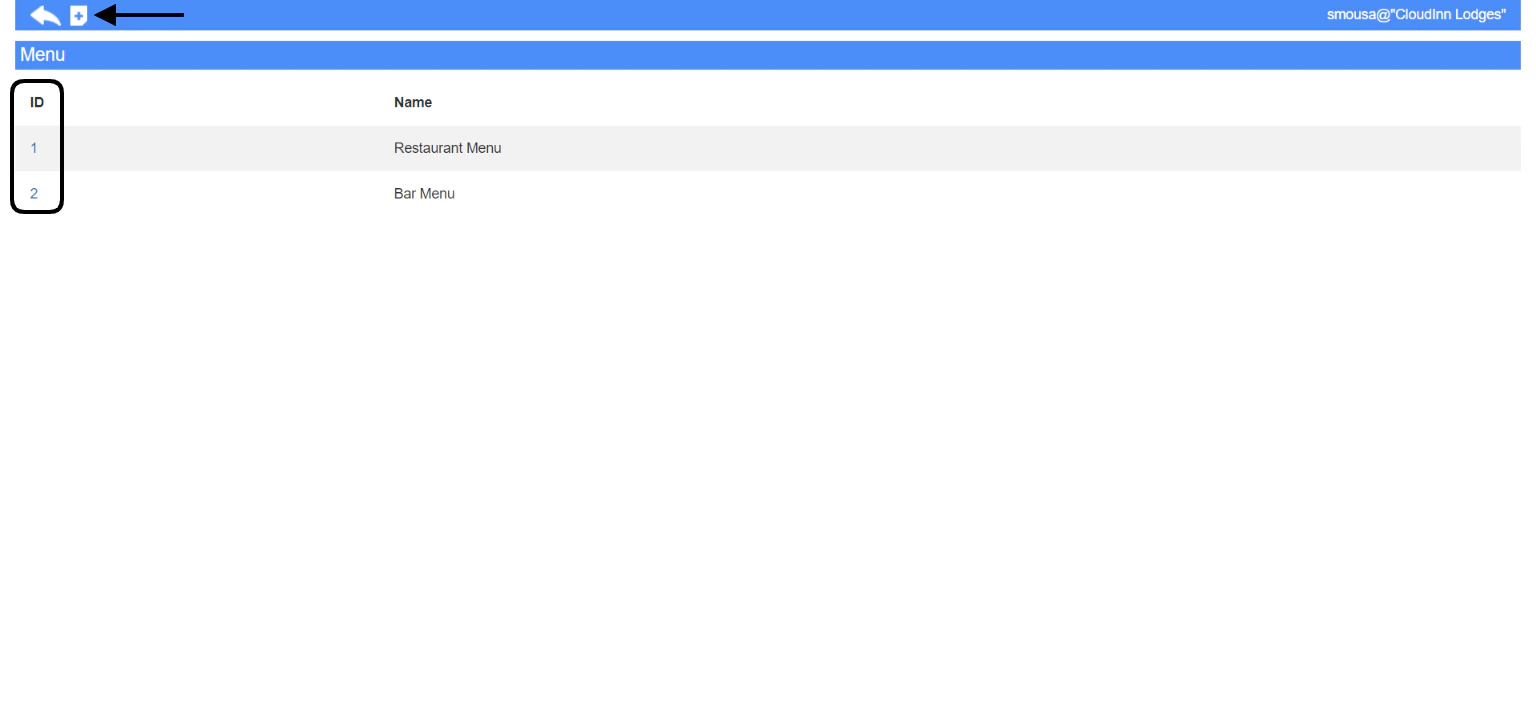
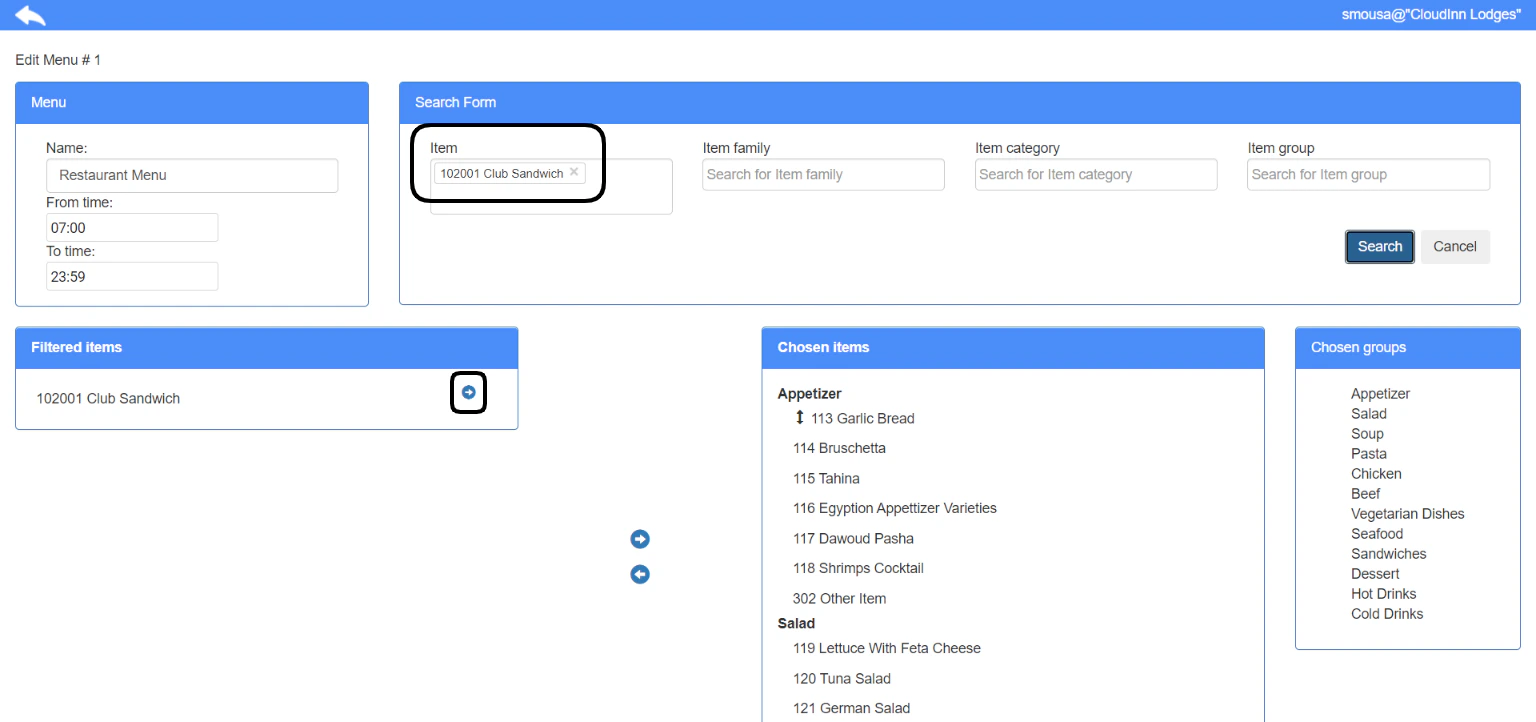
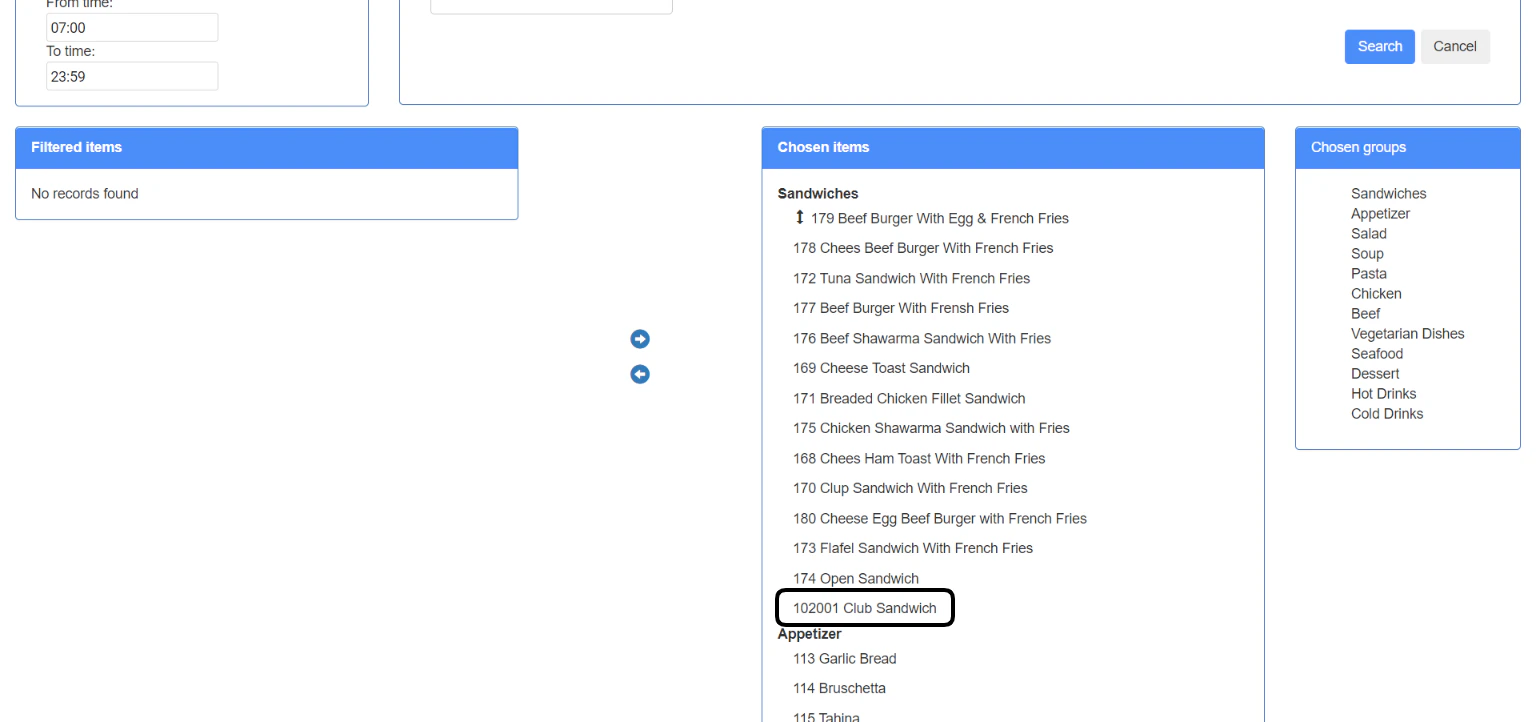
- Search for the menu.
- Find the item you want to configure in the filtered items.
- Select the store this item should reflect in.
- Link the item to a revenue department depending on its type.
- Optional: add a waste department so that it counts properly when wasted from Cashiering screen.
- Optional: add an expense account so that when the item is consumed it counts its cost on the correct expenses account.
- Optional: add a house-use expense account so that when an invoice needs to be settled for House Use purposes it goes to the correct account.