When you need to instruct certain billing postings to reflect in different places i.e PayMaster Accounts, other room reservations and different windows under the same reservation. Your billing screen consists of 1 Billing Window, this window will reflect all billing postings. Add a Billing Window: Front Office → Individual Reservations → Select Reservation → Billing → Charging InstructionsDocumentation Index
Fetch the complete documentation index at: https://help.kwentra.com/llms.txt
Use this file to discover all available pages before exploring further.
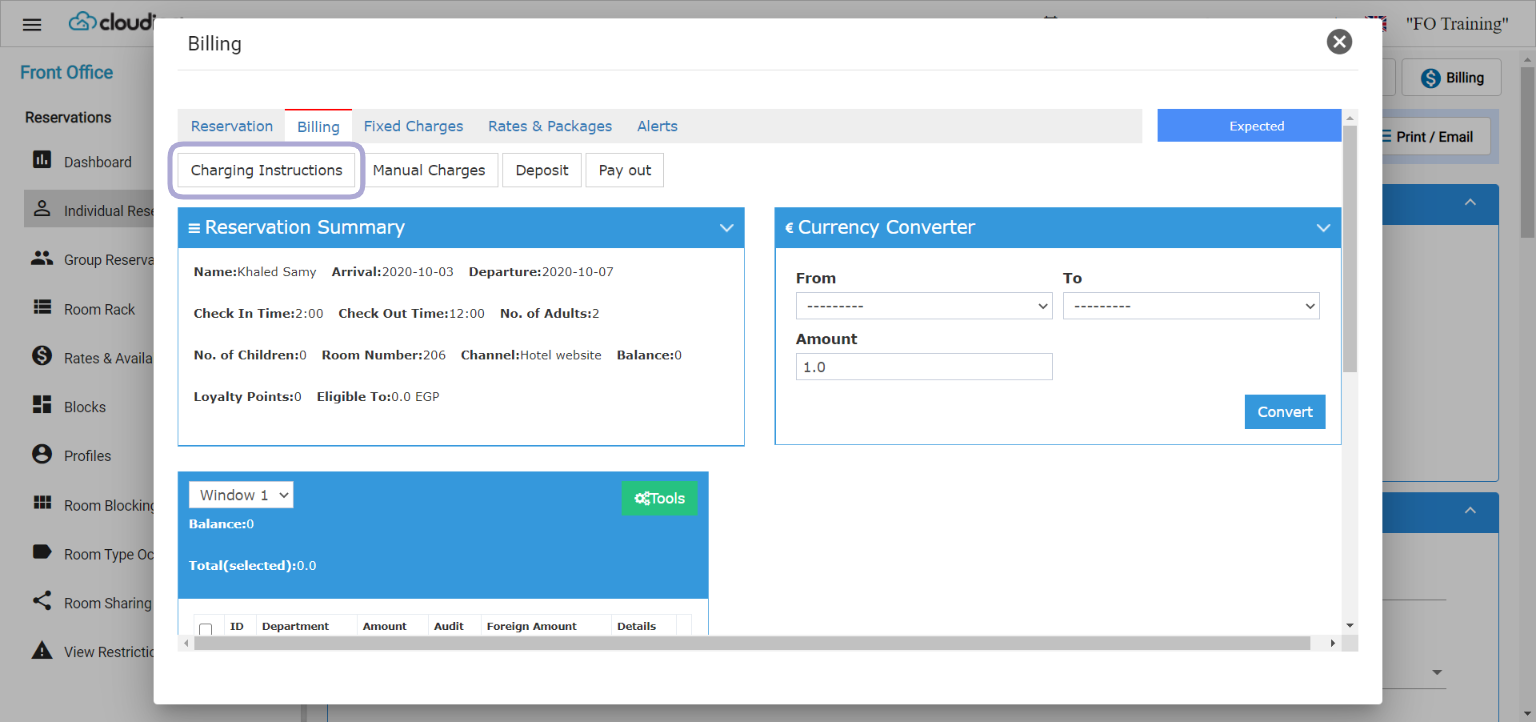 Once you reach charging instruction you will get the option to Add Window.
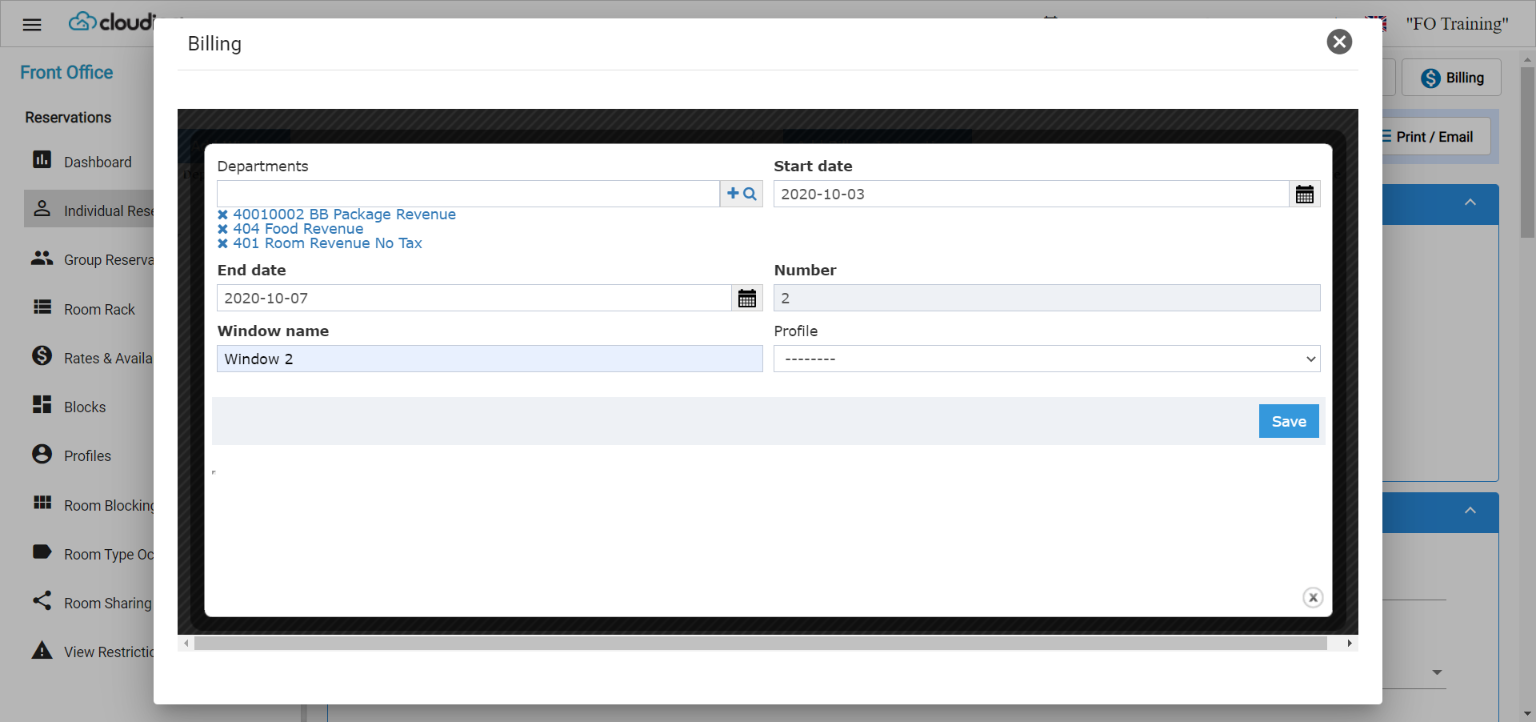
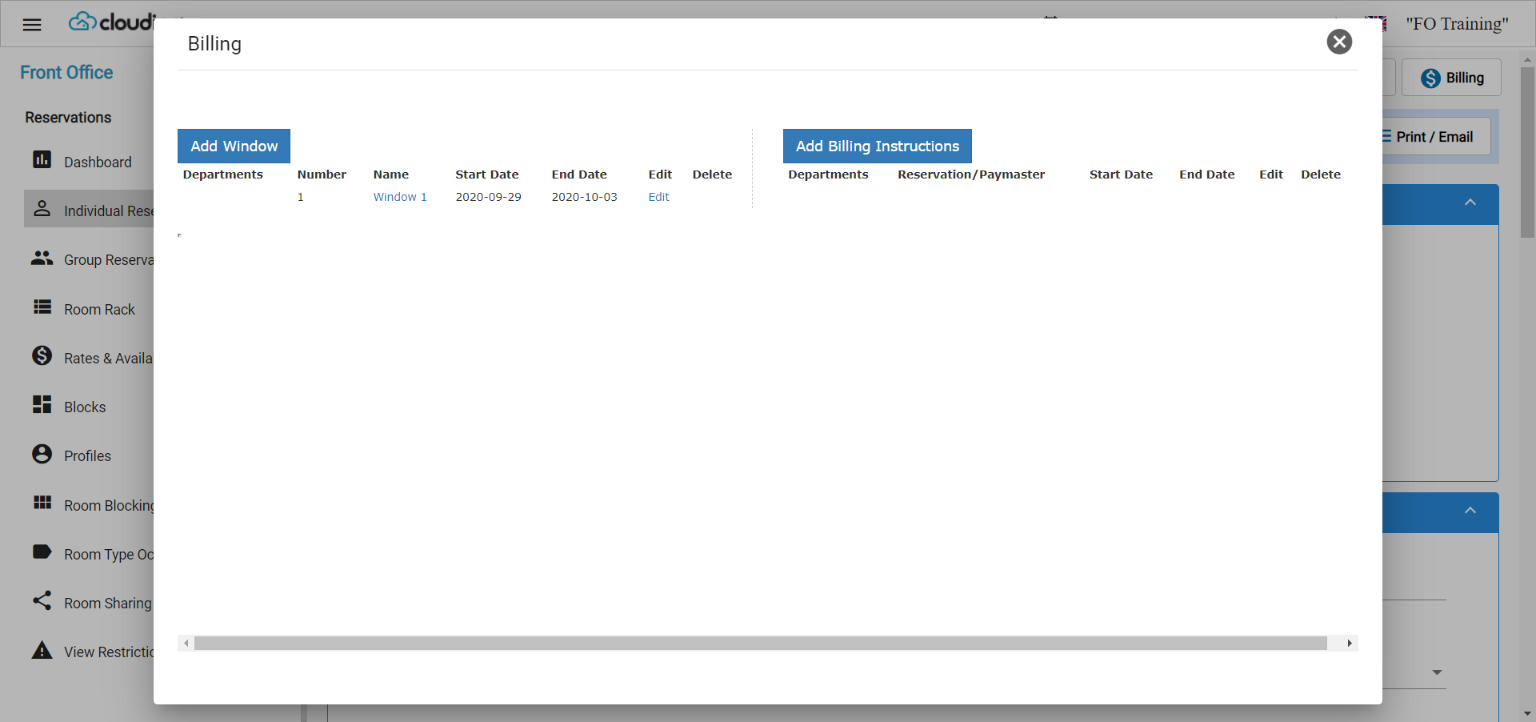 When adding a window, you can do the below:
- Instruct certain postings to automatically go to the new window.
- Link the new window with a channel profile to allow City Ledger Settlement.
 New Update - 7th of November, 2021:
You can easily link any window with the Channel’s Accounts Receivable by using the below new feature in our billing windows.
This feature helps you link the billing window and all the billing charges under it to the AR account of the travel agency to be able to settle it using City Ledger Payment easily.
If the Travel Agency has multiple branches added on the system, changing the branch happens easily from the dropdown so that the invoice gets printed with the correct data “travel agency address, phone etc”
Front Office → Individual Reservations → Select Reservation → Billing
New Update - 7th of November, 2021:
You can easily link any window with the Channel’s Accounts Receivable by using the below new feature in our billing windows.
This feature helps you link the billing window and all the billing charges under it to the AR account of the travel agency to be able to settle it using City Ledger Payment easily.
If the Travel Agency has multiple branches added on the system, changing the branch happens easily from the dropdown so that the invoice gets printed with the correct data “travel agency address, phone etc”
Front Office → Individual Reservations → Select Reservation → Billing
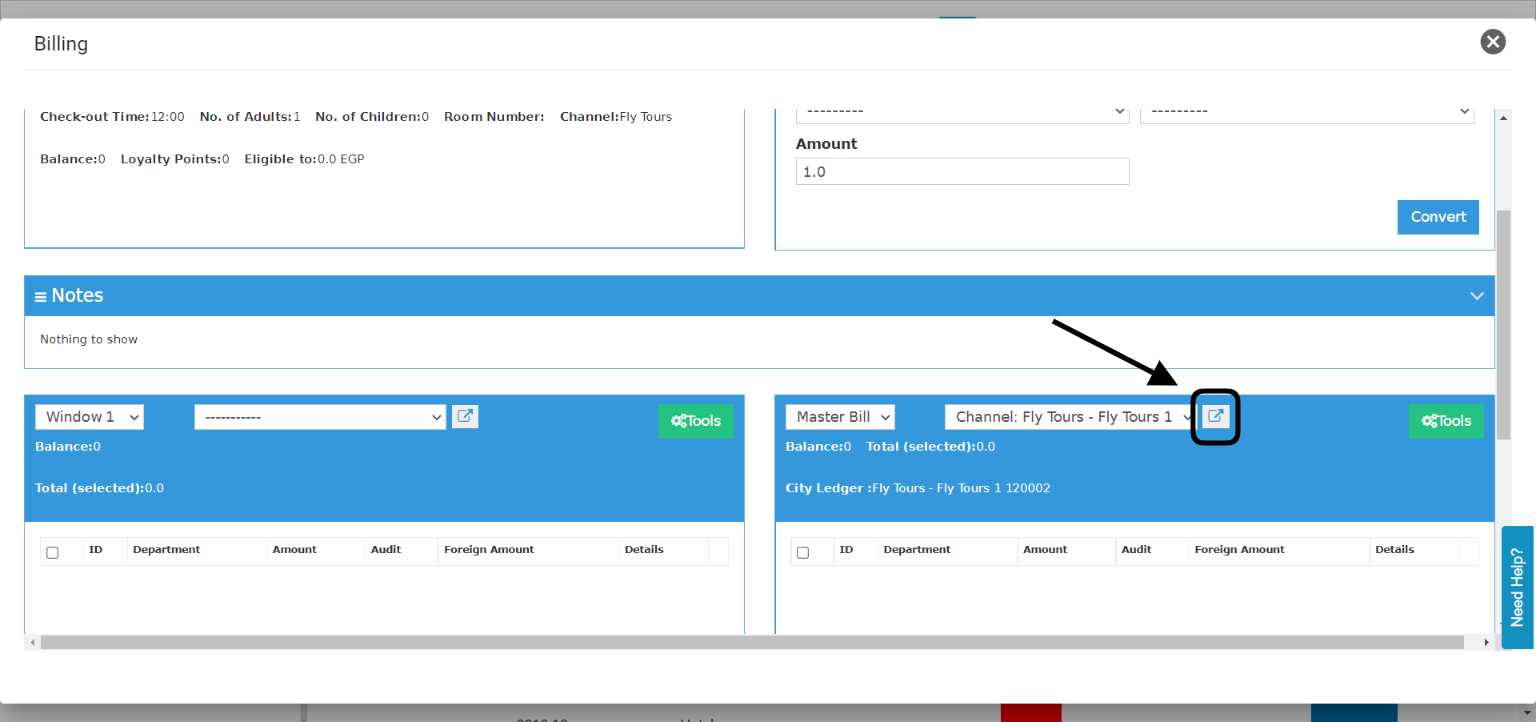
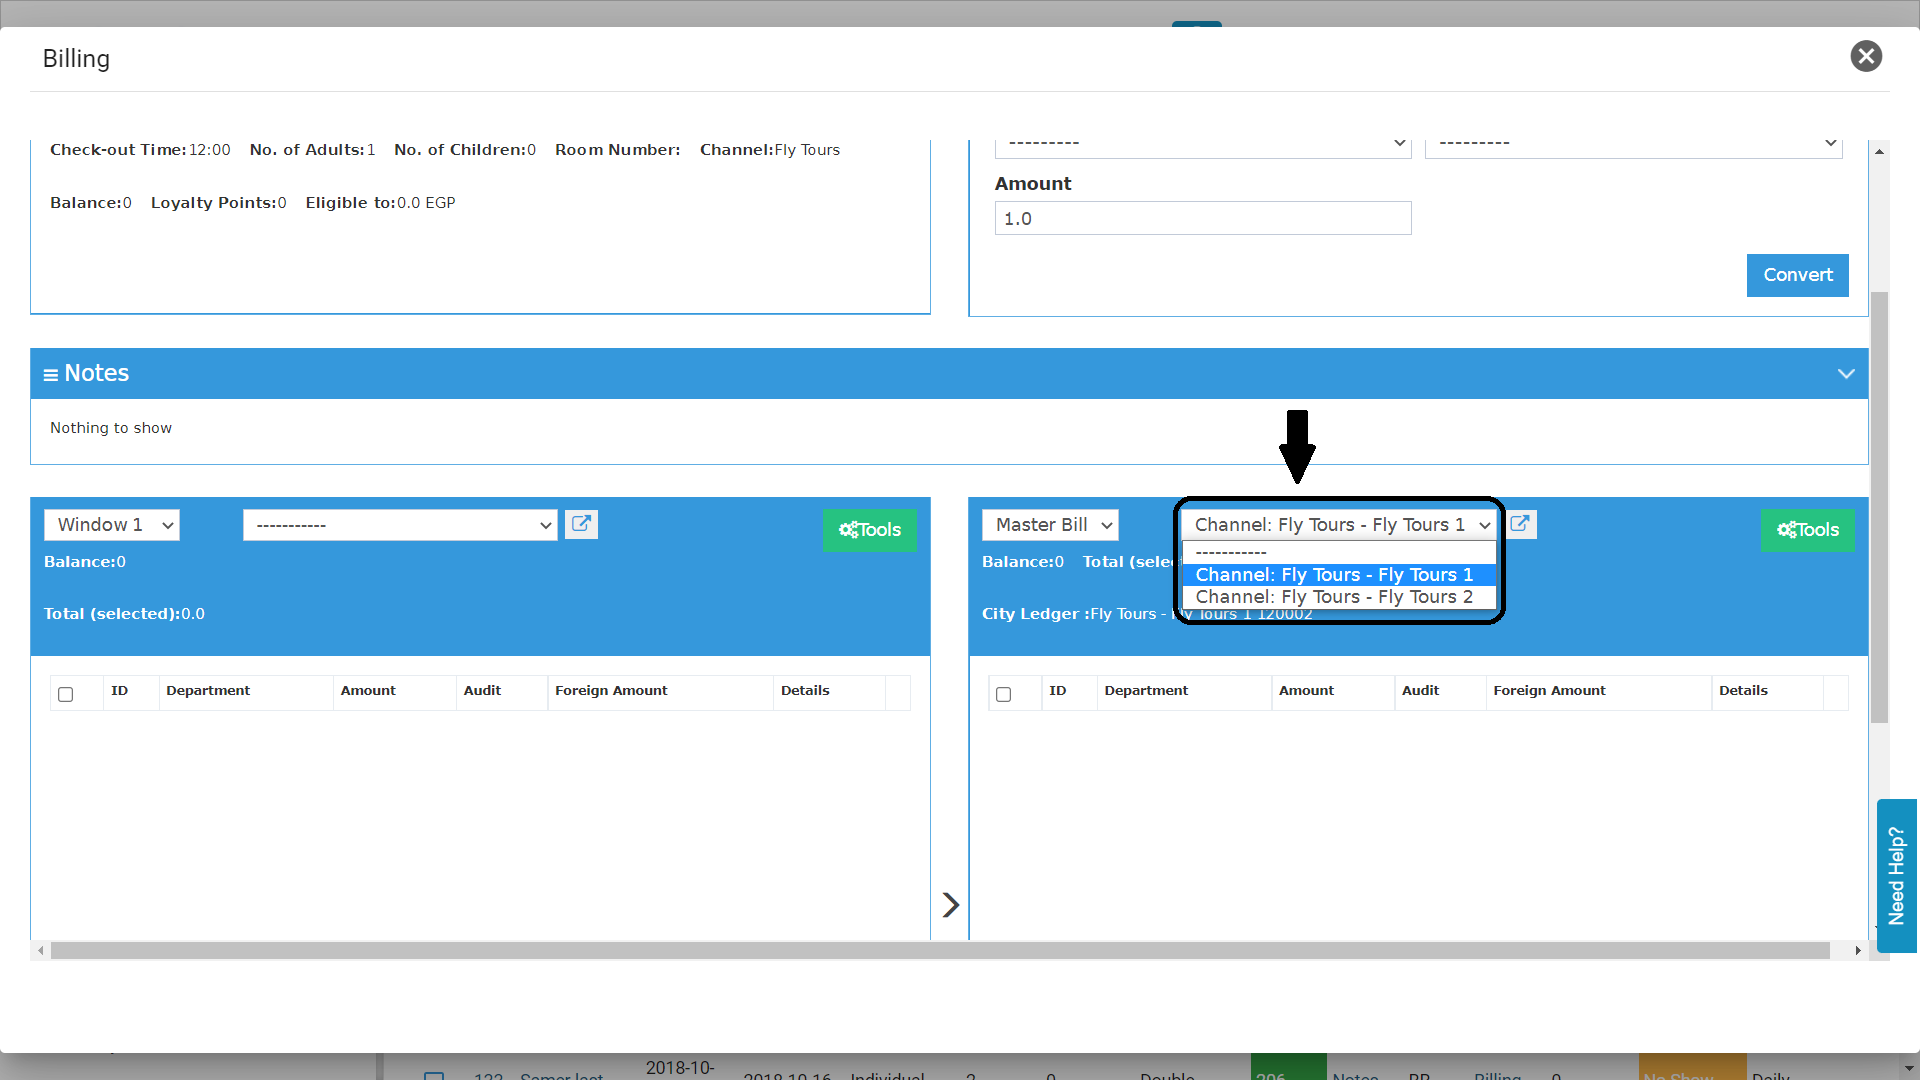 From the reservation’s billing screen you have access to the channel’s information directly to be able to edit the travel agency’s information before making your City Ledger Payment.
- Choose the channel from the dropdown menu.
- Click on the Open in New Tab option below.
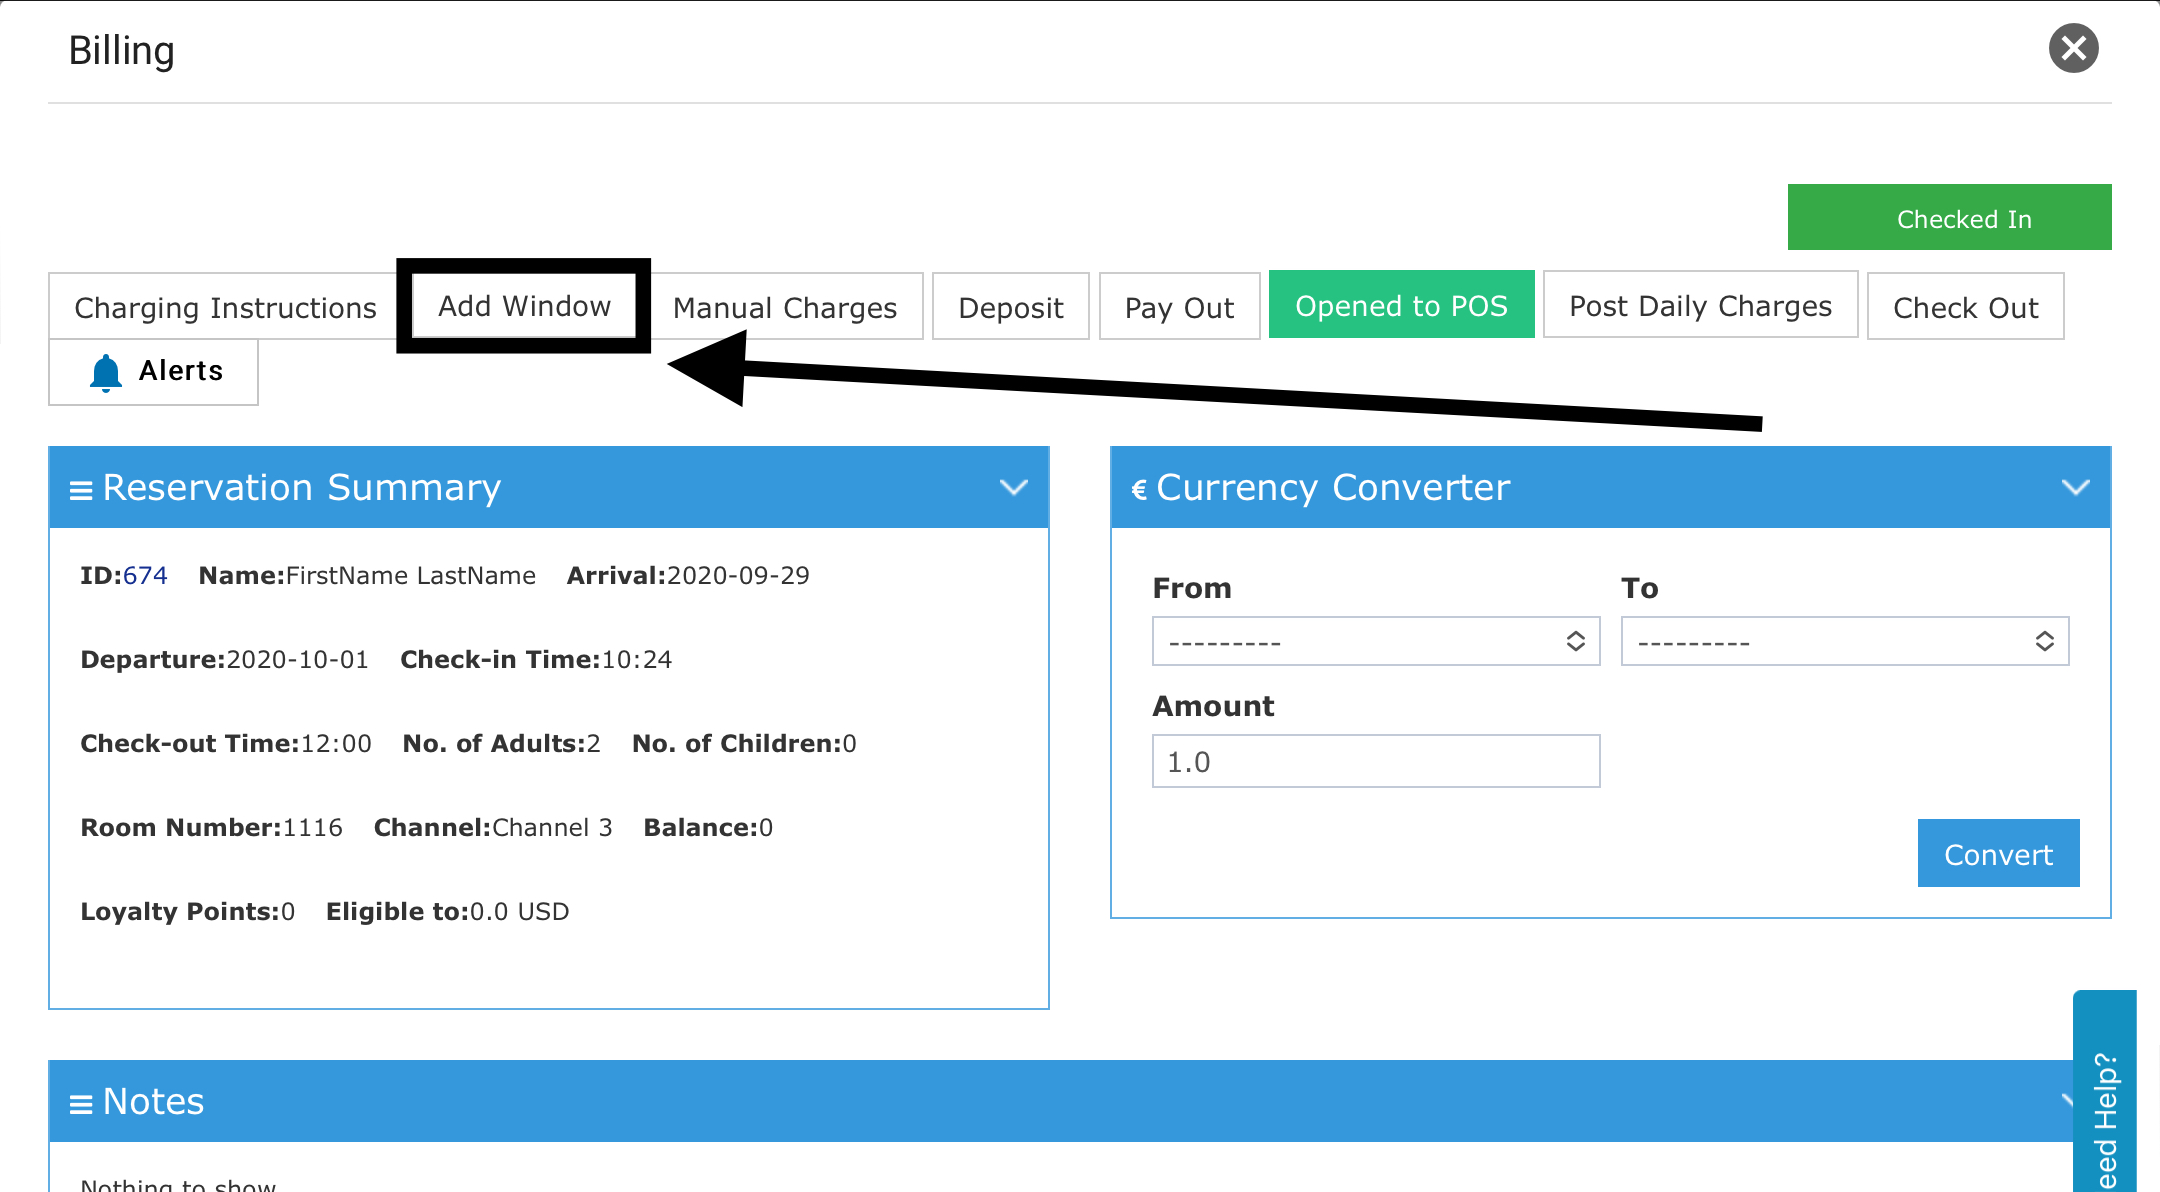
 Update: 28th of August, 2022
The Add Window button has now been added to the main billing screen so you would be able to easily add a new window and link it to a revenue department without the need of going to Charging Instructions.
Update: 28th of August, 2022
The Add Window button has now been added to the main billing screen so you would be able to easily add a new window and link it to a revenue department without the need of going to Charging Instructions.
 Add a Billing Instruction:
You can instruct certain charges to go to another reservations on your list or to be automatically transferred to a virtual room I.e. PayMasters.
Front Office → Individual Reservations → Select Reservation → Billing → Charging Instructions
After finishing the above steps, click on Add Billing Instruction.
From here you can easily instruct certain postings to be automatically reflecting where you want them.
Add a Billing Instruction:
You can instruct certain charges to go to another reservations on your list or to be automatically transferred to a virtual room I.e. PayMasters.
Front Office → Individual Reservations → Select Reservation → Billing → Charging Instructions
After finishing the above steps, click on Add Billing Instruction.
From here you can easily instruct certain postings to be automatically reflecting where you want them.
