Check-In Procedure: In order to check-in a guest there are certain conditions and criteria in order to do this task:Documentation Index
Fetch the complete documentation index at: https://help.kwentra.com/llms.txt
Use this file to discover all available pages before exploring further.
- Check-in date must be equal to Audit Date.
- Room number should be added on the reservation.
How to add a room number to an Expected Reservation?
First, we need to locate and open the reservation to be able to add the room number. 1- Search for the reservation you would like to check-in and open it. 2- From Rate Plan section, assign the room number using the autocomplete optoin or use the magnifying glass.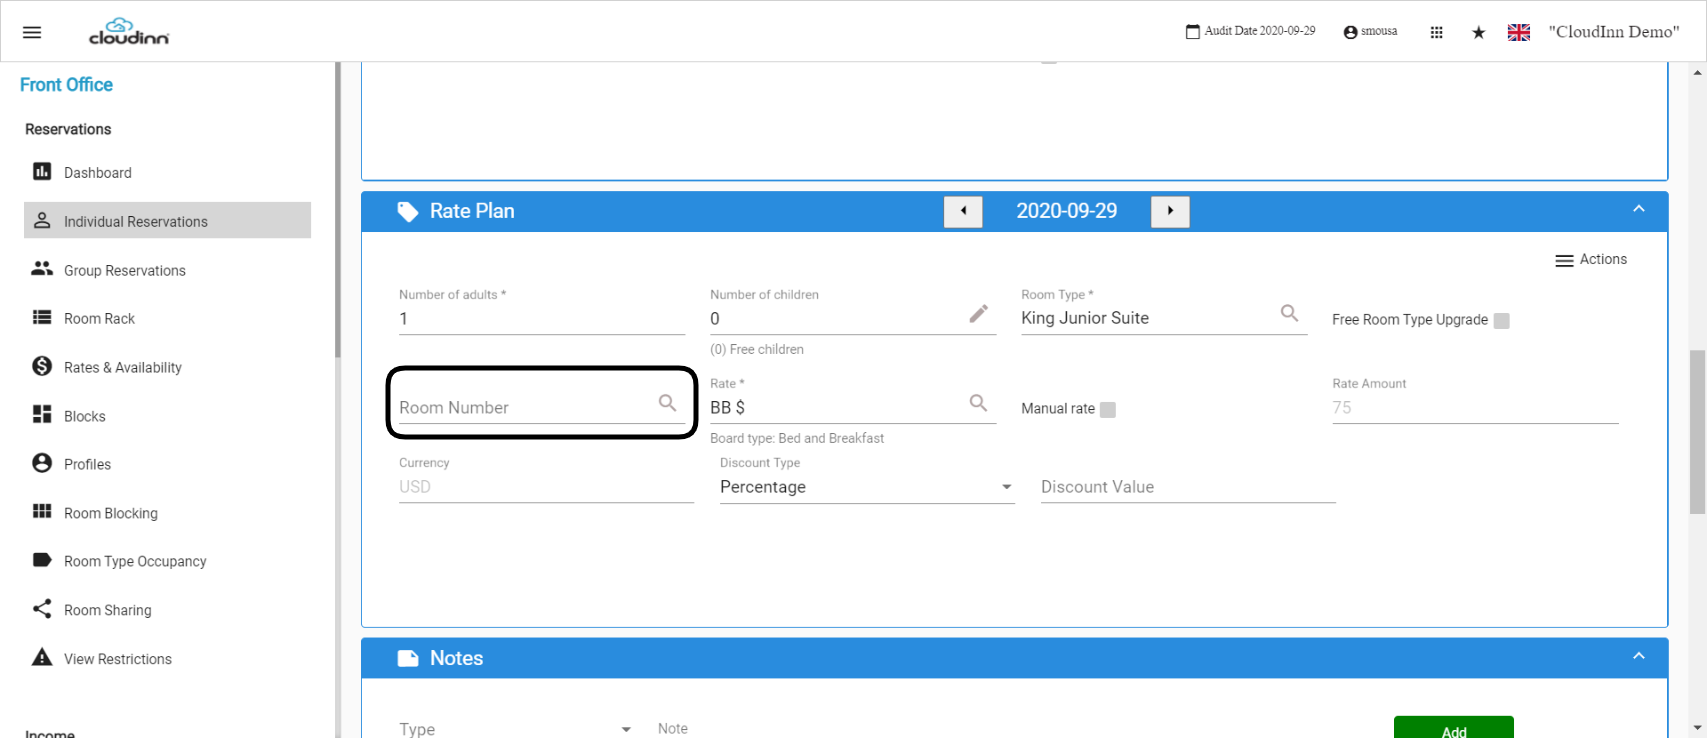 3- After assigning the room to the reservation, go to the Check In option on the top of the reservation.
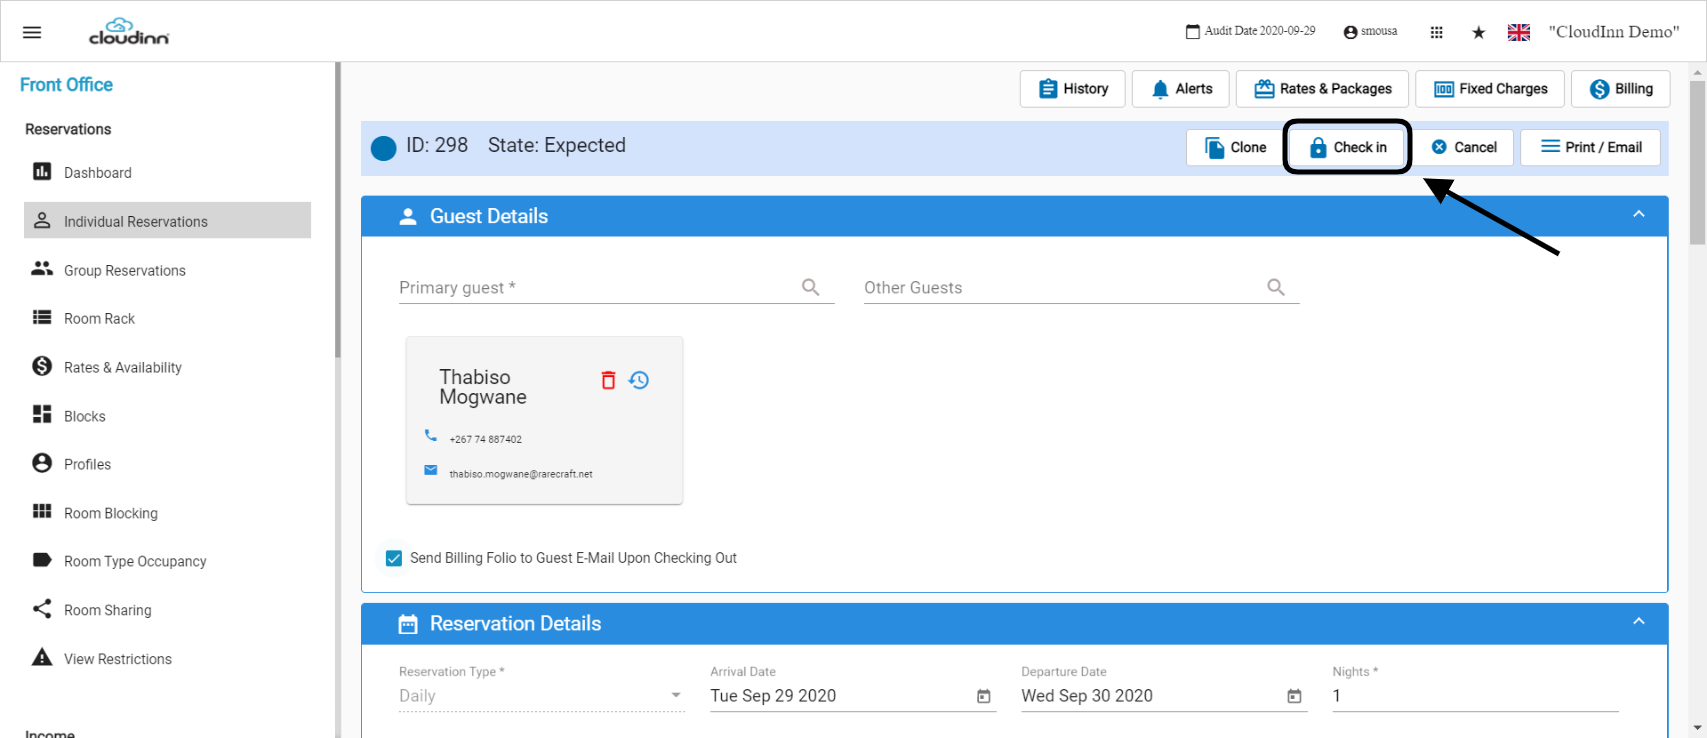 4- Once the reservation is checked in, you would find the new reservation state mentioned on the top of the reservation.
You will also get the option to undo the check-in you just did, this will reverse the action you just made and returns the reservation to the Expected State.
4- Once the reservation is checked in, you would find the new reservation state mentioned on the top of the reservation.
You will also get the option to undo the check-in you just did, this will reverse the action you just made and returns the reservation to the Expected State.
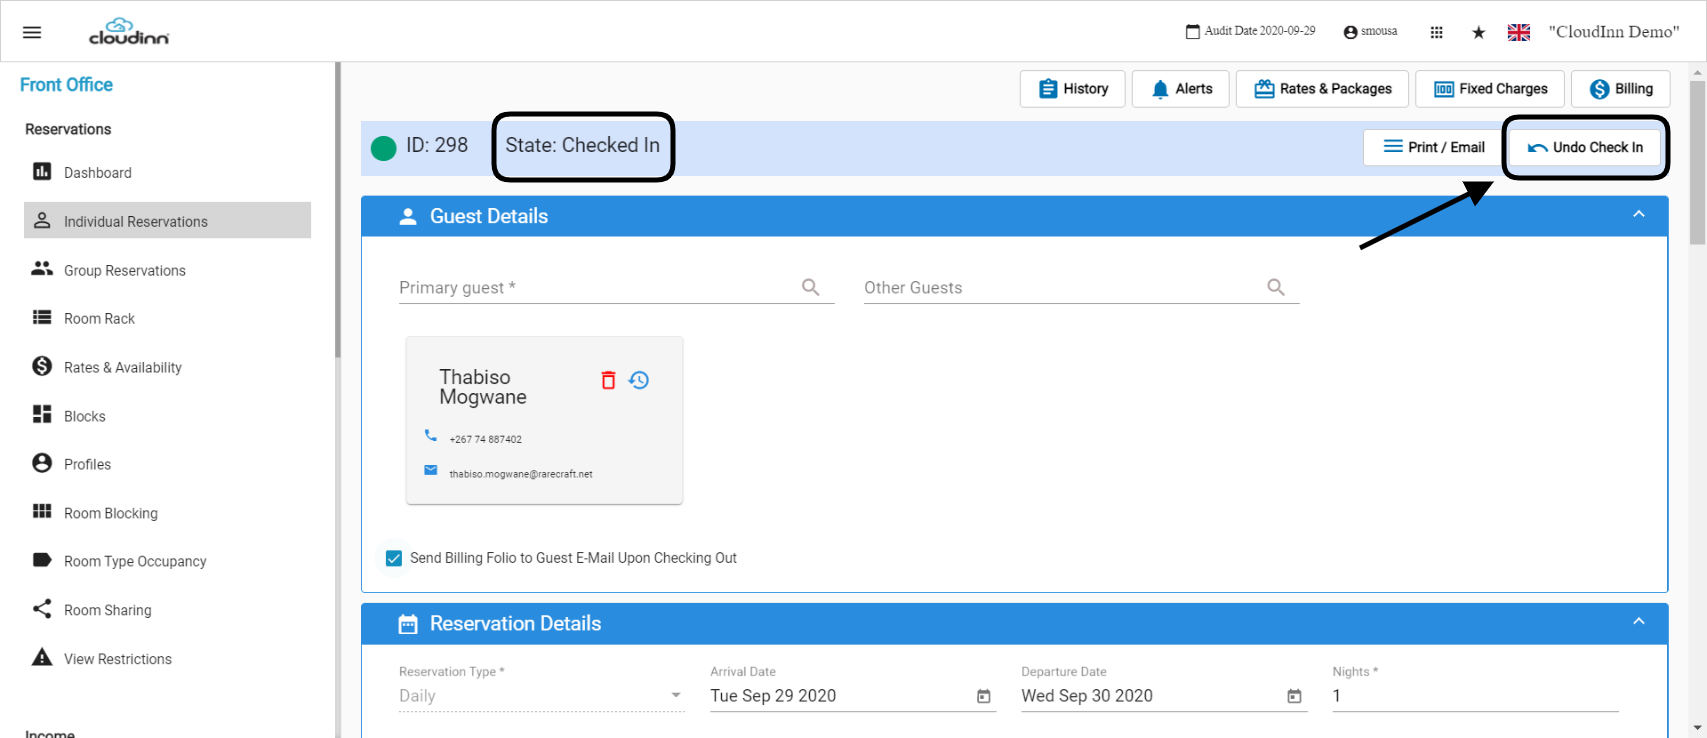
When can you use Undo Check-in?
Undo Check in comes in handy when we accidentally check-in a reservation and we want to reverse this action.- Search for the reservation and open it.
- Click on “undo check in” from top right of the page.
- Click “save” from the bottom of the page.